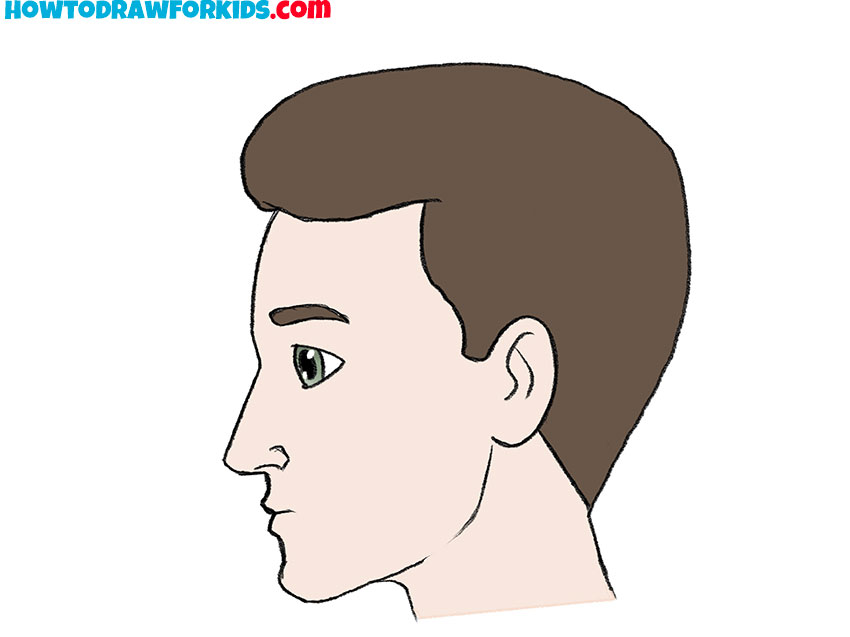
How to Draw a Face in Profile
The profile of a face is not just a side view; it’s a landscape rich with detail, and knowing how to draw a face in profile is like holding a key to this vast terrain. I’ve designed this lesson to guide you through the nuances of profile drawing, from the initial outline to the defining features that give a face its character and depth.
How to Draw a Face in Profile: Basic Information
In the art of drawing, capturing a face in profile is a fundamental skill that can be quite enchanting. With this lesson, I’ll show you how to draw a face in profile using a simple method that I’ve developed. Understanding proportions is the bedrock of profile drawing, and I’ll guide you through it with ease and precision.
Through each phase of the drawing, from the overarching shape of the head to the placement of the ear, I will show you how to map the face’s landmarks accurately. This profile drawing will challenge you to consider the space between the forehead, nose, and chin, and how these features align in profile.
Finally, as we draw a face in profile, we concentrate on the personality that a side view can offer. With each stroke, you’ll learn to express not just the physical characteristics, but also the essence of the subject. This lesson isn’t just about creating an image; it’s about bringing life to your canvas with every thoughtful detail.
Face in Profile Drawing Tutorial
Materials
- Pencil
- Paper
- Eraser
- Coloring supplies
Time needed: 30 minutes
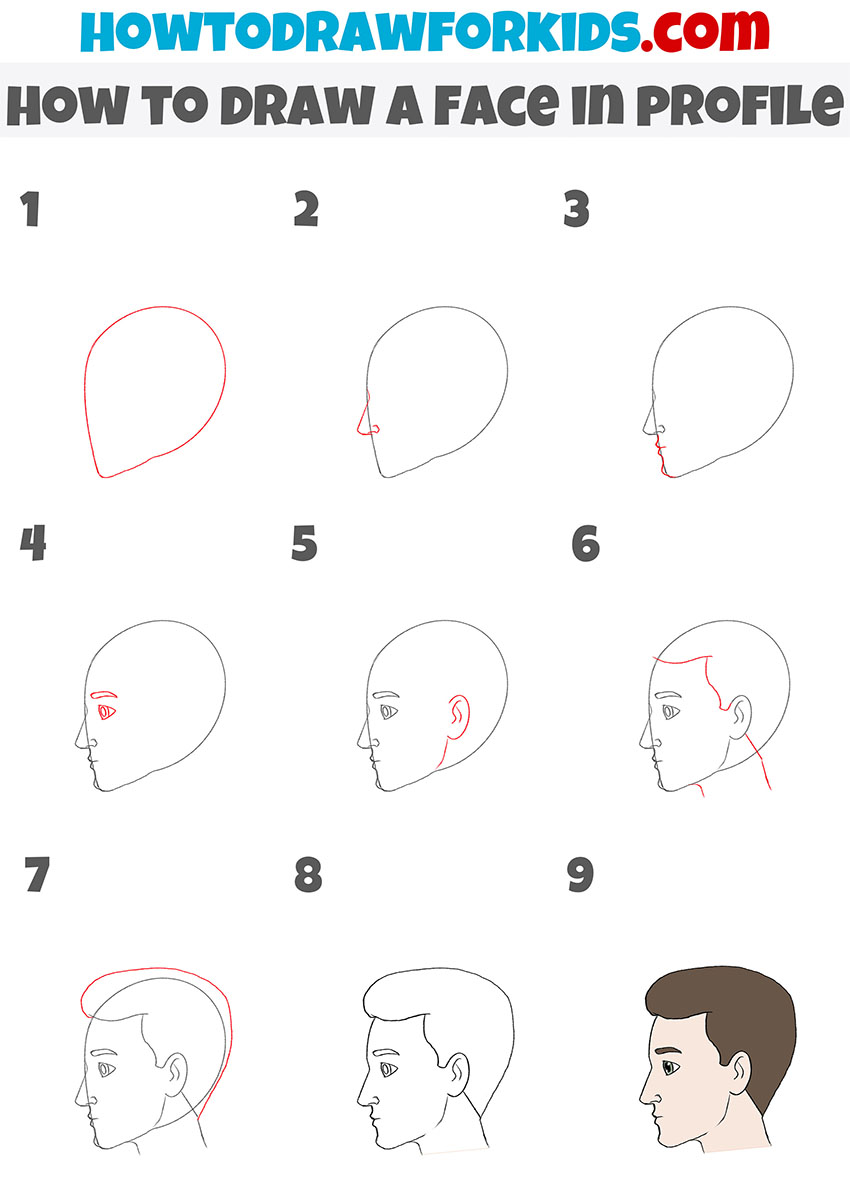
How to Draw a Face in Profile
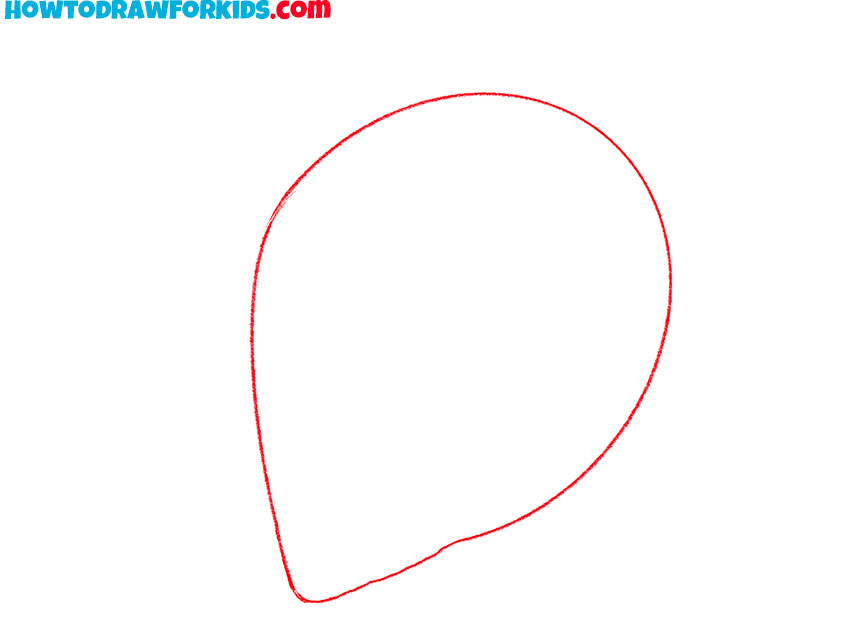
- Draw the outline of the head.
The top of the head has a rounded shape, and at the bottom there is еру pointed chin.
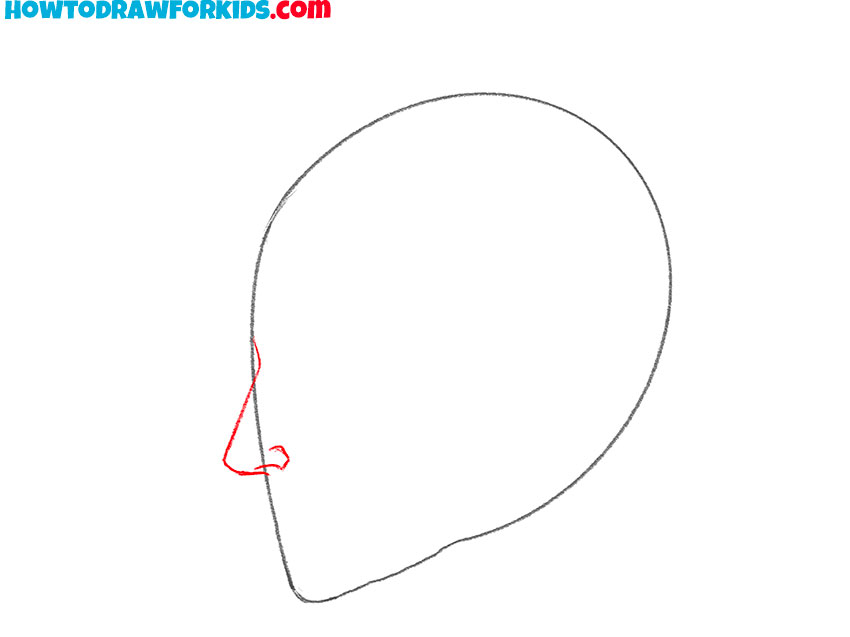
- Sketch out the nose.
Try to correctly portray all the curves of the nose.
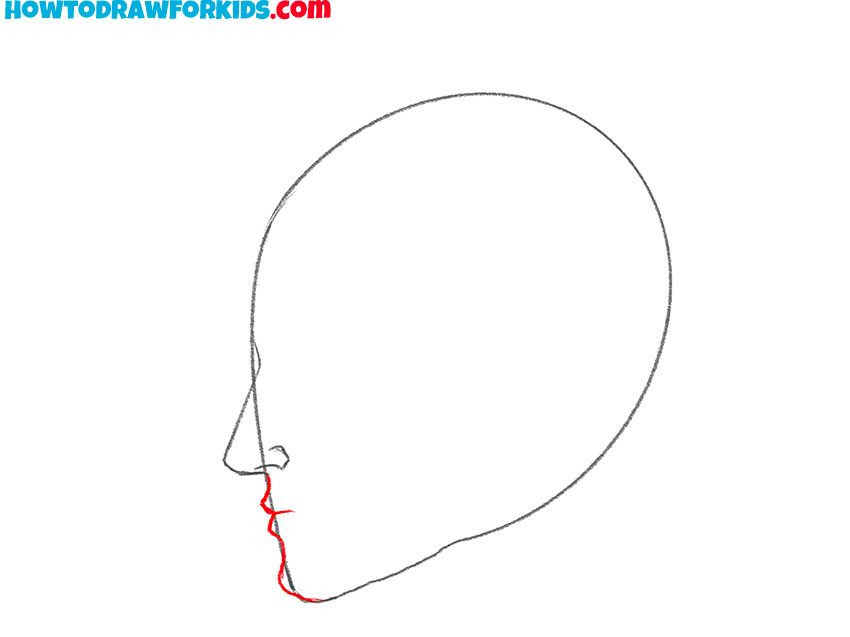
- Depict the lips and chin.
Use smooth curved lines to depict the upper and lower lip and add the outline of the chin.
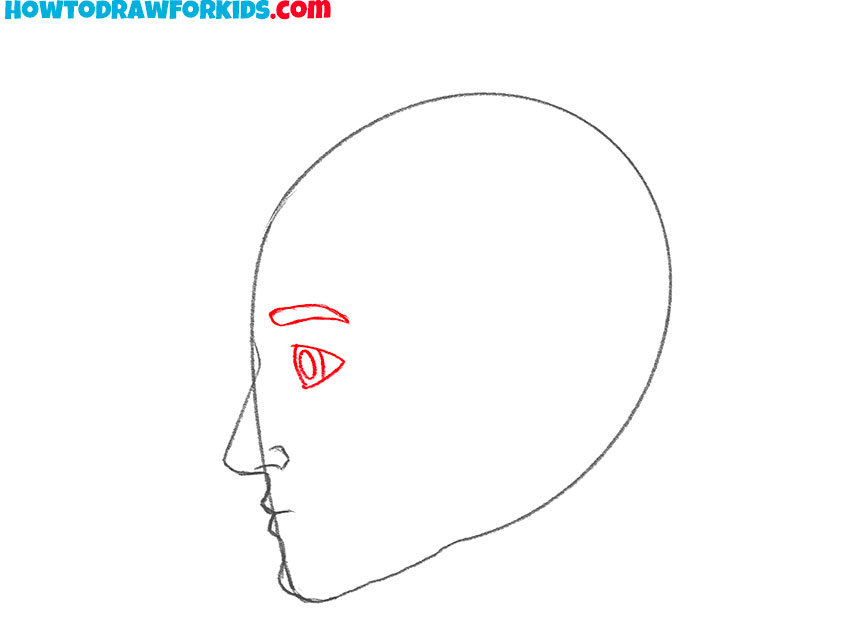
- Add the eye and eyebrow.
Depict the upper and lower eyelids, then add the iris and pupil. Draw the shape of the eyebrow.
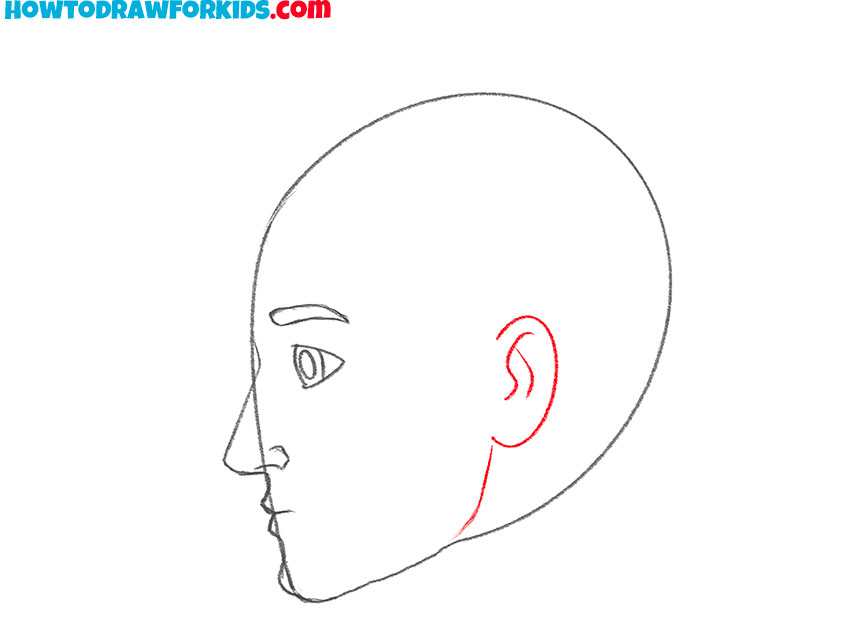
- Sketch out the ear.
Use a smooth, rounded line to depict the outer contour of the ear and add the inner part.
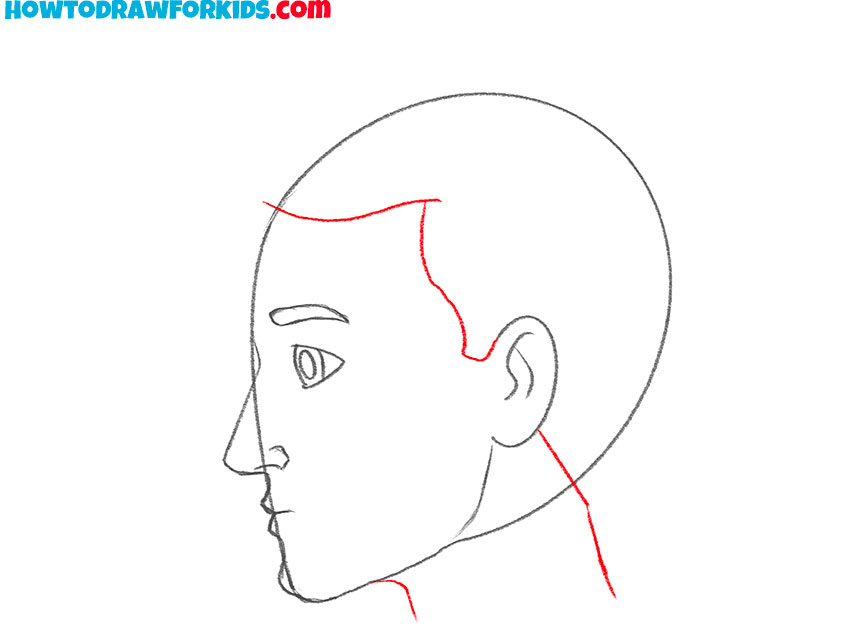
- Add the neck and bottom outline of the hair.
Smooth lines draw the lower outline of the hair. At the bottom, add two lines to depict the neck.
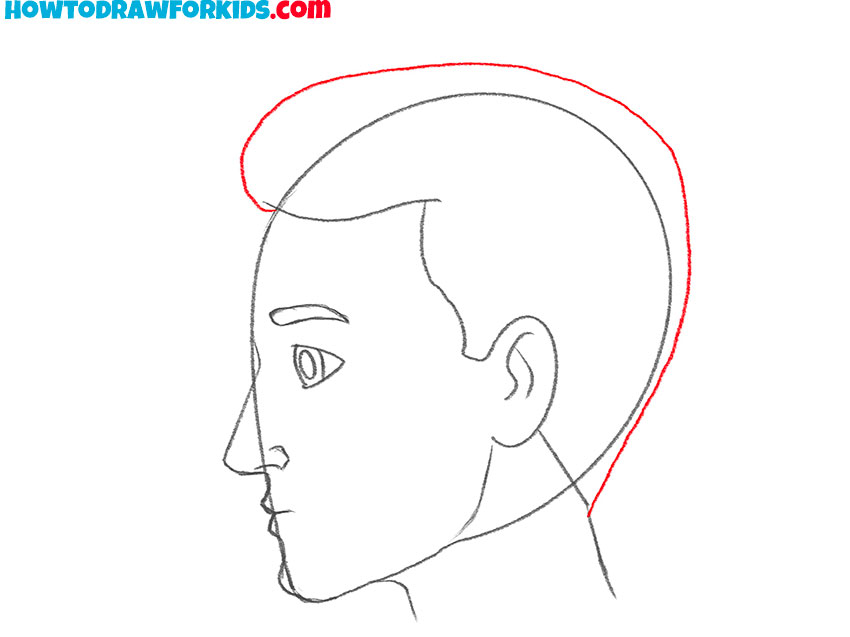
- Depict the top outline of the hair.
Sketch out the rest of the hair with a smooth, rounded line.
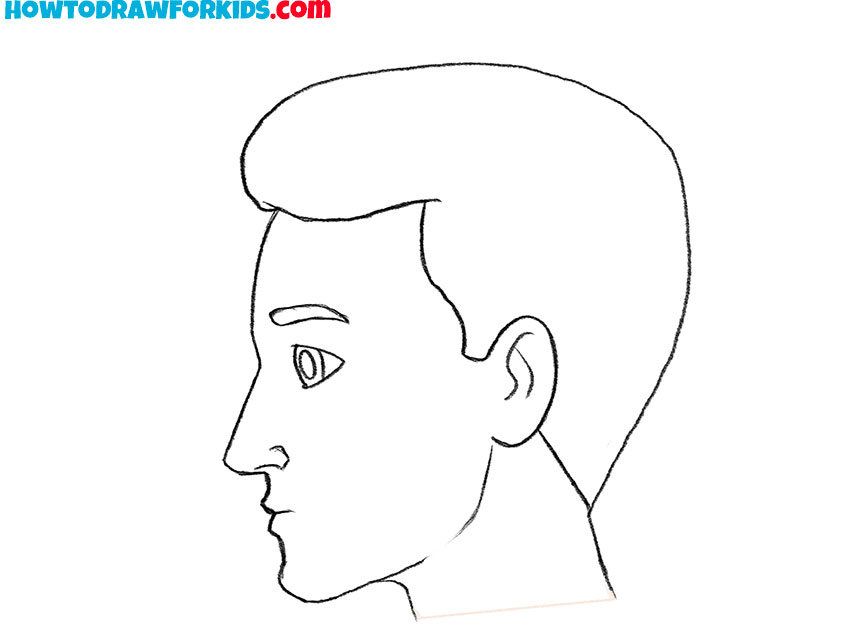
- Correct inaccuracies.
Remove any extra lines in the drawing with the eraser.
- Color the face in profile.
You can choose any color for the drawing.
Additional Content
In enhancing your learning experience, I’ve crafted a free PDF file that summarizes this lesson on drawing a face in profile. This distilled guide captures the essence of the tutorial, providing a quick and accessible reference that you can use anywhere, at any time – even without an internet connection.
This downloadable PDF is designed with ease in mind, allowing you to revisit the fundamental steps of proportion and placement whenever you wish to practice. It’s a tool that supports your desire to refine your skills, serving as a portable tutor for your artistic journey.
I encourage you to take advantage of this resource; it’s a complement to our online content and a tangible piece of my commitment to your art education. With this PDF, the ability to draw a face in profile is never more than a few pencil strokes away, ensuring that your path to mastery is always within reach.
Alternative Drawing Technique
To offer you more avenues for practice and skill enhancement, I’ve also developed an alternative technique for drawing a face in profile. This additional method is a simplified variation, designed to reinforce your understanding of facial structure while providing ample room for practice and improvement.
This supplementary approach strips down the complexity of profile drawing, focusing on broader strokes and basic shapes. It’s a way for you to engage with the fundamental aspects of proportion and perspective, sharpening your artistic skills with every attempt.
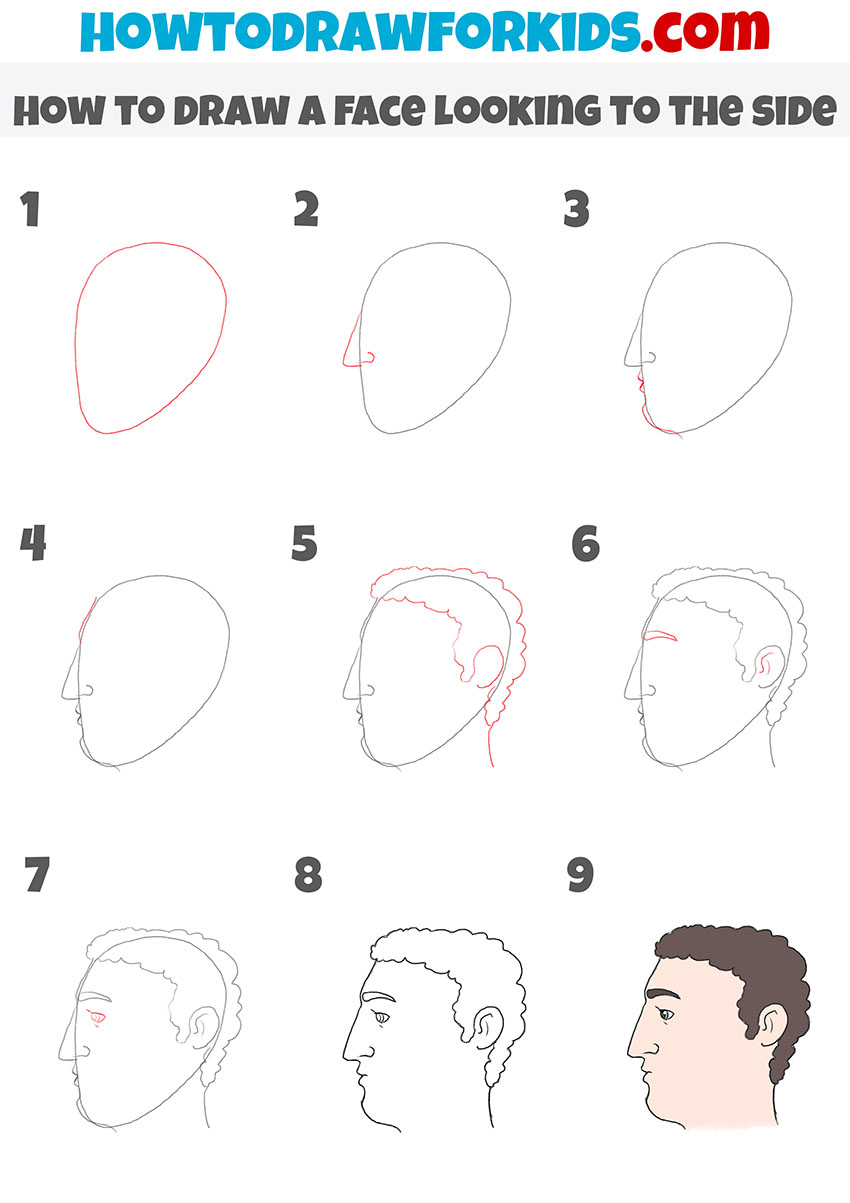
How to Draw a Face Looking to the Side
This alternative method offers a fresh take, focusing on unique features like the shape of the nose and the hairstyle, distinguishing it from our first approach. We begin with the same foundational oval, but this time, we take extra care to shape the nose with its distinctive characteristics, providing a more pronounced profile.
The hairstyle is not just an afterthought; it’s an integral part of this technique. Here, we sketch the hair with more detail and texture, adding personality and depth to the drawing. This method encourages an exploration of varied hairstyles, allowing each artist to reflect individuality through their work.
In this approach, we also emphasize the interplay between the nose and the hair, as these elements are key to portraying a recognizable side profile. This alternative technique is designed to expand your skillset, encouraging you to practice and enhance your artistic abilities with every curl and contour.
Common Errors in Side Profile Sketching
As we conclude our artistic endeavor, it is as important to reflect on common missteps as it is to celebrate our successes. In learning to draw a face looking to the side, awareness of these pitfalls can be just as enlightening as the techniques themselves.
- Overlooking Proportions: Forgetting to measure the distances between features can lead to a distorted profile.
- Ignoring the Jawline: A common slip is to draw a too straight or too curved jawline, which can unbalance the facial harmony.
- Misplacing the Ear: Placing the ear too high or too low disrupts the natural alignment of the profile.
- Exaggerating Features: Overemphasizing the nose, lips, or eyebrows can lead to an unnatural appearance.
- Neglecting Hair Dynamics: Treating hair as a solid mass rather than a flow of individual strands can make the drawing feel lifeless.
These common mistakes are stepping stones to greater mastery. With each sketch, you become more attuned to the subtleties of the human profile and more adept at capturing its essence. Take these lessons to heart, embrace the learning curve, and let each drawing be a conversation where you listen and learn from the lines you create.
Conclusion
And thus, our exploration of drawing a face in profile comes to a graceful close. But the artistic path you walk is sprawling with vistas yet to be explored. From the dramatic eruptions of a volcano to the sweeping arches of a bridge, my website hosts a variety of lessons to quench your creative thirst.
Don’t forget to follow my social channels for the freshest content and announcements. I warmly welcome your input for future tutorials, so please leave your thoughts and wishes in the comments section below. Together, we will continue to sketch the world with beauty and precision.