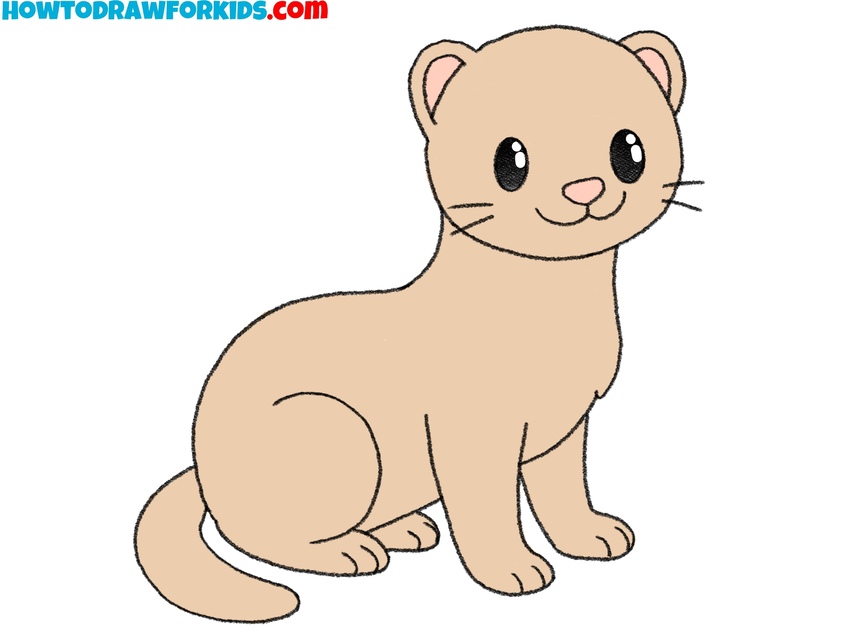
How to Draw a Ferret
Since you are on this page, it means you wish to know how to draw a ferret, and I’ll explain it clearly in two different versions.
How to Draw a Ferret: Introduction
In this tutorial, I will show you how to draw a ferret. It is a small carnivorous animal that lives in forests and steppes. Sometimes a ferret can be kept at home. Many people are happy to have such a pet.
This animal is surprisingly active. Ferrets are very fast, dexterous, and inquisitive. It is very interesting to spend time with such a cheerful and cute animal. You will surely enjoy drawing this little fidget.
The ferret has an elongated body, short legs, and a beautiful shiny coat. Usually, the legs and chest are darker, and the back and muzzle are lighter. Sometimes in nature, there are ferrets that have a uniform light color, but more often there are animals with a contrasting brown-beige color.
In order to make the drawing more realistic, you can detail the fur with thin, short lines.
Ferret Drawing Tutorial
Materials
- Pencil
- Paper
- Eraser
- Coloring supplies
Time needed: 30 minutes
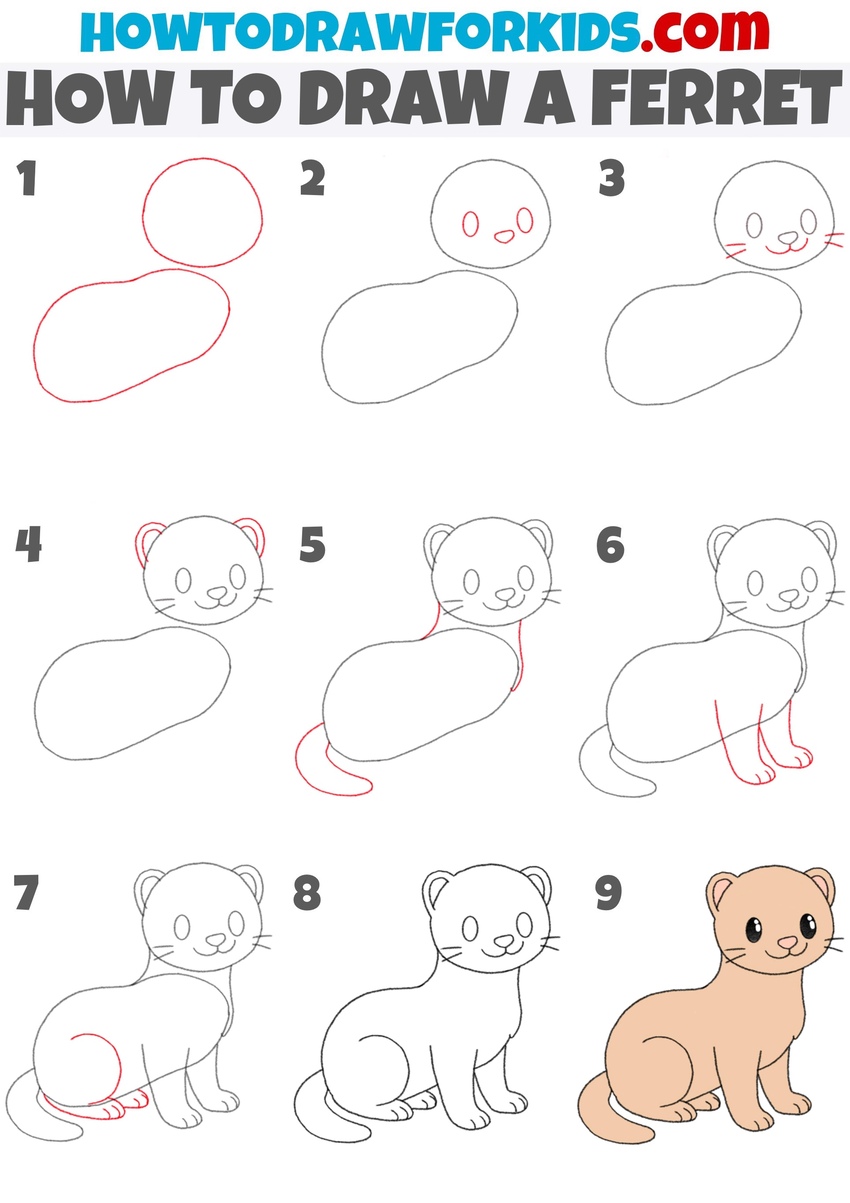
How to Draw a Ferret
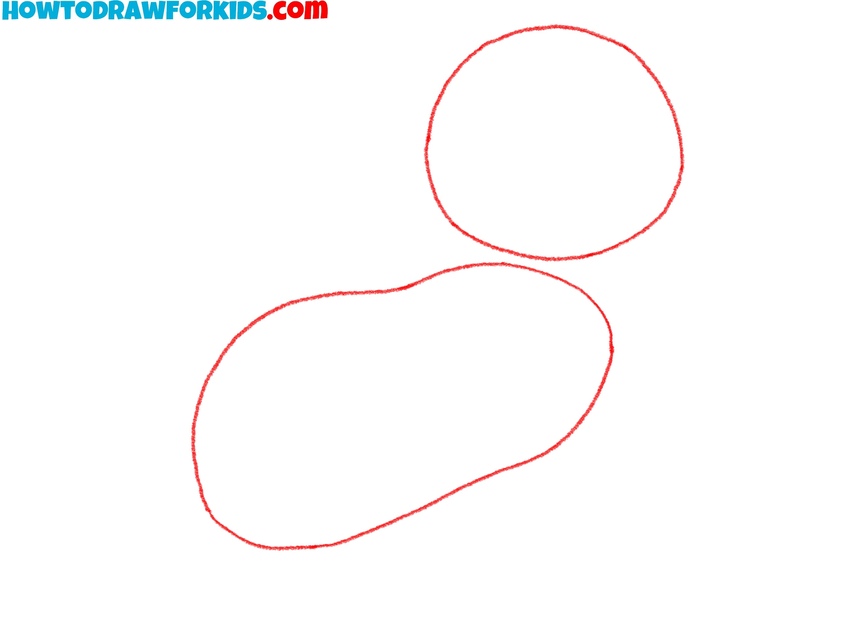
- Mark the circle and oval base.
To establish proportions correctly, it is useful to separate the ferret into two basic shapes. Sketch a circle for the head and, directly below it, an elongated oval for the The body oval should be larger and horizontally stretched, since ferrets have long, flexible torsos.
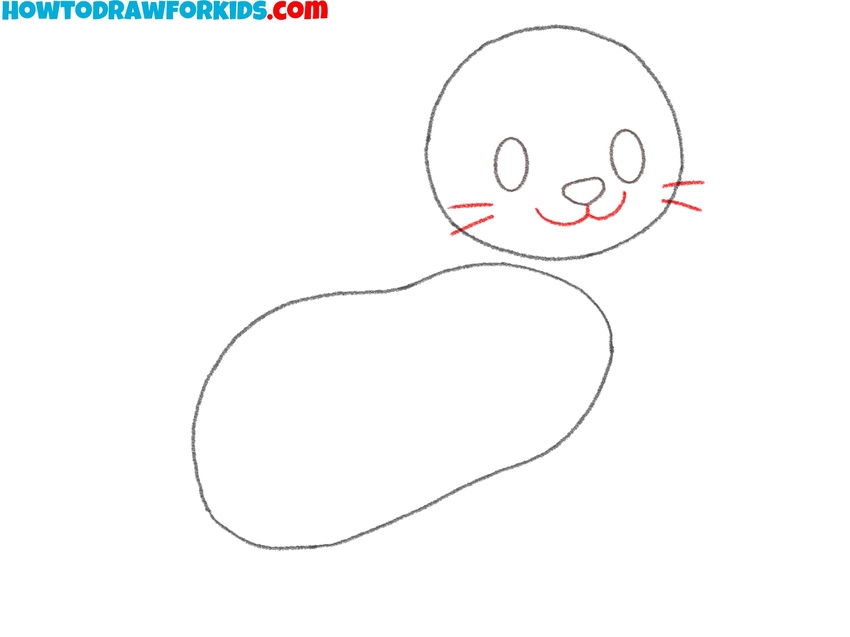
- Start drawing the ferret’s facial features.
Once the basic shapes are set, add simple facial features to indicate the front view. Place two small ovals near the upper part of the head circle for the eyes. Then draw a small rounded shape between them, slightly lower, to represent the nose of the animal.

- Sketch the mouth lines and whiskers.
To complete the muzzle, draw a couple of short curved lines from the nose to represent the mouth of the ferret. Next, place several slightly curved whisker lines on each cheek. These whiskers should extend out beyond the head outline.
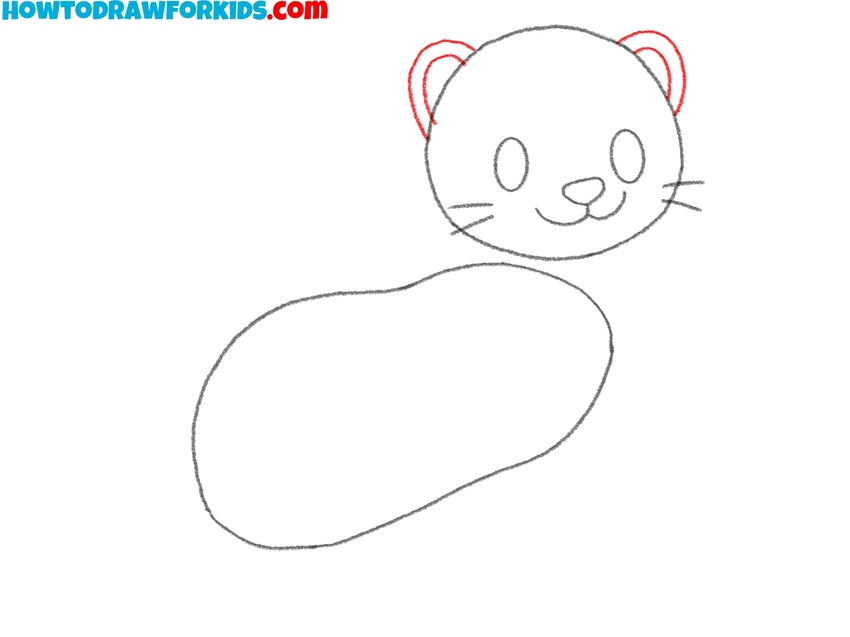
- Place rounded ears on the head.
To give the head of the head more finished look, draw two rounded ears at the top of the circle. Each ear should be shaped like a small semicircle and placed at the top sides of the animal’s head. Inside each ear, add a second smaller curve to show the inner edge.
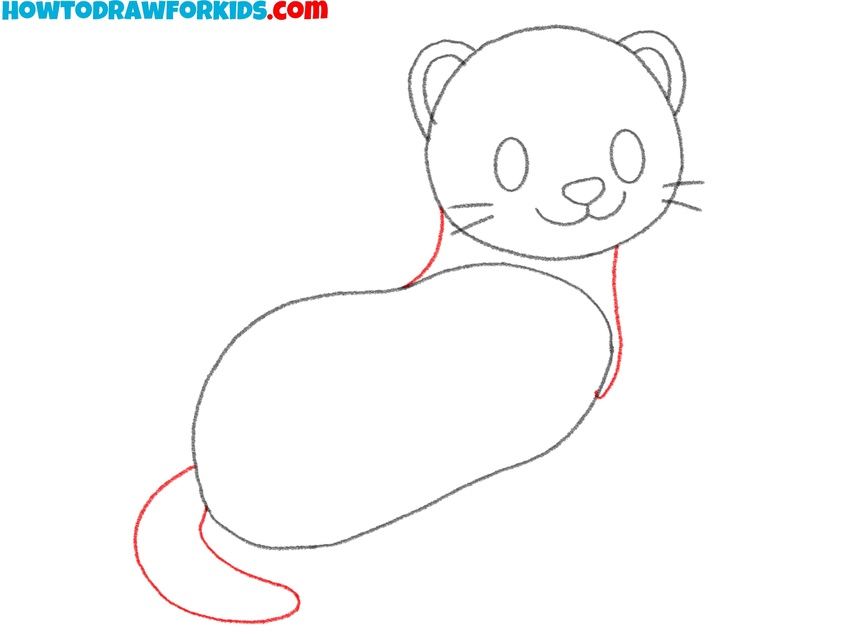
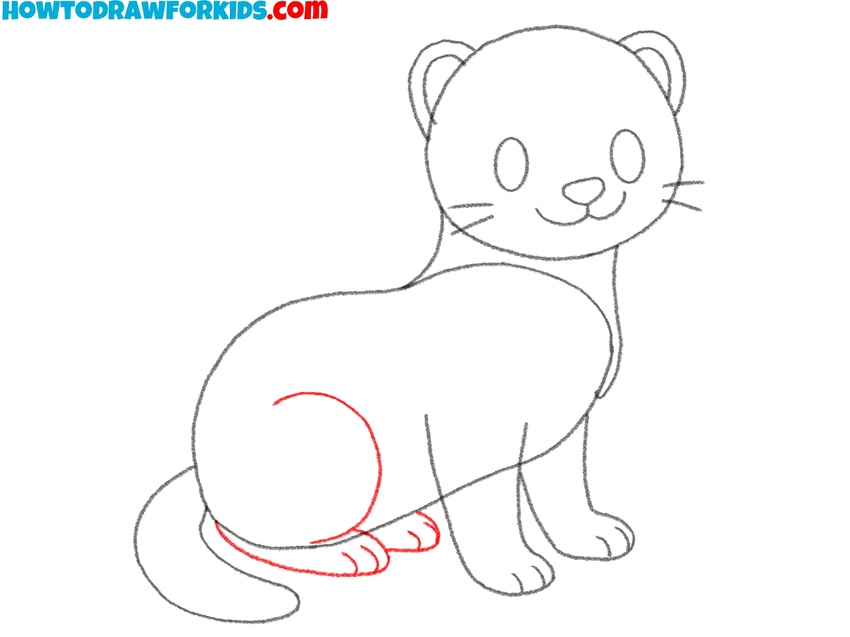
- Draw the ferret’s neck and tail.
At this stage, it is necessary to complete the body outline. Draw a couple of smooth lines from the bottom of the ferret’s head to illustrate the neck and connect the it and torso. Then sketch a couple of other lines to form a long, curved tail.
- Indicate the front limb outlines.
To continue drawing the ferret’s body, add the front legs positioned underneath the head and chest area, something two vertical shapes, each ending in a rounded paw. Indicate toes with three short lines on each paw.
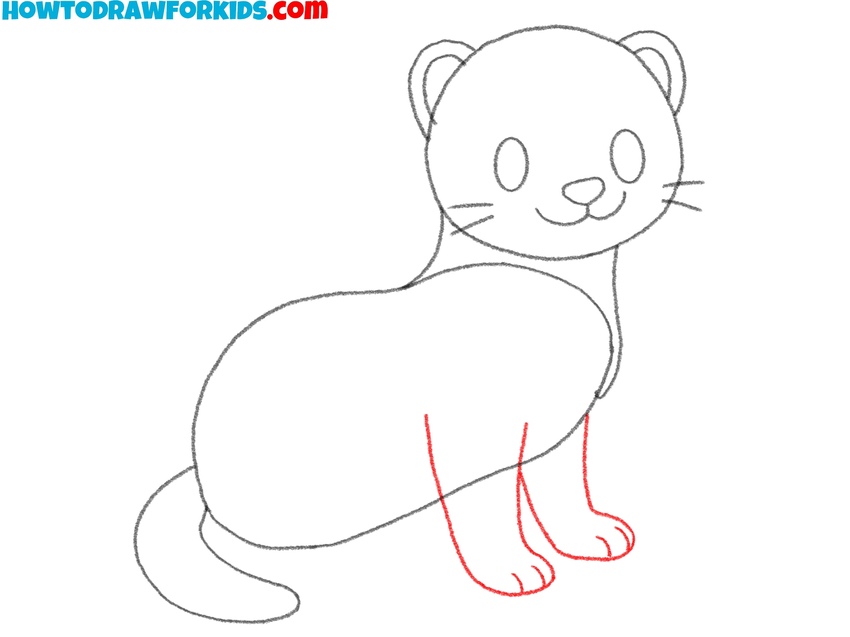
- Illustrate the curved hind legs.
The back legs complete the sitting posture of the animal. On the side of the body oval, sketch a curved line to form the hind leg. Add a rounded shape for the hind paw, positioned just beside the front paws. After that, sketch the visible part of the second paw using a similar shape.
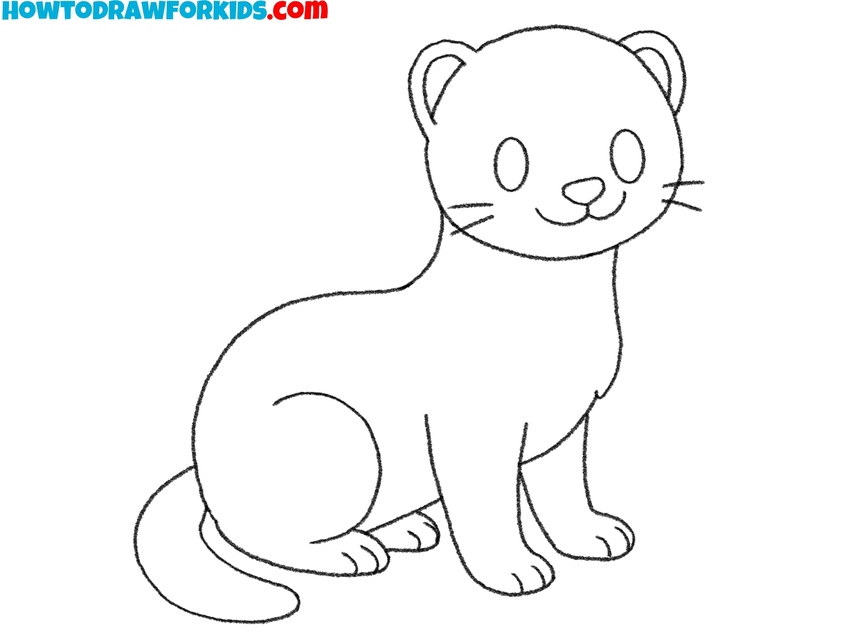
- Clean up the sketch lines.
Now that all body parts of the animal are in place, review the drawing and smooth the lines. Erase any overlapping construction shapes that are no longer needed, such as the extra parts of the head and body circles. Redraw the outline with more consistent curves so that the figure looks clean.
- Finish with flat and simple coloring.
The last step is to add simple color to distinguish the ferret, so fill the body with a light brown or beige shade, leaving the inner ears pink. Color the eyes black but add a small white in each eyes for a highlight. The nose should be a soft pink or darker brown, depending on the effect you want.

Bonus: Easy Ferret Drawing Tutorial
Just as the main tutorial shows a seated version of this animal, here the ferret is drawn in a different pose, showing its elongated body while moving. The drawing remains simple enough for kids but introduces a different sequence of steps.
To create this ferret drawing, illustrate the head with a small curved line, then extend the back and body smoothly to show the long, slender shape. Draw the underside using curved strokes to define the belly. Add the front and hind legs using simple bent lines.
Sketch the tail at the back, using smooth lines. Mark the eye and muzzle with small shapes, then refine the details of the head. Add a few patches on the body to represent fur patterns.
Smooth the outline and clean extra guides before applying color. Use shades of brown, gray, or black as shown to complete the ferret drawing.

Conclusion
If you want to continue, see the animal drawing tutorials to study other creatures in simple steps, for example, check out the cat drawing tutorial to practice another small mammal with different proportions.
You can also check the grass drawing tutorial to add a simple background to your picture, the cute animal drawing tutorial for lighter styles and to learn how to make your animal drawing even cuter.
Share your drawings, leave comments with your thoughts, and return for new lessons.