How to Draw a Sitting Dog
In this article, using two very simple step-by-step drawing lessons and additional PDF materials, I will show you how to draw a sitting dog.
In the first basic lesson of drawing a sitting dog, I will show you the basic techniques and describe them in detail. Next, I will show you an additional method that will help you go a little deeper into the topic of the lesson.

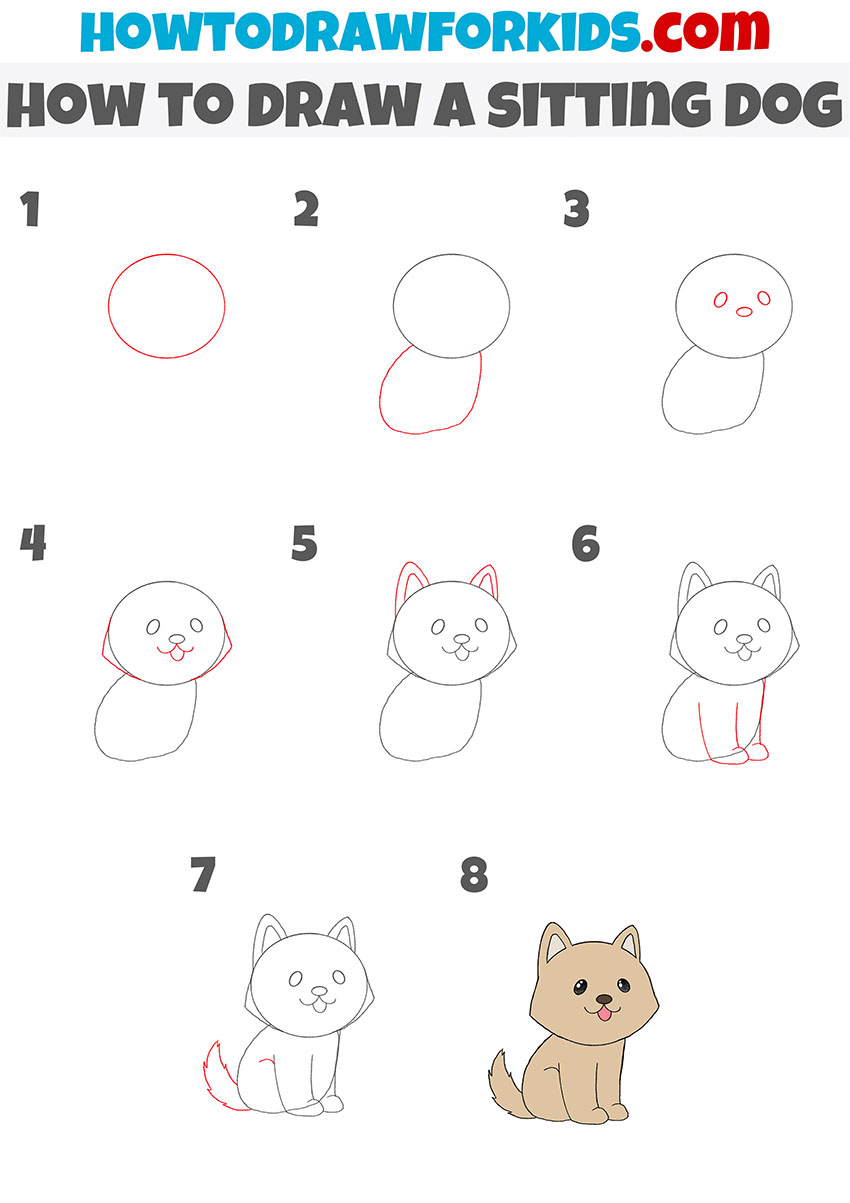
Table of Contents
- Basic information
- Steps on how to draw a sitting dog
- Additional content
- Alternative method for drawing a sitting dog
- Conclusion
Basic Information on How to Draw a Sitting Dog
In this lesson, I want to show you how to draw a sitting dog. I promise that this lesson will be useful for you and the acquired skills will be useful to you in the future.
On our site you will find many interesting lessons that are devoted to the topic of pets, and now I want to present you a new step-by-step guide.
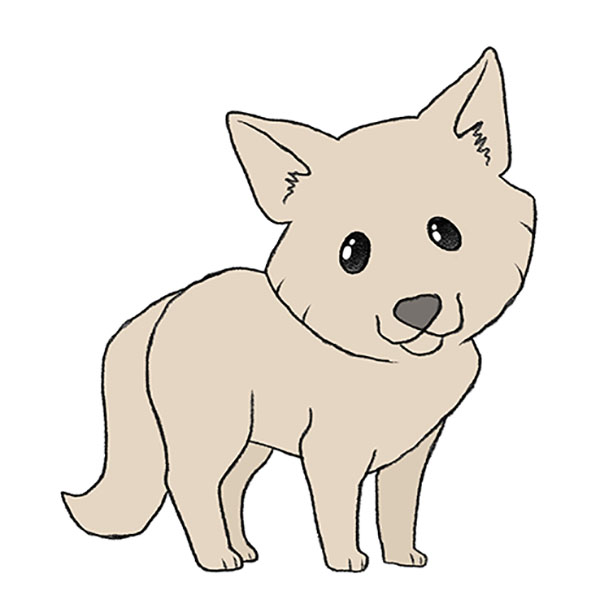
In this tutorial, you will learn how to draw a sitting dog. Here the dog is presented in a cartoon style and therefore the drawing consists of simple lines that any novice artist can easily repeat. The dog is small and looks very cute.
Pay attention to the ratio of the size of the head and torso and try to repeat these proportions in your drawing. Memorize all the drawing steps so that you can easily draw a dog later if necessary.
Materials
- Pencil
- Paper
- Eraser
- Coloring supplies
Steps on How to Draw a Sitting Dog
Time needed: 30 minutes
How to Draw a Sitting Dog
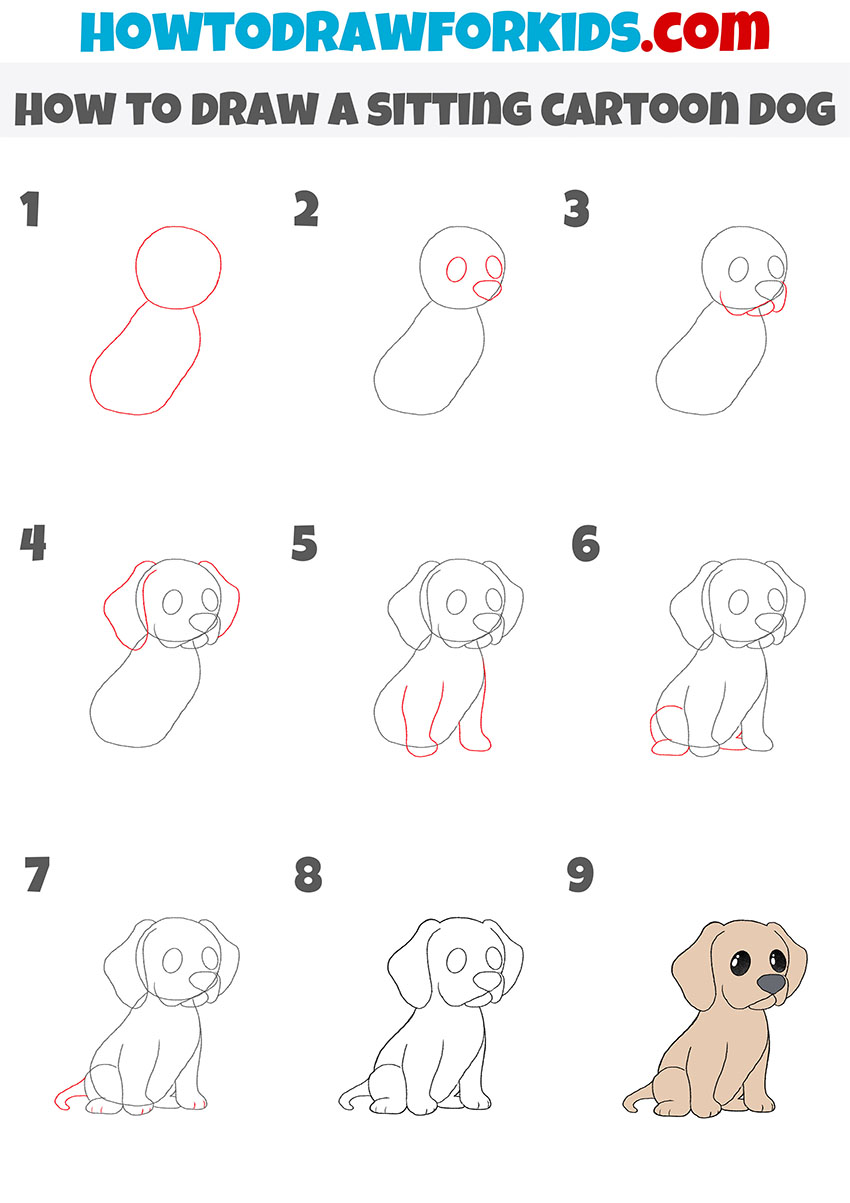
- Draw the head.
First of all, determine where you will draw your sitting dog. At the beginning of drawing, sketch an even oval for the dog’s head.

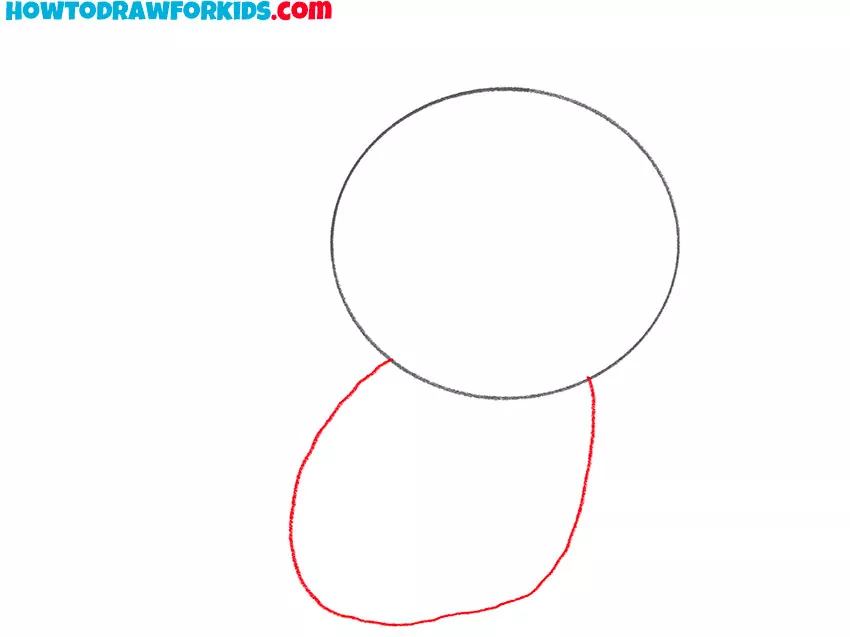
- Depict the torso.
Below the head, depict the torso with a smooth line, while observing the proportions. The dog’s torso should be approximately the same size as its head.
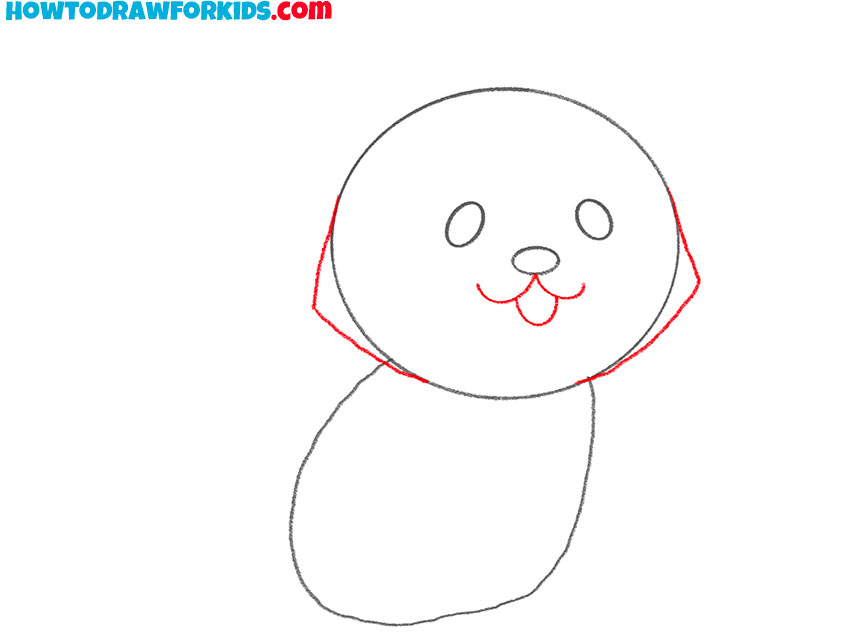
- Add the eyes and nose.
Draw three small ovals as shown in the example. The top two ovals are the dog’s eyes, and the oval in the very center of the head is the dog’s nose.

- Add the details of the head.
Sketch out the mouth and detail the outline of the head. The mouth and tongue look like three simple semicircles, and the sides of the head look like two triangles.
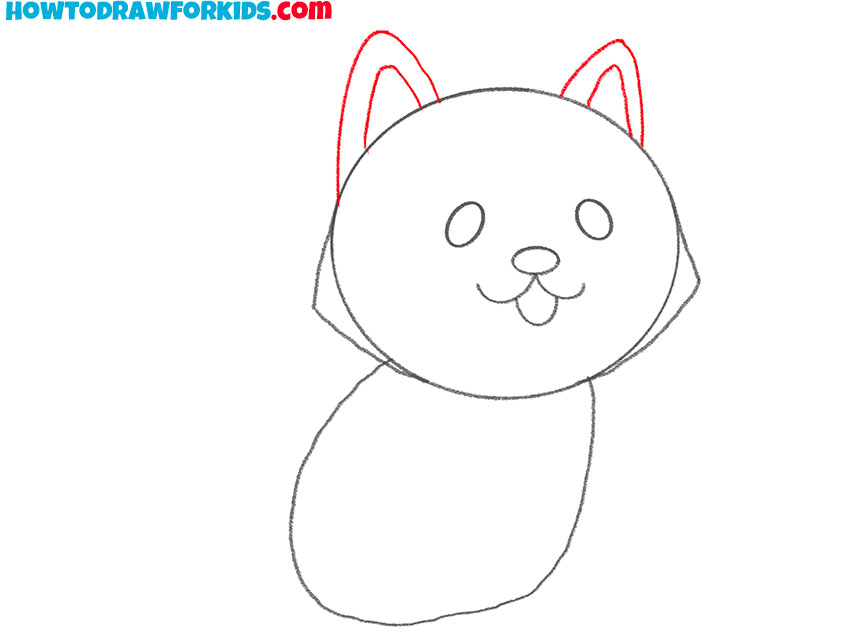
- Draw the ears.
Depict two ears and immediately add the inner outlines. The dog’s ears look like two triangles, slightly rounded at the top.
- Add the front legs.
With smooth lines, draw two front paws that are located side by side. The dog’s legs are very plump, which makes the whole drawing more cute and cartoonish.
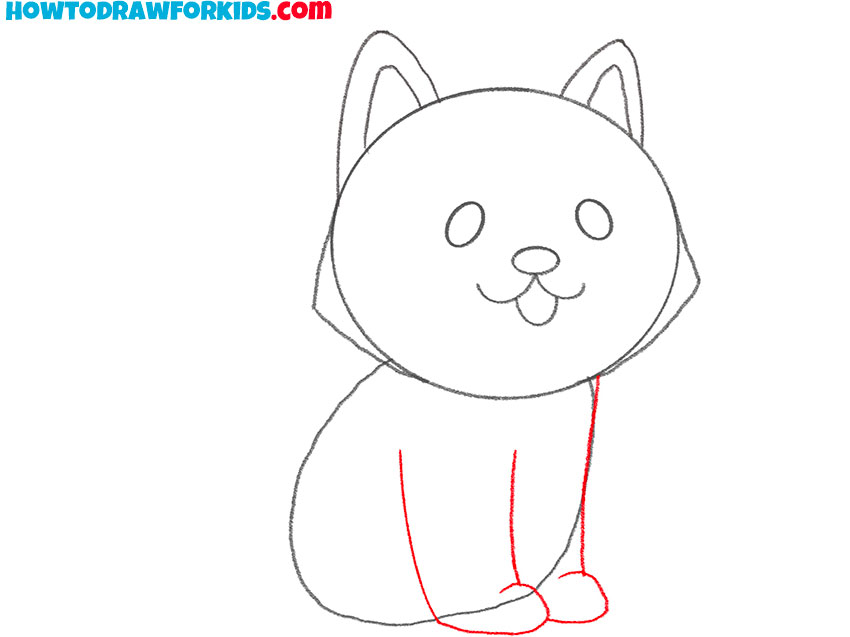
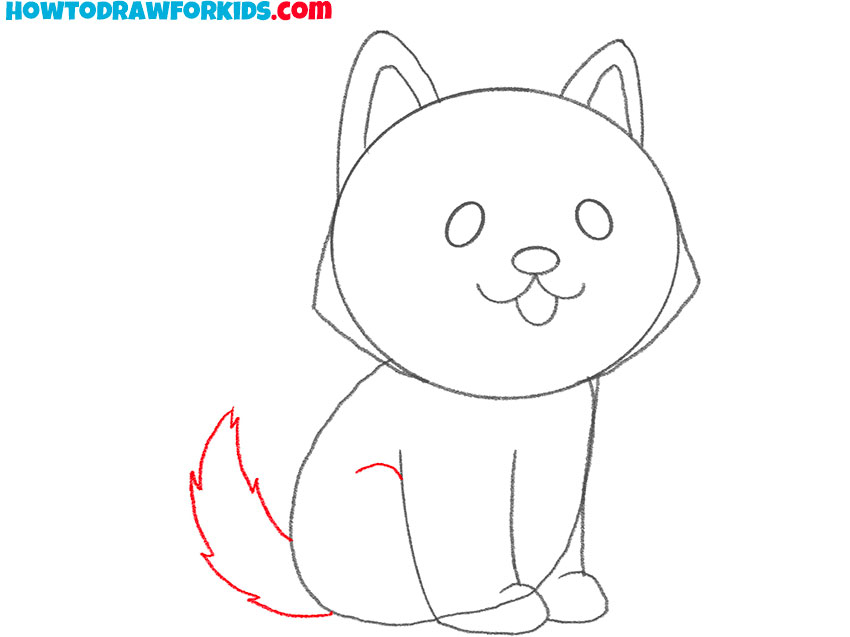
- Add part of the hind leg and tail.
Draw a short line to depict the outline of the hind leg. Using short strokes, draw the tail. Try to convey the texture of the fur on the tail as shown in my example.
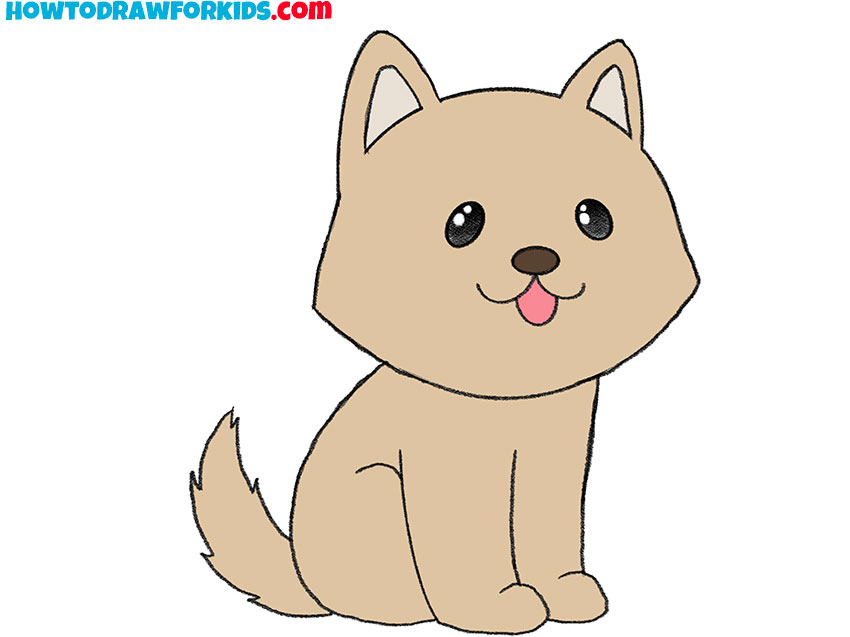
- Color the sitting dog sketch.
Choose from beige, brown, pink, and black. Add highlights to the eyes. Next, you can leave your drawing of a sitting dog as is, or you can add shadows, highlights and details to it.
Additional Content
Don’t forget to download the PDF file that I have prepared especially for your convenience. This file contains a brief instruction and other useful content. Among the additional content you will also find a coloring page, tracing worksheet and grid drawing worksheet.
Alternative Method for Drawing a Sitting Dog
In terms of method, this lesson will be somewhat reminiscent of the previous one, but there are a number of significant differences. Firstly, here we will draw another breed of dog. Secondly, we will try to give it a little more cartoonishness.
But of course, you can make your sitting dog artwork more realistic. To do this, make the eyes more real, as well as the body shapes. That is, try to make the dog less chubby and less puppy-like.
In addition, you can add more complex shadows and highlights, which again add realism to your sketch. By the way, to learn more about this, go to my article on light and shadow.
Conclusion
As you can see, drawing a sitting dog is a fairly easy process. As in the first and second example, I showed you that it is best to start with basic shapes such as circles and ovals. Then you need to gradually move on to the details and finally to coloring.
If you start drawing with details, such as eyes, nose, etc., you will most likely get the proportions wrong and you will have to draw the entire sitting dog from the beginning.
In addition, you can see that drawing a sitting dog is not much different from drawing this animal in any other pose. The basic principles remain the same.