How to Draw Alexander Hamilton
To develop your portrait drawing skills, particularly with historical figures, this tutorial will demonstrate how to draw Alexander Hamilton.
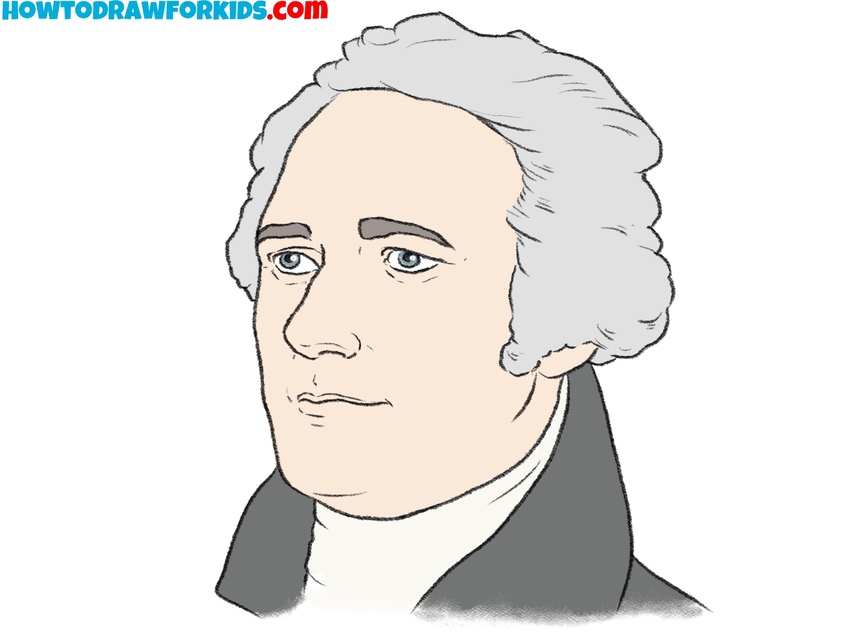
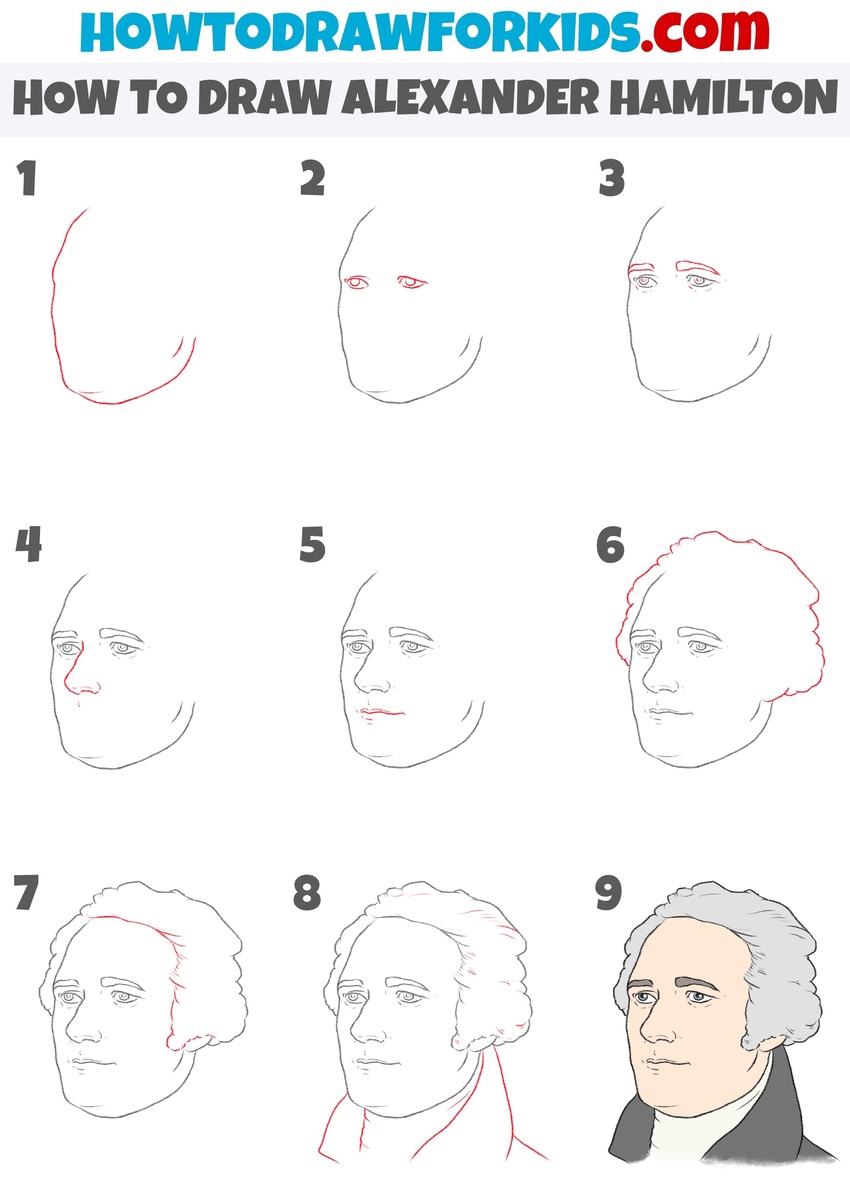
How to Draw Alexander Hamilton: Introduction
Drawing portraits of historical figures, such as Alexander Hamilton, is a great exercise for developing artistic skills. This tutorial provides a simple guide to accurately sketch Hamilton’s portrait, illustrating his unique facial features.
Additionally, this tutorial on how to draw Alexander Hamilton teaches artists to observe key aspects of a subject’s appearance carefully, such as proportions, overall shape, and the arrangement of elements. By focusing on these details, artists learn how to translate what they see into accurate lines and forms, enhancing their ability to observe and recreate any subject realistically.
This tutorial includes elements like Hamilton’s hairstyle and clothing, providing an opportunity to practice illustrating historical details. This boosts an artist’s ability to incorporate contextual elements into their work.
By drawing Alexander Hamilton, artists gain experience in depicting historical figures, which requires attention to both accuracy and style. This exercise helps develop a broader understanding of portraiture while building transferable skills that can be applied to other drawing challenges.
Alexander Hamilton Drawing Tutorial
Materials
- Pencil
- Paper
- Eraser
- Coloring supplies
Time needed: 40 minutes
How to Draw Alexander Hamilton
- Sketch the outlines of the president’s face.
Start drawing Alexander Hamilton by sketching the basic outline of the face. Use light, curved lines to form the shape of his head, conturing the jawline and the shapes of the cheeks. Pay attention to the slightly rounded edges of the chin and the gentle curve of the forehead.

- Sketch the eyes of the president.
Alexander Hamilton’s eyes are almond-shaped with a slight upward tilt at the outer corners. Draw the eyes symmetrically, keeping the spacing roughly equal to the width of one eye. The upper eyelids are slightly heavier, the pupils are round and centered. Add subtle creases above the eyes.
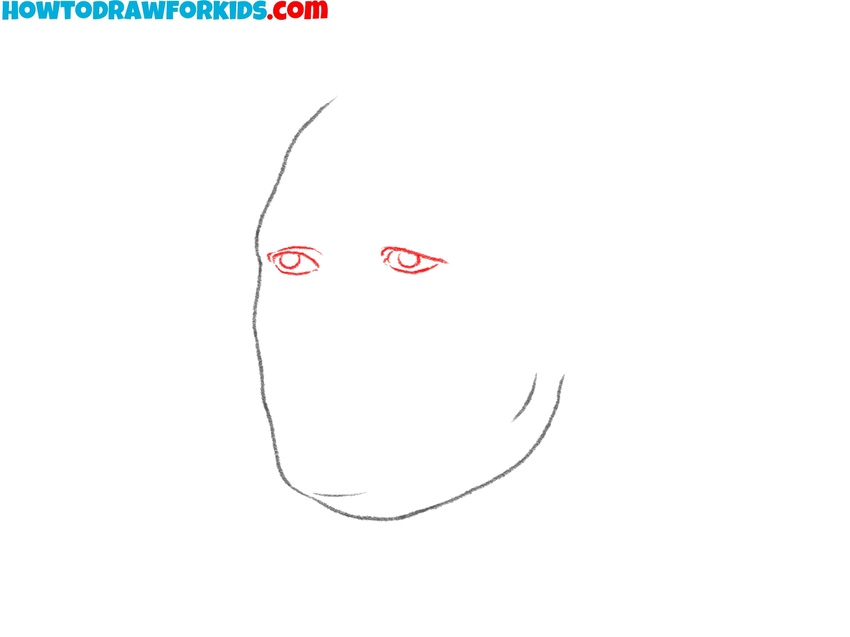
- Add the eyebrows, pupils and creases.
Hamilton’s eyebrows have a natural arch, tapering slightly at the ends. The brows follow the contour of the brow ridge. Use smooth, curved lines to draw the eyebrows of Alexander Hamilton. You can include short, fine strokes to represent the hair texture.

- Draw the nose of Alexander Hamilton.
Begin drawing the nose by sketching the bridge of the nose as a soft line that gradually widens as it reaches the nostrils. Then, add the visible nostril. The nostrils of Alexander Hamilton are small, rounded, and subtly flared. The nose is straight and narrow, with a slight curve at the bridge and a rounded tip.
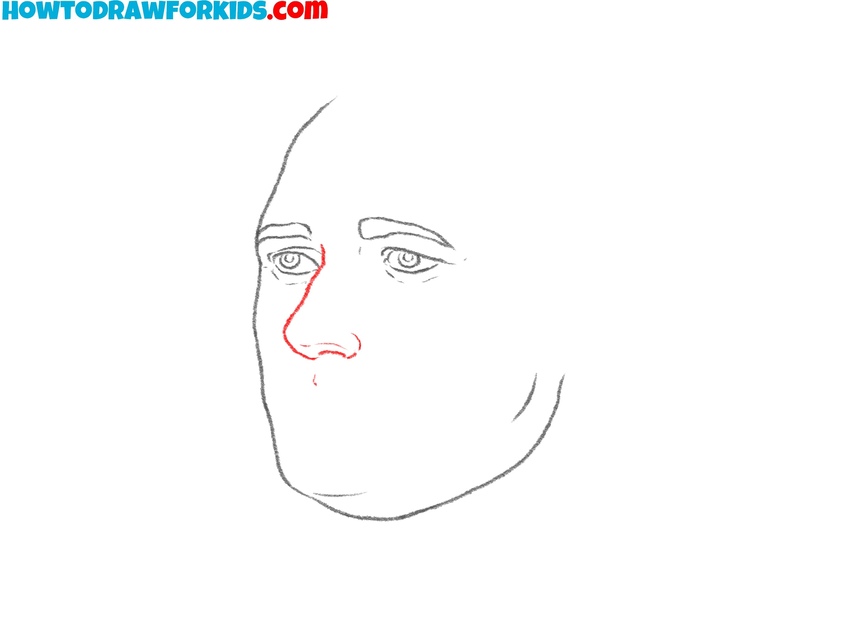
- Draw Alexander Hamilton’s mouth.
Now, draw the mouth of Alexander Hamilton with smooth lines. The upper lip has a delicate “M” shape, with a pronounced dip at the center. The lower lip is fuller, gently curving outward and tapering at the corners. Don’t forget to draw the nasolabial folds, as well as the folds on the sides of the mouth.

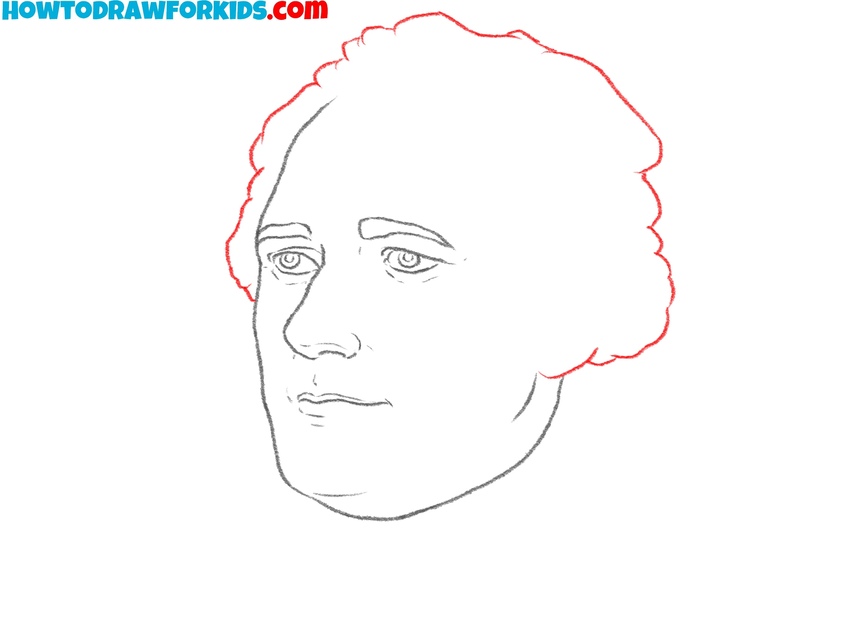
- Start sketching the hairstyle.
Hamilton’s hair is voluminous and wavy, forming a recognizable frame around his face. The overall shape is wide. When drawing the hair of Alexander Hamilton, remember that it represents a historical figure from the 18th century, so aim to replicate the outlines shown in the example.
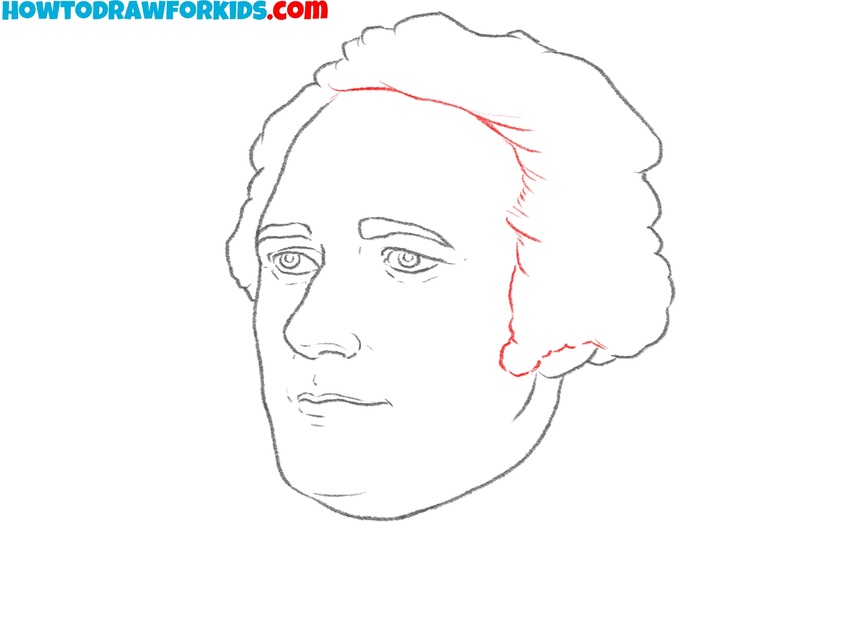
- Finish drawing the hairstyle of the president.
Next, draw the lower edge of the hairstyle, shaping the outlines around the forehead and temples. Remember to include the sideburn that covers the ear. The hair of Alexander Hamilton should have a slightly wavy outline, creating a recognizable look of 18th century hairstyle.
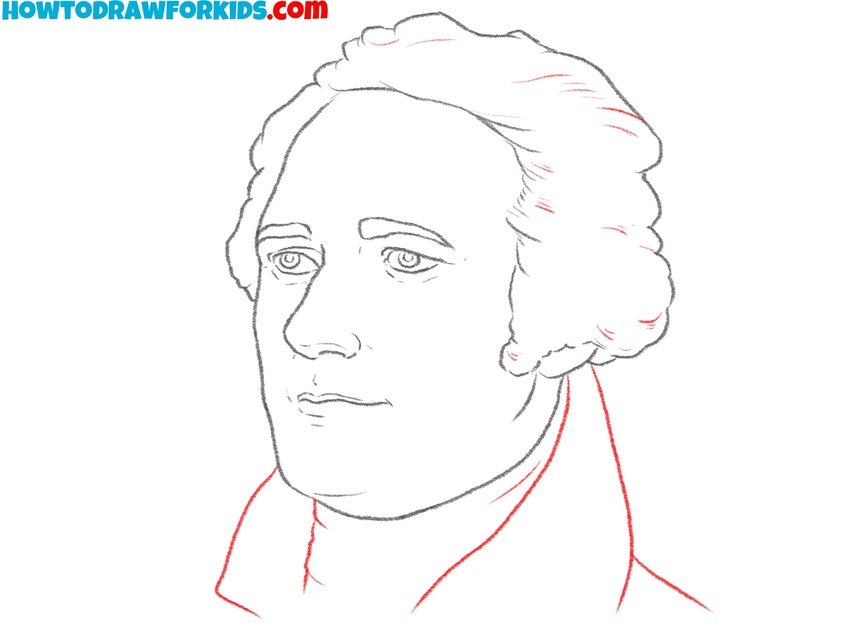
- Add the collar and detail the hairstyle.
The collar of Hamilton’s attire is formal with clean, angular lines. It frames the lower portion of the head. The high neckline reflects the elegant style of the 18th century. Also, using short strokes, draw the hair texture inside the general outline from the previous steps.
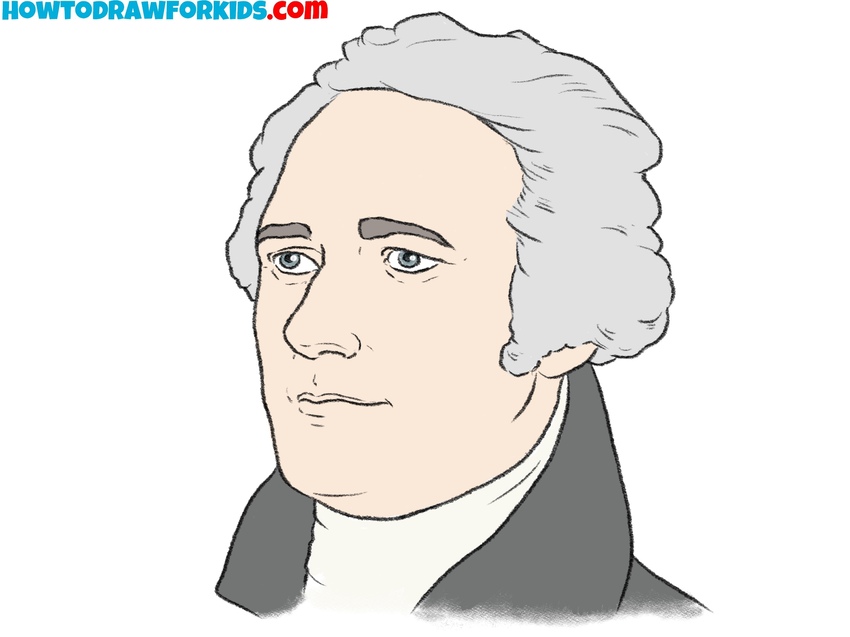
- Cool the portrait of Alexander Hamilton.
Examine the facial features for any inconsistencies and refine the characteristic shapes. Erase any stray guidelines to leave a polished outline. Then, add color to finish the portrait of Alexander Hamilton. Use pale tones for the skin, gray for the hair, and darker shades for the clothing.
Conclusion
So, dear artists, today we learned how to draw Alexander Hamilton, one of the most significant presidents in US history. We learned how to create a portrait conveying important and noticeable facial features, making the portrait of the president truly recognizable.
Of course, this lesson helps you learn how to draw not only Alexander Hamilton. Using the knowledge gained in this lesson, you will be able to create portraits of historical figures from different eras.
Also, let me remind you that this is not the only lesson on drawing the American president. Go to the People section to learn how to draw George Washington and John F. Kennedy and other American presidents.
In addition, this section will help you generally boost your skills in drawing persons with simple and clear instructions. You will be able to create convincing portraits of both historical figures and any other people.

