How to Draw a Panda
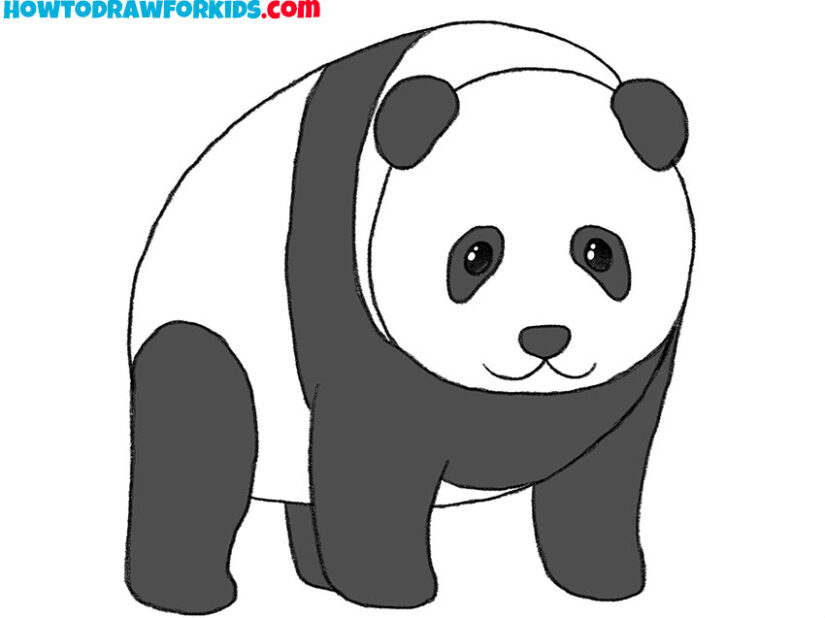
Pandas are probably one of the cutest creatures on planet earth, and in this tutorial I want to show you how to draw a panda in several different ways.
How to Draw a Panda: Basic Information
Following the established tradition, we will learn to draw a panda in a very simple way. I have removed any unnecessary details and kept only the most important ones, which will be sufficient for your drawing of a panda to have the necessary recognizable features.
What do you need to draw a panda in a simple way while ensuring it is recognizable? First, you need to convey the overall shape of the body and the roundness of its parts. Second, you should include the distinctive black and white pattern. In this lesson, I will explain how to achieve this.
You can also draw a panda in a more realistic style, rather than in this simplified one. To achieve this, reduce the exaggerated features in your drawing and depict the details of the face in a less cartoonish manner.
In line with another established tradition, I have supplemented the basic lesson with several additional ones to help reinforce the skills learned and provide new knowledge.
Panda Drawing Tutorial
Materials
- Pencil
- Paper
- Eraser
- Coloring supplies
Time needed: 30 minutes
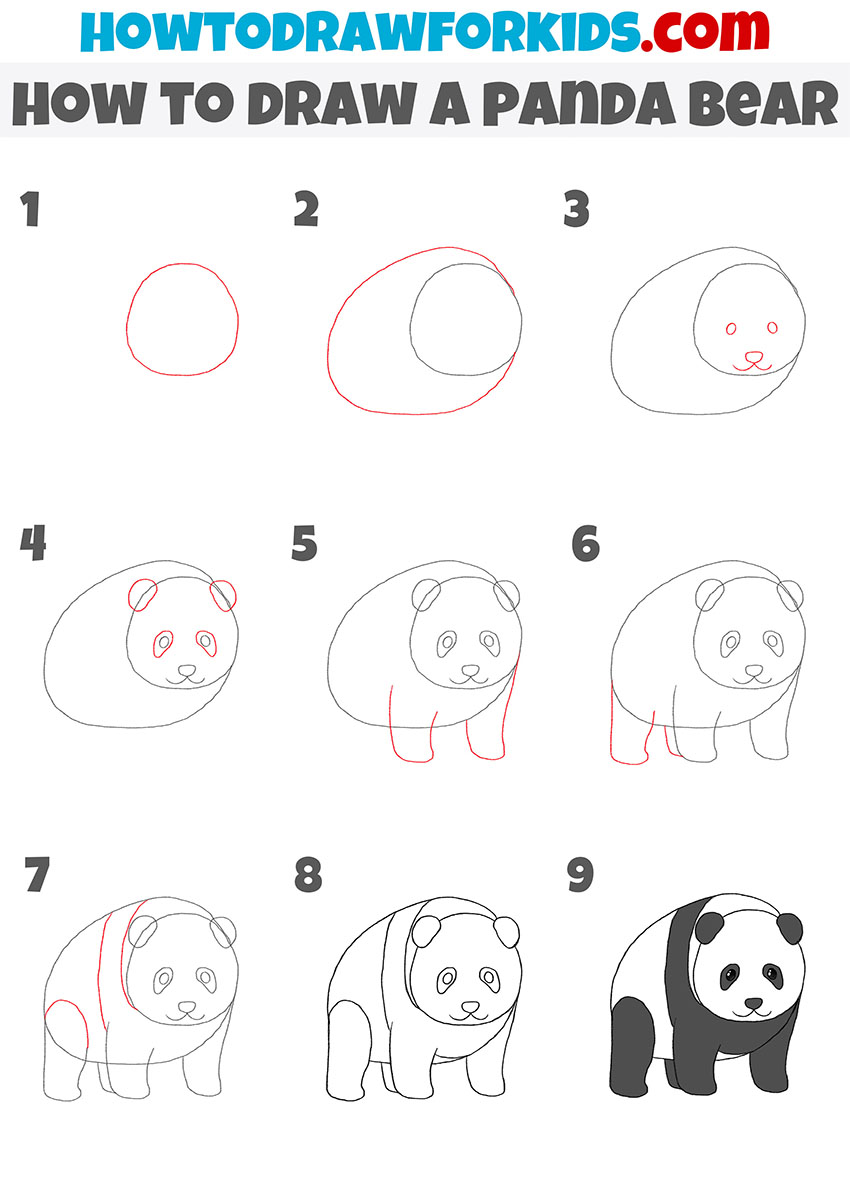
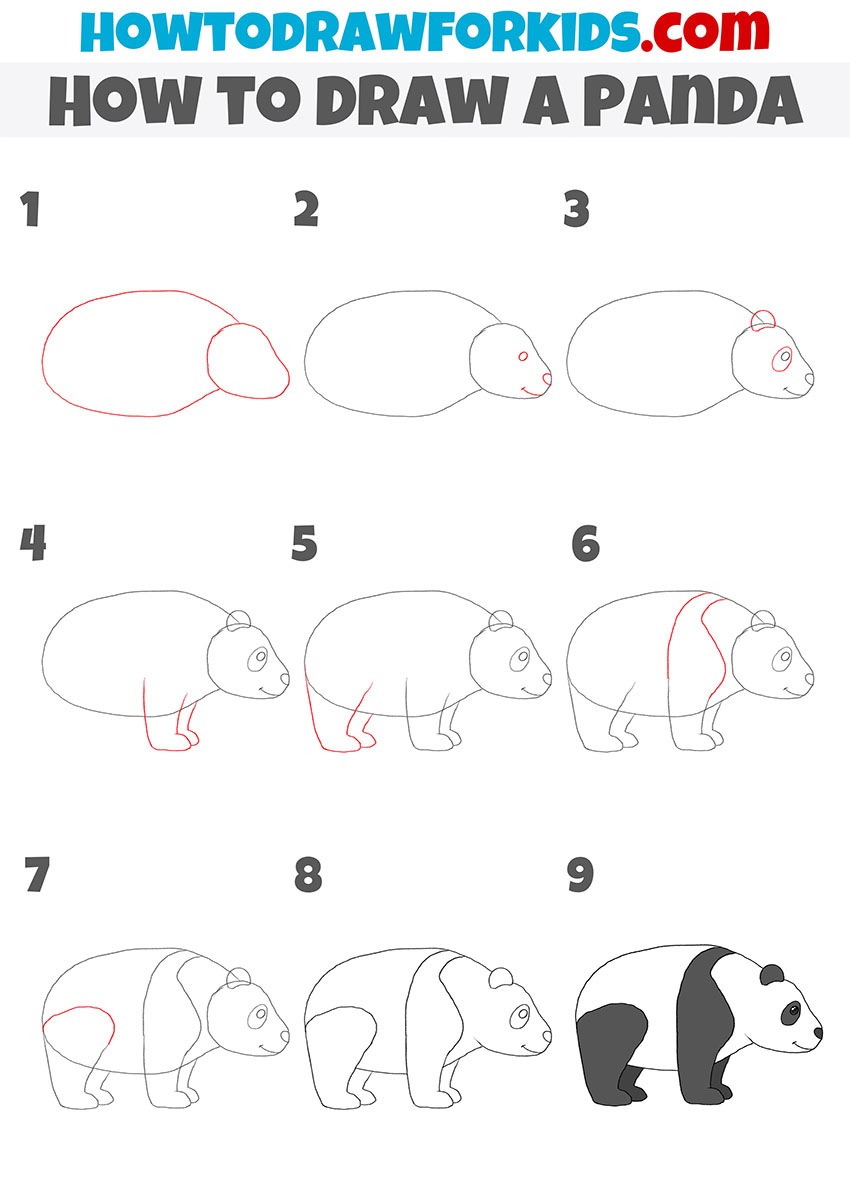
How to Draw a Panda
- Sketch the head.
Begin by drawing a simple oval shape in the center of your paper. This oval will serve as the base of the panda’s head. Don’t worry if the shape is not perfectly symmetrical. This is just a guide to help form the panda’s head, and any imperfections will not be noticeable in the final panda drawing.

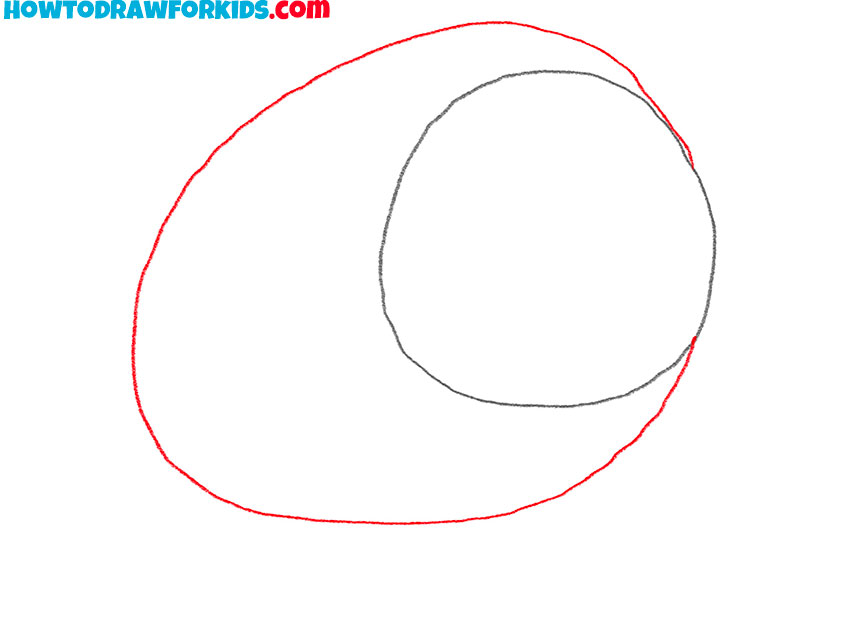
- Add the body outline.
Next, draw a larger, more elongated oval shape below and slightly overlapping the head shape. This oval will be the panda’s body, which is significantly larger than the head. Keep the body shape smooth and rounded, highlighting the panda’s chubby appearance.
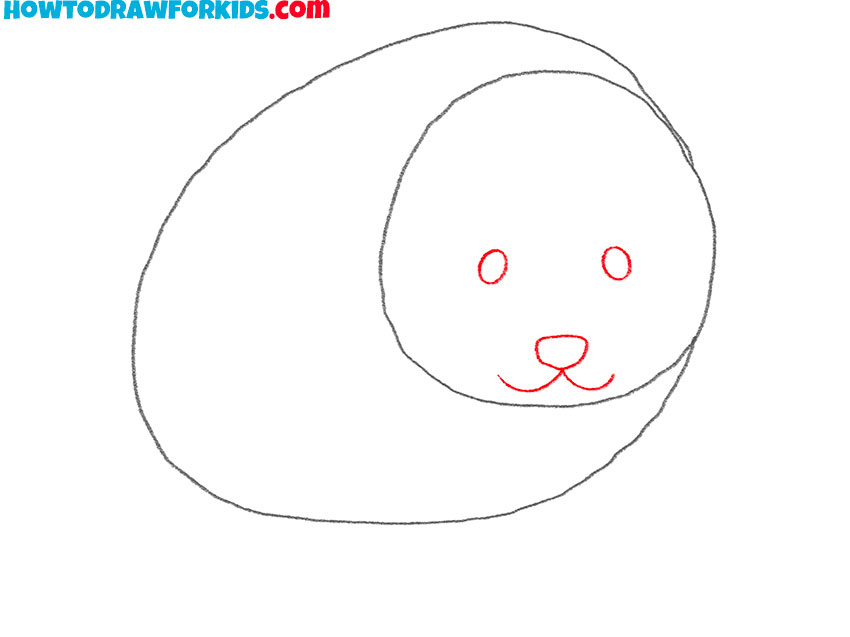
- Sketch the facial features.
Now, focus on the face. Draw two small circles inside the head oval to represent the panda’s eyes. The eyes should be placed about halfway down the head. Below the eyes, add a small rounded triangle for the nose. Then, draw a curved line extending from the bottom of the nose to form the mouth.
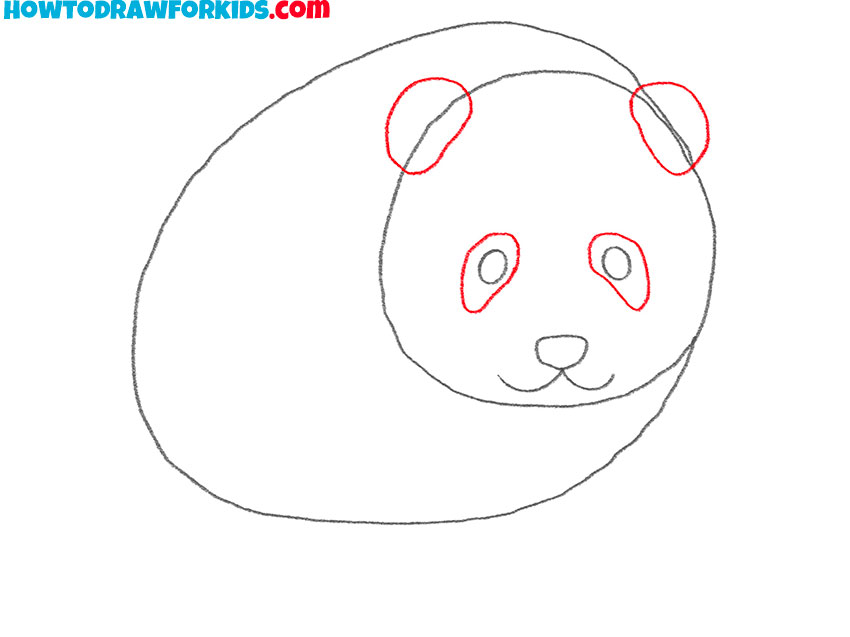
- Add the ears and eye patches.
To draw the ears of the panda sketch two small curved shapes on each side of the head baby. Then, draw two large ovals around the eyes to represent the panda’s distinct black eye patches. These patches should be larger than the eyes and placed evenly around them, giving the panda its characteristic look.
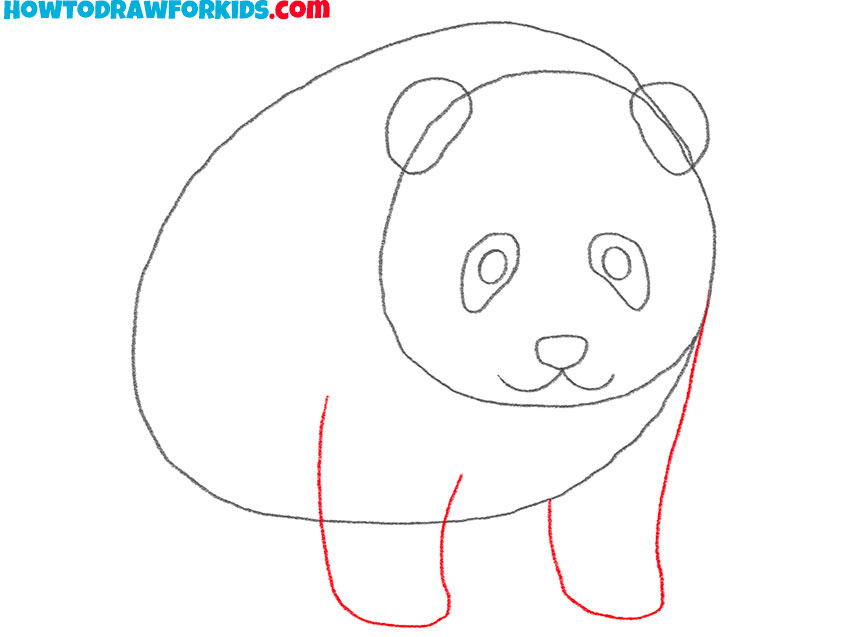
- Sketch the front legs.
To illustrate the panda’s front legs, sketch two curved lines that extend downward from the body. The legs should appear as short, rounded shapes near the front of the body. To make your panda drawing more realistic, sketch the toes or texture of the fur.
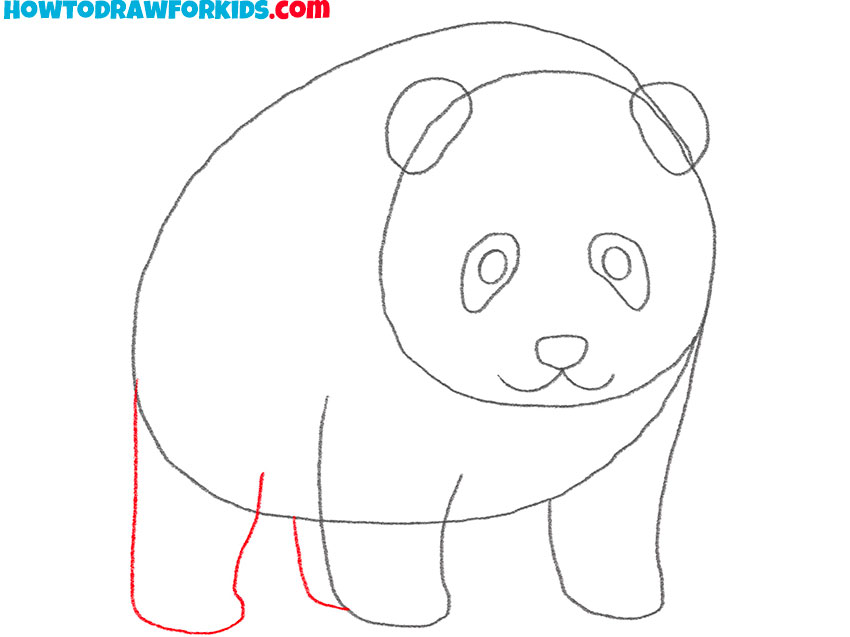
- Add the back legs.
Now, draw the back legs, which will appear slightly behind the front legs. Start by sketching two curved lines near the bottom of the body. The back legs should have the same rounded, short appearance as the front legs. This step will complete the basic structure of the panda’s body.
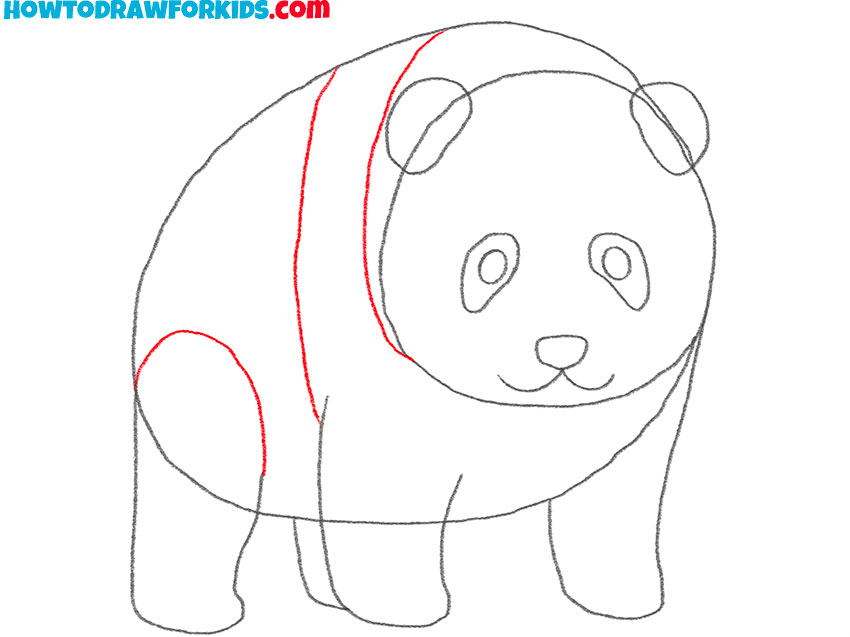
- Detail the body.
Draw a curved line across the panda’s back. Then, add another curved line around the upper part of the hind leg. These additional lines will help shape the panda’s iconic black-and-white fur pattern, giving it a more recognizable appearance.
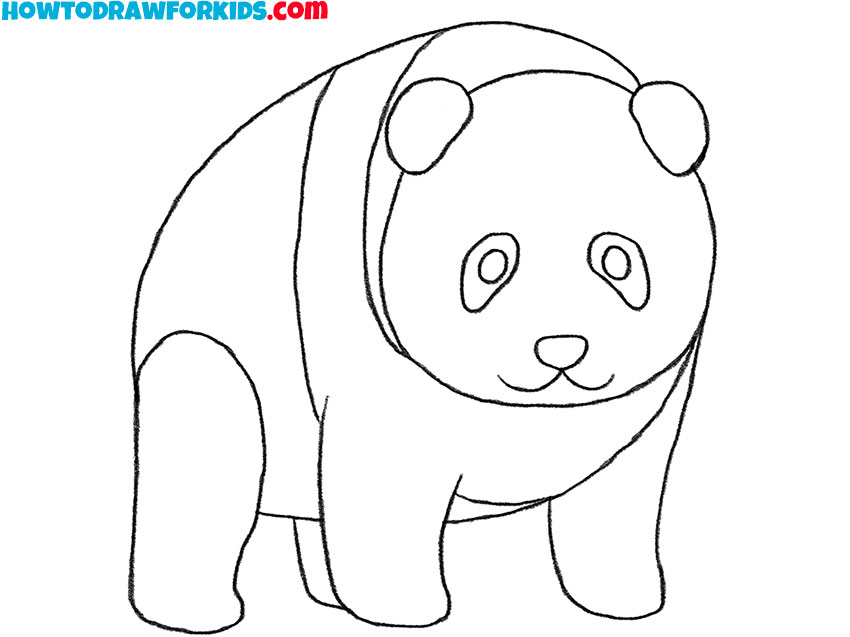
- Finalize the sketch.
Go over the entire panda sketch to finalize the animal’s outline. Erase the guidelines, smooth out any rough lines, and adjust the proportions and facial features if necessary. This step will help you clean up the drawing and prepare it for coloring.
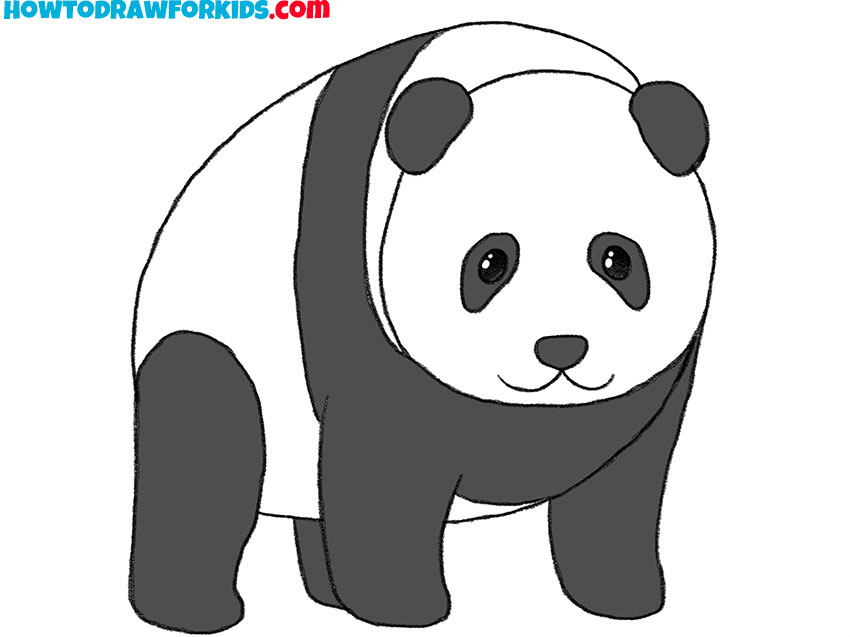
- Color the eyes and black areas.
First, add black color to the ears, the large eye patches, and the nose. Then, color the front and back legs, along with the patches around the eyes. After that, color the eyes black, leaving white highlights inside them. Also, you can make your panda look more realistic, by adding shadows.
Additional Content
In preparing this lesson, I have also created a free, downloadable PDF version. It is a condensed version of the tutorial, allowing you to practice drawing pandas with or without internet access. This guide is useful for those who prefer having a reference available at any time and place.
Alternative Drawing Techniques
I believe that growth in art comes through practice, and varied practice boosts your skills. That’s why, alongside the primary panda drawing tutorial, I have created a set of alternative techniques for you.
These variations are intended to challenge your abilities, giving detailed practice that will help train your skills and improve your drawings.
How to Draw a Panda From the Side
This side-view panda drawing technique is a simple way to illustrate the form of one of nature’s most recognizable animals from the different perspective.
To draw a panda from the side, start by outlining the body with a large oval and a smaller oval for the head. Refine the head by connecting the shapes smoothly and adding the nose and mouth. Draw two small circles to outline the panda’s eyes, and place two rounded shapes on top of the head for the ears. Next, sketch the front leg, extending down from the body, and then draw the back legs, slightly larger and more curved.
Add details to show the panda’s recognizable black-and-white pattern by marking the areas around the front and hind legs. Finalize the drawing by refining the body shape and the legs. Finally, shade the black areas such as the ears, legs, and eye patches. Your panda drawing is now complete.
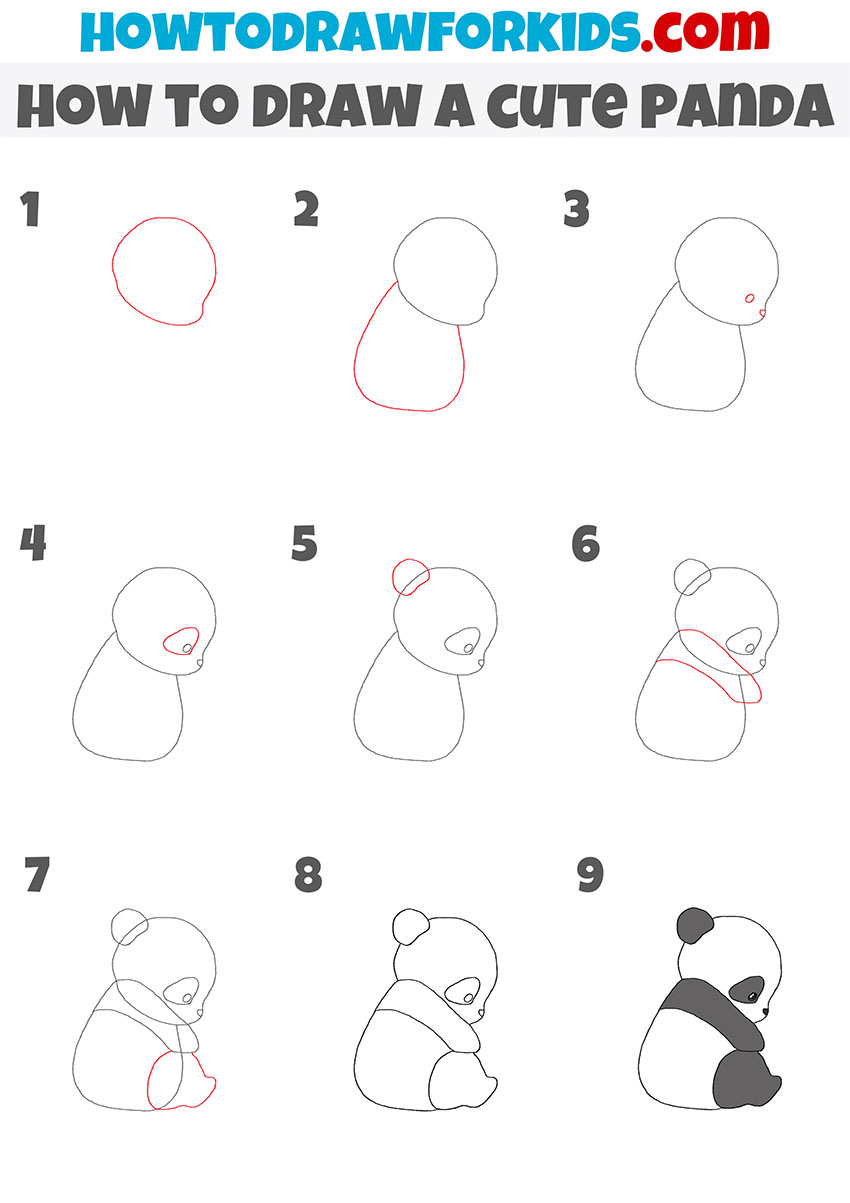
Sitting Panda Drawing Tutorial
The image shows a step-by-step process for drawing a sitting panda with its head turned to the side. This lesson demonstrates the process of drawing the panda from an uncommon angle, giving valuable practice for young artists.
To draw a sitting panda, begin by sketching a curved lines to outline the head and body. Next, draw a small oval shape to indicate the arm resting on the body. Below, outline the leg with a smooth line, extending from the body downwards. Add facial details by placing a small circle for the eye and drawing a line for the mouth.
Outline the panda’s black patch around the eye and create two rounded ears on top of the head. Define the body by adding a line across the back, which will separate the black and white fur. Complete the sitting panda drawing by shading the black areas, including the ears, eye patch, arm, and leg.
How to Draw a Panda for Preschoolers
This really simple four-step drawing method is created for a kindergarten audience. The tutorial contains only simple steps and geometric shapes. This method ensures that young learners can easily follow the instructions.
To draw a simple panda for preschoolers, begin by sketching two circles. Place a smaller circle on top of a larger one. These will form the head and body of the panda. Next, draw two small ears on the top of the head. Inside the head, add two large circles for the eye patches and two smaller circles within them to represent the eyes. Draw a small oval for the nose and a curved line below for the mouth.
Then, detail the body by adding two arms on each side of the body and two small legs at the bottom. The arms and legs should be rounded. Lastly, add shading to the black areas: the ears, eye patches, arms, and legs. Leave the rest of the body white to complete the typical black-and-white appearance of the panda. The drawing is now ready.

Cartoon Panda Drawing Guide
This method outlines a simple cartoon version of a panda. The steps involve drawing rounded and simplified shapes for the head, limbs, and body. The simplicity of this technique ensures that the drawing process is accessible to all skill levels, especially for children.
To draw a cartoon panda, begin by sketching an oval shape for the head. Next, add two small circles on top of the head for the ears and two larger ovals inside the face to form the eye patches. Draw the eyes inside the patches along with a small oval for the nose and a curved line for the mouth.
Then, outline the body using a large rounded shape attached to the head. Draw the front legs extending downward from the body. Add the back leg, which should appear behind the front legs, and a rounded shape for the foot. Next, sketch a line across the shoulder and back to indicate the panda’s black-and-white pattern.
Finalize the drawing by refining the outline and checking the proportions. Once complete, shade the appropriate areas like the ears, legs, and eye patches to achieve the classic panda look. The cartoon panda drawing is now ready for coloring.

Conclusion
This panda drawing lesson aims to provide you with a sense of accomplishment and motivation to continue improving your skills. You can find more tutorials on my website, ranging from how to draw a cat to more advanced articles like drawing lights and shadows.
To stay updated on new lessons, coloring pages, and tips, feel free to follow my social media profiles. If there is a specific tutorial you would like to see, leave a comment under the lesson.


very good
good
good
good
good