How to Draw a Polar Bear
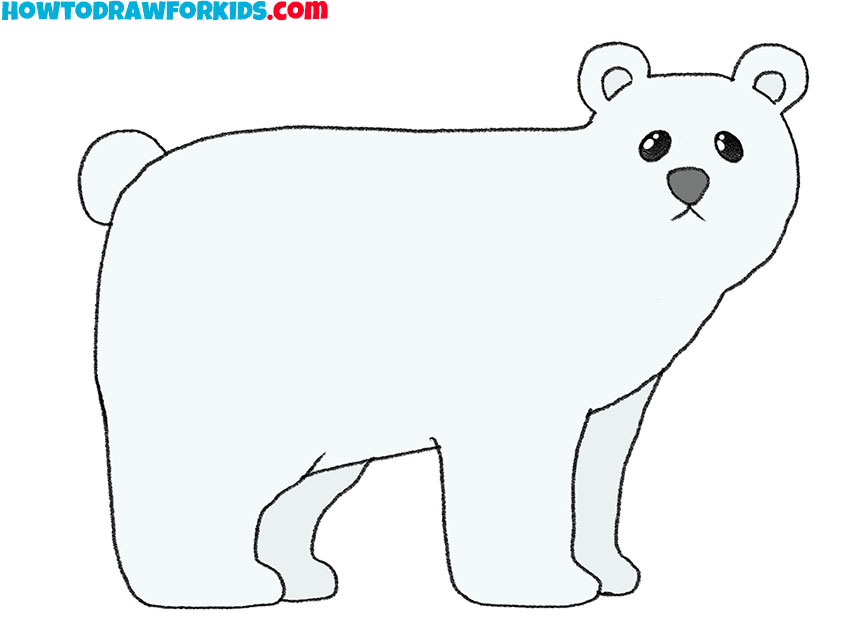
Embark on an artistic expedition to the Arctic as I show you how to draw a polar bear with a series of simple, easy-to-follow steps. Starting with the bear’s head and body, we’ll establish the proportions that bring balance to your drawing. Each step is crafted to make the process enjoyable and to imbue your bear with character.
How to Draw a Polar Bear: Basic Information
Welcome to a frosty adventure where I’ll teach you how to draw a polar bear with strokes as gentle as snowflakes. This simple method begins with basic geometric shapes to capture the bear’s imposing yet cuddly form. I’ll guide you through each curve and line, ensuring you can replicate the bear‘s silhouette with ease.
In this drawing, you’ll notice we use soft, rounded shapes to evoke the polar bear’s thick, fluffy coat, essential for its survival in the harsh Arctic. The careful placement of its eyes, ears, and nose gives our bear a friendly and lifelike expression. Step by step, we’ll add definition to the body, infusing warmth into our Arctic scene.
By the end of this lesson, as you draw a polar bear, you’ll feel a connection with this majestic creature of the North. My goal is to equip you with not just the skills to create art but also to foster an appreciation for these magnificent animals through your drawings. Let’s begin our artistic journey to the Arctic.
Polar Bear Drawing Tutorial
Materials
- Pencil
- Paper
- Eraser
- Coloring supplies
Time needed: 30 minutes
How to Draw a Polar Bear
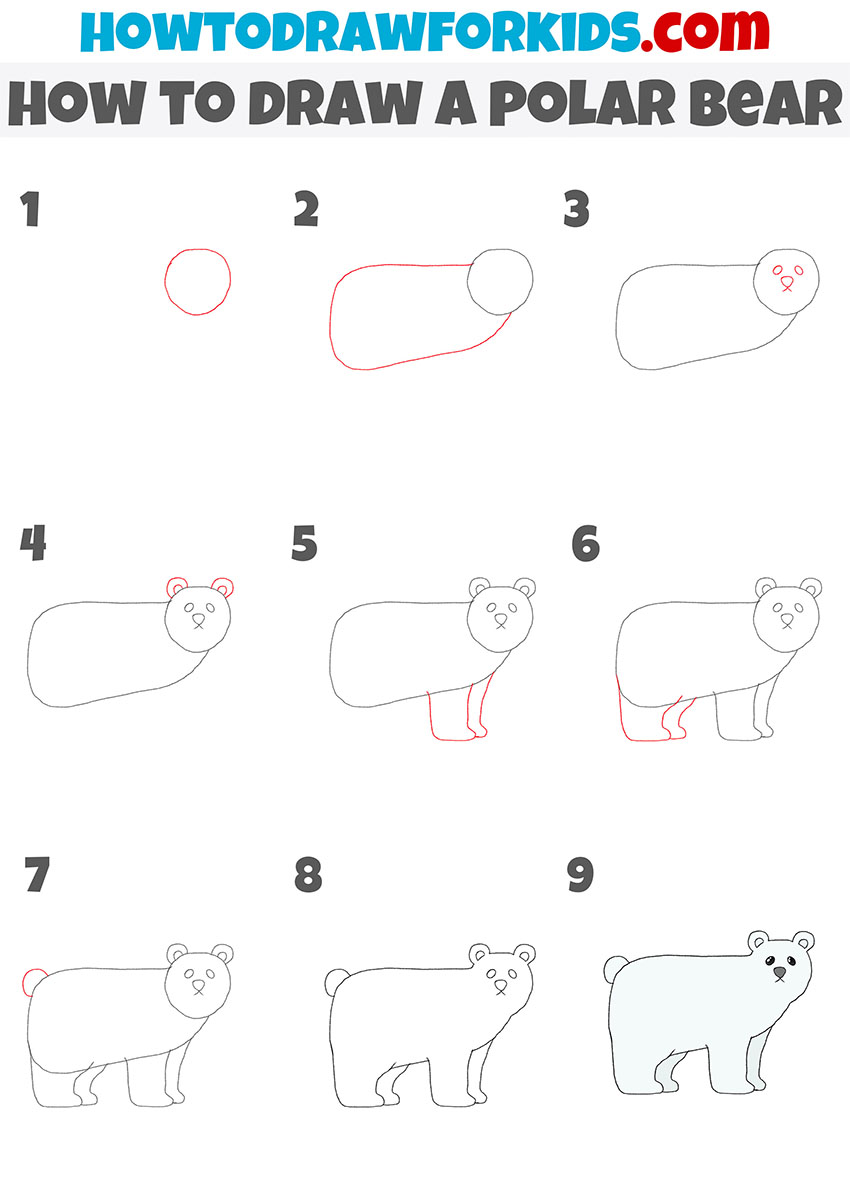
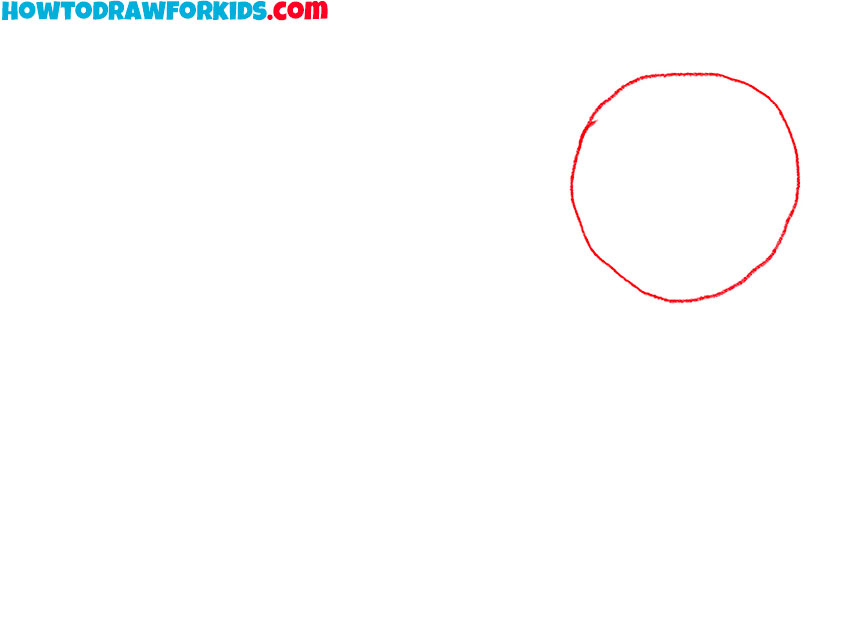
- Draw the outline of the bear’s head.
Depict a shape that looks like a slightly deformed circle using a curved line.
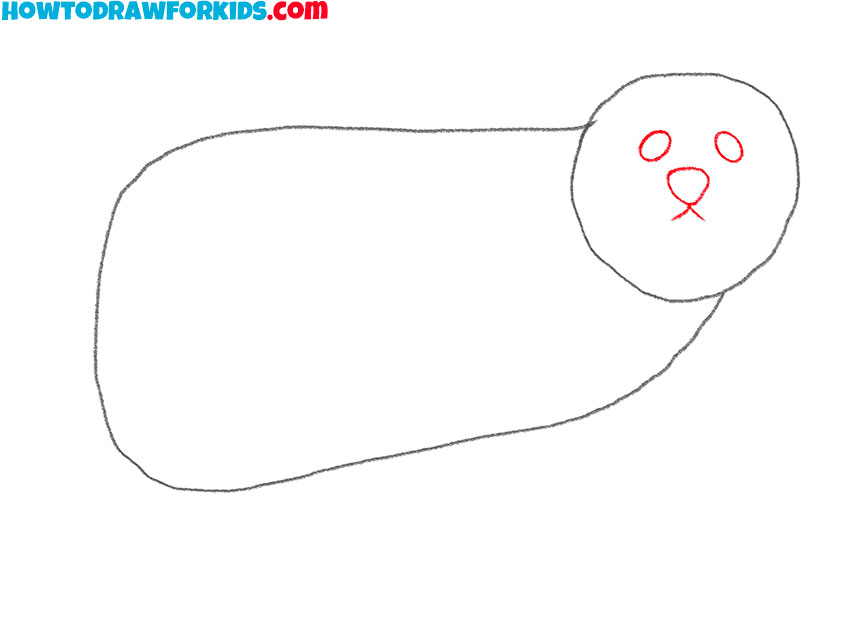
- Depict the outline of the bear’s torso.
To complete this step, you need to draw one long, curved line.

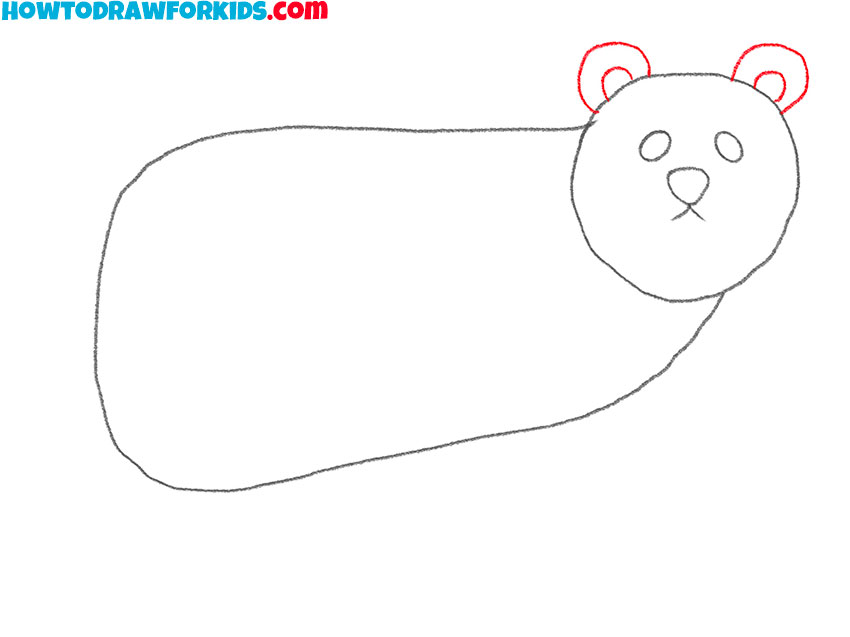
- Add facial features.
Inside the previously drawn outline of the head, add two ovals as well as a few curved lines.
- Sketch out the ears of the bear.
Draw two symmetrical ears on top of the bear’s head using arcs of different sizes.
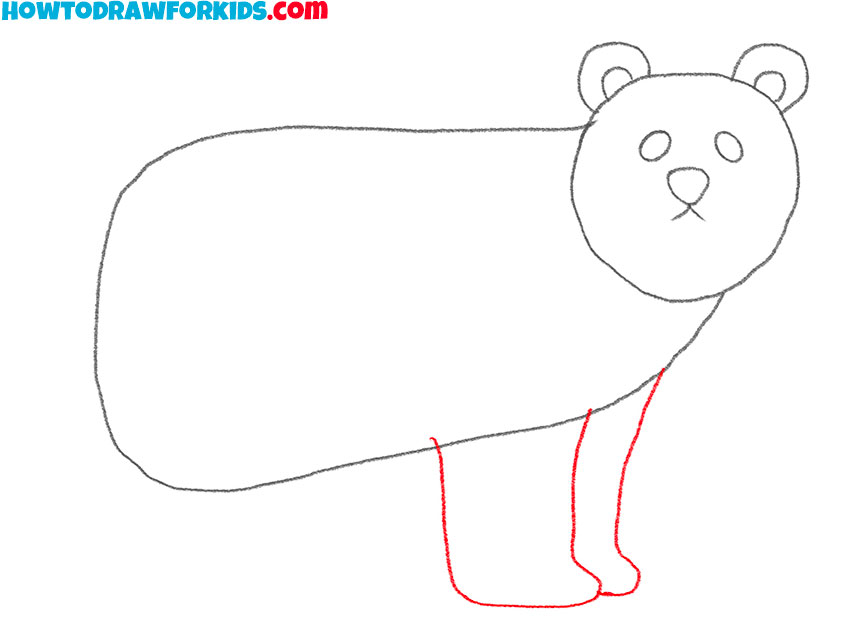
- Add the front legs.
Depict the legs of the bear using curved lines. One leg is partially covered by the other.
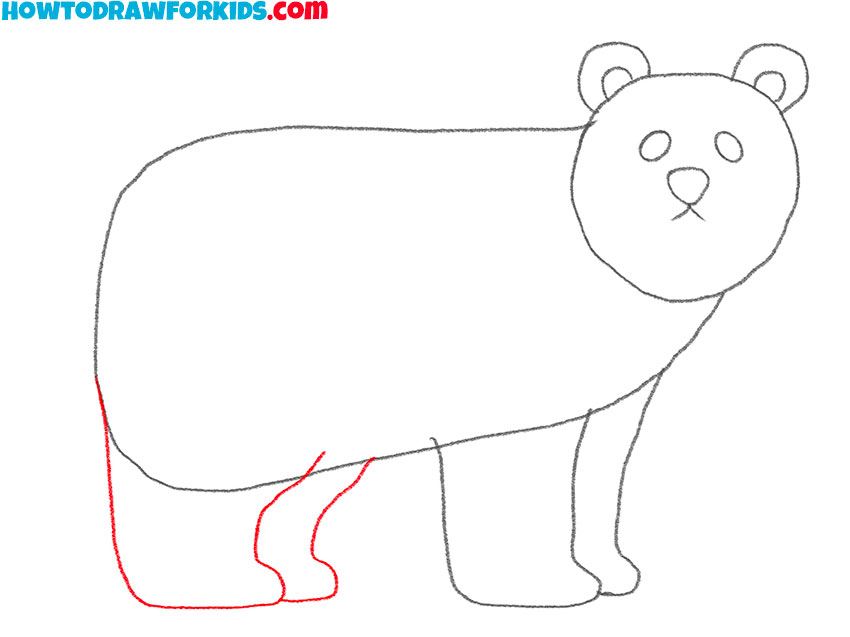
- Depict the bear’s hind legs.
Now draw two more paws at the back of the bear’s torso.
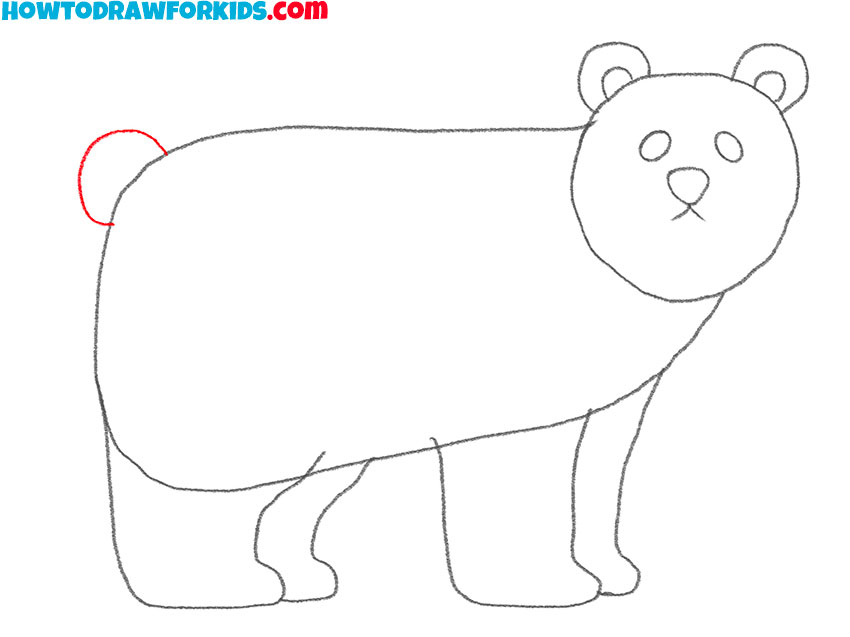
- Sketch out the tail.
Above the previously drawn hind legs, add one arc.
- Correct inaccuracies.
Use the eraser to remove any unnecessary guidelines.
- Color the drawing.
To color the polar bear, use shades of blue, gray, and black.
Additional Content
To complement your learning, I have compiled a free PDF file for this tutorial on drawing a polar bear. This abridged version of the lesson is designed for your convenience, allowing you to download and carry it with you for practice anytime, anywhere, even when offline.
This downloadable guide condenses the drawing process into key stages, providing a quick reference that supports your artistic development. It’s an ideal way to revisit the lesson’s core points, ensuring you can reinforce what you’ve learned and continue to refine your skills in depicting the majestic polar bear.
I’m delighted to offer this resource at no charge, as part of my commitment to making art education accessible to all. Whether you’re at home, in the classroom, or out in nature, this PDF is a tool that can help you perfect your ability to draw a polar bear and enhance your overall artistic technique.
Alternative Drawing Technique
Beyond the primary lesson, I’ve crafted an alternative technique for you to draw a polar bear. This method simplifies the process further, emphasizing basic forms and broad strokes that capture the bear’s essence. It’s designed to help you practice more and refine your ability to convey this majestic animal’s features with ease.
By introducing this alternative technique, my aim is to provide you with a broader set of tools to enhance your artistic skills. As you employ this method to draw a polar bear, you’ll develop a keener eye for detail and a deeper understanding of how to suggest form and volume with minimal lines.
How to Draw a Cute Polar Bear
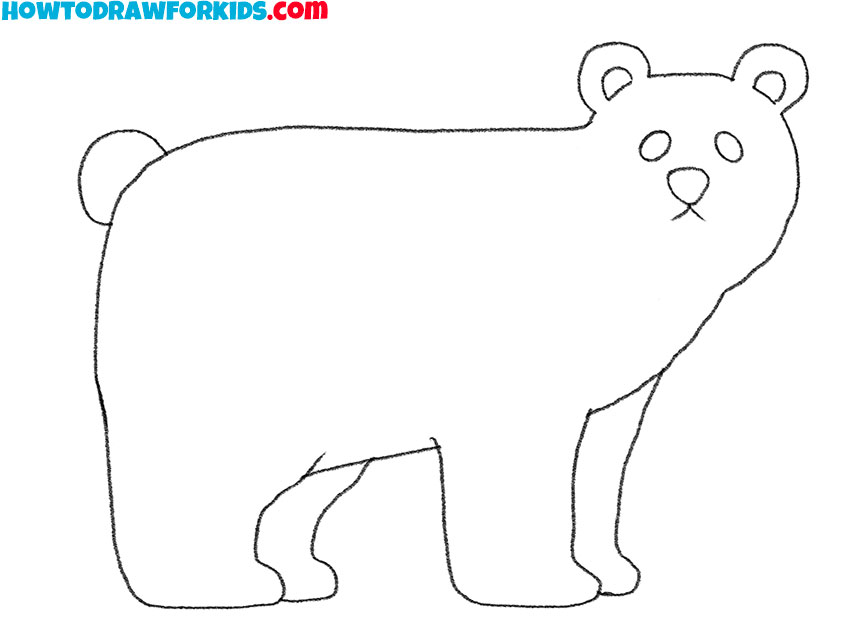
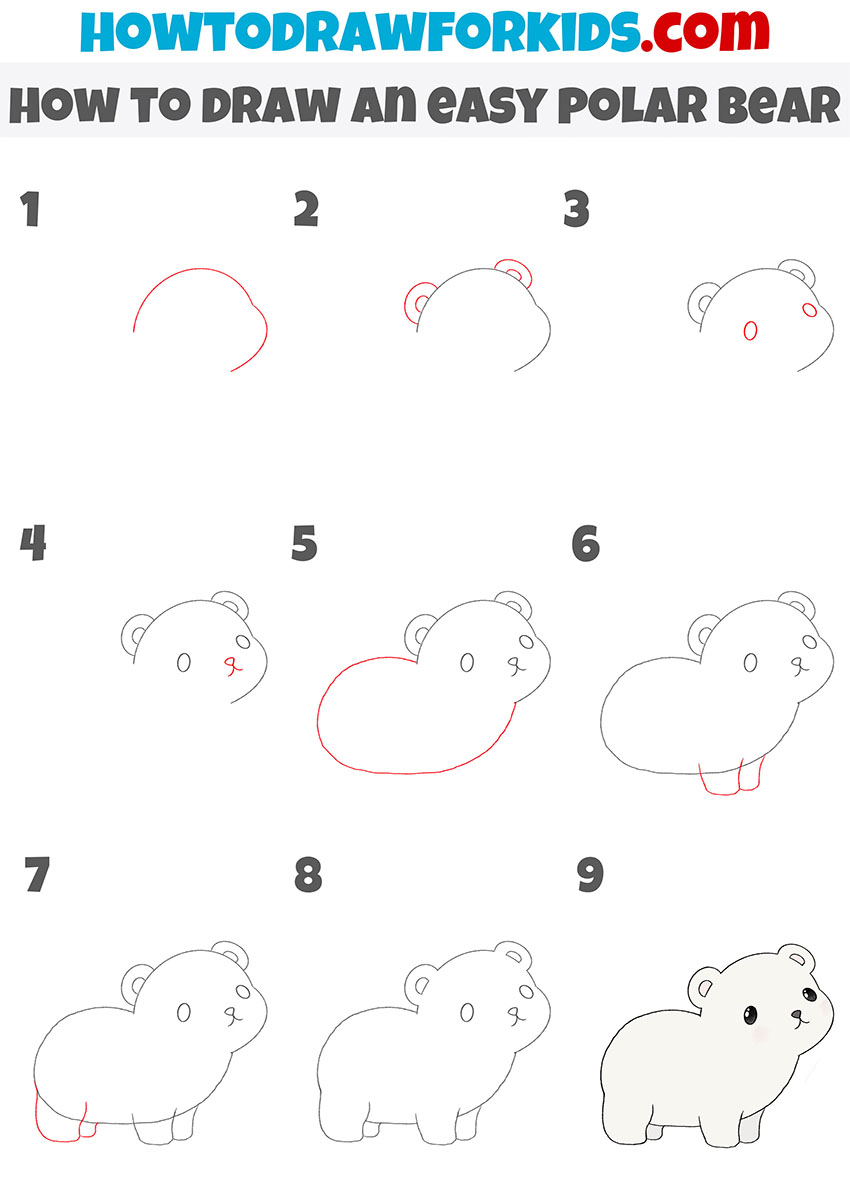
This method of drawing a polar bear starts with a simple curved line for the back, which forms the foundation of our bear’s cozy shape. Next, two round ears are perched atop to frame the bear’s face, immediately infusing the drawing with a sense of friendliness. Even in its initial stages, the bear’s form begins to emerge with a charming personality.
Adding the facial features, we draw two gentle eyes and a sweet nose, placed carefully to keep the bear’s expression soft and approachable. The simplicity of this style is intentional, making it not just easy to follow, but also ensuring that each feature contributes to the overall cuteness of the bear.
In the final steps, we sketch the bear’s body and limbs, using rounded shapes to maintain the cuddly look. The lack of sharp edges in this method ensures that the bear remains plush and huggable in appearance. Finishing off with a few light shadings, our polar bear comes to life, ready to waddle off the page and into the heart.
Refining Your Polar Bear Art
Art is an evolving process, and there’s always room for embellishment and growth. Here are some suggestions to add depth and context to your polar bear, enriching the story that your artwork tells.
- Add Texture: Give your bear’s coat some texture with light pencil strokes to represent fur, adding a touch of realism.
- Create a Scene: Place your polar bear in its natural habitat by drawing a snowy landscape or glistening icebergs in the background.
- Experiment with Color: Although polar bears are white, playing with different shades of blue and gray can bring out the shadows and highlights in the bear’s fur.
- Introduce Companions: Sketch a cub or two beside your bear, fostering a sense of family and interaction.
- Incorporate Weather: Suggesting a blizzard with scattered dots and lines can lend a dynamic atmosphere to your composition.
Your drawing now has character and charm, and with these additional touches, it can gain even more life and context. Remember, every added detail is a step in your artistic journey, a chance to explore and express more of the world you imagine.
Conclusion
Our journey in drawing a polar bear may have concluded, but the adventure in art has just begun. On my website, you’ll find a wealth of tutorials on subjects as endearing as an donkey or as dazzling as a disco ball. Connect with me on social media to catch every new tutorial and to share your progress with a community of fellow artists.
If there’s a specific drawing lesson you’re yearning for, let me know in the comments section. Your ideas are the seeds from which new lessons grow, and I can’t wait to nurture them into our next artistic explorations.