How to Draw Iron Man
I’ll show you how to draw Iron Man in an adorable cartoon form with alternate coloring techniques and a bonus Tony Stark face drawing tips.
How to Draw Iron Man: Basic Information
Prepare for a tutorial where you will learn how to draw Iron Man, the embodiment of cutting-edge technology and heroism in the Marvel saga. This easy tutorial transforms the formidable Iron Man suit into a cute cartoon form, simplifying its complex design.
We’ll concentrate on the distinct shape of Iron Man’s helmet, the angular lines of his suit, and his superhero posture. By compartmentalizing each feature into basic forms, the task of drawing such a detailed character becomes much less daunting.
At the very end of this Iron Man drawing tutorial I’ll tell you how to draw him in different scenes and how to change some details to make the sketch different from my example.
Iron Man Drawing Tutorial
Materials
- Pencil
- Paper
- Eraser
- Coloring supplies
Time needed: 50 minutes
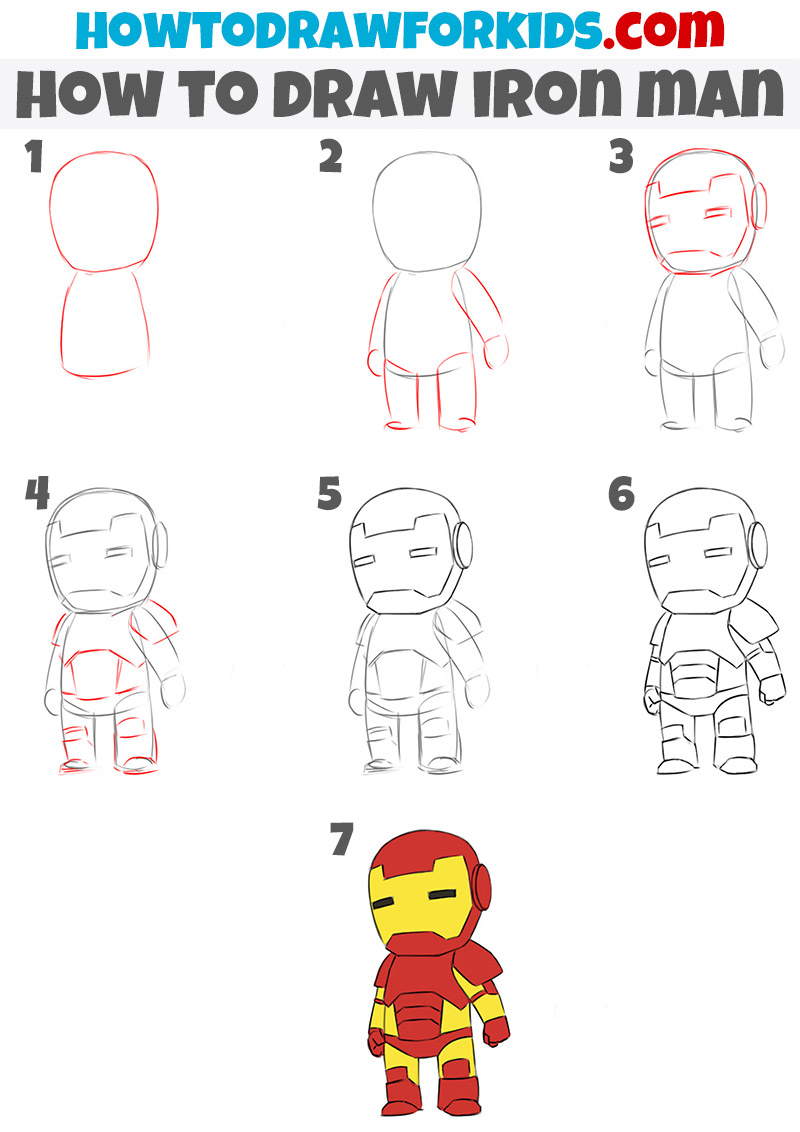
How to Draw Iron Man
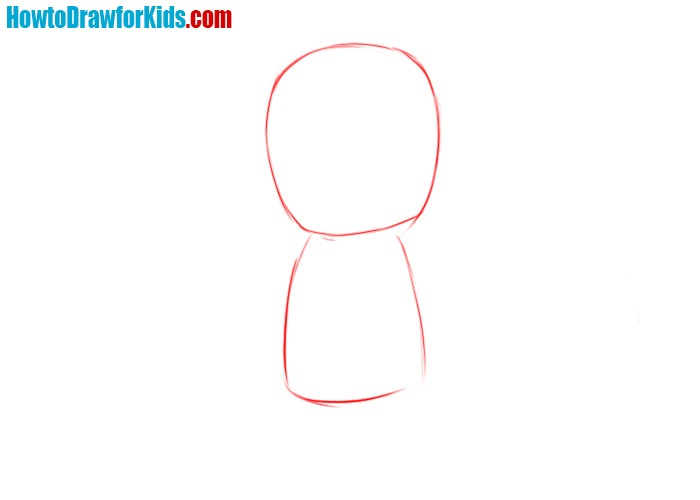
- Draw the head and body outlines.
Draw an oval for the head, slightly wider at the top, and a curved line below it, forming the torso. Make the torso wider at the bottom, with a gentle curve at its base. Keep the lines simple and loose, allowing for adjustments later.
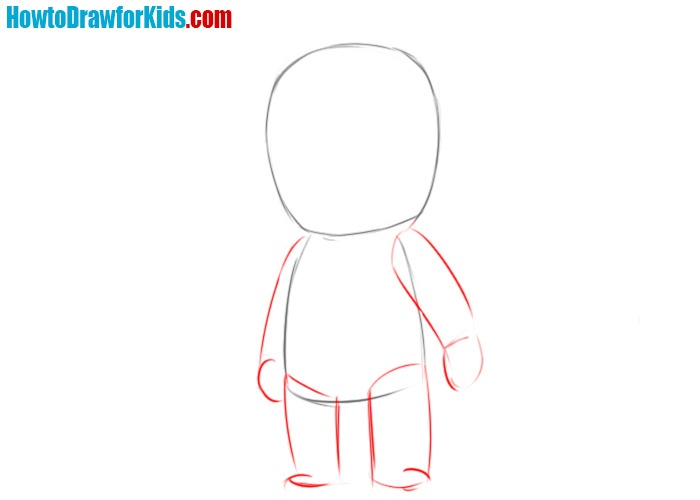
- Draw the limbs of Iron Man.
Attach curved lines to the torso for the arms, extending outward. Draw lines down from the torso for the legs. Since we are drawing Iron Man in cartoon style, the arms and legs are disproportionately short. This step finishes the basic outline of Iron Man’s body.
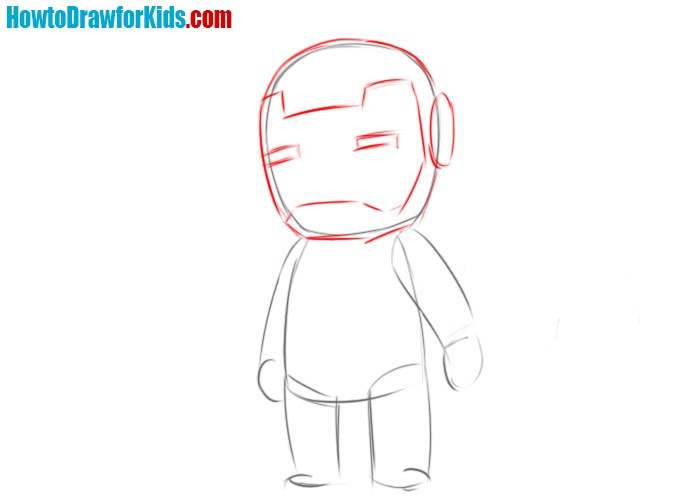
- Detail the helmet.
Draw a horizontal line across the head, separating the visor from the rest of the helmet. Add angular lines for the eyes and a straight line for the mouth, creating a stern expression. Additional lines around the cheeks and chin give the helmet structure, distinguishing it from the body.
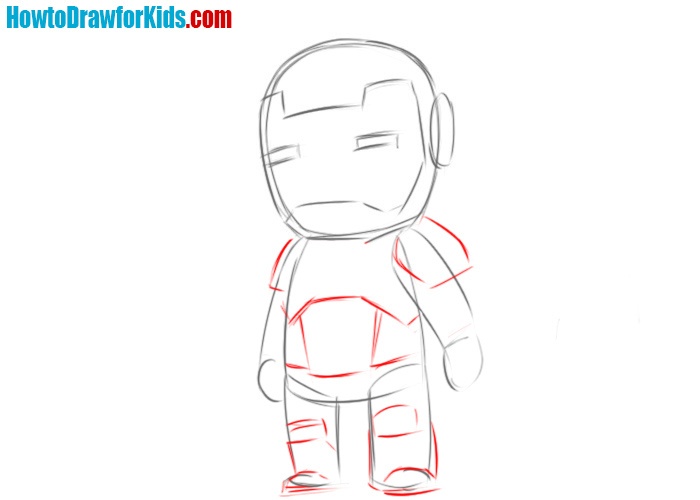
- Detail the armor.
Add angular lines to the chest, representing the armor plating. Continue down to the abdomen and lower body, adding lines to form the armor segments. Draw similar lines on the arms and legs, detailing them with protective plates.
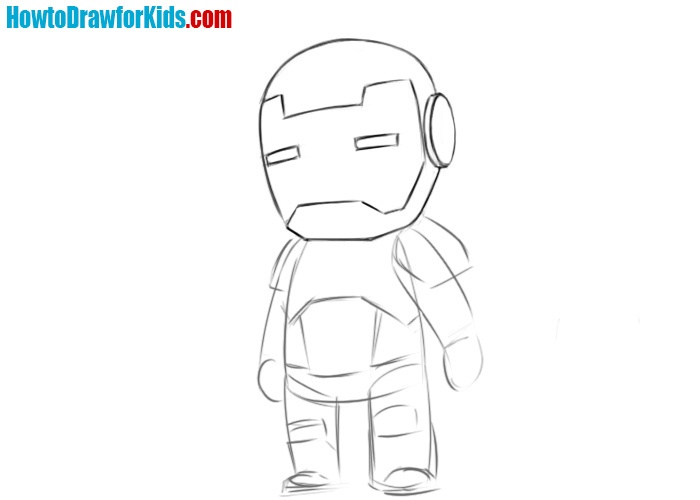
- Refine the helmet of Iron Man.
Draw smaller lines to add texture and some realism to the helmet of Iron Man. Clean up any sketch lines to create a polished look, removing unnecessary guidelines. Make sure the proportions of the helmet of Iron Man are accurate and recognisable.
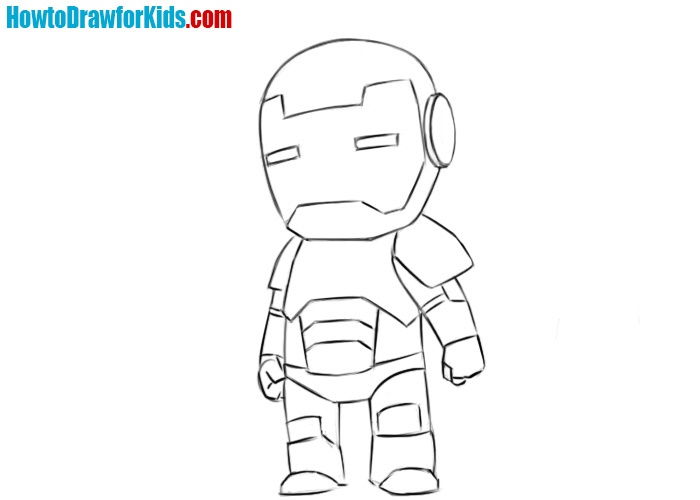
- Refine the rest of the body.
Add details such as segment lines on the armor, joints, and plates, making them more realistic and functional. Clean up guidelines from earlier steps, creating a polished and finished Iron Man sketch. Ensure the segments of the costume are recognisable.
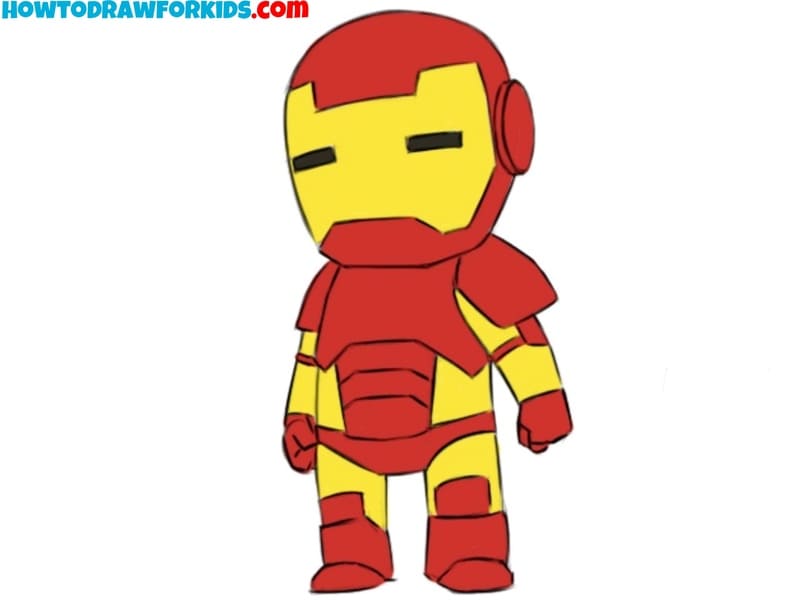
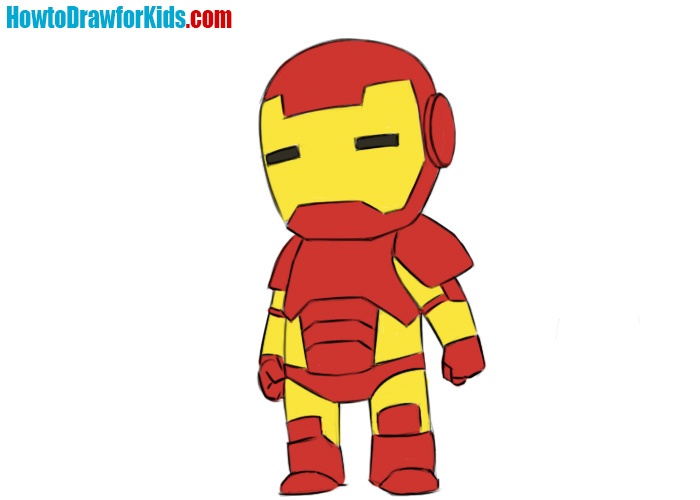
- Color the drawing of Iron Man.
Start by filling in the helmet, making sure to distinguish the red parts from the yellow sections. Color the torso, arms, and legs, alternating between red and gold. Ensure each color section is neatly filled in, staying within the lines for a clean appearance.
Additional Content
Additionally, to help you to train your drawing skills further, a free PDF version of the Iron Man drawing tutorial is now available. It’s a condensed iteration of the full lesson, neatly packed into a format that’s convenient for offline use.
How to Draw Iron Man: Alternative Drawing Options
I’ve developed a range of alternative techniques for sketching Iron Man, aiming to continue your practice and boost your drawing skills. These variations are crafted to offer you diverse perspectives on Iron Man’s iconic suit, from its intricate details to its overall silhouette.
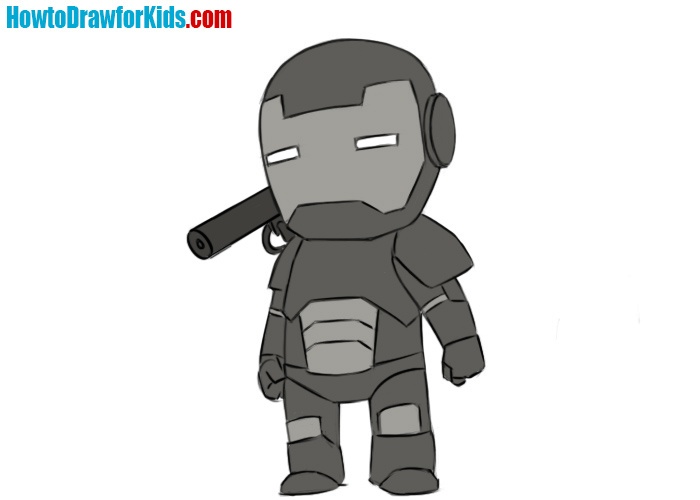
War Machine
Iron Man fans are certainly acquainted with War Machine, his armored ally, distinguished by his unwavering loyalty and powerful suit. By altering the color palette of your Iron Man drawing to darker tones, you can illustrate War Machine. As you can see, the costume of this character consists of different shades of black and grey.
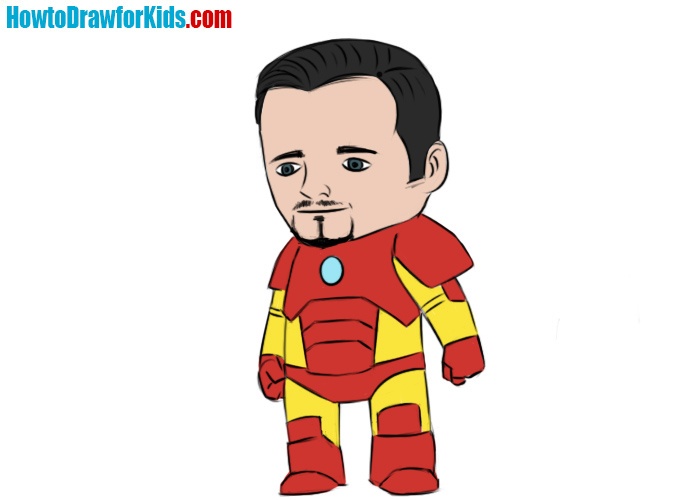
Tony Stark Face
Creating Tony Stark, showcasing his features without the Iron Man helmet, can be done with very simple steps. You can capture his distinctive features and charismatic persona with a few well-placed strokes. In fact, you just need to draw a face with slicked back hair and goatee beard using simple techniques.
Conclusion
And there you have it, young artists – your very own drawing of Iron Man, ready to save the day! And it’s time to remind you that I have a lot of different comic book characters drawing tutorials on my website. You can draw Venom, Thor or other Marvel comics character with my simple sketching techniques.
Be sure to subscribe to my social media, for example Pinterest or YouTube. Also don’t forget to share your drawings with me in the comment section on Pinterest.


Fan of you and him😎
Thanks, Zephan!