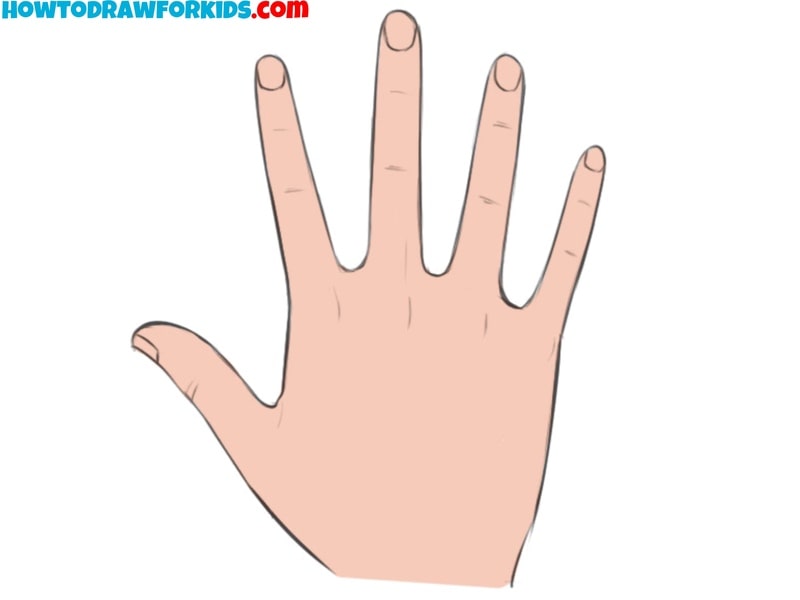
How to Draw a Hand
Do you want more easy-to-follow guides? You’re in luck! I’ve created a new tutorial on how to draw a hand step by step. There are many crucial lessons to explore, and this hand drawing tutorial, is particularly valuable.
How to Draw a Hand: Introcudtion
So why is knowing how to draw hands so important?
Firstly, hands are an integral part of the human body. Naturally, to accurately depict a person, you must be able to illustrate hands as well as other parts of the body.
Drawing hands is a fundamental exercise in art school. Consequently, aspiring artists frequently sketch the hands of various sculptures, such as those of Michelangelo’s David, to hone their skills.
Additionally, hands can serve as a central motif in a work of art. Take, for example, Albrecht Dürer’s “Praying Hands.” Observe how masterfully the hands are drawn and how the artist captures the intended mood with simple techniques, showcasing the impact of well-crafted hand illustrations.
In this lesson, I won’t overwhelm the young artist with complicated instructions. Instead, I’ll guide you through the entire process of drawing a hand using a series of very simple steps that anyone can follow.
Hand Drawing Tutorial
Materials:
- Pencil
- Paper
- Eraser
- Coloring supplies (optional)
Time needed: 30 minutes
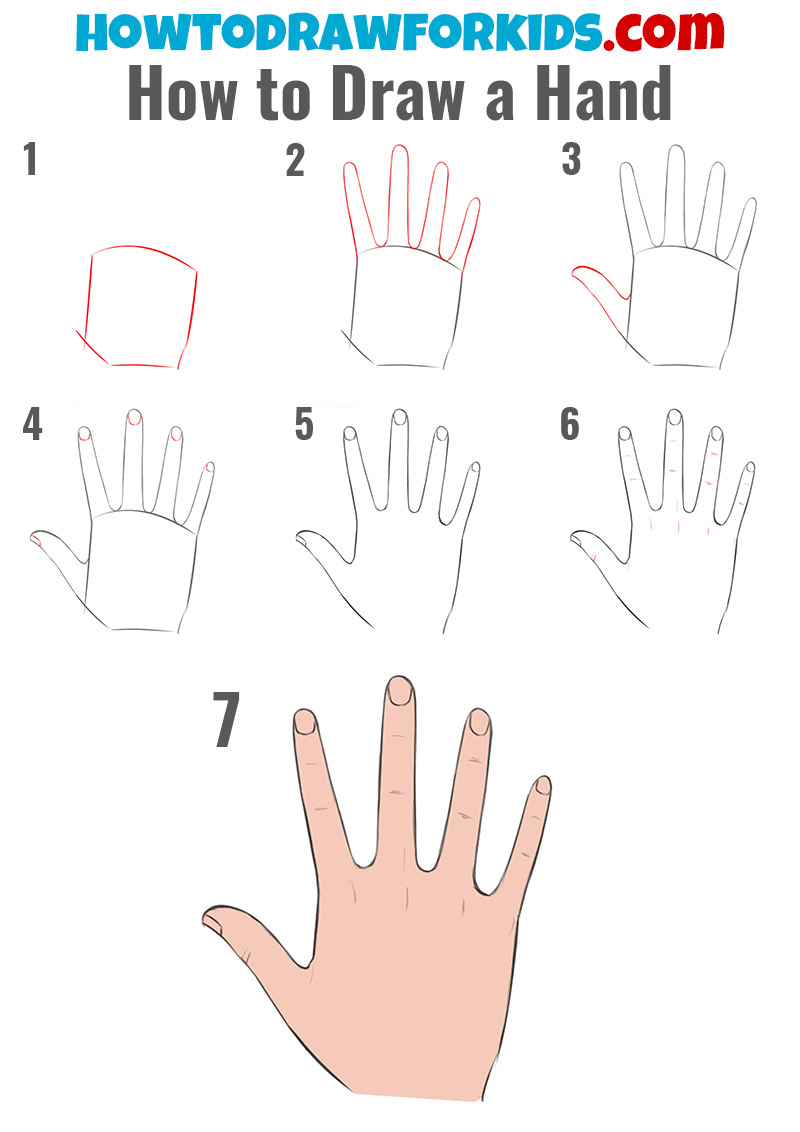
How to Draw a Hand Step-by-Step
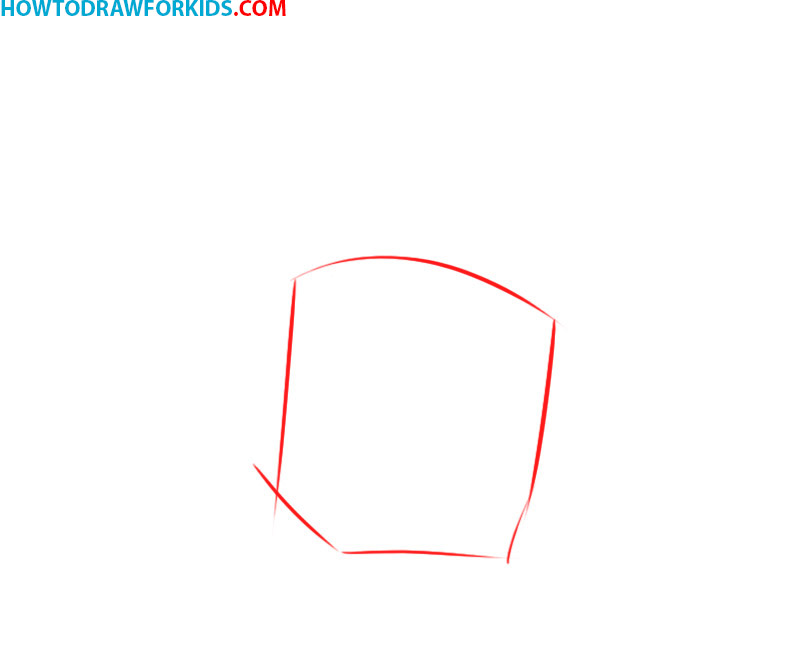
- Outline the palm.
Start by sketching the basic shape of the palm. Draw a roughly trapezoidal or pentagonal shape, slightly wider at the top than the bottom, to represent the palm’s broadness. Ensure the bottom of the shape has a slight angle to indicate the connection to the wrist.
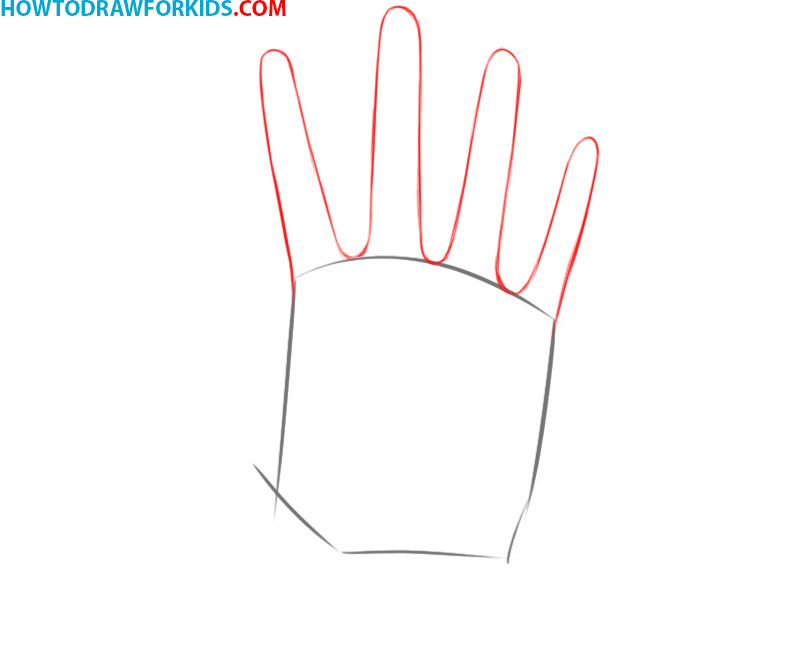
- Draw the fingers.
From the top of the palm outline, extend four lines for the index, middle, ring, and little fingers. Make these lines slightly curved to follow the natural shape of each finger. Vary their lengths to reflect the differences between each finger, with the middle finger being the longest and others gradually shorter.
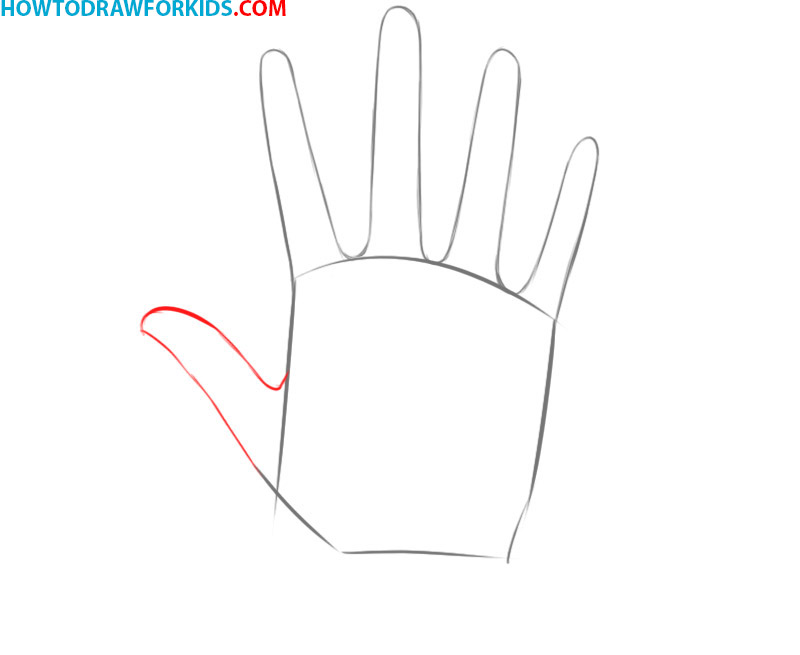
- Add the thumb.
Extend a curved line from the lower left side of the palm’s outline to form the thumb. Position it at an angle away from the other fingers, ensuring it connects smoothly to the palm. Draw a rounded tip or oval at the end of the thumb, completing its basic shape.
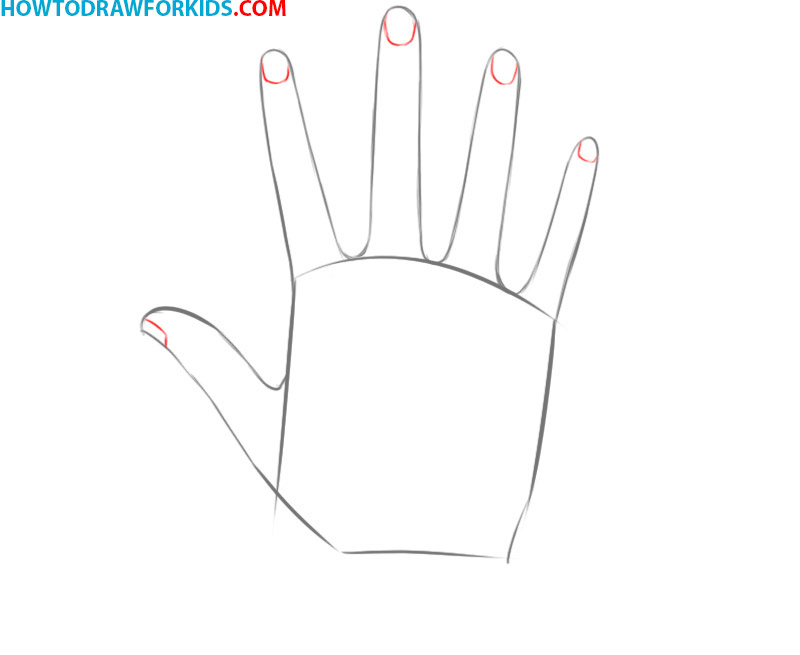
- Illustrate the nails.
Draw small, curved shapes at the tips of each finger and thumb to represent the nails. These shapes should follow the contours of each fingertip, appearing as narrow crescents or rectangles. Ensure each nail is proportional to the finger, with the middle finger.
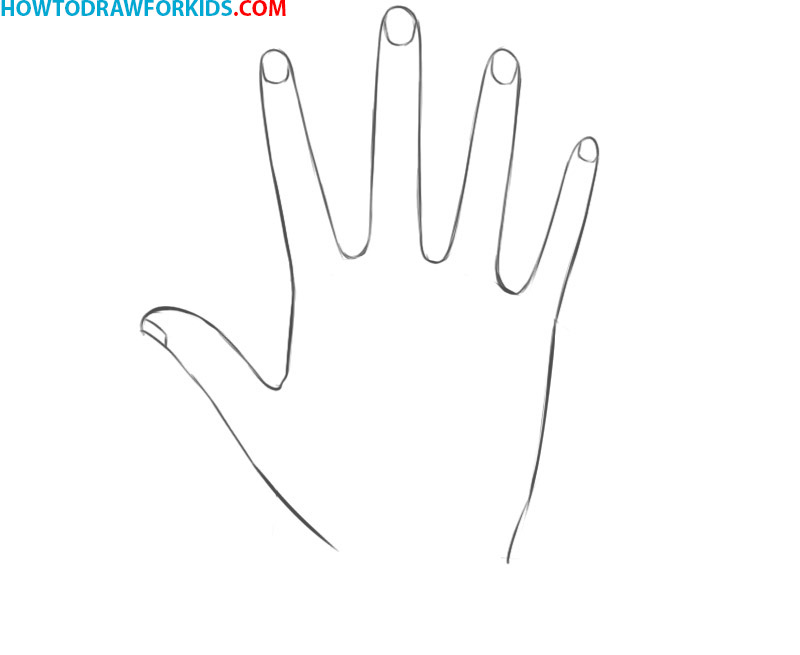
- Erase the construction lines.
Go back over the drawing of the hand and erase the guidelines used to create the palm and fingers, leaving only the refined outlines. This step cleans up the hand’s appearance, highlighting its final structure. Ensure to smooth out any remaining rough edges, maintaining consistent and fluid lines.
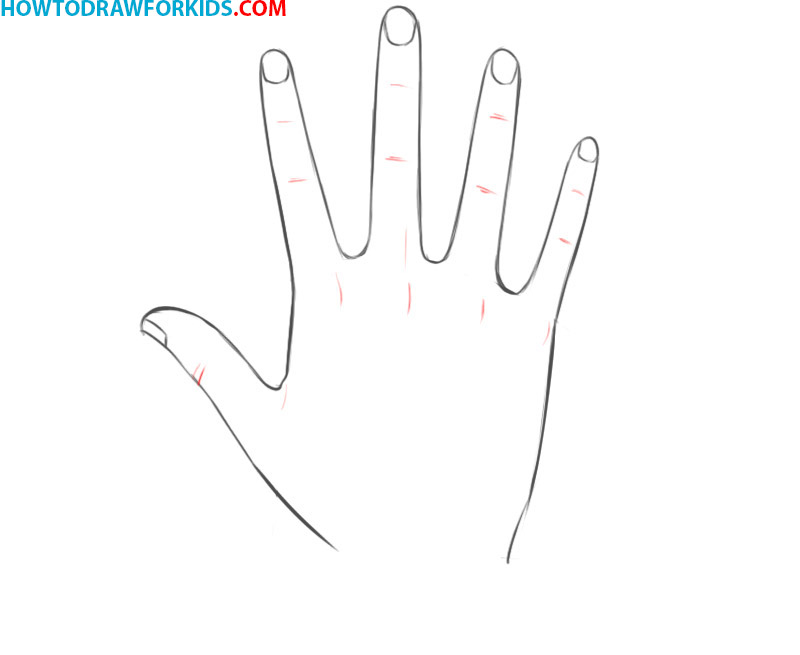
- Add the final touches.
Draw creases and lines on the palm and fingers, illustrating natural joint bends. Include small lines across the knuckles to make them more prominent. You can and add subtle shading along the fingers and thumb to make the hand look more realistic.
- Color the hand drawing.
Fill in the hand with a skin tone color, choosing a shade that suits the intended appearance. You can apply shading along the palm, fingers, and thumb to create a three-dimensional effect. Vary the tone around knuckles, joints, and creases to add depth and texture.

Additional Content
To ensure you can access this drawing lesson whenever you need it, I’ve created a free PDF file that includes the steps from this lesson along with additional materials.
In this PDF supplement to the lesson, I’ve compiled the following for you:
- Hands step-by-step drawing guide
- Coloring page
- Tracing worksheet
- Grid drawing worksheet
Download, print and practice illustrating hands at any time convenient for you.
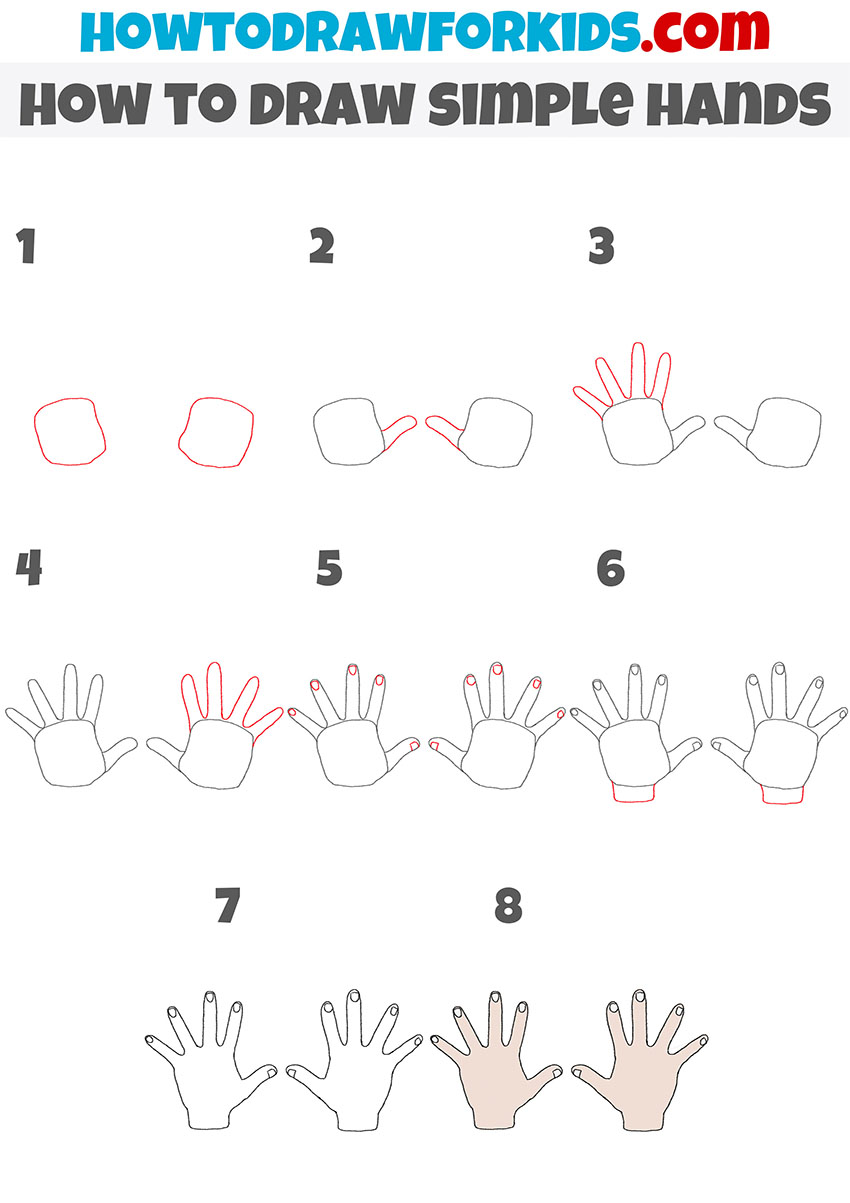
How to Draw a Pair of Hands
An essential skill for any artist is learning to draw not just a single hand, but a pair of hands. Among other things, this is extremely important for teaching the basics of symmetry and composition. By drawing two hands at the same time, the young artist learns not to lose sight of important things and to achieve ideal proportionality of both parts of the drawing.
Begin by sketching two roughly rectangular shapes with curved edges to represent the palms. Next, add a curved line extending from the lower right side of each palm to form the thumbs, completing their shape with rounded tips. Draw four slightly curved lines from the top of the left palm for the fingers, then repeat for the right palm.
Add small curved shapes at the tips of each digit for nails, ensuring they follow the contours of each fingertip. Draw a simple line extending from each palm’s bottom to create the wrists. Erase guidelines, then color the hands with a skin tone, shading for more realism.
Advanced Techniques
What else can you do to make your hand drawing even more interesting:
- Add shadows and highlights to the nails. This was covered in the last step, but it’s worth repeating. Shadows, highlights, and other similar techniques will help you understand the intricacies of hand anatomy.
- Illustrate a hand in motion, such as clenched into a fist or making a gesture. This will aid you in future artwork where hands play a dynamic role.
- Draw the hands in some environment. For example, you can paint hands on a table or hands holding an object.
- You can try drawing a ring or bracelet on the wrist. This will also make the hand artwork more dimensional and complex, which again will help you to go deeper into the learning process.
But above all, practice regularly, drawing hands until your skills rival those of Da Vinci or Michelangelo.
How to Draw a Hand: Conclusion
As you can see, drawing hands is very simple. But you may also have noticed that with seven simple steps, I only gave basic instructions on this topic.
All you have to do is practice and try to make each your new artwork more complex and detailed than the previous one.
Next, to take your skills even further, draw a full-length portrait of a person. To do this, go to my tutorial on how to draw a person.


This helped me so much with an art assignment! I got an awesome grade and a compliment from my teacher! I’ve always felt I inherited the inability to draw from my mom, but this site helped release the true drawing talent from my dad. Thank you, “How to draw for kids!”
I like this so much but it now am try to learning
I loved it I had to do a project for my class and it helped a lot