How to Draw the White House
The subject of this drawing tutorial is the most famous and iconic government building on Earth, as we learn how to draw the White House.

How to Draw the White House: Introduction
In this tutorial, I will show you how to draw a white house. This is a huge administrative building. There are such buildings in every major city. The building is quite high, the facade of the building is decorated with columns. Columns are used as additional support and are also an important architectural design element.
This tutorial is very simple, but it will still require some skill. Here you need to be able to draw straight lines. Try to do it yourself, without using the tools at hand. Thus, you will train your skills, and this will be useful to you in the future when creating new beautiful drawings.
Also, during this lesson, make sure that both sides of the building are symmetrical. So, get your art supplies ready and get started with this fun tutorial.
White House Drawing Tutorial
Materials
- Pencil
- Paper
- Eraser
- Coloring supplies
- Ruler (optional)
Time needed: 30 minutes
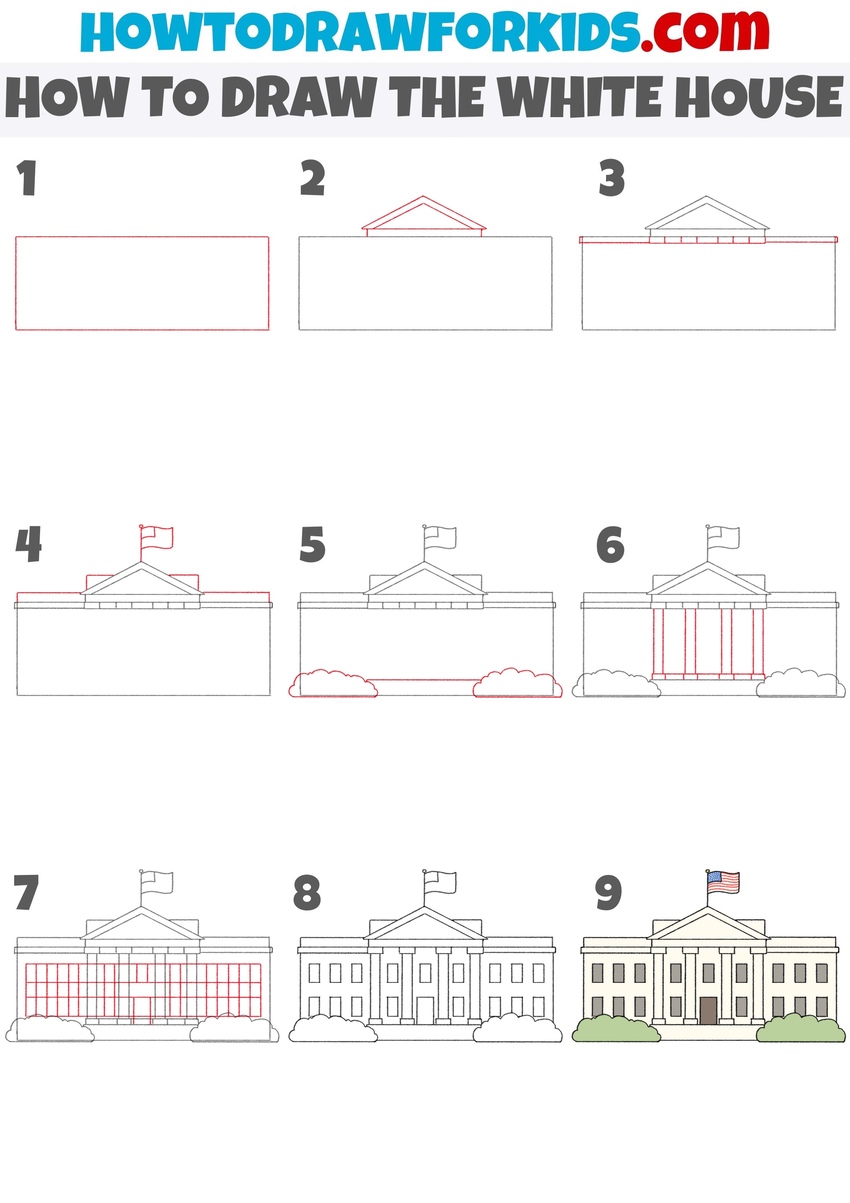
How to Draw the White House
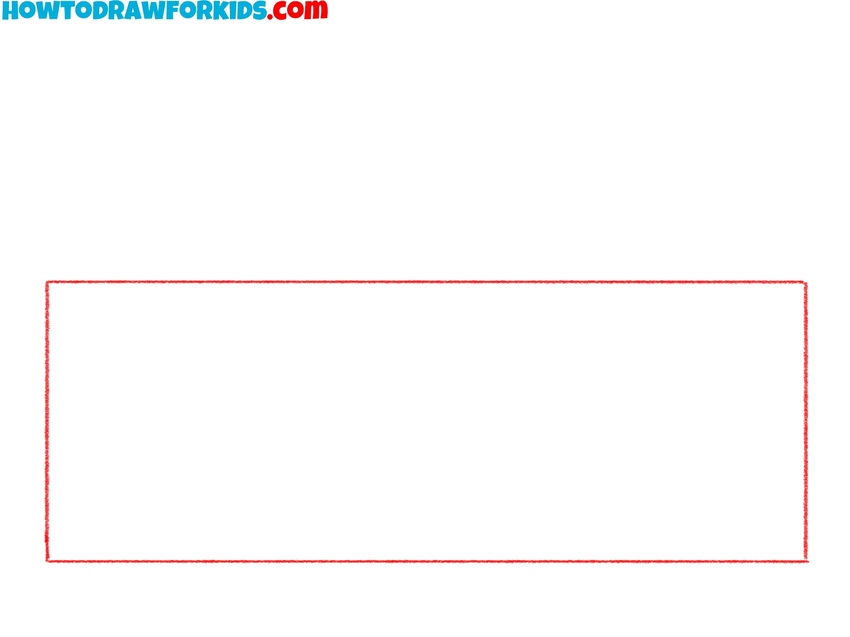
- Sketch the base rectangle.
Every architectural drawing needs a base shape to keep proportions accurate, and here that begins with a long rectangle. Sketch a horizontal rectangle with clean, straight edges, as this will serve as the foundation of the White House. Be careful to keep the sides parallel and the corners sharp.
- Sketch the triangular pediment.
Above the rectangle, a triangular roof shape is needed to represent the central pediment. Draw a thin rectangle at the very top of the main rectangle and then add a triangle on top of it, creating the classic triangular peak.
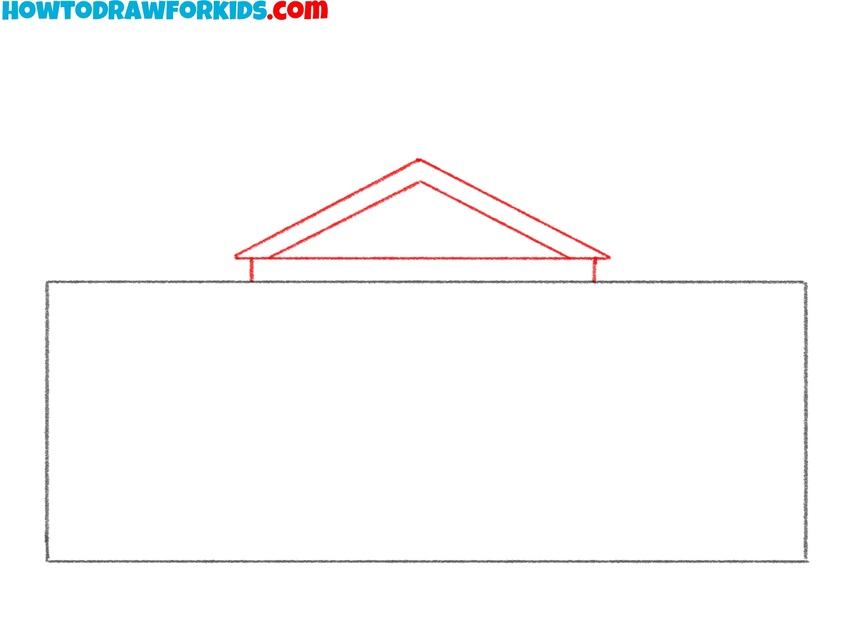
- Add the molding and capitals to the roof.
To make the roof look more architectural, add details by illustrating a thin horizontal strip above the main rectangle and under the triangle. Then, inside the triangle itself, mark a few small vertical divisions to represent the capitals of the columns.

- Sketch the flagpole and flag.
To give your white house drawing a more recognizable look, draw the American flag on the very top. Sketch a thin vertical line as the flagpole. On side of it, sketch a small flag waving to the side. Use very smooth and curved lines for the flag’s outline. Add the sides of the roof with a couple of straight lines.

- Sketch the bushes below the building.
To place the White House into its natural and authentic setting, draw bushes at the bottom of the building. Sketch simple cloud-like shapes along the left and right sides of the base. Remember that the bushes should not cover too much of the rectangle; they are just accents in front of the building.

- Draw the columns of the White House.
The White House is famous for its tall columns, which are a central feature of its design. In the middle section of the rectangle, sketch four thin vertical rectangles. The spacing between them should be equal. Be sure to mark the bases and tops, capitals of the columns making them a bit wider.

- Sketch the windows and entrance across the building.
With the main shapes in place, it’s time to illustrate the windows and the main entrance. To do this, let’s draw a straight and clear grid of horizontal and vertical lines. All lines should be equal vertically and horizontally. I recommend starting with horizontal lines and then adding rows of vertical ones.

- Erase the guidelines and finalize the windows.
Now finalize the White House drawing by erasing all unnecessary guide line and leaving main lines. You can also add rectangular shapes to represent smaller windows around the main sections of the building. You can lightly darken some outlines to make the important features look more finished.
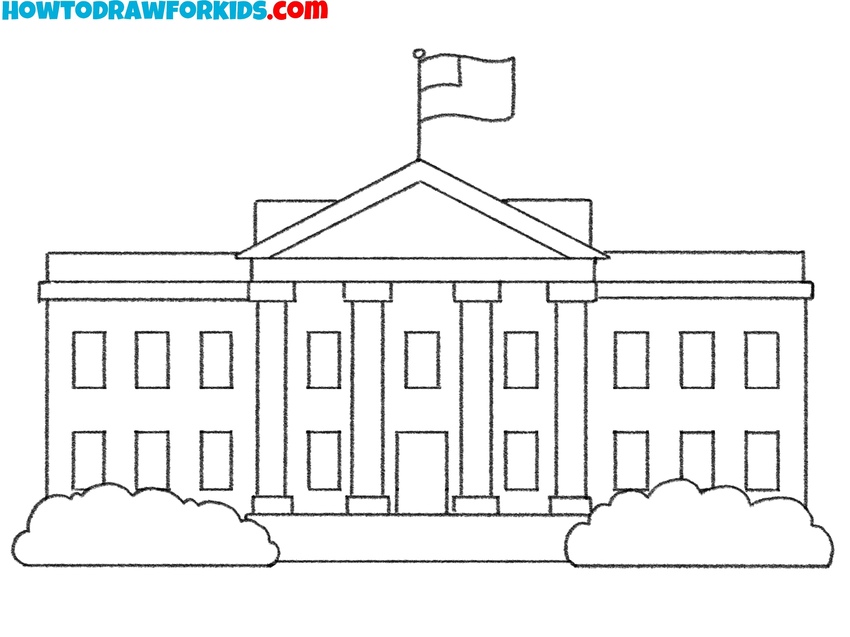
- Color the White House, buses, and flag.
To finish, color the White House using a light gray or off-white tone for the building. Paint the windows, doors, and roof lines in a bit darker colors. Add green for the bushes and grass, and red, white, and blue for the American flag at the top.

Bonus: Easy White House Drawing Tutorial
To draw the White House into this simple style, it is important to think of the building as a combination of basic shapes. Outline the triangular roof resting on a rectangular base, then extend vertical lines downward to form the central block.
Add a wide base at the bottom to support the main section. Sketch the horizontal wings on both sides, keeping the lines level so the drawing remains symmetrical. Extend the structure with additional rectangles to complete the sides of the White House.
Place the columns at the front. Add a simple row of windows by drawing small rectangles on each side of the White House. Complete the front by adding the doorway in the center with rectangular outlines. For coloring, apply neutral shades such as white and gray to reflect the appearance of the White House.

Conclusion
Now you can draw a white house! I hope that you did your best and that you like the result of the work. You can enhance your drawing and add some elements. For example, draw flower beds and shrubs in front of the building’s facade and draw the sky at the top of the drawing.
For more related lessons, see the house drawing tutorial to work on simpler buildings, or the castle drawing tutorial to practice larger structures with more details.
You can also look at the city drawing tutorial to study how different buildings can be combined into a full scene.
Share your drawings, leave comments, and return for new step-by-step lessons.