How to Draw WALL-E
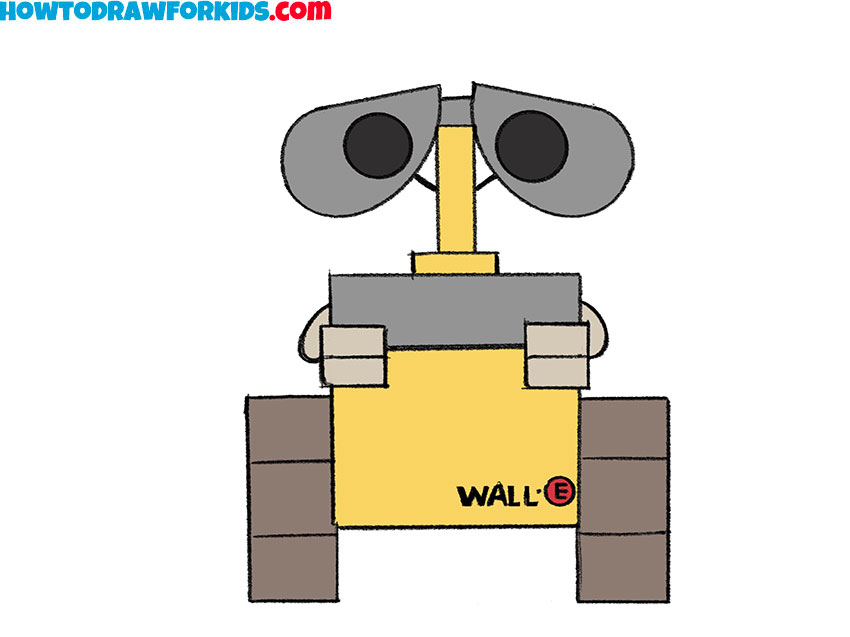
Let’s learn how to draw WALL-E with this step-by-step tutorial to sketch his boxy shape, characteristic eyes, and detailed tracks.
How to Draw Wall-E: Introduction
WALL-E is a computer-animated science fiction film. The title character, WALL-E, stands for Waste Allocation Load Lifter Earth-class. He is the last functioning robot on Earth, spending his days cleaning up the planet, one piece of garbage at a time. Over time, WALL-E has developed a unique personality, making him more than just a machine. When he meets EVE, his life takes an unexpected turn, sending him on an adventure across the galaxy.
WALL-E has several distinct features that are important to keep in mind when drawing him. His design is highly recognizable, with his unusual binocular-like eyes, square body, robotic arms, and caterpillar tracks instead of legs.
These elements are very important for illustrating his appearance accurately. Paying attention to these details ensures that your WALL-E drawing closely resembles the beloved character. In this step-by-step tutorial on how to draw WALL-E, I will guide you through depicting all of these features in a simplified style.
When drawing WALL-E, take your time and follow each step carefully. Paying close attention to the methods and recommendations in this lesson will help you with future drawings of other characters. Practicing these techniques will improve your ability to draw mechanical and robotic designs with confidence. And of course, this tutorial will train your robot drawing skills.
WALL-E Drawing Tutorial
Materials
- Pencil
- Paper
- Eraser
- Coloring supplies
Time needed: 35 minutes
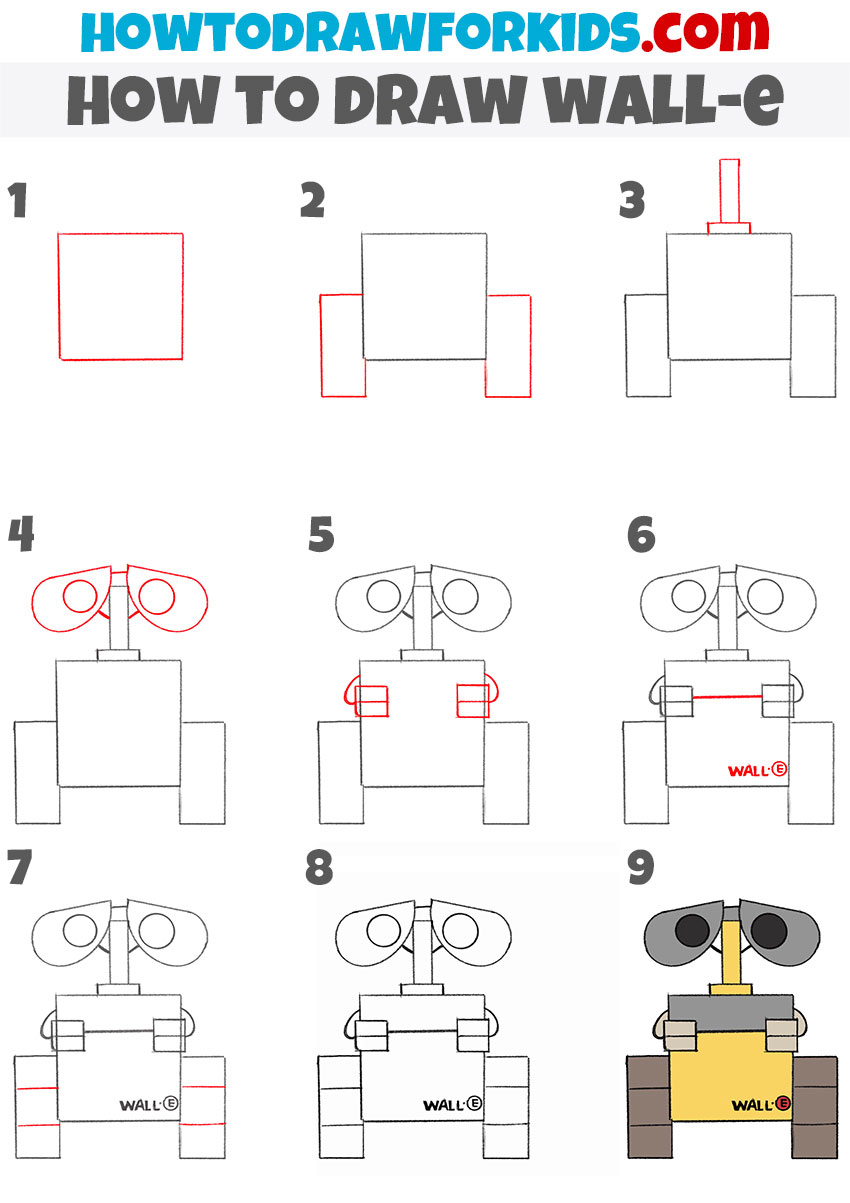
How to Draw WALL-E
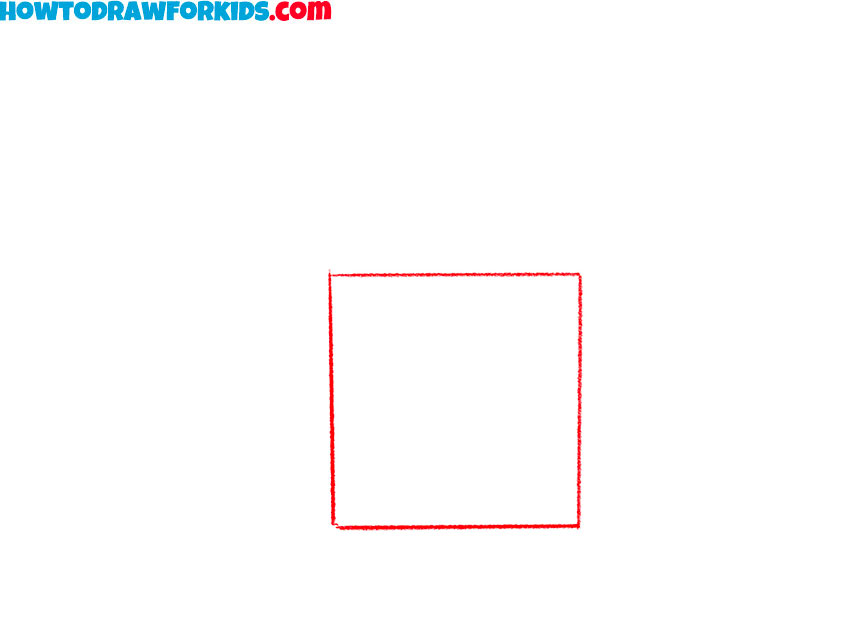
- Draw the toros of WALL-E.
To begin this lesson on how to draw WALL-E, start by sketching a large square in the center of your paper. This will serve as the foundation for WALL-E’s boxy body. Make sure the lines are straight and even. Check my cube drawing tutorial to learn how to sketch square forms as a professional artist.
- Add the tracks.
The next step of the WALL-E drawing tutorial is to add his tracks, which replace legs in his design. To do this, draw two rectangles on either side of the square body. These will form the base of his tracks. Make sure they are symmetrical and proportional.

- Sketch the neck.
Now that you have the body and tracks outlined, the next step in this WALL-E drawing tutorial is to add his neck. Start by drawing a small rectangle centered at the top of the square body. This will act as the base for his neck. Then, draw a thinner, elongated rectangle extending upward from it.

- Draw WALL-E’s eyes.
At the top of the neck, draw two large, rounded shapes that resemble binoculars. These shapes should be slightly tilted. Connect these parts and neck with simple short lines. Inside each shape, add smaller circles to represent the eyes of the character. If necessary, adjust the angles to make them look more natural.

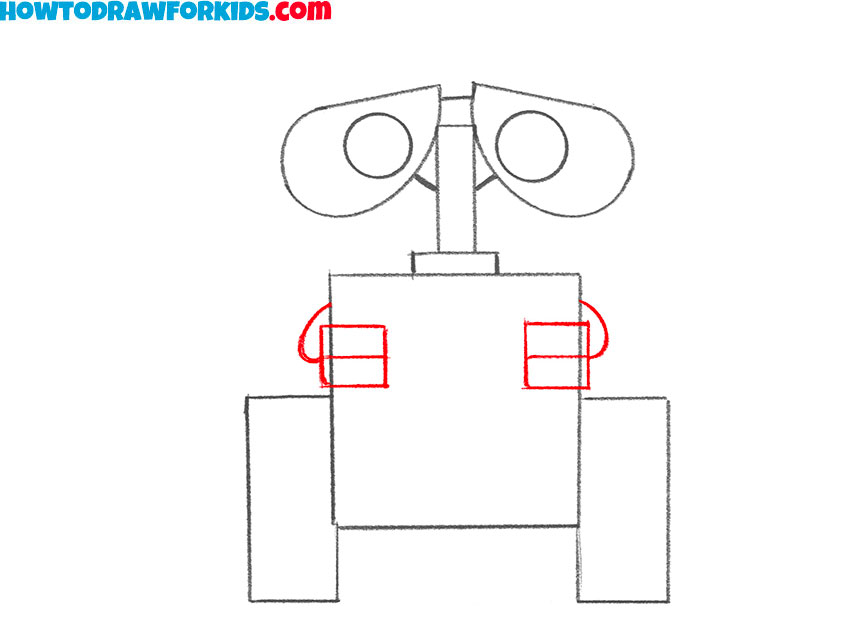
- Add the arms.
Draw two small, rectangular shapes on either side of his body, slightly above the tracks. These will serve as the hands of WALL-E. Separate the shapes with short horizontal lines to indicate the robotic fingers. Then, sketch two curved lines extending from these shapes to create the robotic arms.
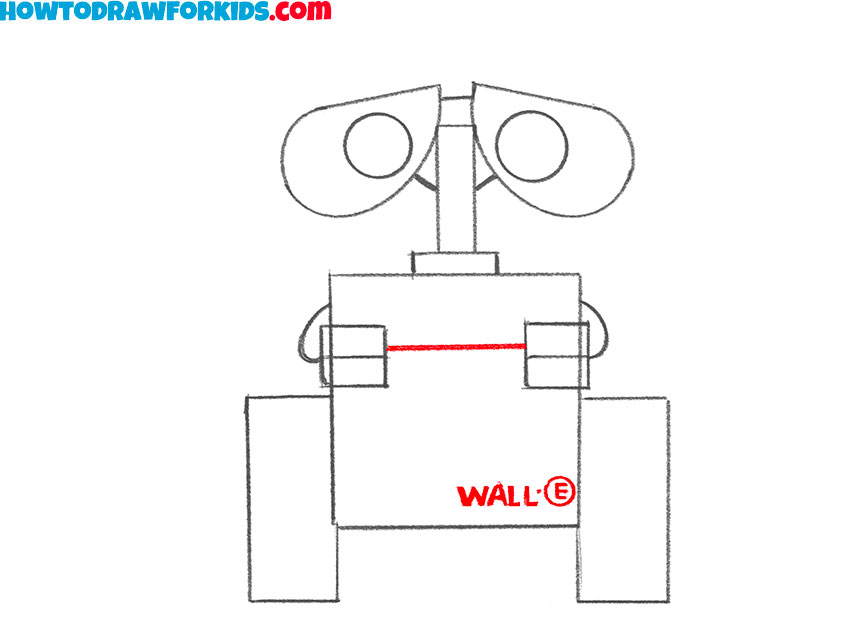
- Sketch the front panel.
Sketch a horizontal line across the middle of the square body to define the front compartment. This part of WALL-E’s design is where he compacts garbage. You can also include the WALL-E logo on the lower right side of the body. This simple text detail enhances accuracy.
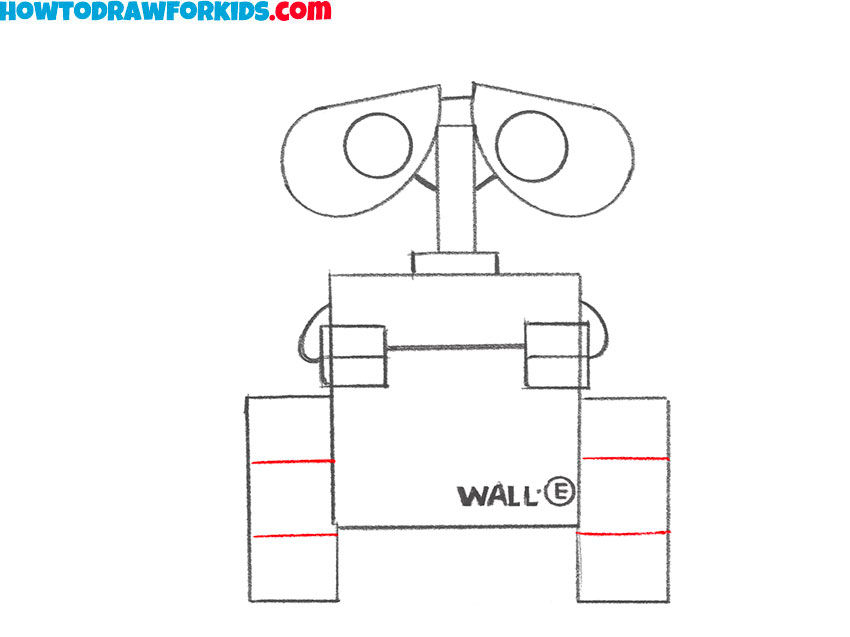
- Detail the tracks.
Now, refine the tracks by adding horizontal lines inside each rectangular shape. These lines represent the tread pattern, giving the tracks a more realistic look. Keep the lines parallel and horizontal. You can draw these lines using a ruler or freehand.
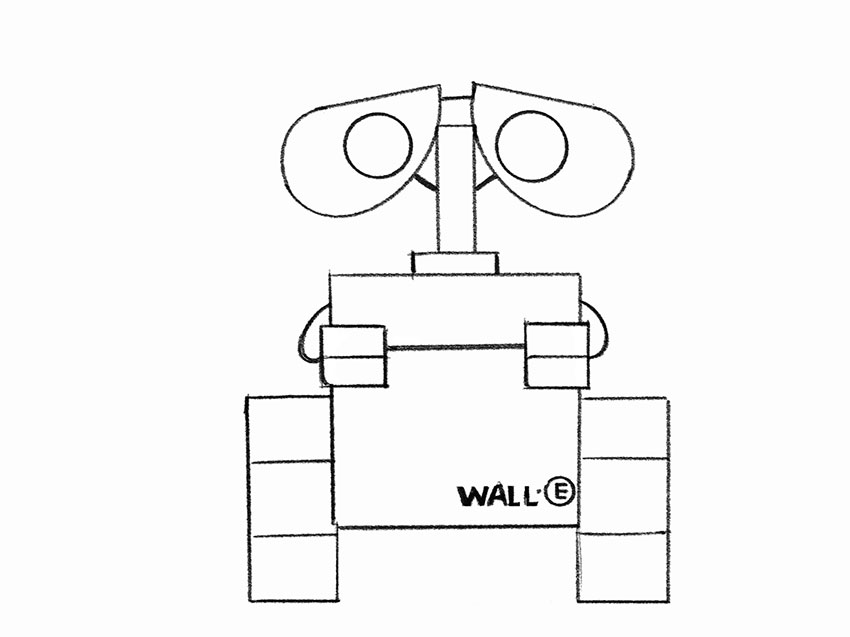
- Finalize the outline of WALL-E.
Now, erase any unnecessary guidelines and clean up the shapes of your WALL-E drawing. Make sure all lines are smooth and well-defined, adjusting proportions where needed. WALL-E’s body should look symmetrical, his arms correctly positioned, and his tracks detailed. If any part seems incorrect, make small corrections.
- Color the drawing of WALL-E.
To color the character correctly, use yellow for WALL-E’s body. His tracks should be a darker gray or brown. The eyes of the character should be black with dark gray for the binocular-like outlines. The front panel can include the red WALL-E logo for accuracy.

Additional Content
I also want to remind you that I have created a PDF file with a short version of this tutorial for your convenience. Save this file and follow the drawing lesson any time you want.
Conclusion
If you’d like to improve your cartoon character drawing skills, check out my Cartoon section. There, you can learn how to draw SpongeBob or practice sketching characters with my Winnie the Pooh drawing tutorial. If you’d like more tutorials like this, let me know in the comments below this article.
This lesson has come to an end. Feel free to ask any questions in the comments. I’d also love to hear your thoughts on this drawing guide and any suggestions you have for future tutorials. Don’t forget to subscribe to my social media channels and share the lessons you enjoyed the most.


Pretty easy I did it the ⏲️ at 5min.
Nice work, Zayn, finishing it in five minutes is impressive.