How to Draw a Wine Glass
Learn how to draw a realistic wine glass in five easy steps. This tutorial guides you through creating the bowl, stem, and base, refining shapes, and adding details.
How to Draw a Wineglass: Introduction
Wine is a great drink that not only has a great taste but also has a very good impact on human health.
Drawing a wine glass is particularly useful for learning balance and proportion, as it requires careful attention to the relationship between the bowl, stem, and base. This exercise helps young artists understand how different elements of an object interact, fostering an eye for composition and harmony.
Creating the smooth curves of a wine glass helps artists practice refining their work. The transition from basic shapes to polished contours demonstrates how initial outlines can evolve into finished pieces, a crucial aspect of the drawing process.
Shading techniques in this tutorial show how to create depth and dimension. This practice helps artists learn to convey light and shadow effectively, transforming a simple outline into a three-dimensional, lifelike object.
Drawing a wine glass requires subtle touches, such as refining the rim and adding reflections. This motivates artists to pay attention to finer details, training the overall quality of their artwork.
So let’s start the lesson about how to draw a wine glass easy.
Wineglass Drawing Tutorial
Time needed: 20 minutes
How to Draw a Wine Glass
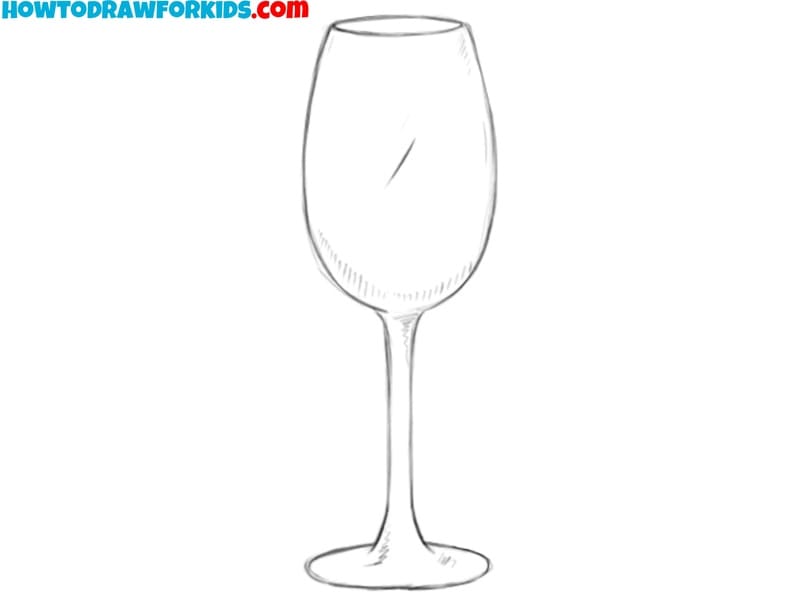
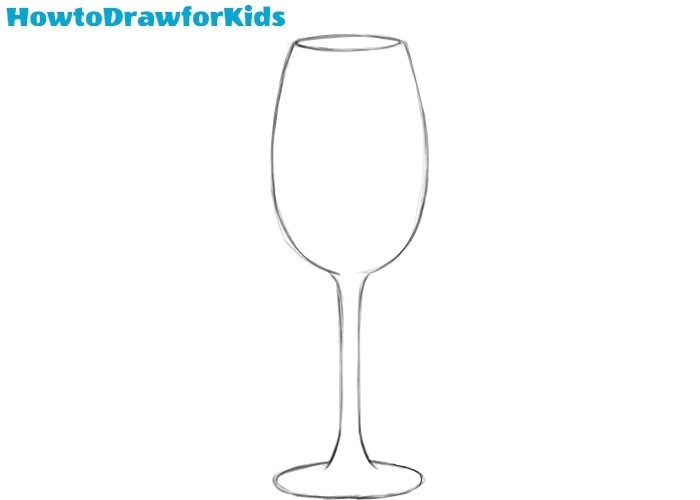
- Outline the wine glass bowl.
To start, draw an oval at the top of the wine glass, representing the bowl. This shape forms the main body of the glass, which holds the liquid. The oval should be placed upright, with its longer axis vertical. Use light lines at first, making it easier to adjust and refine.
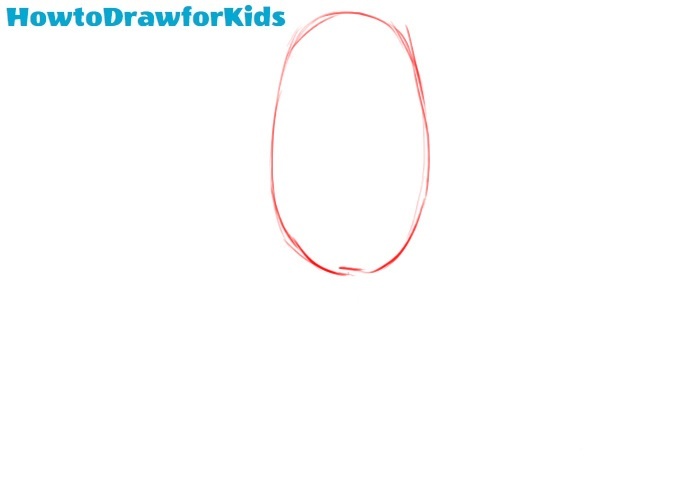
- Draw the stem and base of the wine glass.
Next, extend a vertical line downward from the bottom of the oval to form the stem. This line should be straight and of a moderate length, ensuring it connects to the base at a natural angle. At the end of the stem, draw an elliptical base, which stabilizes the wine glass.
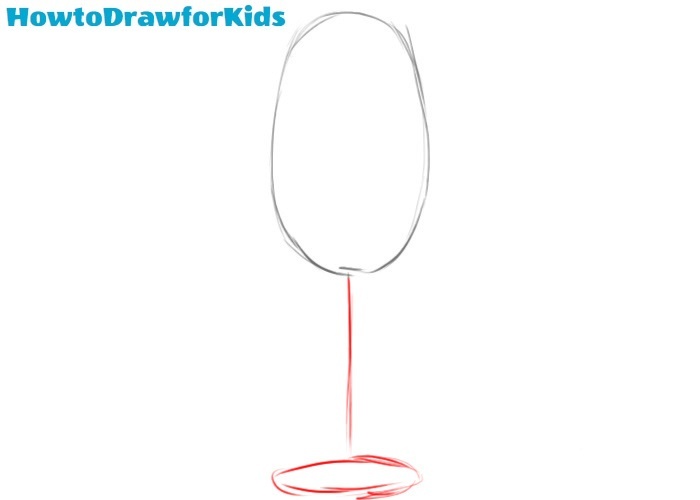
- Define the rim.
To add dimension and realism, draw a curved line inside the top of the oval, running parallel to its upper edge. This line represents the rim of the wine glass, creating a three-dimensional effect. Ensure this inner curve is smooth and evenly spaced from the outer oval.
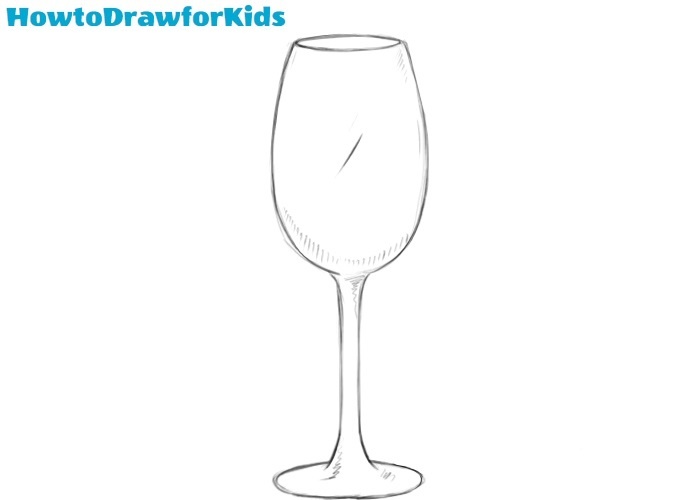
- Finalise the details.
Now, refine the overall shape of the glass by smoothing out the edges of the oval and ensuring the stem flows naturally into the base. Make adjustments to the curves and proportions, ensuring each part of the glass transitions smoothly into the next.
- Refine the glass shape and add shadows.
Complete the wine glass drawing by adding final touches, such as shading and highlights, to give the glass a realistic, reflective look. Apply shading along one side of the bowl, stem, and base to create a sense of light and shadow, improving the three-dimensional feel.
Conclusion
In this lesson, I showed how to draw a wine glass. As you know, I create drawing lessons for beginners or children. I try to make all my lessons as simple as possible so that any readers of Howtodrawforkids.com can become a real artist.

The wine glass was super easy