How to Draw a Pointing Finger
Ready for a hands-on drawing lesson? I’m excited to guide you through two simple ways to learn how draw a pointing finger, created for young, aspiring artists.
How to Draw a Pointing Finger: Basic Information
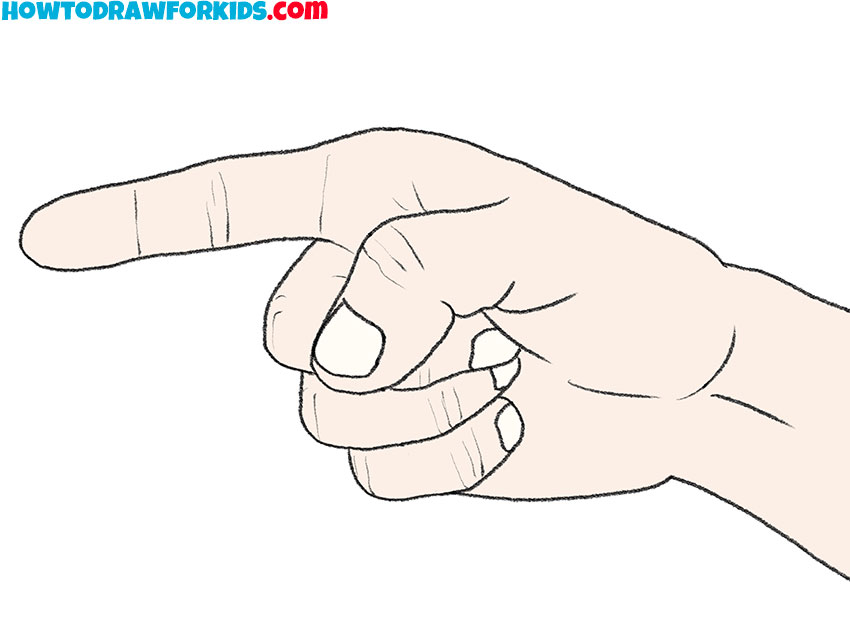
Drawing hands can be one of the most challenging aspects of figure drawing, yet mastering this skill is really important for any aspiring artist. In this tutorial, we will focus on drawing a pointing finger, a gesture that captures direction and intention.
Key aspects to focus on while drawing a pointing finger include the structure of the hand, the positioning and articulation of each finger, and the subtleties of skin and joint details. By concentrating on these elements, the artists can improve their ability to capture realistic and expressive hand gestures.
At the end of the primary instructions, I will present an additional, simpler method for drawing a pointing finger. This alternative approach is specifically created to be more accessible for beginners or those seeking a quicker drawing process.
By offering two distinct techniques, you can choose the one that best suits your current skill level and learning preference, ensuring that you gain a comprehensive grasp of how to accurately depict a pointing finger from start to finish.
Pointing Finger Drawing Tutorial
Materials
- Pencil
- Paper
- Eraser
- Coloring supplies
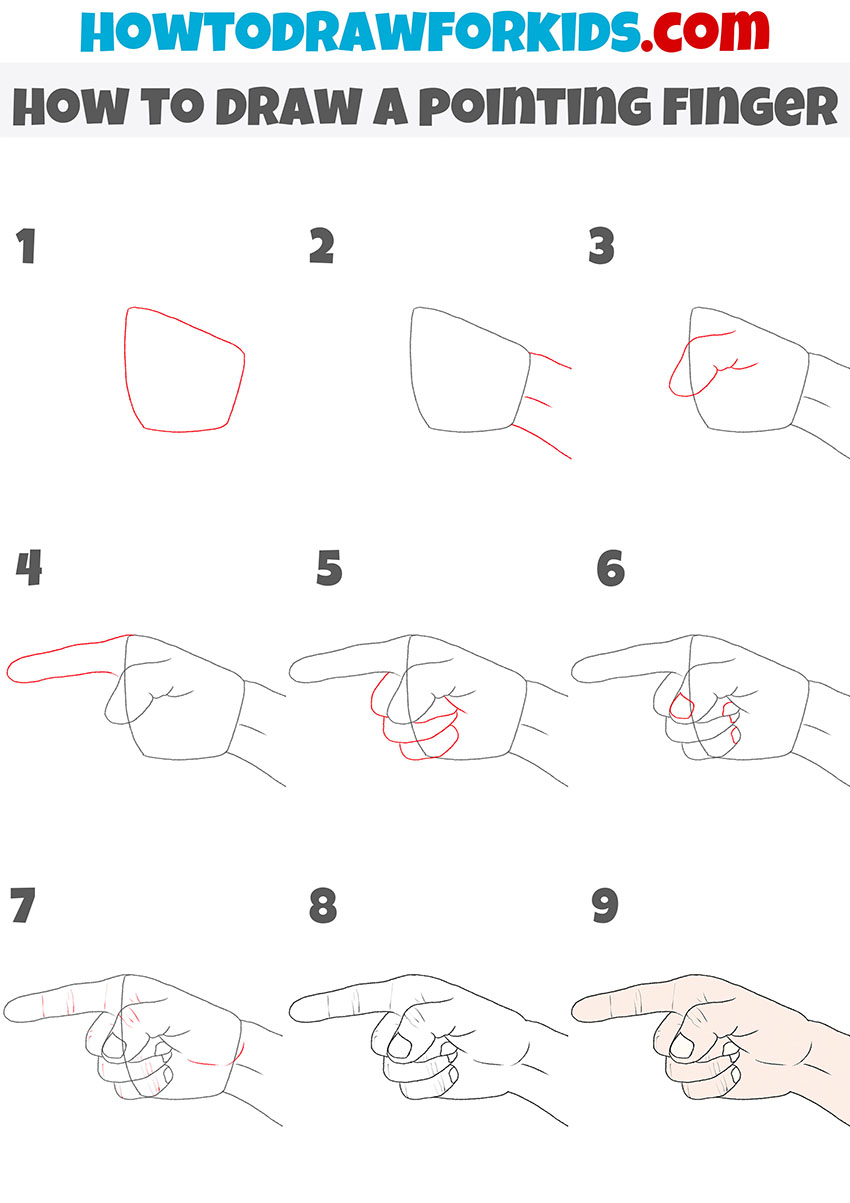
Time needed: 30 minutes
How to Draw a Pointing Finger
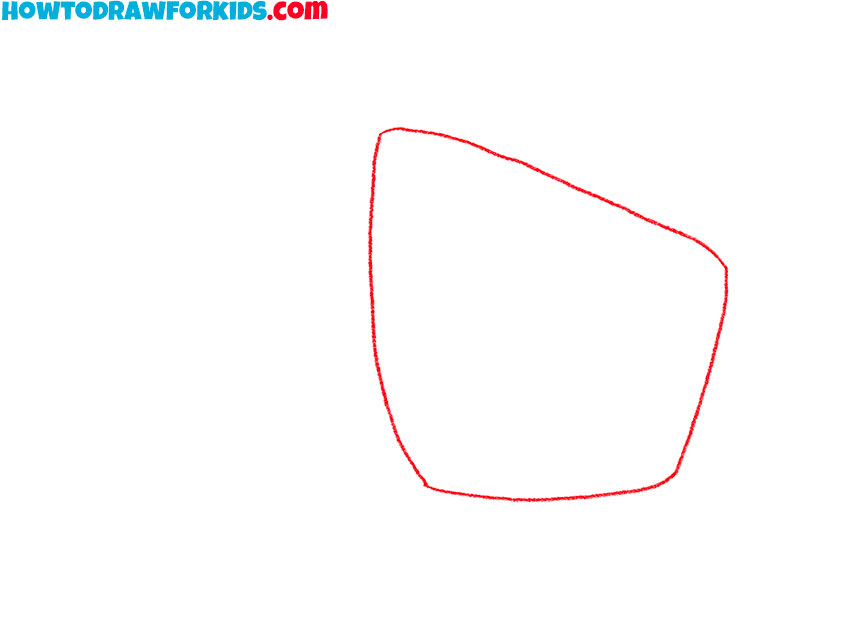
- Draw the palm.
Start by sketching the basic shape of the palm. Draw a slightly curved, rectangular shape with a wider top and a narrower bottom. This will be the foundation of your hand drawing. Ensure that the lines are light and easy to adjust, as this will help you refine the shape and add details later.
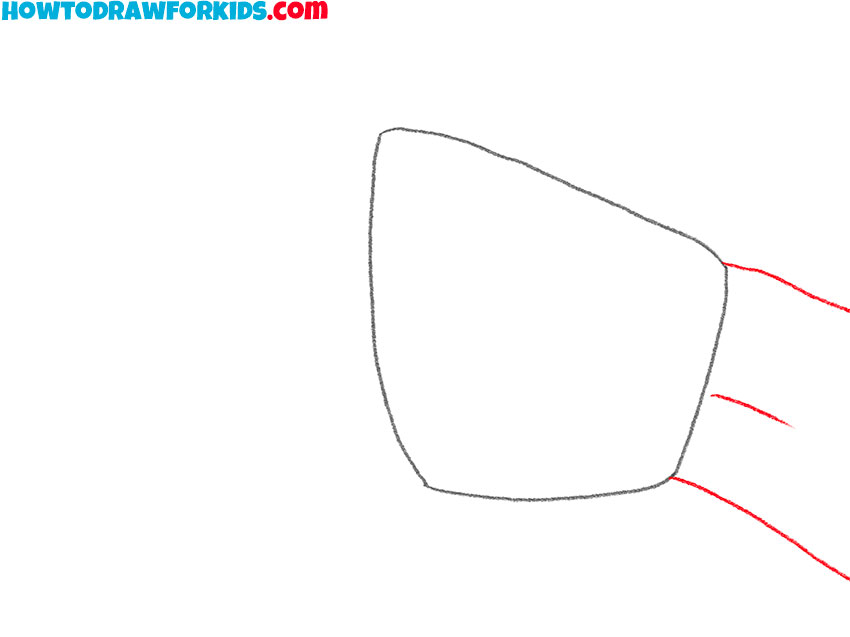
- Illustrate the wrist.
Extend two parallel lines downward from the bottom of the palm to create the wrist. These lines should be of equal length, forming a narrow rectangle that represents the wrist area. In the central part, closer to the base of the palm, draw a line illustrating the ligament.
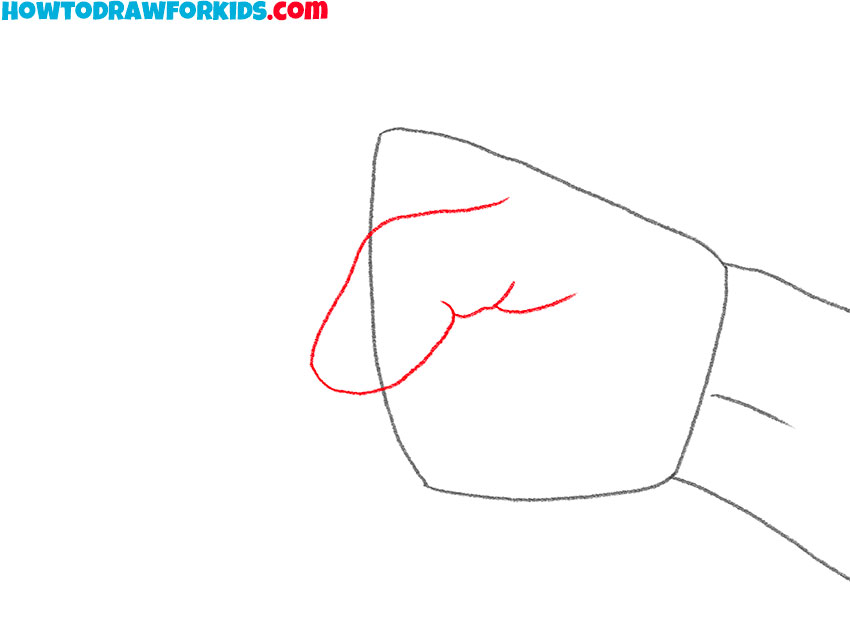
- Add the thumb.
Starting from the upper right side of the palm, sketch a curved shape that extends outward and slightly downwards. The thumb should be bent, with the tip pointing outwards. The thumb should be thicker at the base and taper towards the tip.
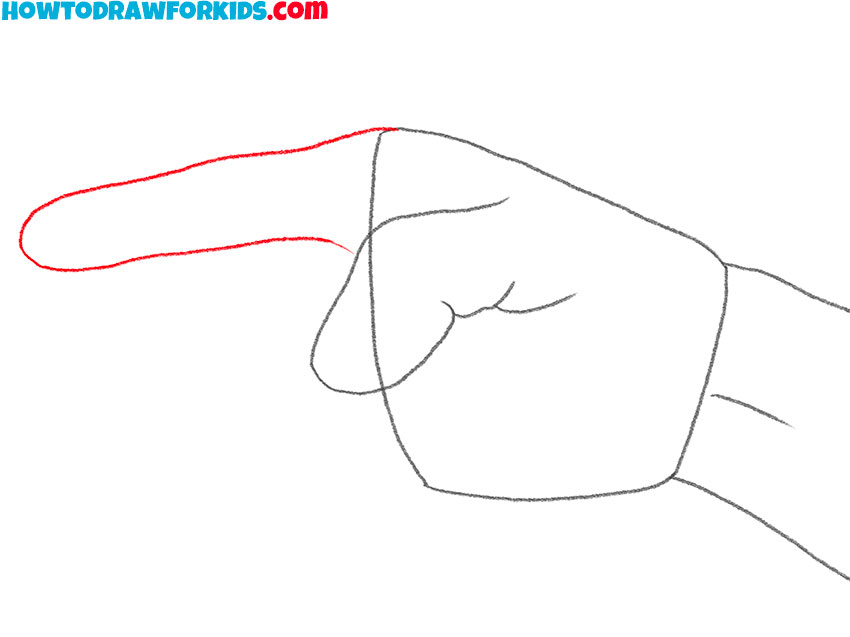
- Draw the pointing finger.
Now, draw the pointing finger extending from the left side of the palm. The finger should be long and straight, with a slight curves to suggest natural bends. Make sure the finger is slightly thicker at the base where it connects to the palm and tapers gently towards the tip.
- Draw the rest of the fingers.
Outline the remaining fingers by drawing curved shapes extending from the palm. These fingers should be partially curled inward, with only the top sections visible. The shapes should resemble a series of overlapping curves that suggest the natural position of fingers
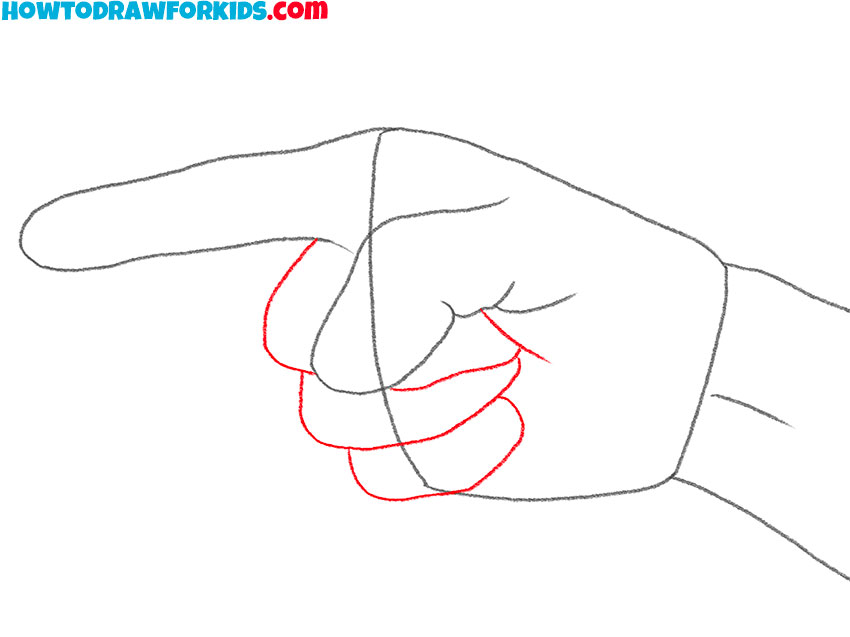
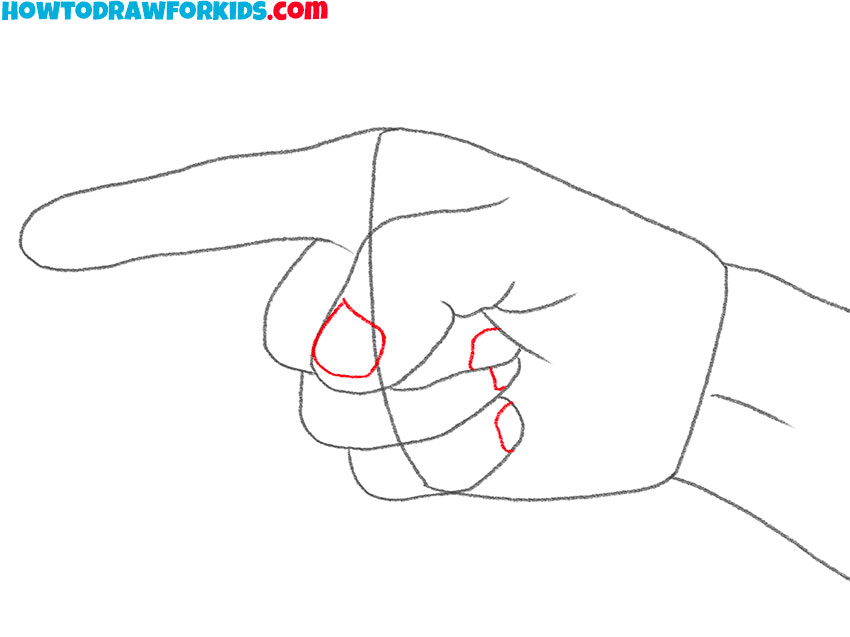
- Illustrate the nails.
Add fingernails to each finger by drawing small, curved shapes at the tips. The nails should follow the natural curve of each finger and be proportional in size. Pay attention to the size and shape of each fingernail, ensuring they match the perspective and angle of the fingers.
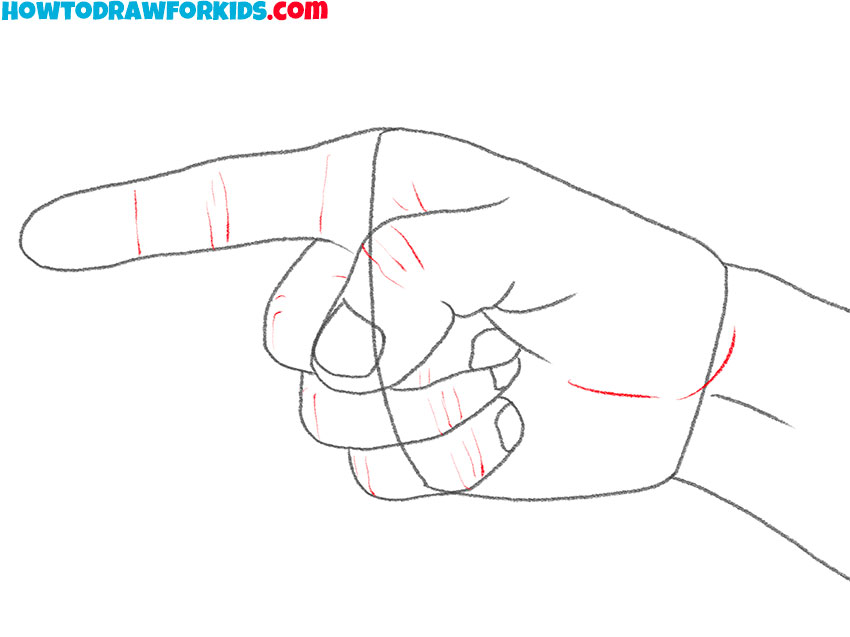
- Add the folds of the skin.
Enhance the realism of your pointing finger drawing by adding skin details. Draw small lines and creases around the knuckles, joints, and the base of the fingers. These details represent the natural lines and folds in the skin and add realism to your drawing.
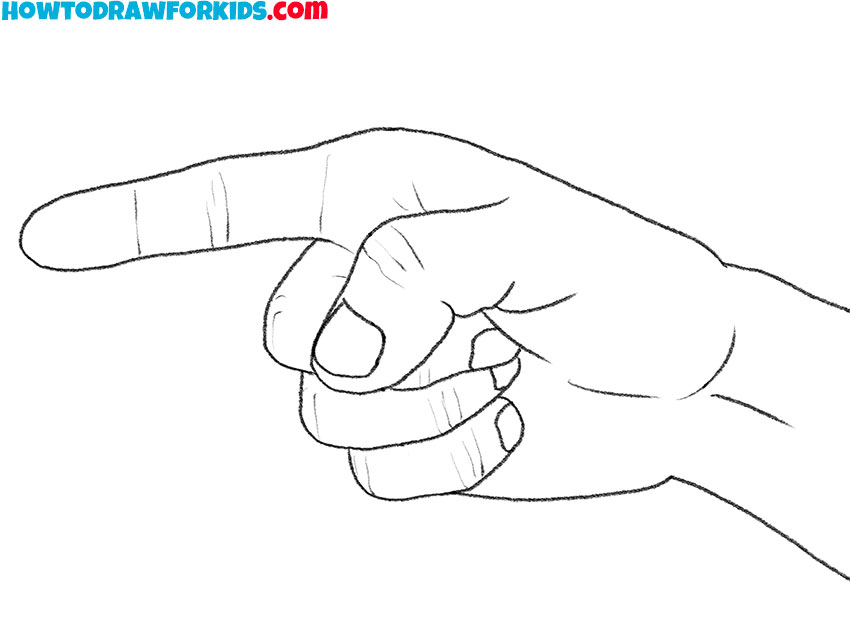
- Erase the guidelines and correct the inaccuracies.
Clean up your drawing by erasing any unnecessary guidelines and refining the overall outline. Ensure all fingers are proportionate and positioned correctly. This step is really important for making your drawing look neat and polished.
- Add colors to the drawing.
You can color your artwork in any hue that appeals to you most. Feel free to use natural tones like beige and brown or opt for more imaginative colors, such as green, if you’re depicting characters like the Hulk or a goblin. Use light and dark shades to create depth and dimension.

Additional Content
Here, you will find a PDF file that includes illustrations of each step covered in the tutorial, along with additional practice materials such as a coloring page, a tracing worksheet, and a grid drawing worksheet.
This PDF is created to boost your abilities and provide you with convenient resources for practicing your drawing skills. You can download and print the file to use at your convenience. These worksheets will help reinforce the concepts learned in the tutorial, allowing you to practice and improve your technique at your own pace.
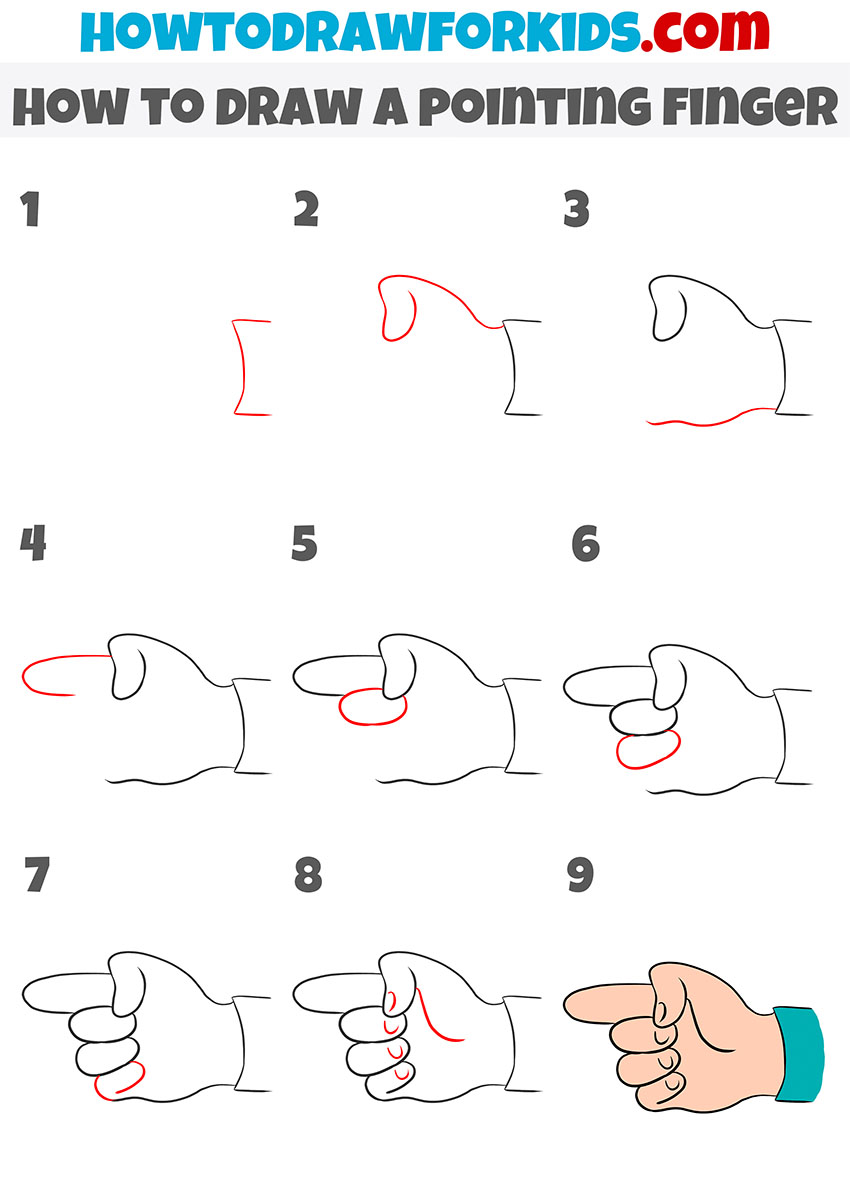
How to Draw a Cartoon Pointing Finger
This drawing method is a cartoonish version of a hand, which is simpler and more stylized compared to the first, more realistic approach. The process starts with basic shapes and lines to form the hand and finger, with each step adding just enough detail to maintain the cartoon-like feel while still suggesting a realistic posture.
Begin by drawing the cuff. Next, sketch the top curve of the thumb. Add a wavy line to represent the base of the palm. Proceed by drawing the pointing finger. Incorporate the rest of the fingers by drawing their curves and overlapping them. Finally, refine the hand’s shape and add any additional details to complete the drawing.
Pointing the Way: Fun Drawing Tips for Kids
You’ve just finished drawing a pointing finger, and I bet it looks awesome. Drawing can be full of surprises, so here are some tips and tricks to make your next finger-pointing masterpiece even better:
- Familiarize yourself with the bones and muscles of the hand. Understanding the underlying structure is essential for drawing hands that look natural and lifelike.
- Pay attention to the relative sizes of the palm, fingers, and thumb. Maintaining correct proportions ensures the hand looks balanced.
- Practice drawing the hand from different angles to develop a strong sense of perspective, which is crucial for realistic depictions.
- Don’t rush your lines. Drawing slowly and steadily allows you to maintain control and precision, making your drawing sharp and clear. Taking your time ensures that each line is deliberate and accurate.
- Use your own hand as a reference. Point with your finger and try to copy what you see. Observing your own hand provides a live, three-dimensional reference that helps you understand the anatomy and dynamics of the pointing gesture.
- Start with light strokes. Pressing lightly with your pencil allows you to create initial guidelines that can be easily adjusted or erased. Light strokes help in sketching the basic shapes and proportions without committing to any lines.
- Ensure that the length of the finger and the size of the hand are proportionate. Accurate proportions are crucial for a realistic drawing. Compare the length of the pointing finger to the other fingers and the palm.
- For the folds on the palm, draw smooth, curved lines. Smooth, flowing lines effectively represent the natural creases in the skin, particularly around the knuckles and where the palm bends. Avoid jagged or harsh lines, as these can make the hand look stiff and unnatural.
Conclusion
Fantastic work on nailing the pointing finger artwork! If you’ve enjoyed this, you’re going to love the other lessons I have on my website. Why not try drawing cute Hello Kitty next, or waddle your way into sketching a charming penguin?
There’s so much more to sketch and draw, so make sure to follow me on social media to catch all the latest updates and new lessons.
Also leave your comments with any wishes, questions, or suggestions. Your feedback helps me improve and create content that meets your needs.