How to Draw a Fighter Jet
Especially for novice artists, I created a fascinating drawing lesson on the topic of military air technology, and now you will learn how to draw a fighter jet step by step. Each step in this instruction is one simple action that you can easily complete.

How to Draw a Fighter Jet: Basic Information
A fighter jet, or fighter aircraft is a military airplane that is designed to destroy enemy air targets. Such an airplane is capable of conducting maneuverable and offensive air combat.
There are a huge number of countries and factories that can produce the fighter jets. These planes will differ from each other in small details, but the process of drawing them will be approximately the same.
In this lesson on how to draw a combat jet, I will show you the basic principles of how to correctly depict all the necessary details, and how to use the simplest methods to get a very beautiful result.
If you master this lesson, then in the future you will easily draw any other model of an airplane.
Check that you have all the art supplies at hand and if everything is ready, then start sequentially following all the steps in this instruction.
Fighter Jet Drawing Tutorial
Materials
- Pencil
- Paper
- Eraser
- Coloring supplies
Time needed: 30 minutes
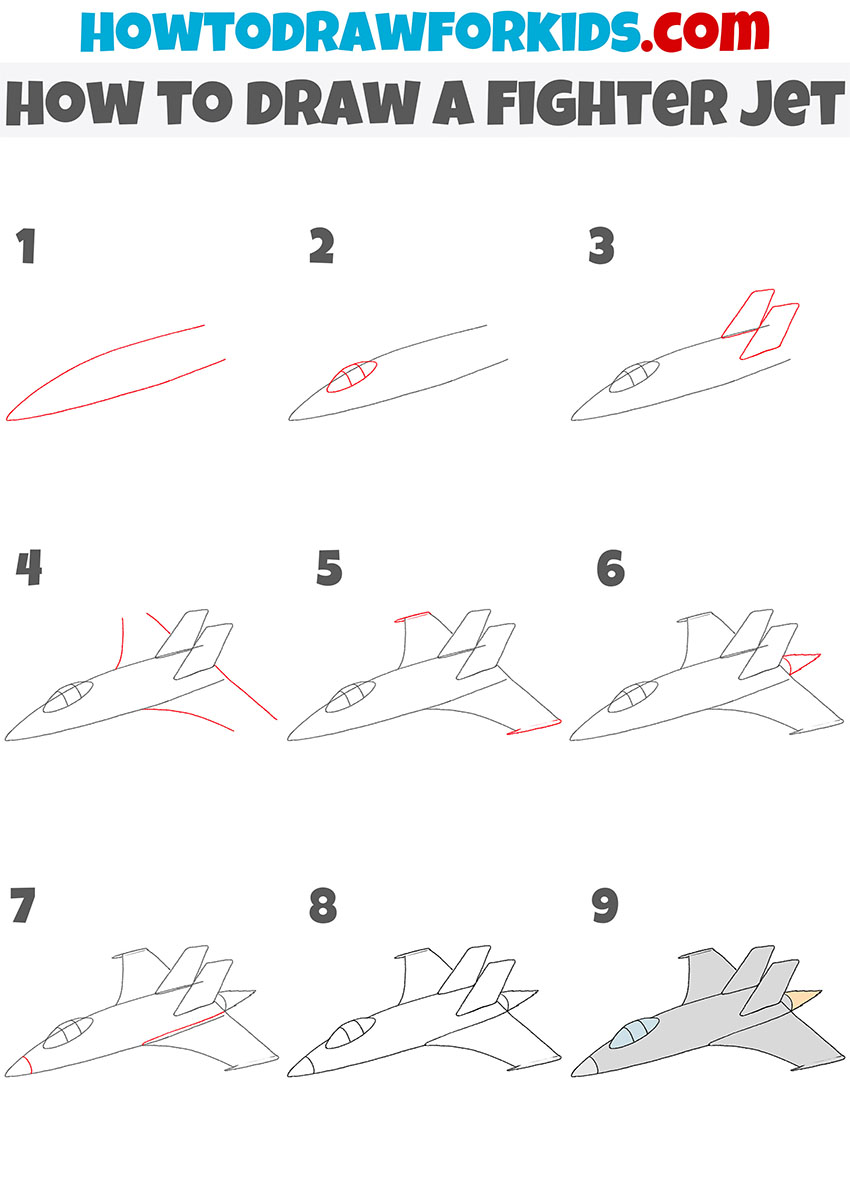
How to Draw a Fighter Jet
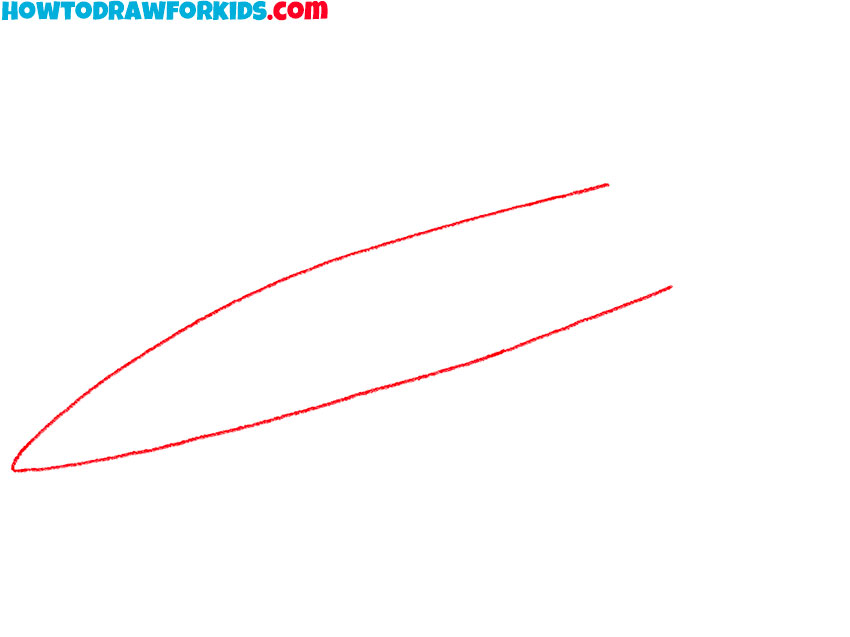
- Draw the body of the fighter jet.
Draw a long, narrow, and slightly curved shape resembling a long letter U. This will serve as the main fuselage of the jet. Ensure that the front is pointed to form the nose of the aircraft, while the back should be slightly wider. Use light, smooth lines to allow for adjustments later on.
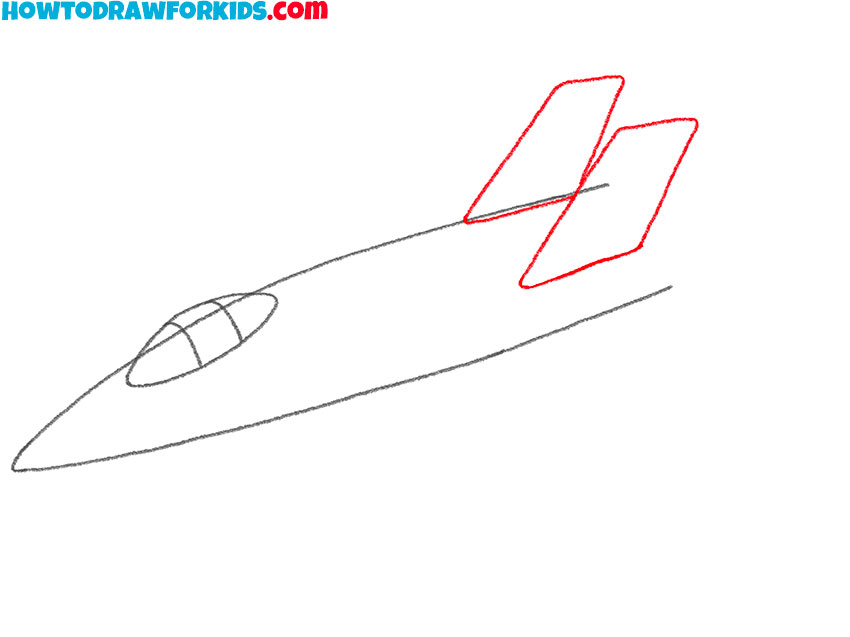
- Illustrate the cockpit of the jet.
Near the front end of the fuselage, sketch an oval shape for the canopy. This oval should sit slightly above the main body line to represent the raised cockpit area. Once the basic oval is drawn, add two lines down the middle to divide it into three sections, which will give a more detailed appearance.

- Sketch the tail fins of the plane.
Now, add the vertical stabilizers at the rear of the jet. Draw two rectangular shapes extending upwards from the back of the fuselage. These shapes should be angled slightly backward to capture the aerodynamic design of a fighter jet. Each stabilizer should be about the same height and width.
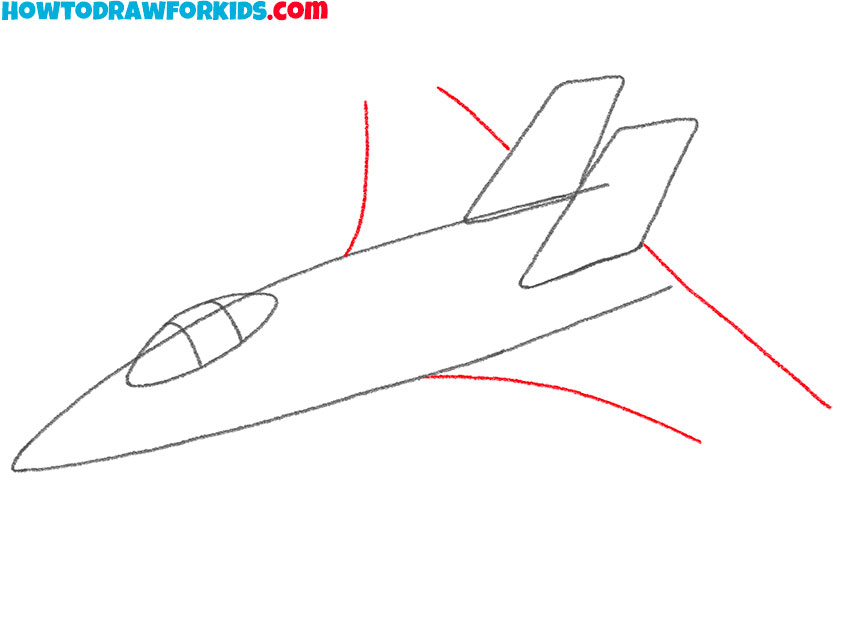
- Start drawing the wings.
From the middle section of the fuselage, draw two triangular shapes extending outwards. The wings should be wide at the base where they connect to the fuselage and taper to the ends. Pay attention to the angle and length of each wing to ensure they are symmetrical.
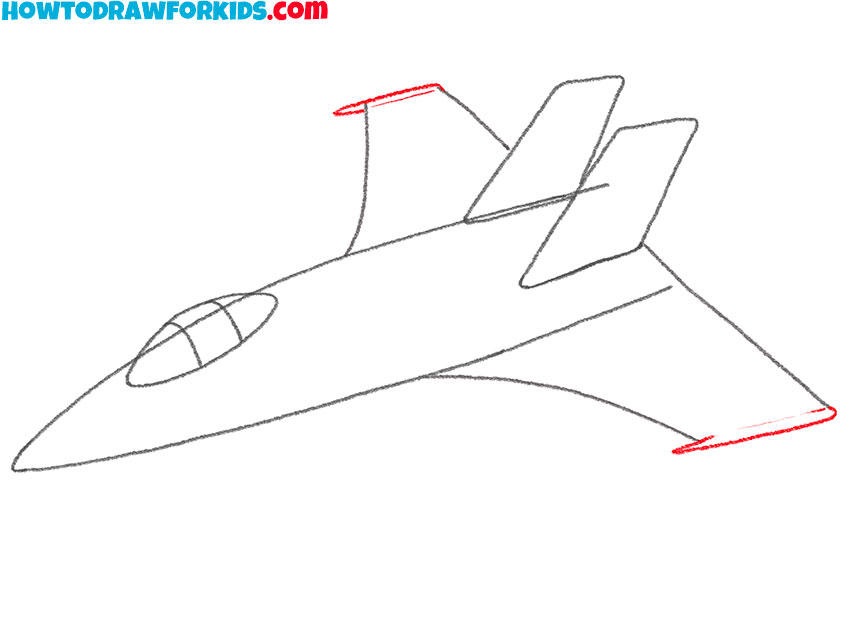
- Add the sides of the wings.
Finish the jet’s wings adding more detailed lines. At the ends of both wings, draw the outlines of the rockets to complete the overall outline of the aircraft. You can add small rectangles at the back of each wing for the ailerons, which help with roll control.
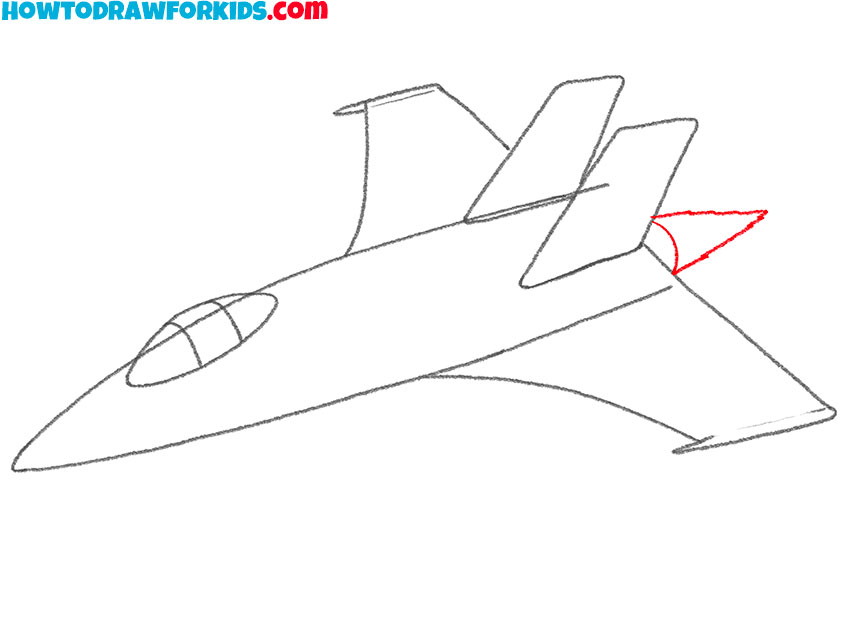
- Draw the remaining elements of the plane.
Draw a small curved shape at the end of the fuselage, behind the vertical stabilizers. This shape should represent the jet’s engine exhaust nozzle. Next draw the flames coming out of the back of the plane using jagged lines. The flame shape should be wider at the base and taper towards the end.
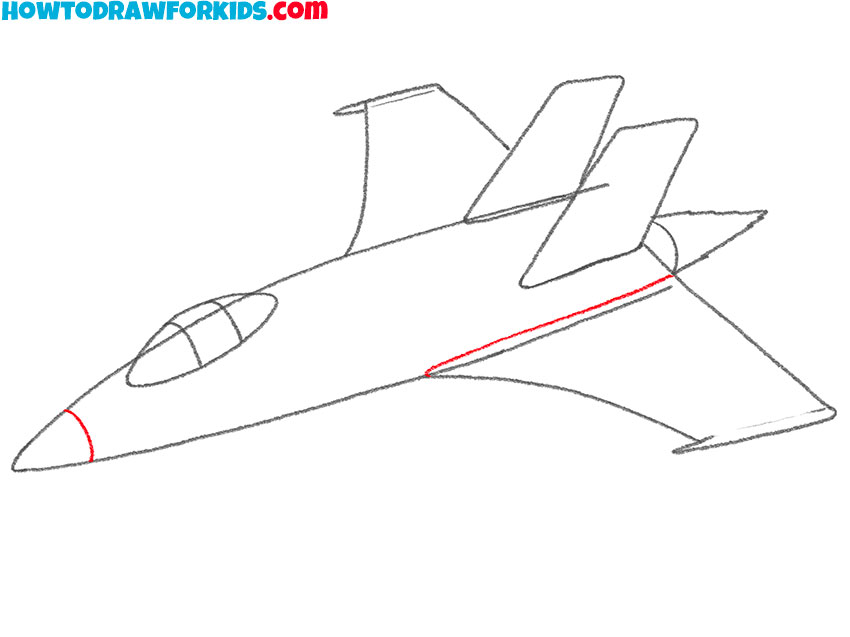
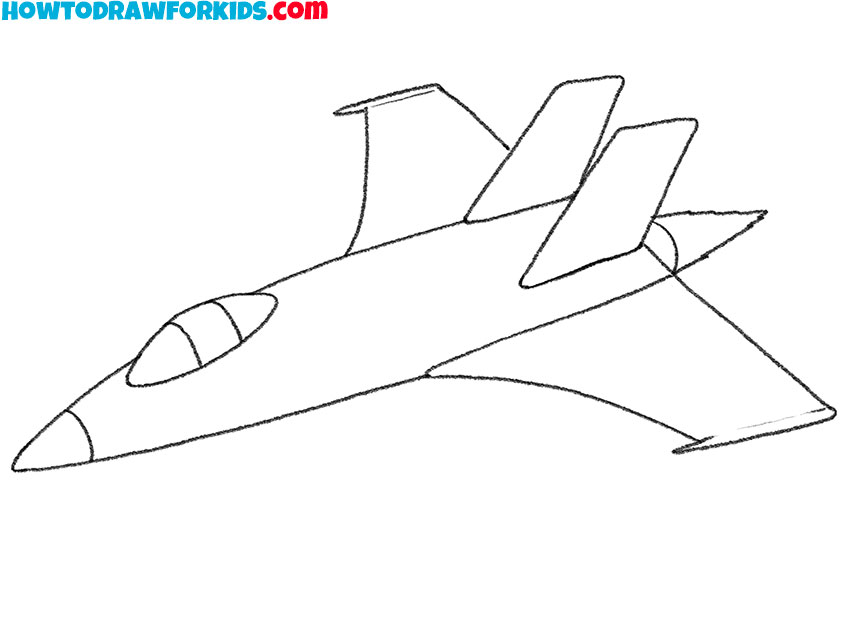
- Detail the fighter jet.
Refine the jet’s front by adding details to the nose and forward fuselage. Draw a small, pointed cone at the tip of the nose to represent the radar or sensor equipment. Now, on the side, draw a line separating the wing of the airplane from the rest of the body.
- Correct any inaccuracies.
Go over your initial lines, making any necessary adjustments to smooth out the shapes and ensure everything is proportionate. You can add any remaining details to the wings, such as small control surfaces or additional lines for texture.
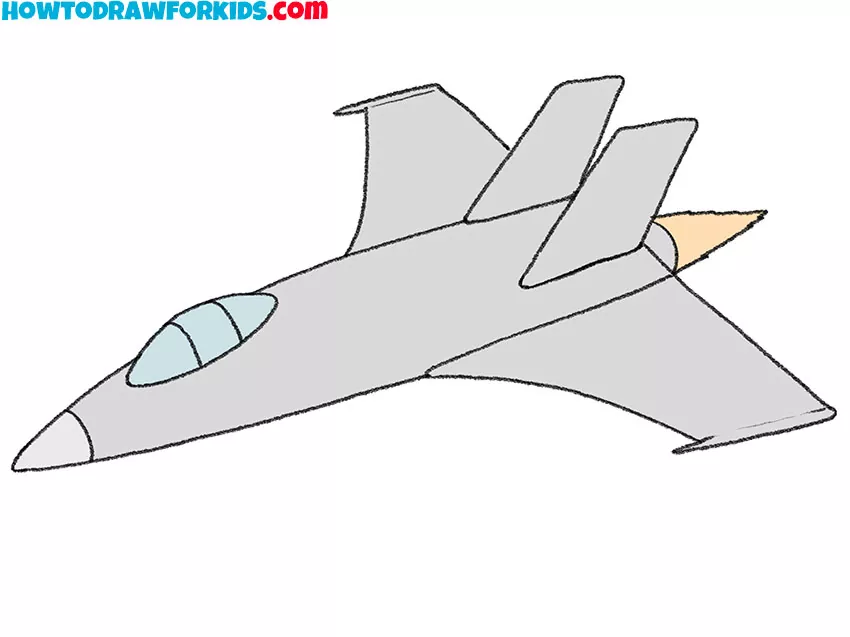
- Color your fighter jet drawing.
Use grey for the main body of the jet, with a lighter grey or blue for the cockpit canopy. You can add darker shades to the exhaust area and other parts to create a sense of realism. Color the flames in shades of yellow, red or orange. You can also add highlights and shadows.
Additional Materials
The fighter jet drawing is complete! If this lesson was interesting and useful for you, then leave a little feedback in the comments. I will be glad to receive your feedback. At the end of the lesson, I suggest you download a PDF file that contains brief instructions and additional training materials, so the lesson will be available to you at any convenient time.
Improving Your Fighter Jet Drawing
The process of drawing a fighter jet has come to an end, and as you have already noticed, it is very, very simple. But according to tradition, I will give you some tips on how you can improve your fighter jet drawing or make it even more interesting.
Draw a few fluffy clouds around the jet to create a sense of altitude and movement through the sky. Then draw a mountain range or some landscape below the jet. This can give the impression of the jet flying over a specific terrain.
You can sketch missiles or other armaments under the wings to make the jet look ready for combat. These can be simple cylindrical shapes attached to the wings or fuselage. Or add more detailed lines and shapes on the wings and fuselage, such as panels, rivets, or insignia.
If the cockpit is transparent, you can add a small figure of a pilot inside, with a helmet and flight suit. Add visible controls or a heads-up display (HUD) inside the cockpit.
To convey movement and speed, add speed lines behind the jet. These are simple, short lines that follow the direction of the jet’s motion. Draw smoke trails behind the jet, which can represent contrails or missile launches. Sketch a smaller, less detailed enemy aircraft in the background, perhaps with smoke indicating damage.
Depending on the time of day you want to depict, add a sun or moon in the sky. The sun can have rays extending outward, while the moon can have stars around it. Small birds flying in the background can add a peaceful contrast to the powerful fighter jet.
Add a camouflage pattern to the jet’s body. Use different shades of grey, green, or desert colors to create a military look. Draw national flags or military insignia on the wings and fuselage.
Conclusion
Essentially, today we just drew a cool fighter jet, but as you have already noticed, drawing different types of airplanes can be very different from each other.
But still, the basic principles of drawing airplanes remain the same, and I hope this art lesson helped you understand them.
This simple lesson helped you not only to illustrate a fighter plane, but also understand how to correctly sketch objects in flight.