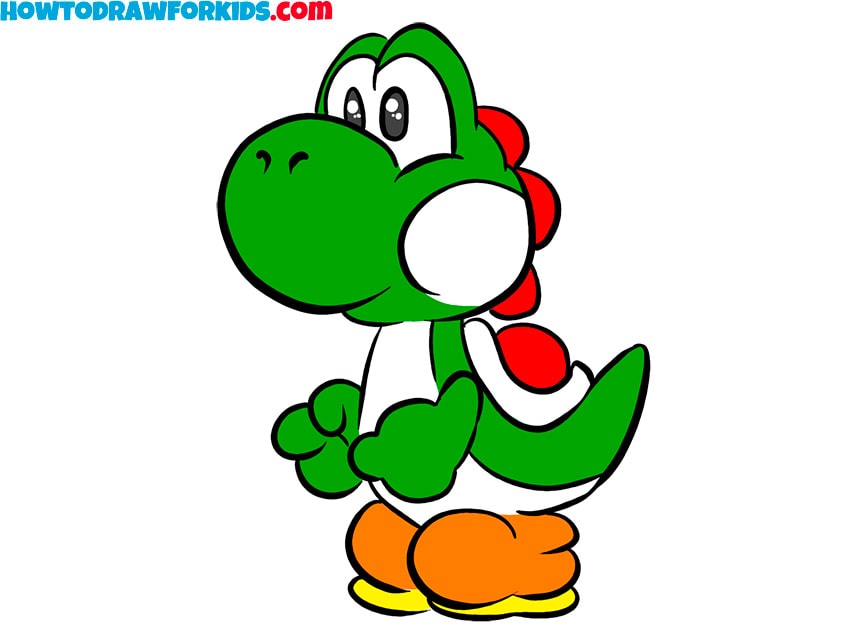
How to Draw Yoshi
In this really simple drawing tutorial, I will demonstrate you how to draw Yoshi – one of the most famous characters from the Mario universe.

How to Draw Yoshi: Basic Information
Unlike the simpler tutorials on Howtodrawforkids.com, this Yoshi drawing guide includes more intricate lines and detailed steps. I usually simplify lessons to make them easier for young artists and beginners.
However, simplifying Yoshi risks losing the distinctive traits that make him instantly recognizable. Thus, we will be faithful to the Yoshi you know from video games, illustrating his unique features in this drawing tutorial.
Toward the end of the tutorial, I’ll provide extra tips that will make your Yoshi drawing even more unique, interesting, and visually appealing.
So get your art supplies ready and let’s get started!
Yoshi Drawing Tutorial
Materials
- Pencil
- Paper
- Eraser
- Coloring supplies
Time needed: 40 minutes
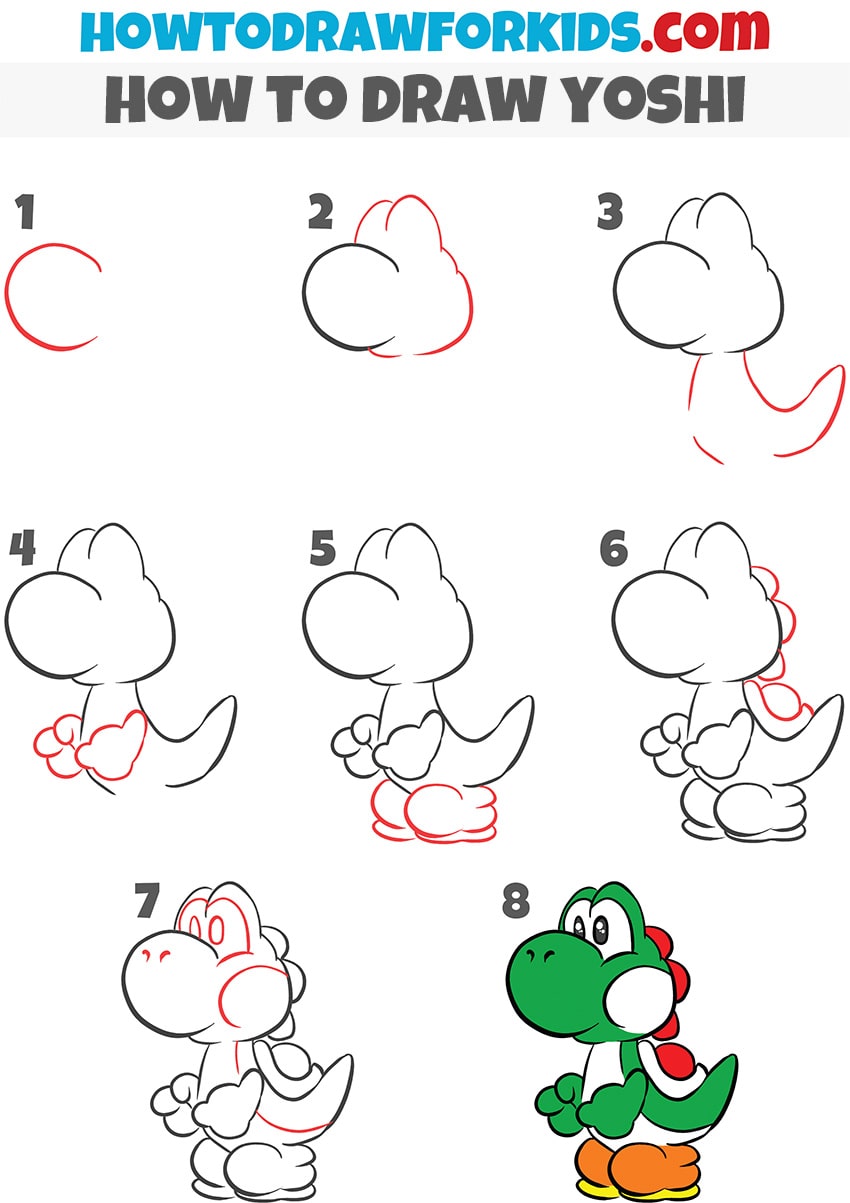
How to Draw Yoshi
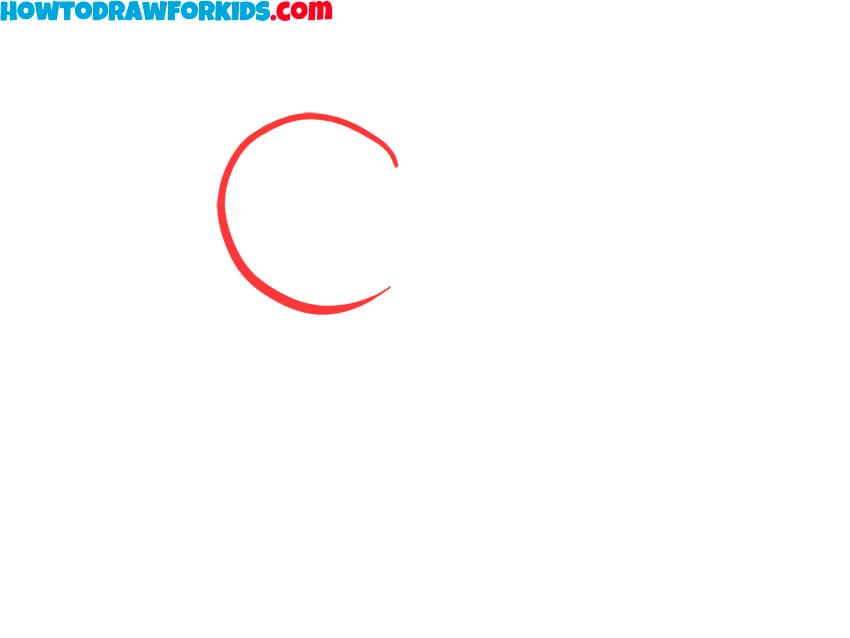
- Sketch Yoshi’s nose.
Begin by drawing Yoshi’s snout, which forms the foundation of his head. Start with a large, rounded curve on the left side of your paper. This will serve as the front part of Yoshi’s face, where his nose will be. Make sure the curve is smooth, resembling a half-oval shape.
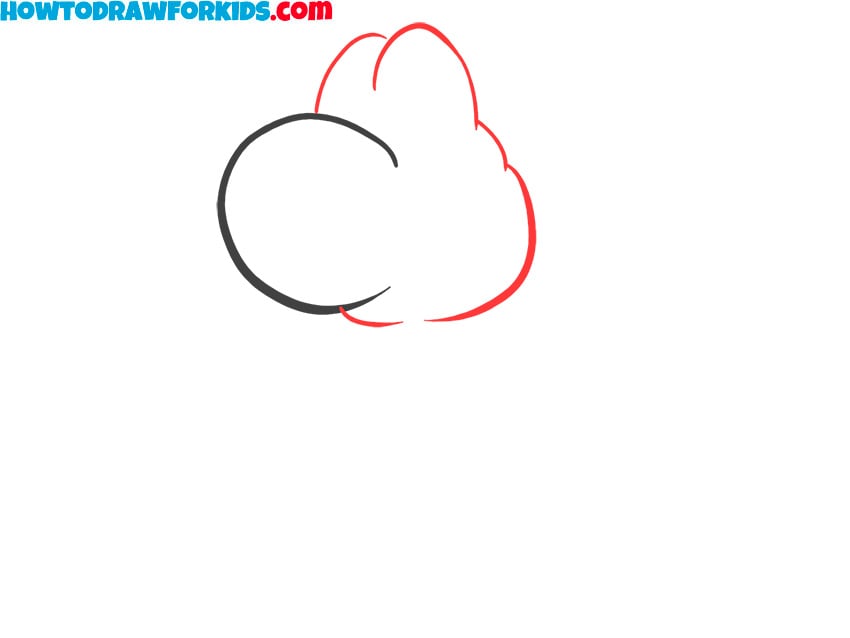
- Draw the top and back of the head.
Next, outline the rest of Yoshi’s head by adding the top and back portions. Start by drawing two overlapping curves at the top of the snout for Yoshi’s eyes. Extend another curve from the back of the snout, moving downward and forming the back of Yoshi’s head.
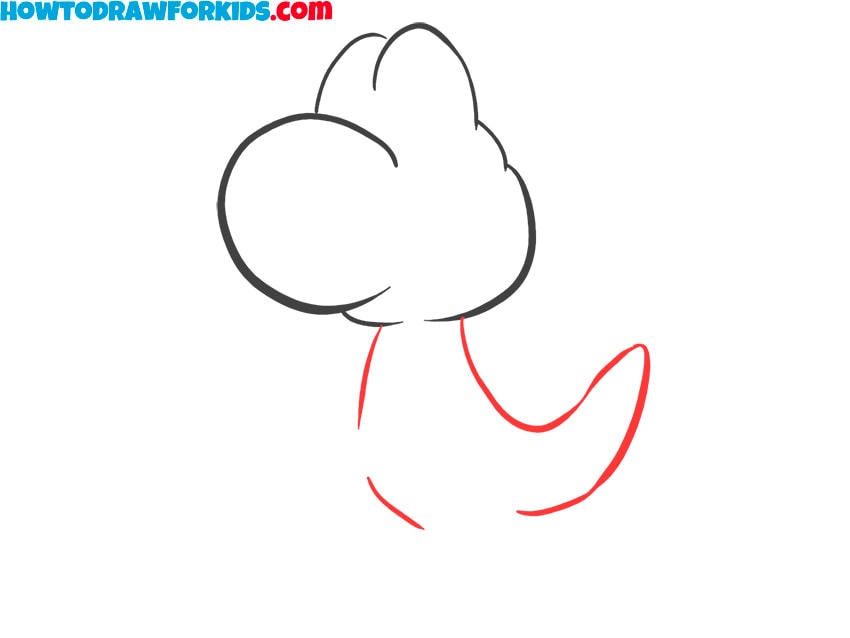
- Sketch Yoshi’s torso and tail.
Now, draw Yoshi’s back by extending a long, sweeping curve from the bottom of his head, tapering slightly at the end. This line will form his back and tail, which is very important for illustrating his overall silhouette. Now it might look like a cartoon snake or worm.
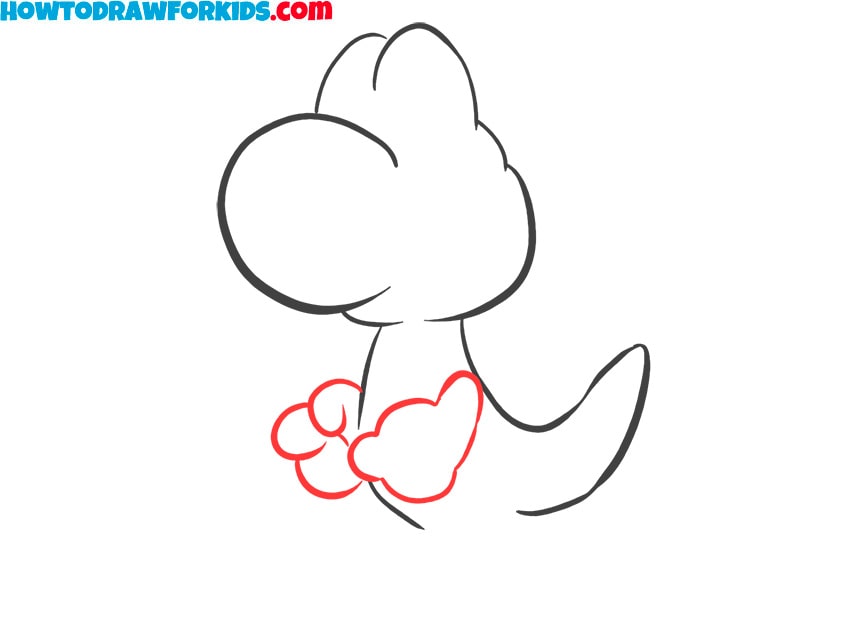
- Draw Yoshi’s arms.
You may have noticed that many cartoon characters have disproportionately large palms. For example, Mickey Mouse has these proportions. Yoshi also has the same proportions – the palms here look like large rounded figures comparable to the torso.
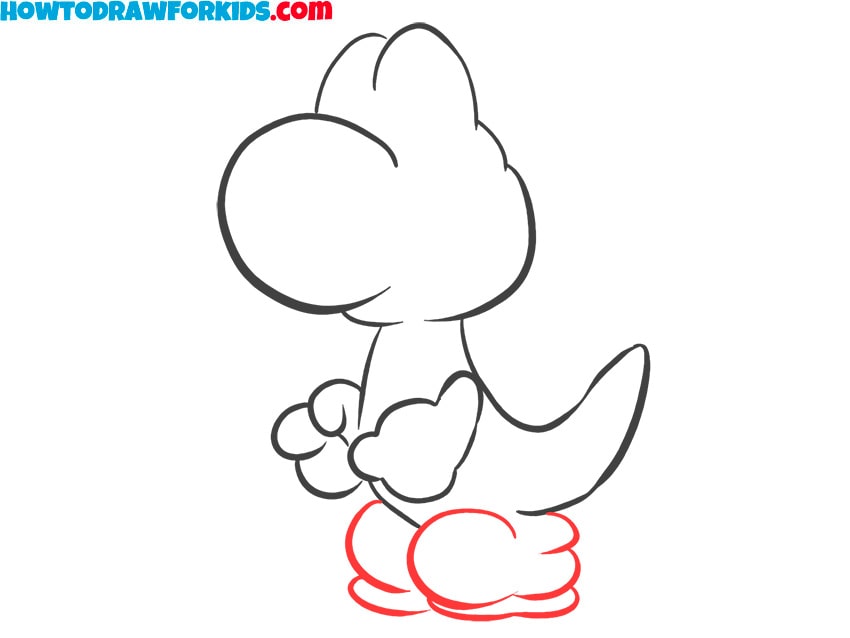
- Illustrate the shoes.
Start by sketching two oval shapes at the bottom of his body for the shoes. These ovals should overlap slightly, as Yoshi’s feet are close together in this stance. Add smaller curves inside these ovals to form the shoe details, including the soles and folds.
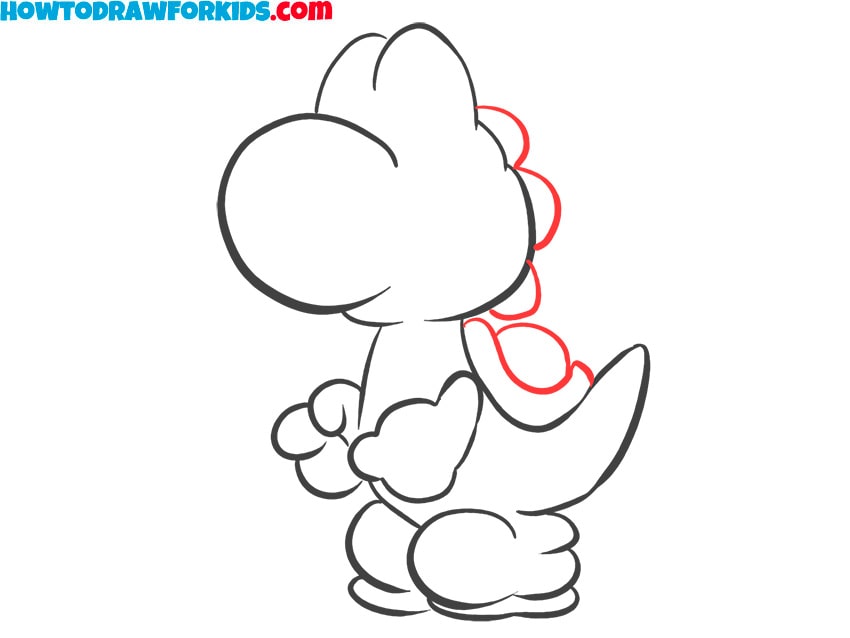
- Add the details.
Next, add the spikes along Yoshi’s back. Start by drawing a series of small, rounded shapes from the back of his head down to his tail. These spikes should decrease in size as they approach the tail, creating a smooth and natural progression. Next with a couple of curves draw the shell on the back.
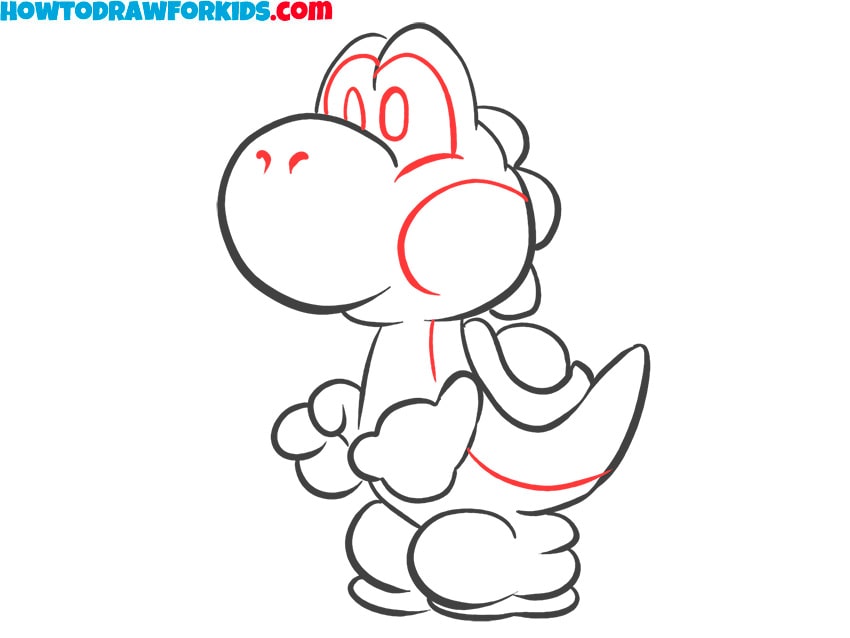
- Draw the details of the face.
It’s time to complete Yoshi’s face by adding his eyes and nostrils. Draw two large oval shapes on the front of his head for his eyes, and add small circles within for his pupils. Finally, place two tiny dots on his snout to complete his nostrils.
- Add the recognisable colors of Yoshi.
Use a green shade for his body and orange for his shoes. The back spikes can be colored red, adding contrast to his green body. Make sure to fill in the pupils with black and add a small white highlight to each eye for a lively expression.
Additional Content
Did you have fun following this Yoshi drawing tutorial? If you did, don’t forget to download the PDF version of the tutorial, which comes packed with extra materials!
This download includes the step-by-step drawing instructions, a Yoshi-themed coloring page, a tracing worksheet to practice your lines, and a grid drawing worksheet to help you master proportions. These additional resources are designed to improve your learning experience and make your drawing sessions even more interesting.
How to Draw Yoshi: Advanced Tips
Introduce shading to give Yoshi a three-dimensional appearance. Focus on areas like under the chin, around the eyes, and beneath the arms and legs. Use gentle gradients to create smooth transitions between light and shadow, adding realism to the character.
Instead of just drawing Yoshi standing still, experiment with more dynamic poses. Try drawing Yoshi in action, such as jumping, running, or holding a favorite item like a fruit. Dynamic posing can make your artwork even more interesting.
Adding a background can set the scene for Yoshi. You could place him in a familiar Mario world setting, such as a grassy plain, a castle, or a cloud-filled sky. A well-designed background complements the character and make the drawing even more recognisable.
If Yoshi is depicted in action, consider adding motion lines to illustrate movement. For example, if he’s jumping, draw lines near the feet to indicate motion. Motion lines can help the viewer understand the action taking place.
Common Mistakes
A common mistake is drawing Yoshi with disproportionate body parts, such as an overly large head or tiny feet. Use basic shapes and guidelines to map out Yoshi’s proportions before adding details. Double-check the size relationship between his head, body, and limbs as you go.
Adding too many small details can clutter the drawing, making it confusing. Focus on the essential details that define Yoshi, such as his eyes, spikes, and shoes. Keep the lines clean and avoid overcrowding with unnecessary elements.
Starting with complex shapes can make the drawing process overwhelming. Begin with simple, basic shapes like circles and ovals to build Yoshi’s structure. This approach makes it easier to refine details later.
Hastily drawing Yoshi can lead to mistakes and uneven lines. Take your time with each step, focusing on accuracy over speed. Review your work frequently to catch and correct errors before moving on.
Conclusion
This tutorial guided you through drawing Yoshi from the Mario Universe. I hope you found it helpful and that you’re now more confident in creating characters from classic games.
I also hope you’ve applied the extra tips and are now drawing characters and scenes from games with even greater confidence.
To boost your confidence in drawing game characters, check the Games category on my site. You’ll find tutorials on Sonic, Sega’s iconic mascot, Sub-Zero from Mortal Kombat, and many more.
i love drawing thanks to your program
I love drawing thanks to your program
I love your drawings.