How to Draw a Bed
Get set for a creative adventure where I’ll teach you two exciting ways to learn how to draw a bed. We’ll tackle both a side view and an overhead angle, giving you the skills to draw beds that are just right for story time.
Step into the world of art as we draw a bed from multiple angles, learning two distinct methods that are great for children. You’ll discover how to sketch comfortable beds that look inviting from every viewpoint, bringing your room drawings to life.

How to Draw a Bed: Basic Information
Snuggle in, young artists, because today we’re going to learn how to draw a bed that looks as cozy as the one in your room. With a few easy steps, you’ll turn simple lines into a comfy place where dreams come alive. This lesson is perfect for all of you who want to add a personal touch to your room drawings.
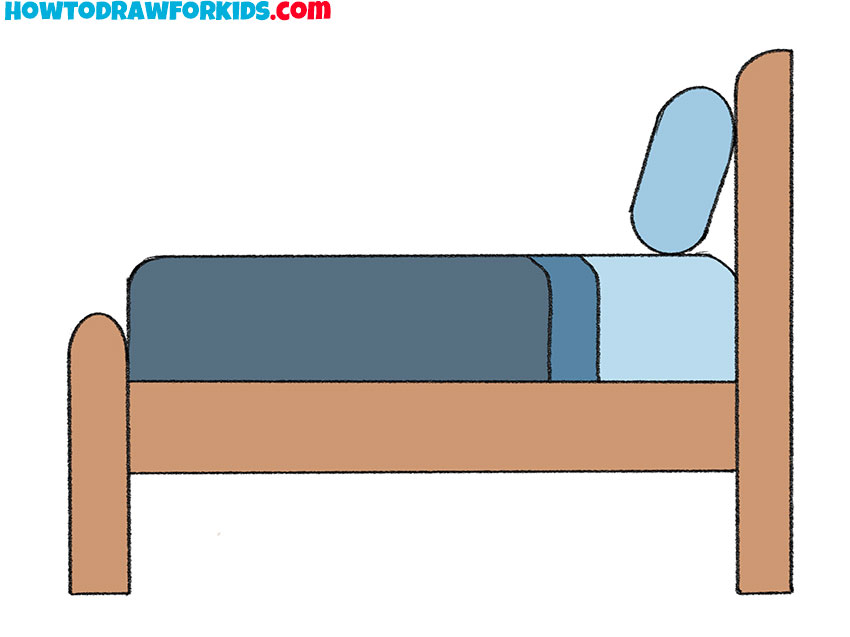
In this lesson, we’ll focus on the bed’s structure from a side perspective, beginning with the base and layering our way up to the fluffy pillows and the folds of the blankets. Each step is simple and is designed to build upon the previous one, making sure that by the end, you have a bed that’s just waiting for someone to jump in.
I’ve made sure this how to draw a bed lesson is super easy to follow. So grab your pencils and let’s tuck into this drawing. When you’re done, you’ll have a bed that looks inviting enough to crawl into and take an artistic nap!
Bed Drawing Tutorial
Materials
- Pencil
- Paper
- Eraser
- Coloring supplies
Time needed: 20 minutes
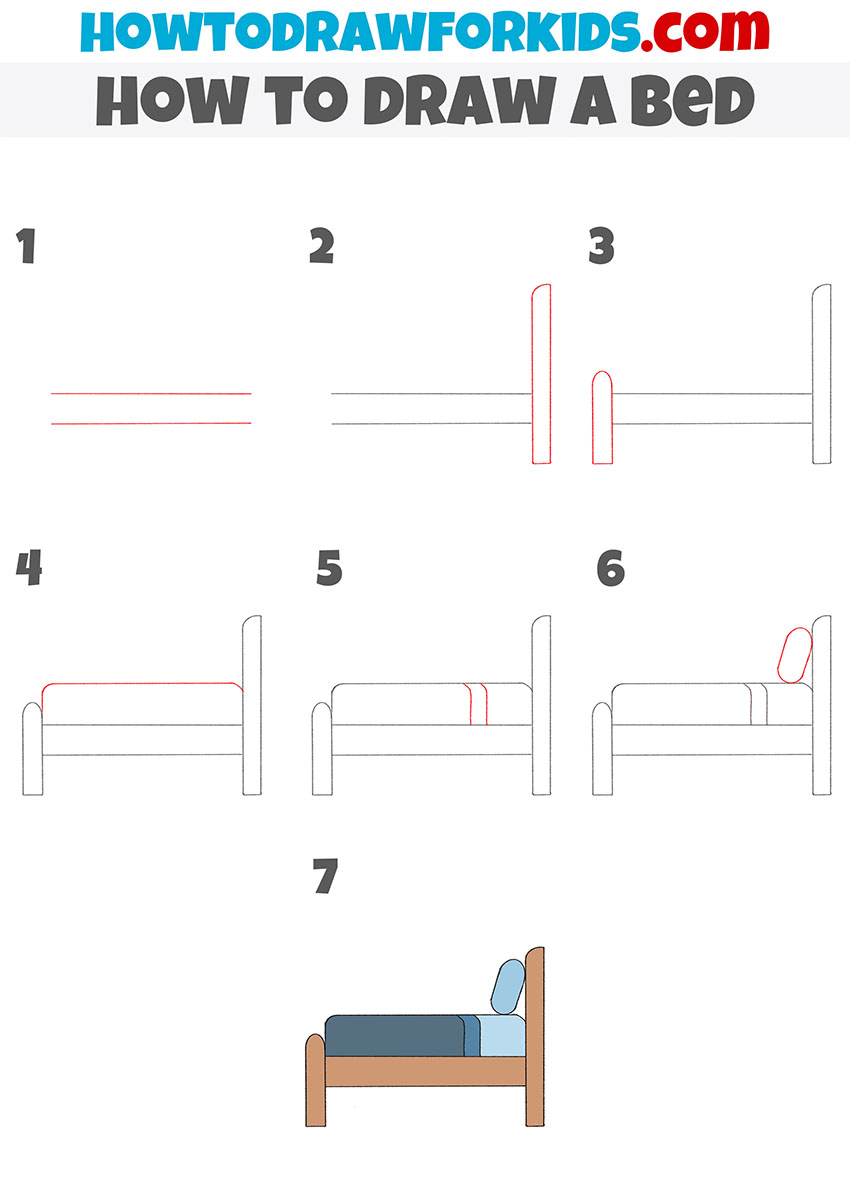
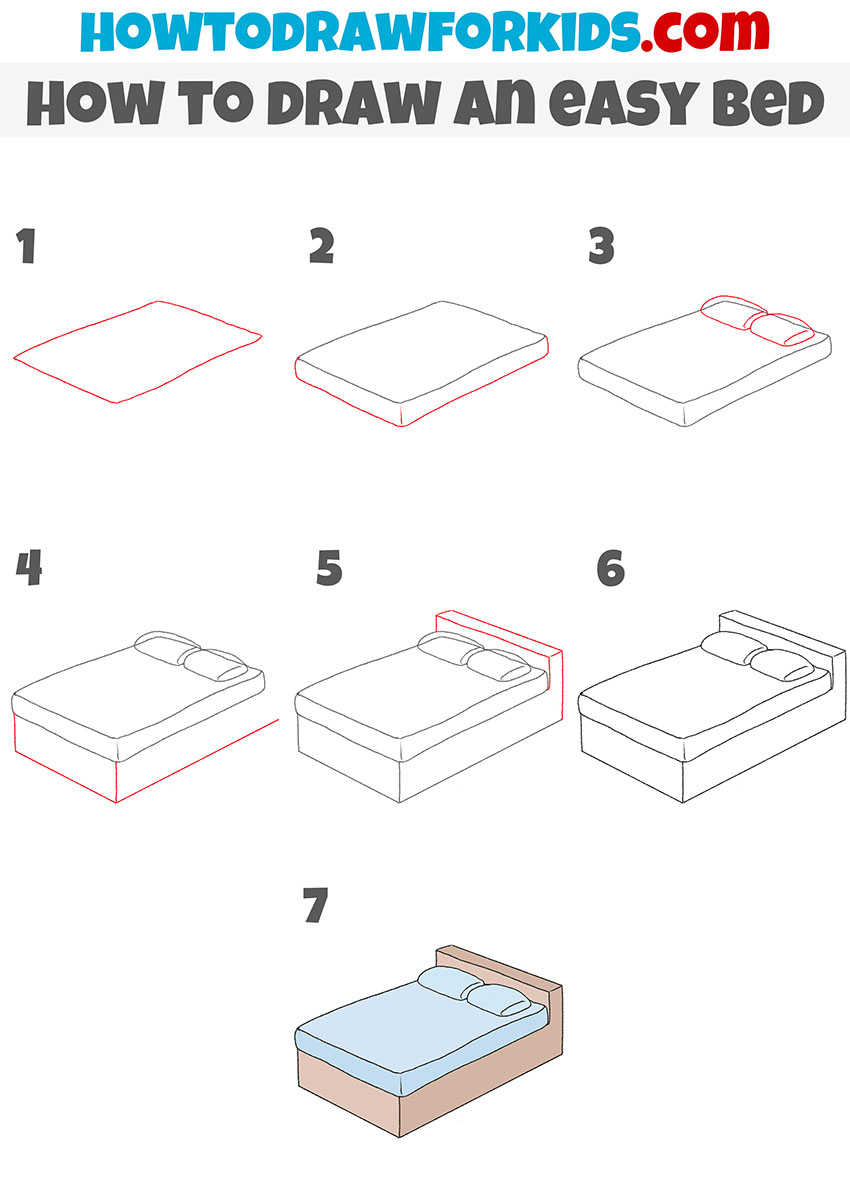
How to Draw a Bed
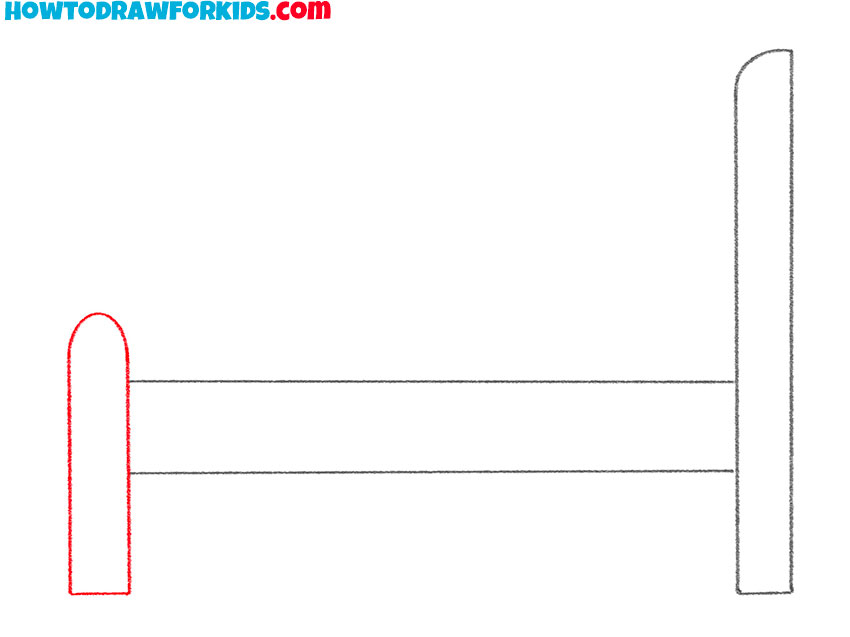
- Draw the outline of the bed’s main part.
To do this step you need to draw two same straight horizontal lines parallel to each other.

- Add the headboard.
On the right side, draw a figure that looks like a rectangle with one rounded corner.

- Add the second headboard to the bed.
On the left side, draw a figure using straight and curved lines.
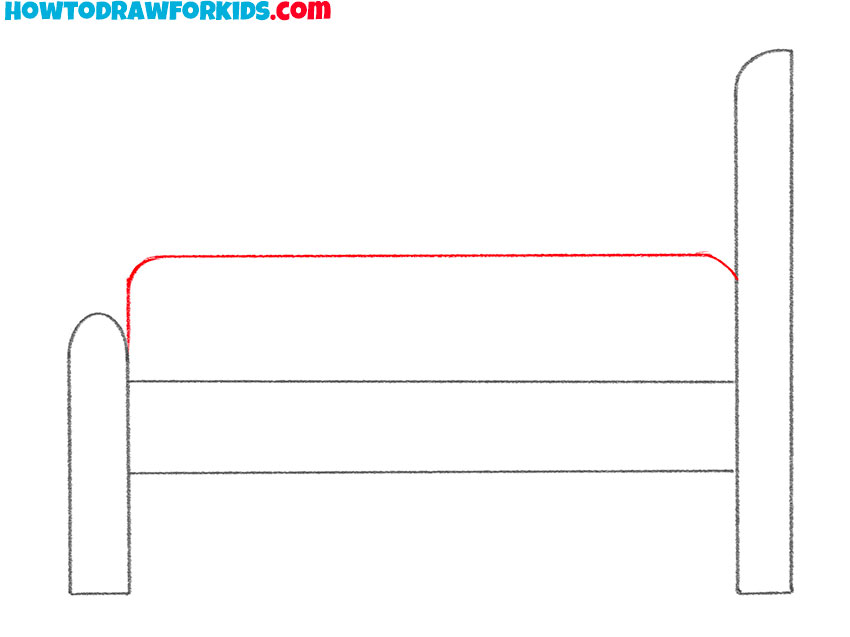
- Depict the mattress on the bed.
Draw the mattress above the previously drawn bed’s main part, using straight and curved lines.
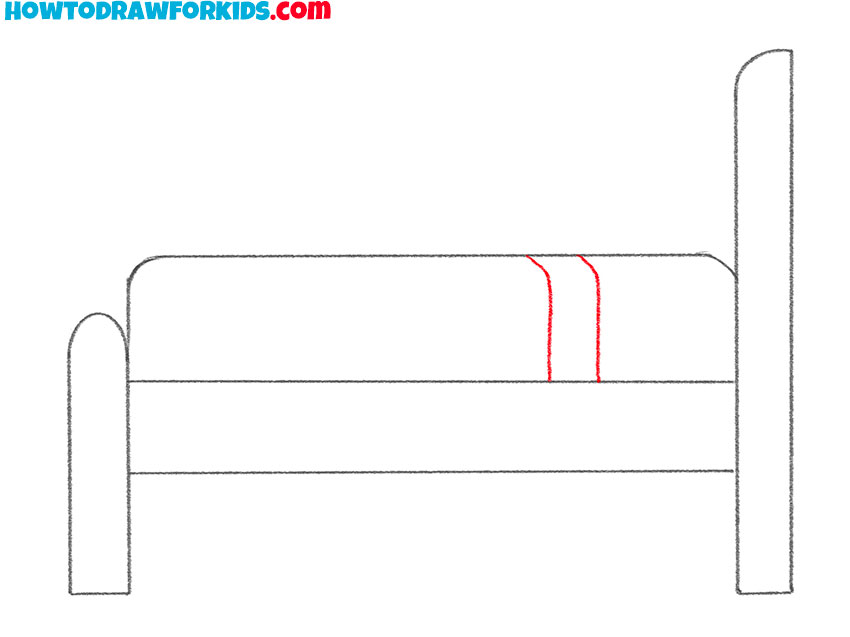
- Add the outline of the quilt.
On the previously drawn mattress, draw two same curved lines.
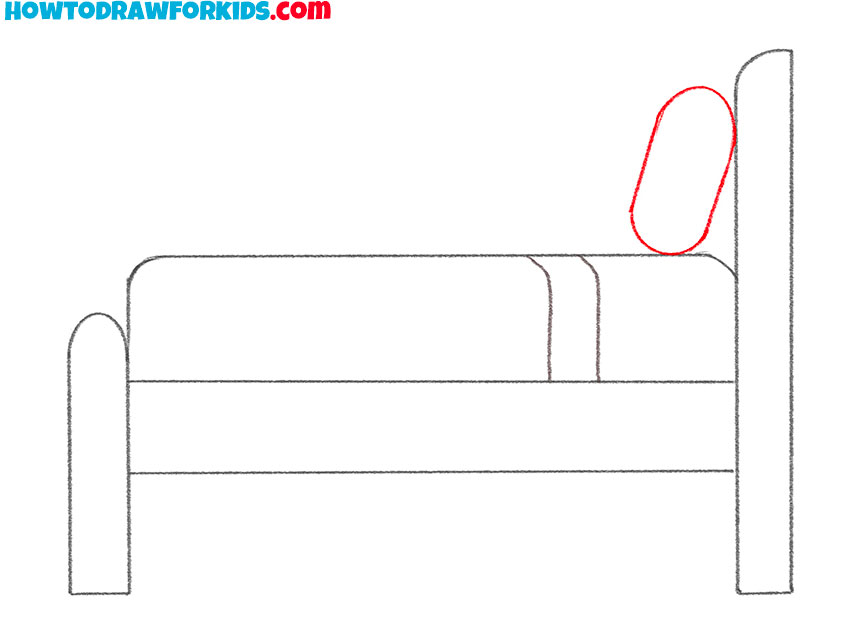
- Outline the pillow.
To depict this detail, you need to draw a figure that looks like an elongated oval.
- Color the drawing.
To color the bed, you should use shades of blue and brown.
Additional Content
Guess what? I’ve created a free downloadable PDF of our bed drawing lesson just for you. It’s a compact version that’s easy to follow, with step-by-step instructions that you can take with you on all your adventures. Next time you’re away from Wi-Fi, no worries—you can still learn to depict a bed with this PDF.
It’s great for quiet time, art class, or whenever you feel like sketching. Download your PDF and you’ll always have a way to practice and improve your drawing, wherever you may be!
Alternative Drawing Method
To keep your artistic journey exciting and challenging, I’ve crafted another drawing method for a bed. This new technique is designed to help you practice further and enhance your drawing skills. With this method, you’ll explore new ways to illustrate comfort and coziness, adding depth and detail to your bedroom scenes.
How to Draw a Bed from Another Angle
In this drawing method we switch a new perspective with the angle of the bed from top to bottom.This gives us the chance to include a bit more detail, like the pillow shapes and the way the blanket lies on the bed. Although we’re incorporating more details, the process is still simple, condensed into seven clear steps.
It’s an uncomplicated yet effective way to depict a bed from above, boosting your skills in depicting objects from various angles. Let’s draw together and discover how an overhead perspective can add depth to your artwork!
Guide to Common Bed Drawing FAQs
You’ve just finished drawing a bed from two cool perspectives. You might have some questions, and that’s totally awesome because asking questions is how we learn. So, here are some FAQs that might pop up after our drawing session. If you have more, just ask – I’m here to help!
- Why do we start with a rectangle? Because it helps us create the bed’s shape easily!
- Can I add more pillows? Absolutely, the more, the cozier!
- Is it okay if my bed looks different? Every artist has their own style, so yes!
- What if I make a mistake? No problem! Erase a little, and you’re good to go.
- Can I color my bed differently? Sure thing, let your imagination run wild with colors.
Remember, every question you ask is a step towards becoming an even better artist. And don’t forget, practice makes perfect, so keep drawing and having fun with it. Can’t wait to see what creative beds you’ll draw next!
Conclusion
What a cozy journey we’ve had drawing beds! But don’t let your pencils rest just yet—there’s a whole ocean of lessons waiting for you on my site. Check out my with my dolphin drawing tutorial, or maybe even get a little mischievous learning to draw the Grinch. There’s so much more to create and explore!
Make sure to follow me on social media to catch all the new lessons I post. You wouldn’t want to miss out on the artistic fun that’s coming your way, right? Keep drawing, keep dreaming, and I’ll see you in our next adventure!