How to Draw a Feather
Art time is fun time, and today, I’m going to teach you three super simple and exciting ways to learn how to draw a feather. Grab your favorite pencils, and let’s create some feathery masterpieces together!
Let’s make art as playful as a game! Join me, as we tackle three entertaining methods to draw a feather. You’ll be amazed at how a few simple lines and curves become a beautiful, detailed feather with my easy instructions!
How to Draw a Feather: Basic Information
Ready to learn how to draw a feather like a pro? It’s like having a magic wand that lets us capture the beauty of birds on our very own piece of paper. We’ll start with a swoosh and a swish, and before you know it, we’ll make a feather that looks so light, it could almost float away!
Now, let’s play detective and spot all the tiny details that make a feather so special. Is it curvy? Is it fluffy? Each line we depict will be a clue that helps us solve the mystery of the perfect feather. And guess what? Your pencil is the best tool for this fun adventure!
By the time we get to the end, you’ll see how these easy peasy steps come together. We’ll draw a feather that’s so light and delicate, you’ll think it could lift your drawing right off the table!
Feather Drawing Tutorial
Materials
- Pencil
- Paper
- Eraser
- Coloring supplies
Time needed: 30 minutes
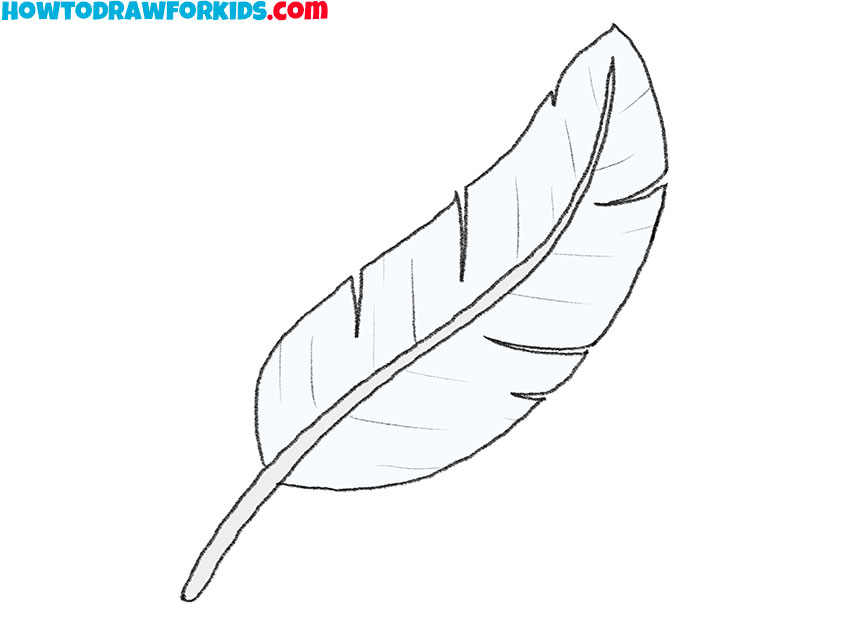
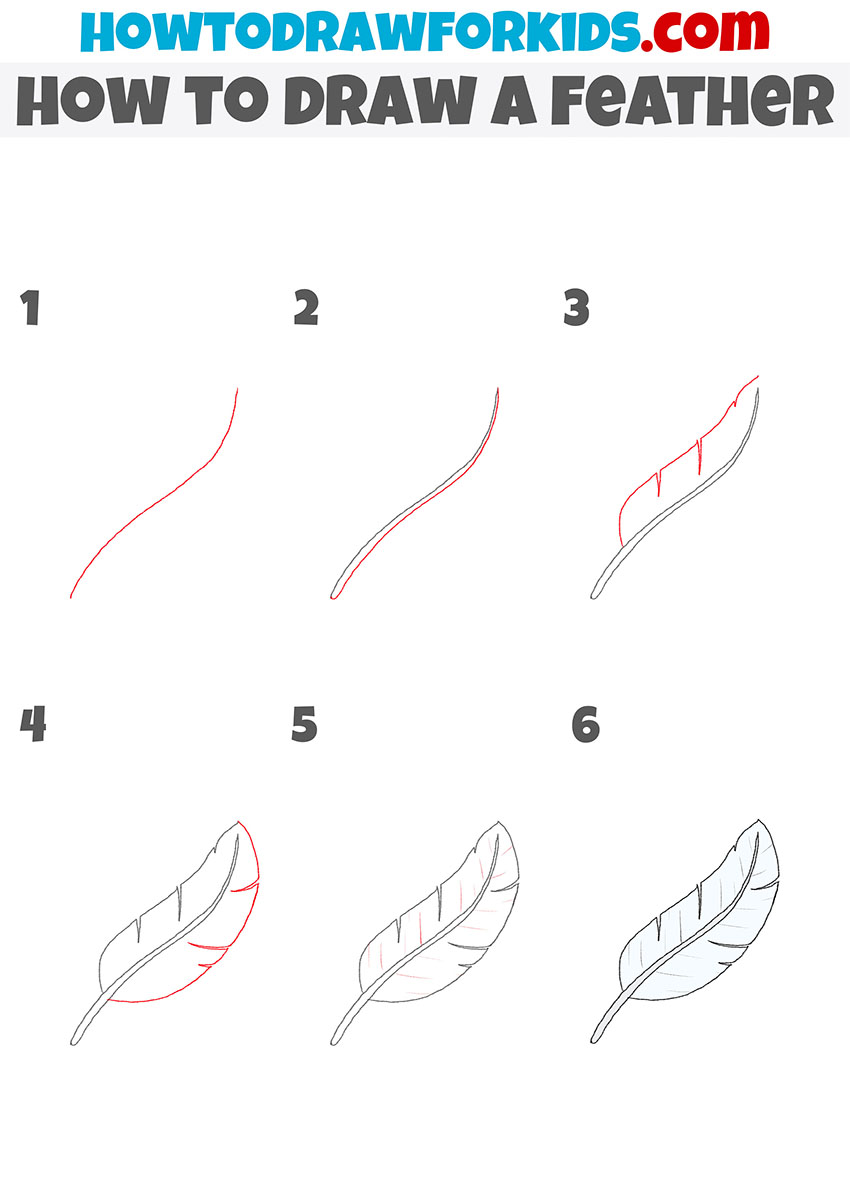
How to Draw a Feather
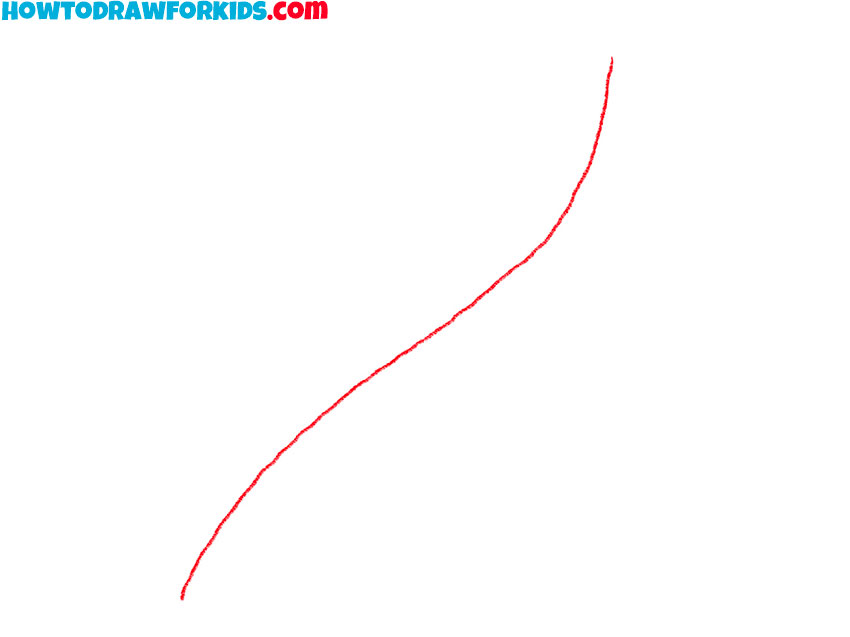
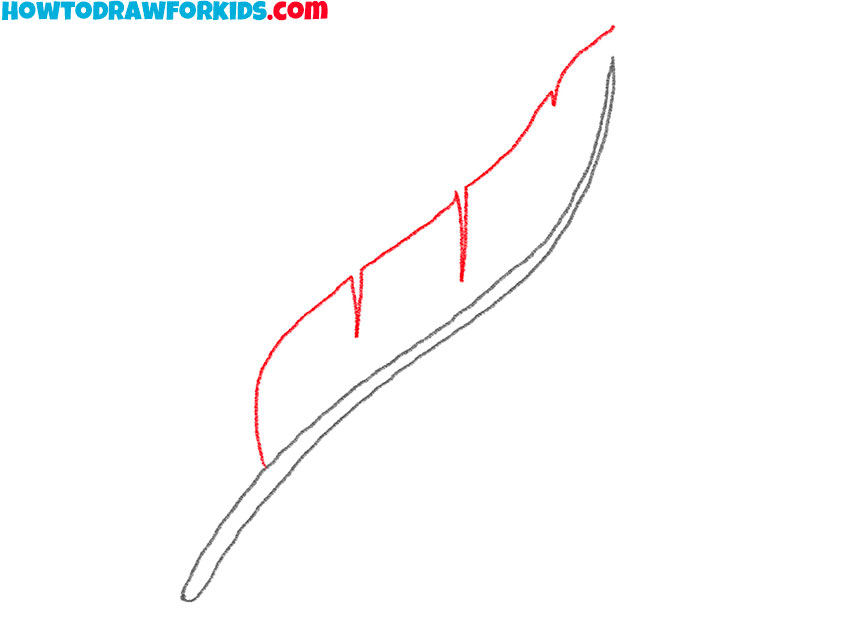
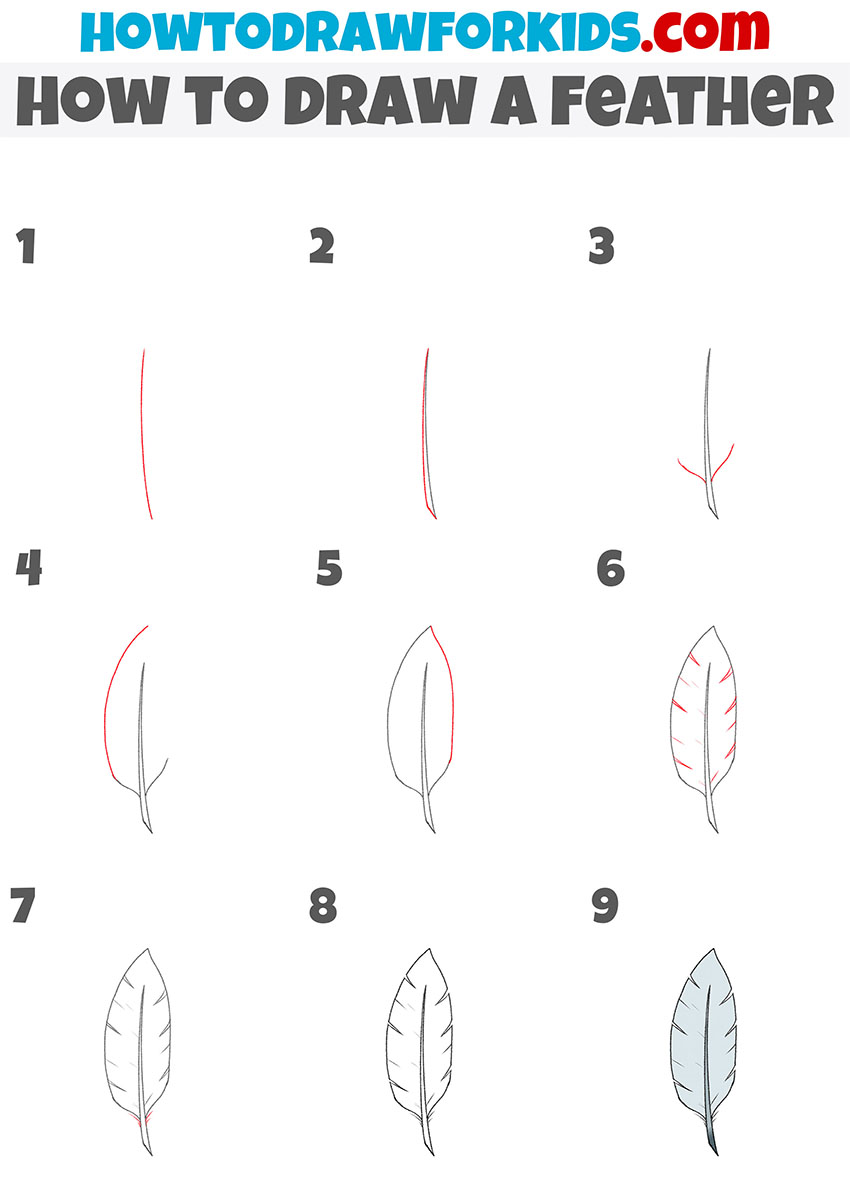
- Draw the outline of the rod.
Begin by drawing a gentle, slightly curved line that tilts to the right. This line will serve as the central shaft, or rachis, of the feather, which is the backbone that holds the feather together.
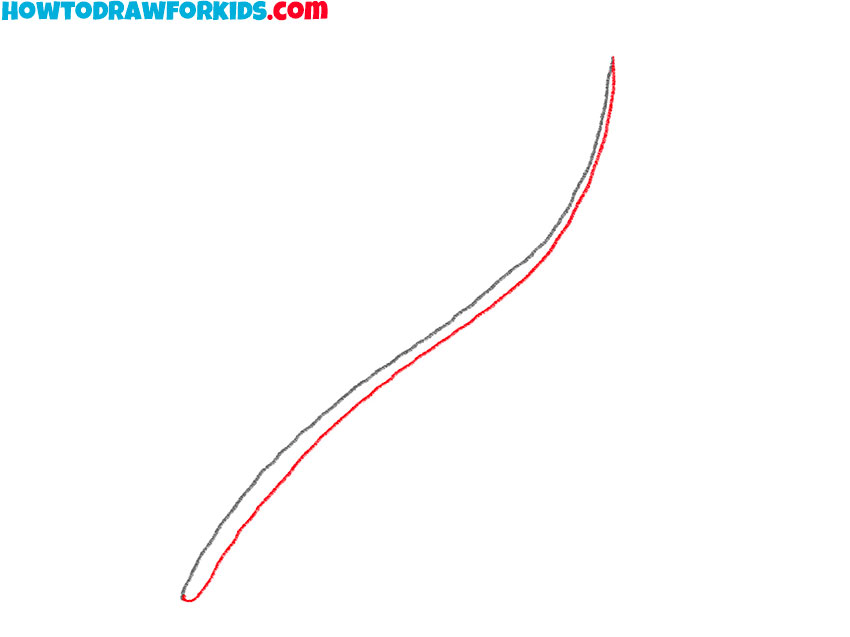
- Depict the thickness.
Once the central shaft is in place, draw a second line parallel to the first, creating the basic shape of the feather. This line should mirror the curvature of the central shaft.
- Add the thin bristles on one side.
At this stage, you will begin to add details to the feather’s vane. Starting from the top of the feather, draw short diagonal lines coming off the central shaft, alternating from side to side.
- Draw the thin bristles on the other side.
Repeat the previous step and draw similar bristles on the underside of the feather. The lines do not need to be perfectly symmetrical, as natural feathers often have slight variations.
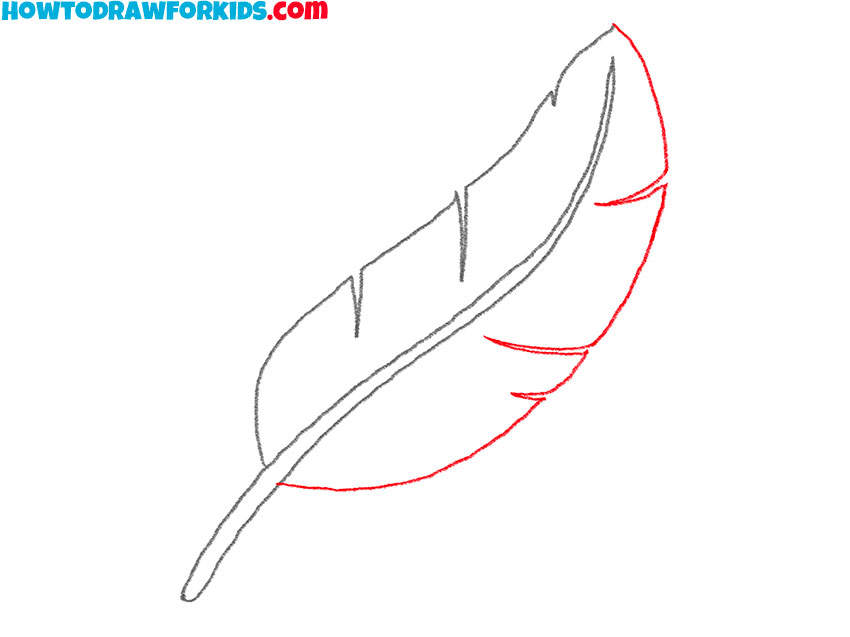
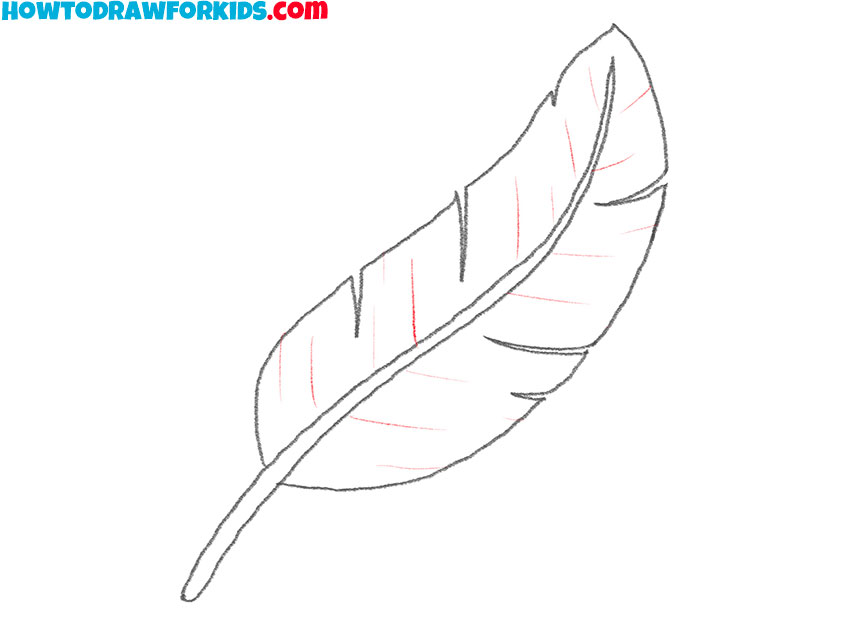
- Detail the feather.
We won’t add too many details. However, a few oblique lines inside the overall outline are what you need before you start coloring.
- Color the feather.
And now you can start coloring. As you know, there are a lot of colorful birds, so you can choose any, even the most variegated colors. But, the base of the feather has a light beige color.
Additional Content
Art pals, I’ve got a special surprise! To make sure you can draw feathers whenever inspiration strikes, I’ve made a free PDF file of our lesson. This compact guide is a burst of creative fun, ready to go wherever you do.
Even when you’re offline, this PDF will be right there with you, full of easy-to-follow steps and tips. Download it now, and you’ll always have a piece of our art class, even when the internet is off on its own adventure!
Alternative Drawing Techniques
To make sure your art skills really take flight, I’ve gone ahead and crafted a variety of alternative techniques for drawing feathers. Each technique is a new challenge, designed to help you practice more and polish your abilities.
They’re fun, they’re different, and they’ll give you a whole new perspective on how to approach drawing. So, give them a whirl, and watch your art skills soar to new heights!
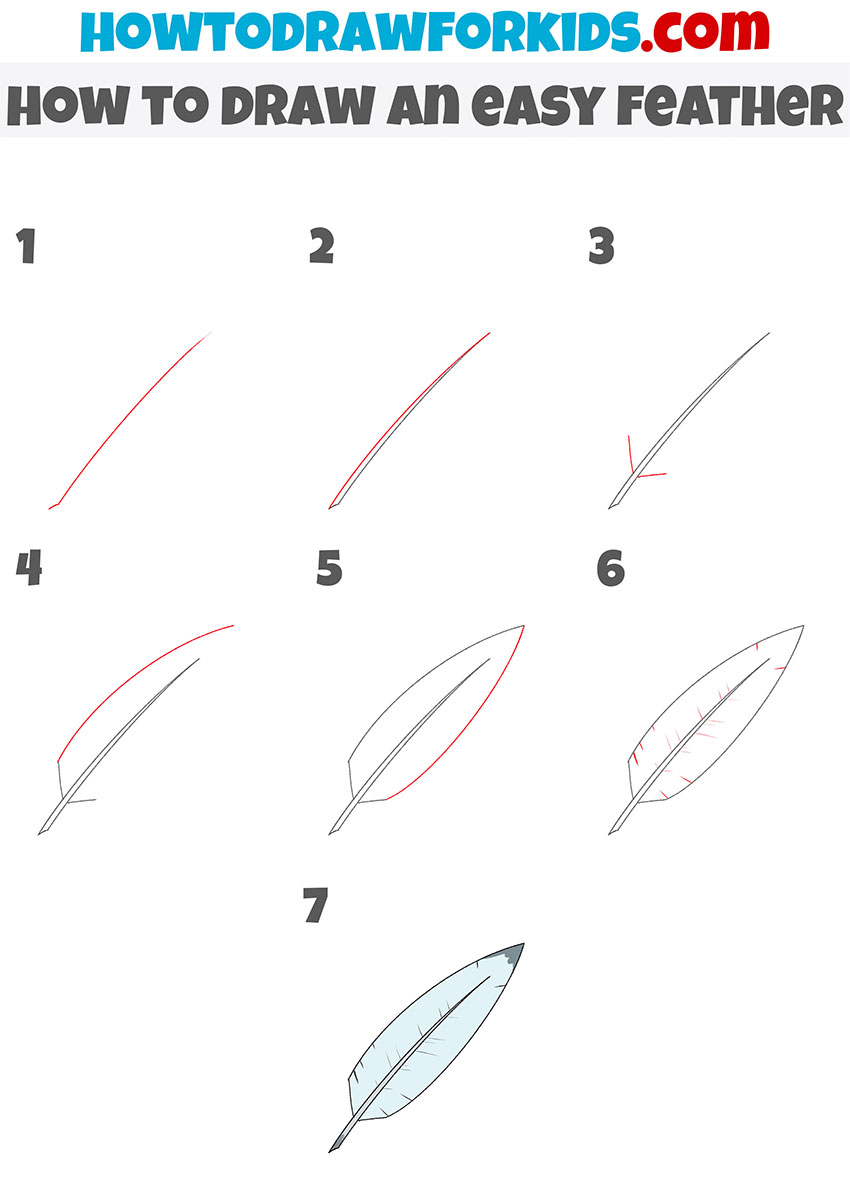
How to Draw an Easy Feather
This drawing technique begins with a simple central line that defines the spine of the feather. Then, step by step, the method adds elements of the feather’s structure, such as the shaft and vane, gradually building up to the detailed texture of the barbs.
The progression from basic shapes to more detailed features allows young artists to develop their drawing incrementally, focusing on one aspect of the feather at a time. This approach is particularly effective for beginners as it simplifies the drawing process, making it less intimidating and more engaging.
How to Draw a Feather for Kindergarten
So, this method is tailored for kindergarten, with a focus on ease. It starts with a single, curved line to establish the feather’s shape, creating a base that’s straightforward for young children to follow. The next steps involve adding the spine and outlining the feather’s edges, which reinforces the concept of symmetry and gentle curves.
As the method progresses, short lines are added to represent the feather’s texture, a step that enhances fine motor skills without overwhelming with detail. The final touch is a gentle shading that gives a sense of volume, perfect for little hands to practice.
Conclusion
Congratulations on finishing your feather drawing! You’ve done an incredible job. Now, are you ready for more drawing fun? My website is full of cool lessons that you’ll love. Why not try drawing a mermaid swimming in the deep blue sea, or learn to draw a bow for your next birthday gift?
And the fun doesn’t have to stop here – follow me on social media for the latest news and never miss out on new lessons that are just as fun as this one. I’m always here to help you make your art dreams come true!


It was amazing I learnt so much