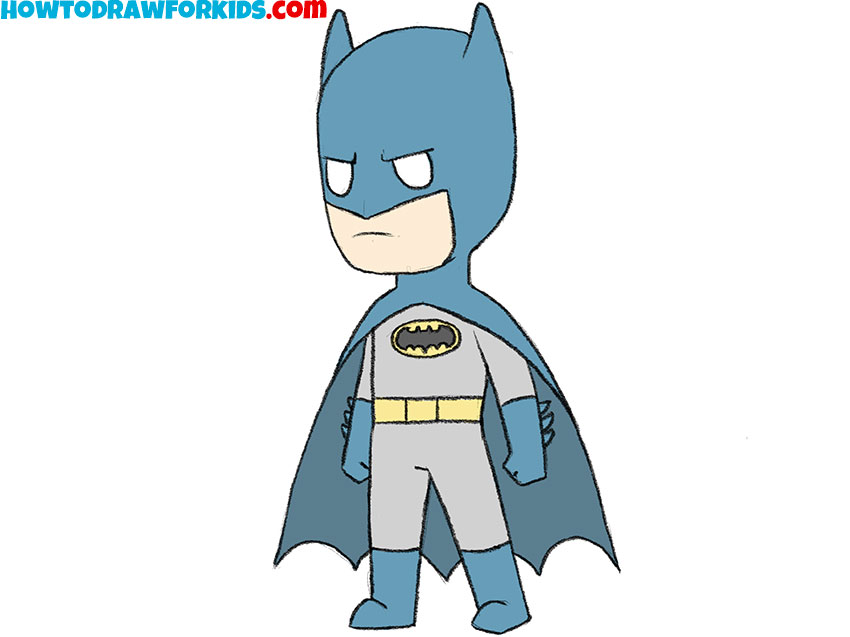
How to Draw a Comic Character
This tutorial teaches you how to draw a comic character using Batman as an example with easy, beginner-friendly steps.
How to Draw a Comic Character: Basic Information
Comic book characters can look very different, but most of them are built in a similar way. In this tutorial, I’ll show you a simple method that you can use to draw a classic comic character step by step.
Don’t worry about making every line perfect. Just follow the steps one by one. After that, you can easily change the mask, costume, facial expression, or colors to create a completely different comic book hero or villain.
This tutorial is based on my Batman drawing tutorial, but it has a different purpose. I’ll use that drawing as an example to show you the features that make a character look like a classic comic book hero.
Comic Character Drawing Tutorial
Materials
- Pencil
- Paper
- Eraser
- Coloring supplies
Time needed: 40 minutes
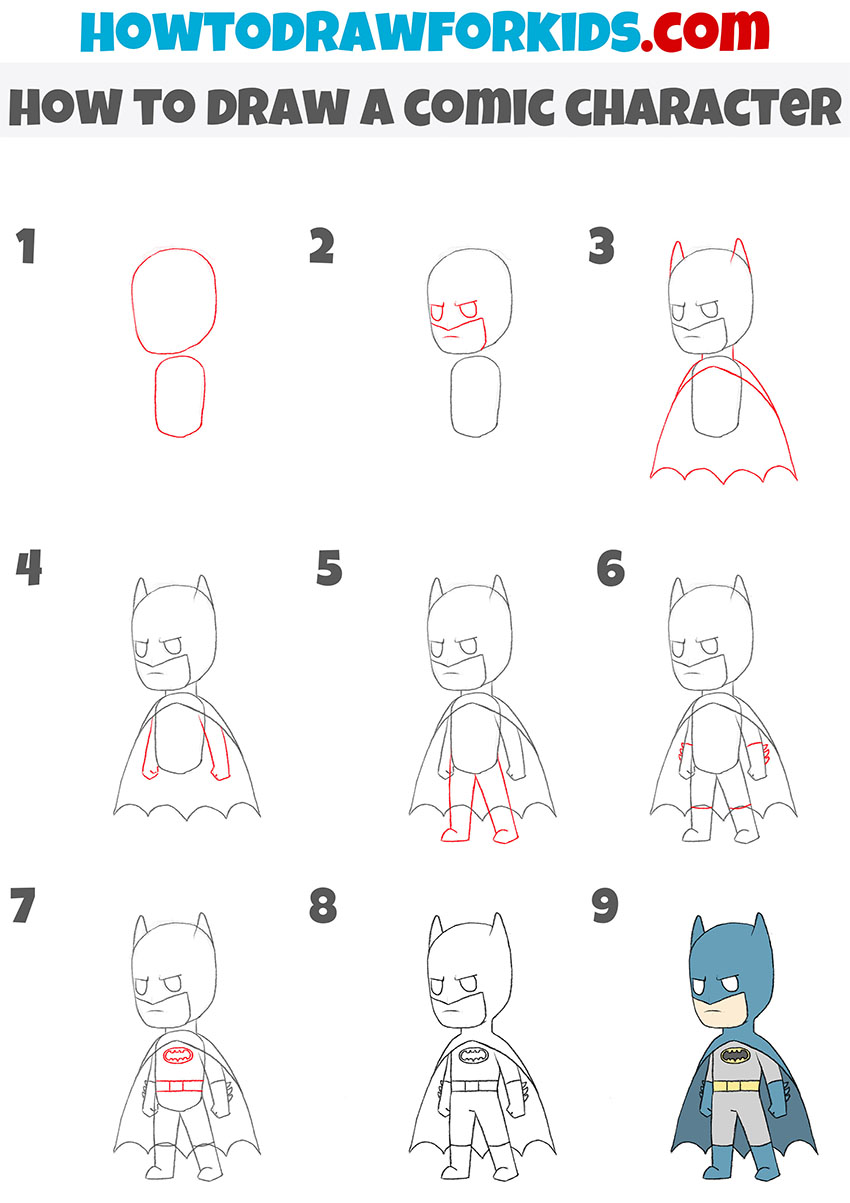
How to draw a comic book character step by step
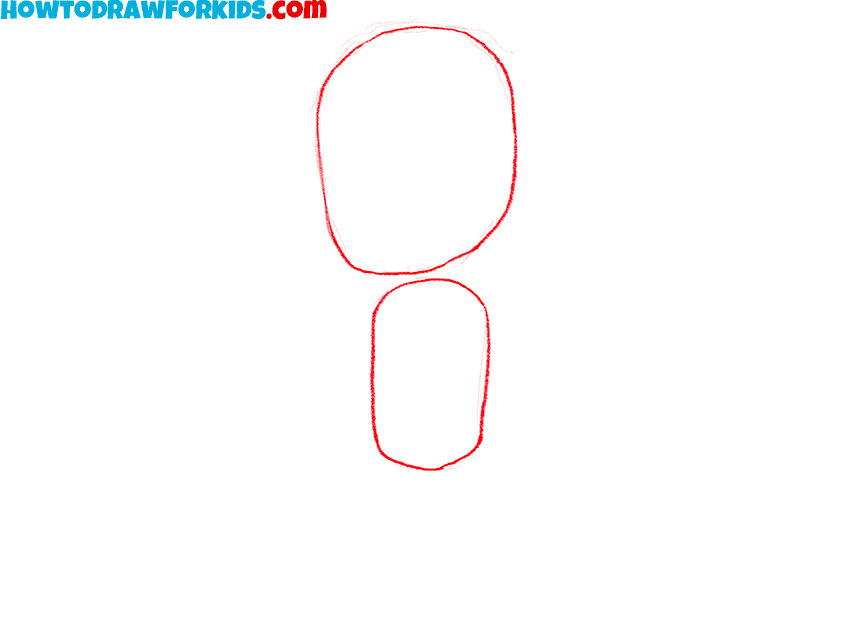
- Sketch the head and torso of the comic character.
Start by sketching the basic outlines for the character’s head and torso. Draw an oval for the head and a rounded rectangle for the torso, ensuring they’re proportionate and well-aligned.
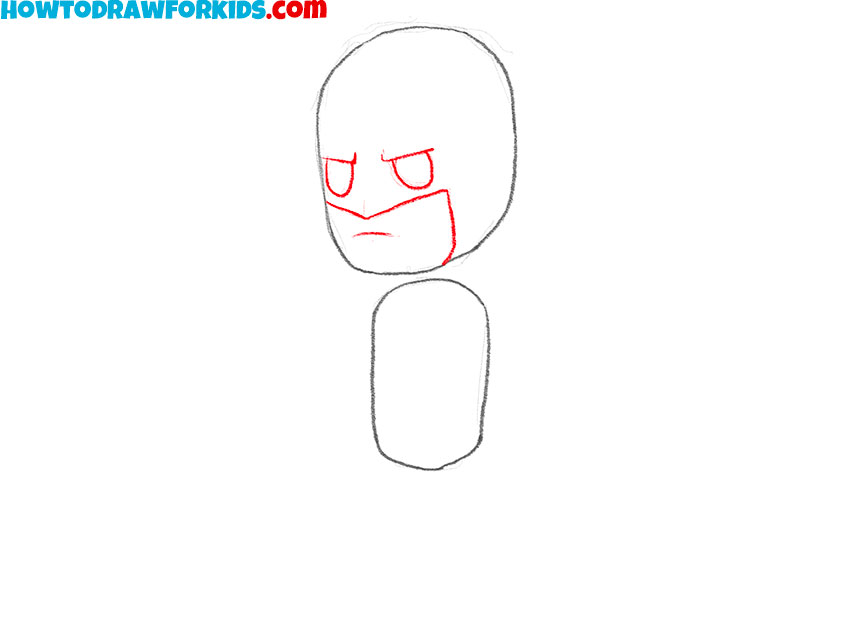
- Draw the eyes and the opening of the mask.
Sketch two slanted ovals for the eyes within the head’s oval, and add the mask’s upper edge, making sure it follows the contour of the head and accentuates the eyes’ expression.
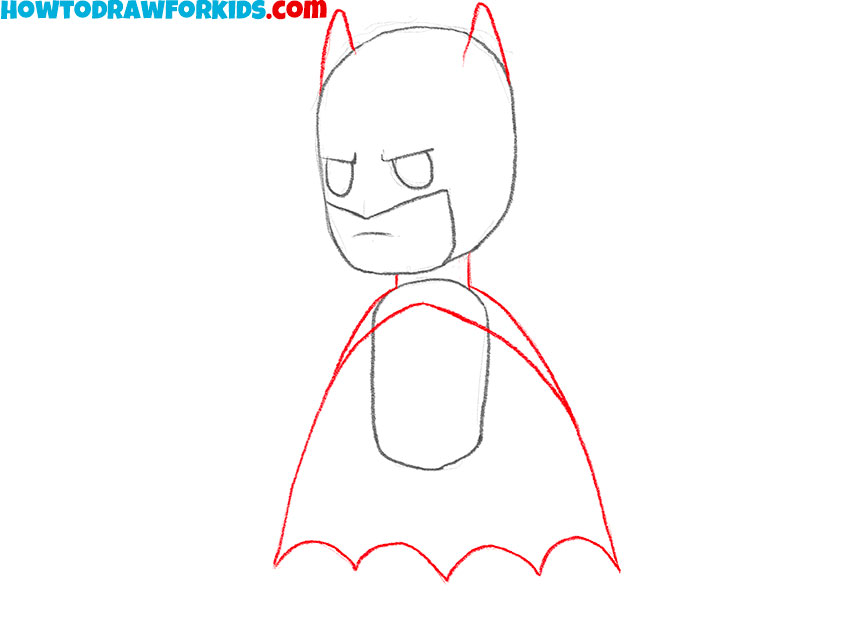
- Draw the superhero’s cape and refine the mask’s details.
Outline a flowing cape that drapes over the shoulders and down, and add the pointed ears giving your character a real super heroe’s silhouette.
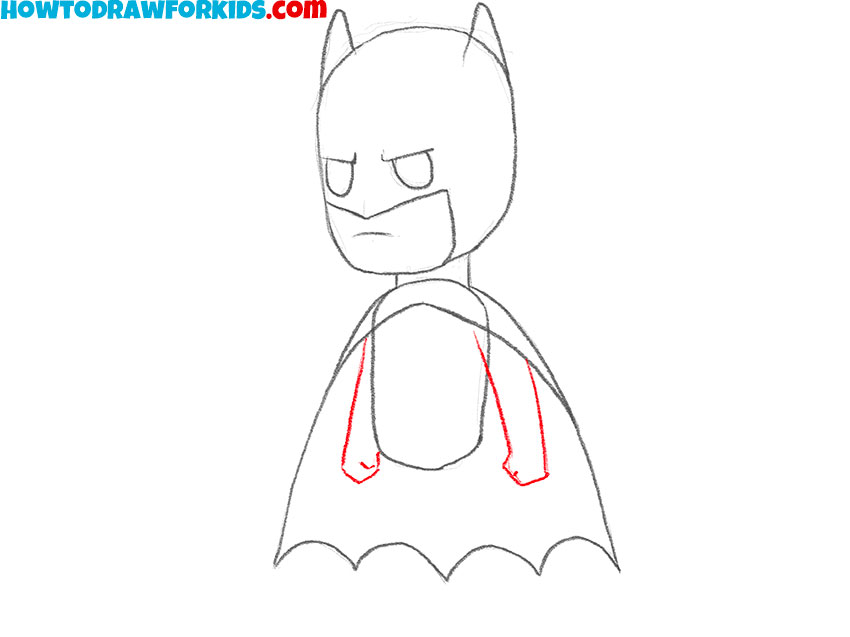
- Add the arms.
Sketch the arms, considering the character’s heroic build. In my example, the character’s hands are clenched into fists, but you can illustrate a different hand position in your comic character art.
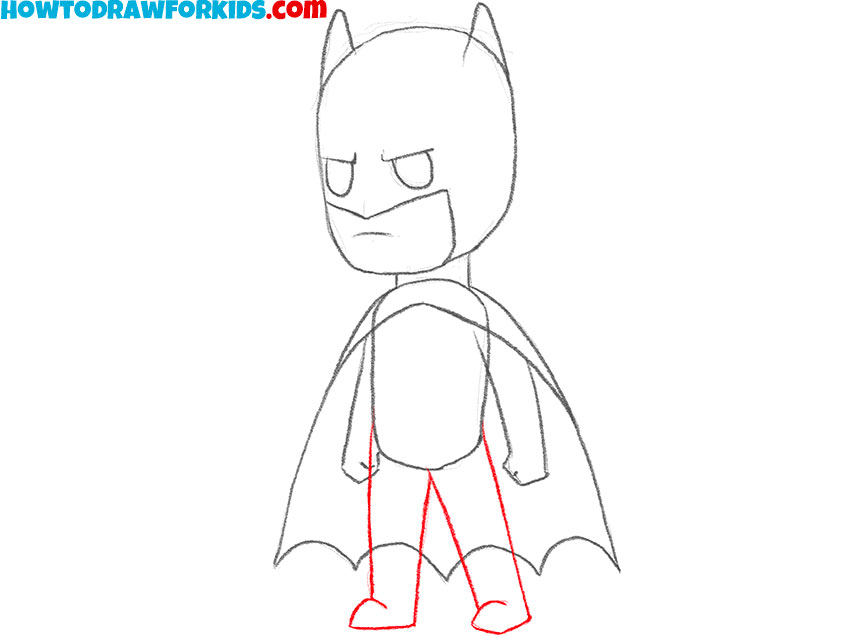
- Form the legs of the character.
Position them to give the impression of a hero who is grounded yet ready to leap into action. The legs should have a subtle bend, suggesting potential movement.
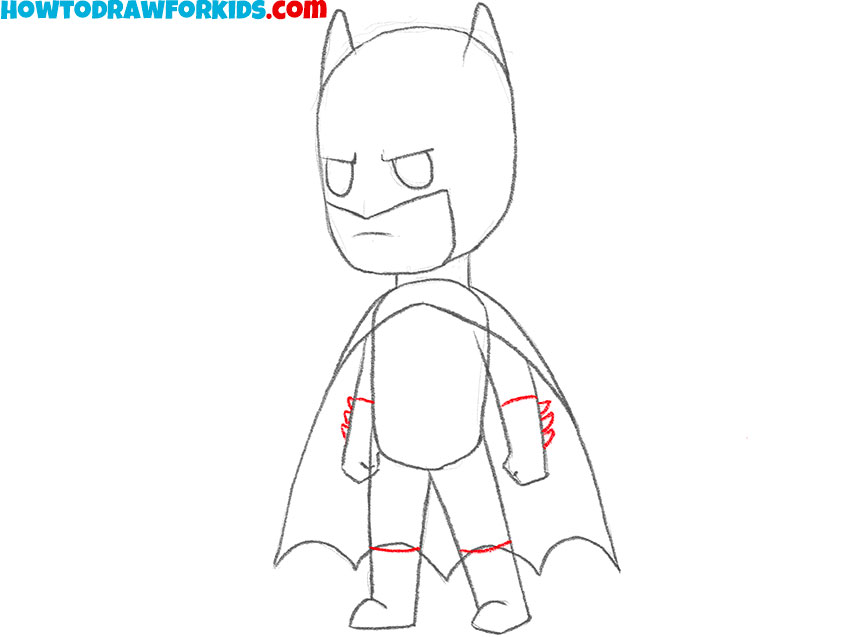
- Detail the costume of the character.
Flesh out the clothing details, highlighting the iconic gloves and boots. These should be drawn with care, as they are not just accessories but vital parts of the hero’s arsenal, crafted for combat and heroics.
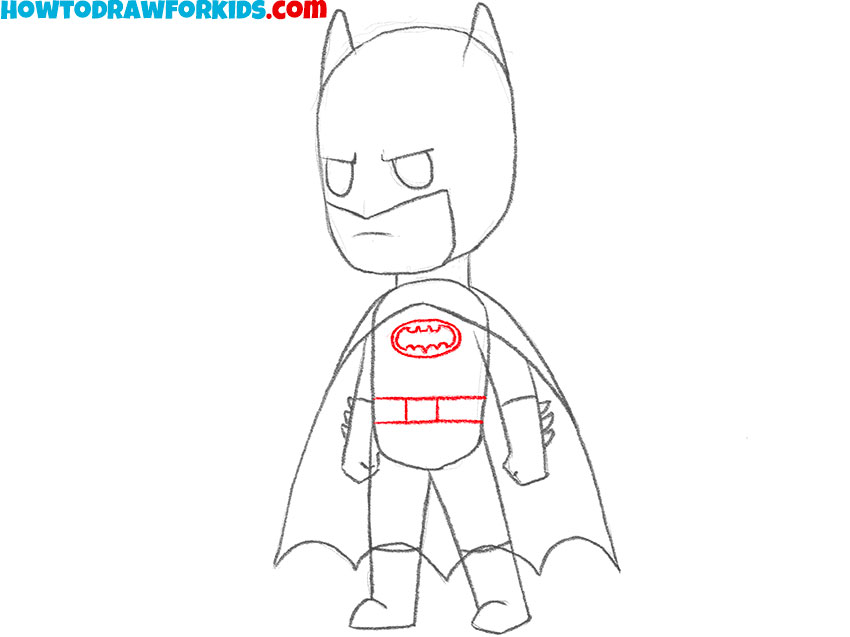
- Draw the emblem and utility belt.
The logo must be bold and central on the chest, while the belt should be utilitarian, filled with gadgets essential for a hero’s duty.
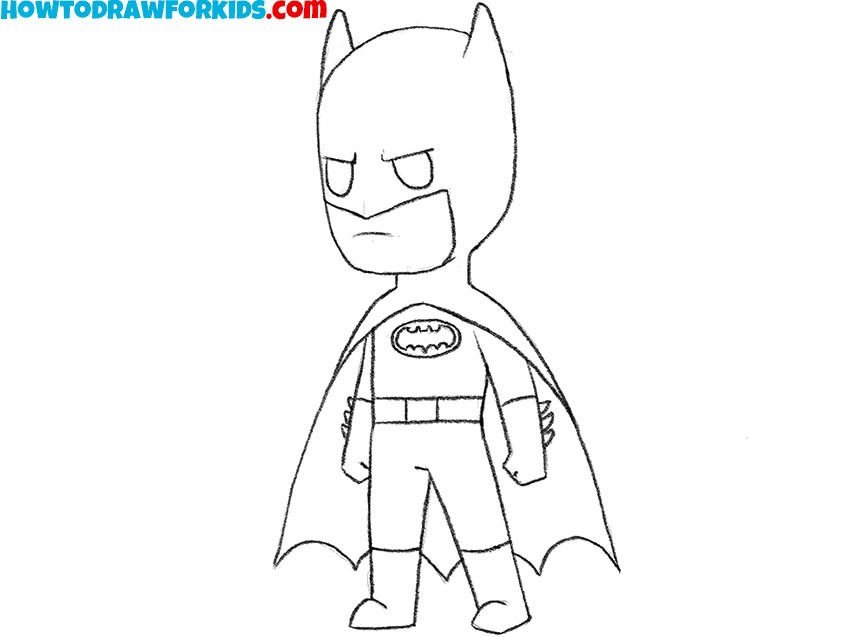
- Erase the initial sketches to clean up the drawing.
This step is like revealing the true identity of the hero, removing any unnecessary lines that hide the crisp details of the character’s figure.
- Add some colors to your comic book character.
Finish with coloration, selecting a palette that encapsulates the hero’s persona. Apply the hues with precision, ensuring they bring out the costume’s design and infuse the character with life and vigor.

Additional Content
I’ve also prepared a free PDF version of this tutorial. It includes a simplified guide, a coloring page, a tracing worksheet, and a grid drawing worksheet.
Download it using the link below and practice drawing comic book characters anytime, even without an internet connection.
Advanced Techniques for Aspiring Artists
Once you’ve finished this comic character, try changing some of the details instead of drawing the same character again.
A new mask, another emblem on the chest, or a different cape can completely change the way the character looks. You don’t have to redesign everything at once – even one small change can create a brand-new hero.
Pay attention to the silhouette of the character. If you can recognize the hero just by looking at the outline, you’re moving in the right direction.
Broad shoulders, a long cape, pointed ears, or large gloves all help make comic book characters easy to recognize, even before you add colors and details.
You can also experiment with the pose. Try drawing your character standing on a rooftop, landing after a jump, or running toward the viewer.
Comic book characters are rarely standing completely still, so changing the pose is one of the easiest ways to make your drawings look more interesting.
Finally, think about the colors. Bright contrasts, a simple costume, and one or two recognizable symbols usually work much better than adding too many small details.
What’s Next?
Now that you’ve learned how to draw a comic character, try drawing the opposite side of the story with my tutorial on how to draw a villain.
Comparing heroes and villains is a great way to understand how costumes, poses, and facial features change the appearance of a character.
You can also explore my Comics drawing collection for many more step-by-step tutorials featuring heroes, villains, and other comic book characters.
If you enjoy coloring as much as drawing, don’t miss my DC coloring pages collection. It’s a fun way to practice colors while spending more time with your favorite comic book characters.
If you enjoyed this tutorial, share it with your friends, parents, classmates, or art teacher so they can draw along with you.
Don’t forget to follow me on social media to see new tutorials, and leave a comment below if there’s another comic character you’d like to learn how to draw.