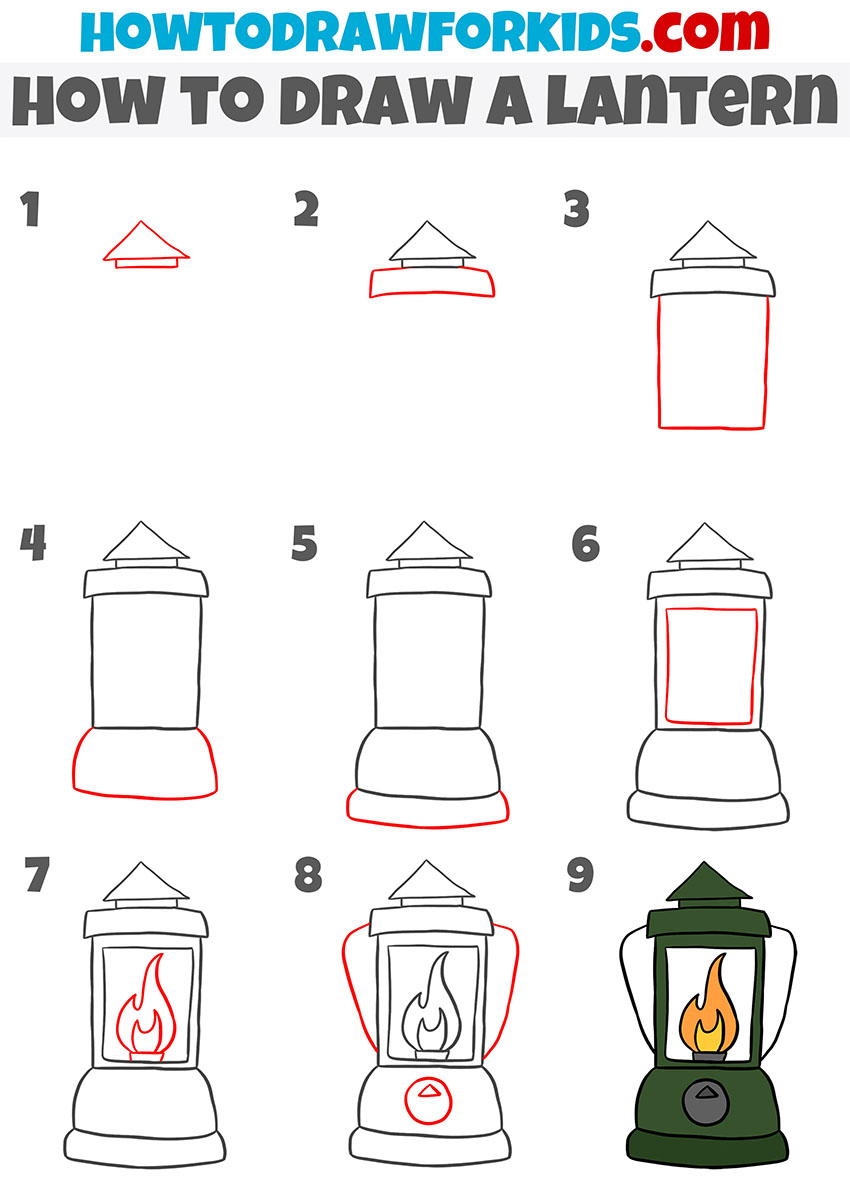
How to Draw a Lantern
There are objects that exude a special style and charisma, and now we will reproduce this on paper using a guide on how to draw a lantern.

In this lesson, you will learn how to draw a lantern. This is a great drawing object. The lantern illuminates the surrounding space and you cannot do without this item in the dark.
In this picture, you see a kerosene lantern, which has a very simple design. There is an upper part here, which is usually protected from the wind by the glass. There is also a lower part – this is a container into which kerosene is poured. At the bottom there is a small round lever – this is the mechanism that ensures the movement of the wick.
Also, the flashlight has comfortable handles on the sides, for which it is convenient to hold. You must depict all these elements in your drawing. With this step-by-step guide, you will do it easily and quickly, since this lesson is adapted for beginners.
Materials
- Pencil
- Paper
- Eraser
- Coloring supplies
Time needed: 20 minutes
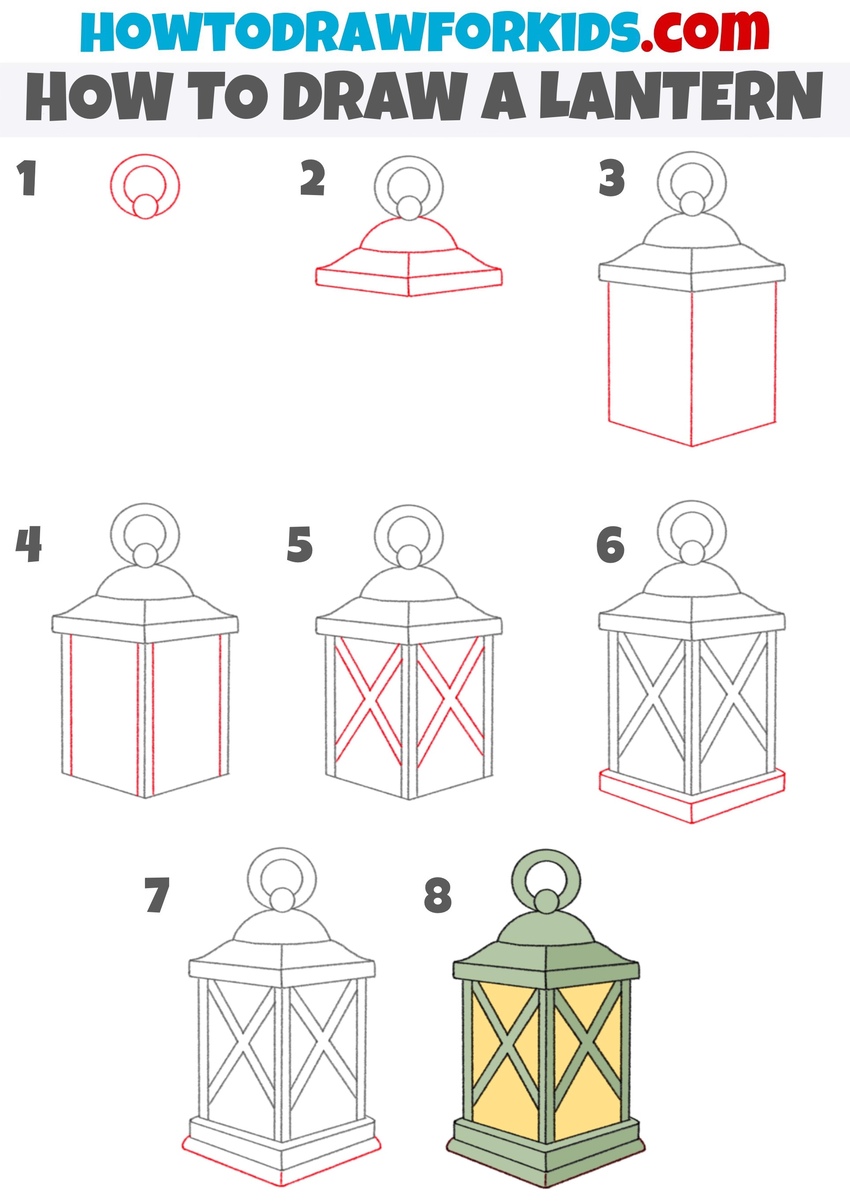
How to draw a lantern step by step
- Sketch the handle loop of the lantern.
To begin the lantern drawing, establish the small details. Start by sketching two concentric circles at the top to represent the metal ring where the lantern would hang. Inside the smaller circle, add a tiny shape to represent the upper part of the lantern’s dome.

- Sketch the dome and upper frame.
With the ring in place, construct the curved dome beneath it, which forms the lantern’s cap. Draw a smooth arc below the ring of the lantern to create the top of the dome, then extend short diagonal lines outward to form the sides of the upper frame. Connect them with horizontal lines to make the top surface look three-dimensional.
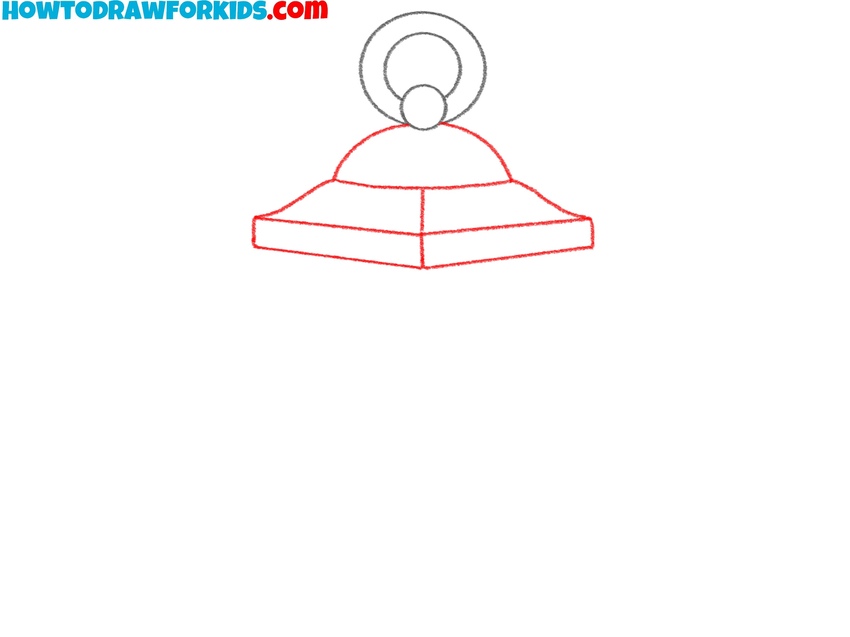
- Draw the main body of the lantern.
Now create the main body, which represents the light chamber of the lantern. From the lower edge of the upper frame, extend vertical lines downward. Connect the bottom with lines, forming a solid box-like shape that shows the lantern’s perspective. This section is the base where the glass panels will appear later.
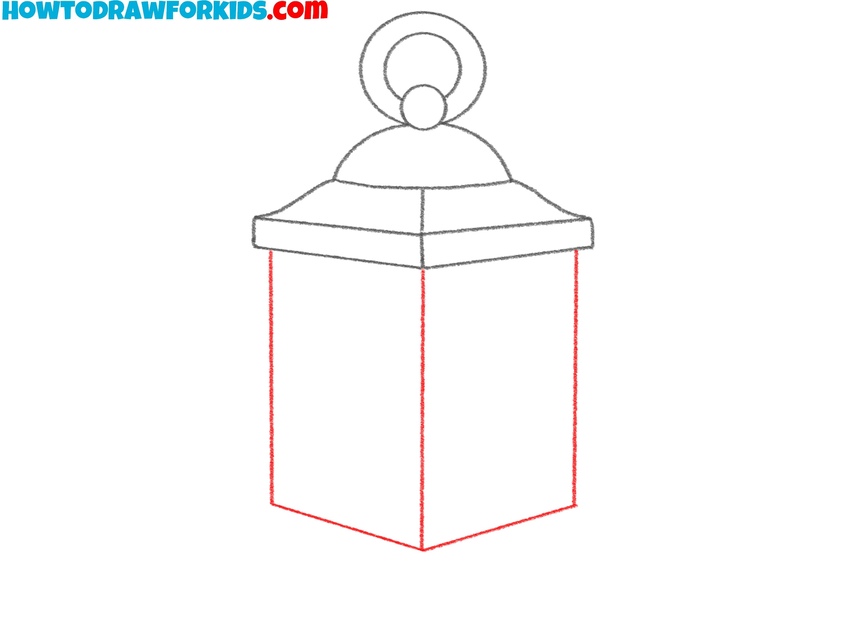
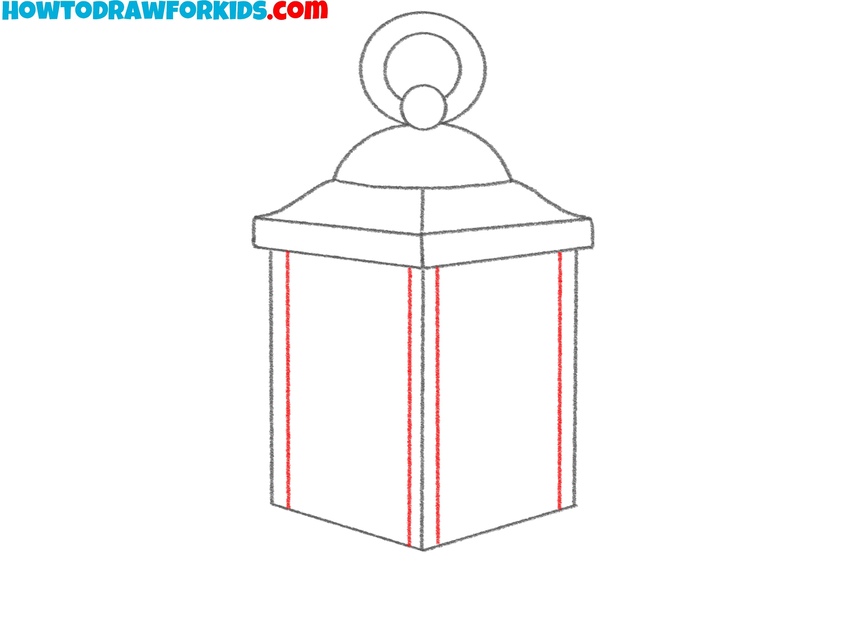
- Add the vertical frame lines.
At this stage, refine the shape by illustrating the outer frame that supports the lantern’s panels. Draw vertical strips along each corner of the lantern’s body, keeping them parallel to the existing edges. These act as the wooden or metal supports that hold the glass sections in place.
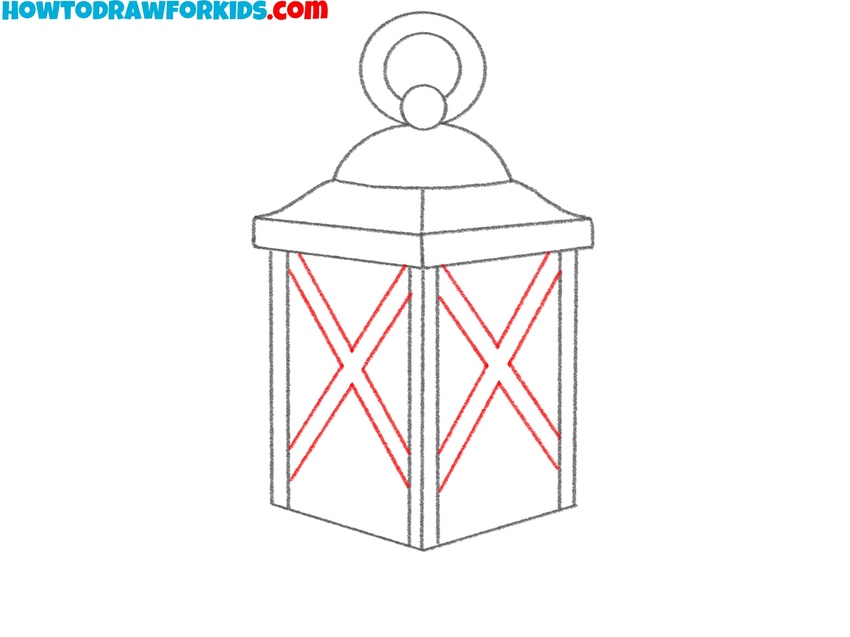
- Sketch the crossbars on the panels.
Now detail the decorative structural elements of the lantern’s central panels. Inside each rectangular section, sketch diagonal lines forming large X shapes. Each diagonal should start from one corner of the panel and end at the opposite corner.
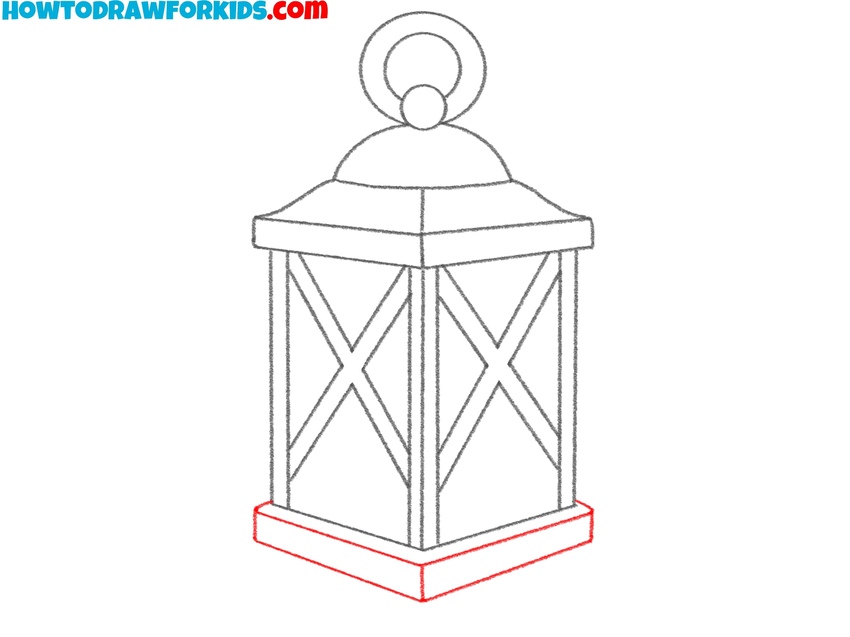
- Add the bottom platform.
Draw a thin rectangular base beneath the main parts of the lantern body, slightly wider on each side. Make sure the angles and proportions match the top frame. Let me remind you that lanterns can have completely different looks, so this part can also differ greatly from my example.
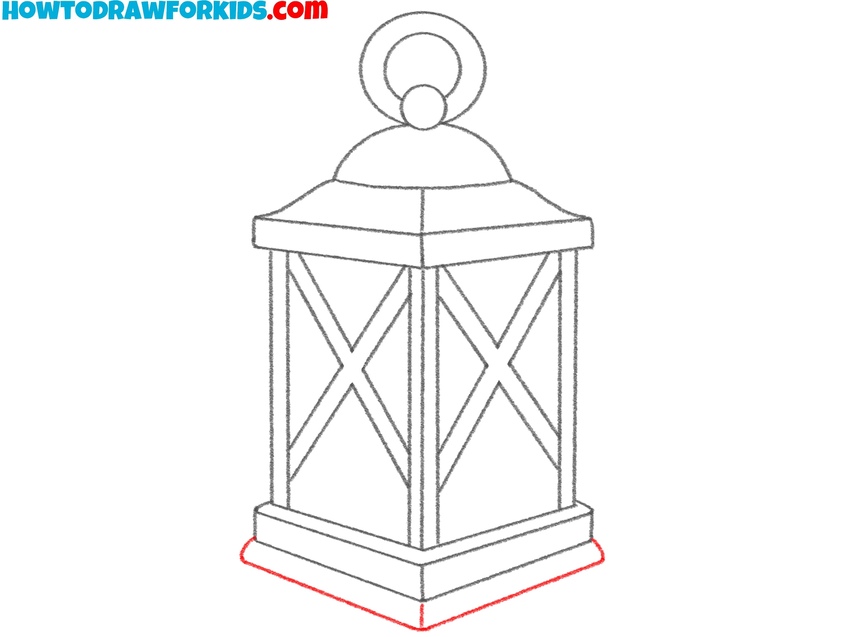
- Draw the base of the lantern.
Using straight lines, draw the base of the lantern, that should look wider than the upper parts. Finalize the lantern drawing by adjusting the shapes and removing all unnecessary construction lines. You can also reinforce the outer frame to give it more cartoony look.
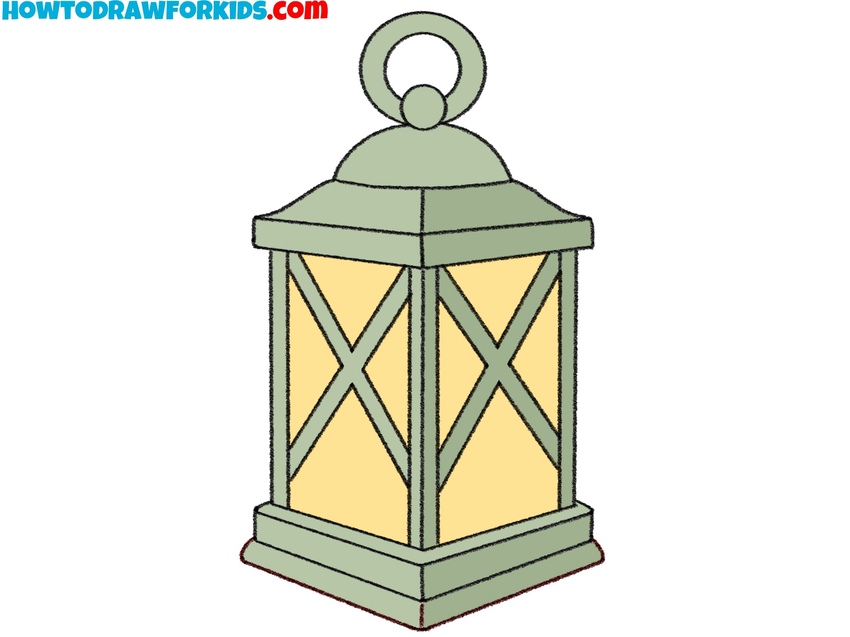
- Paint the frame, details, and glowing panels.
To complete the drawing, fill in the lantern with natural, muted colors. Paint the frame and dome in soft green or gray tones to resemble aged metal or patina, and make the glass panels a warm yellow or orange to represent glowing light. You can darken some areas under the dome and around the base to add shadows.
Easy Lantern Drawing Tutorial
To sketch the lantern, outline the top section with a small triangle resting on a narrow rectangle to represent the cap and lid. Extend vertical lines downward to form the body of the lantern, connecting them with smooth horizontal lines at the base.
Add an additional curved section at the bottom to create a base. Inside the central part, draw a tall rectangular window that will later contain the flame.
Within this space, draw fire using curved, pointed shapes. Add handles on both sides. Include a circular control knob on the lower section to complete the design.
For coloring, use deep green or gray for the lantern body and a warm gradient from yellow to orange for the flame.