How to Draw a Manga Face
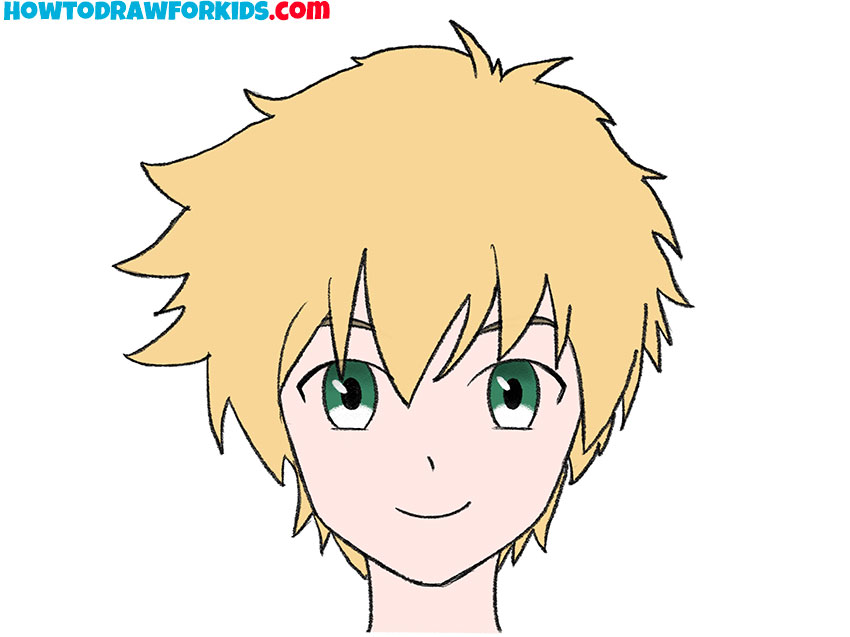
Here you will learn how to draw a manga face and capture the distinctive facial shape with messy hair and large eyes using two simple methods.
Prepare to Draw a Manga Face
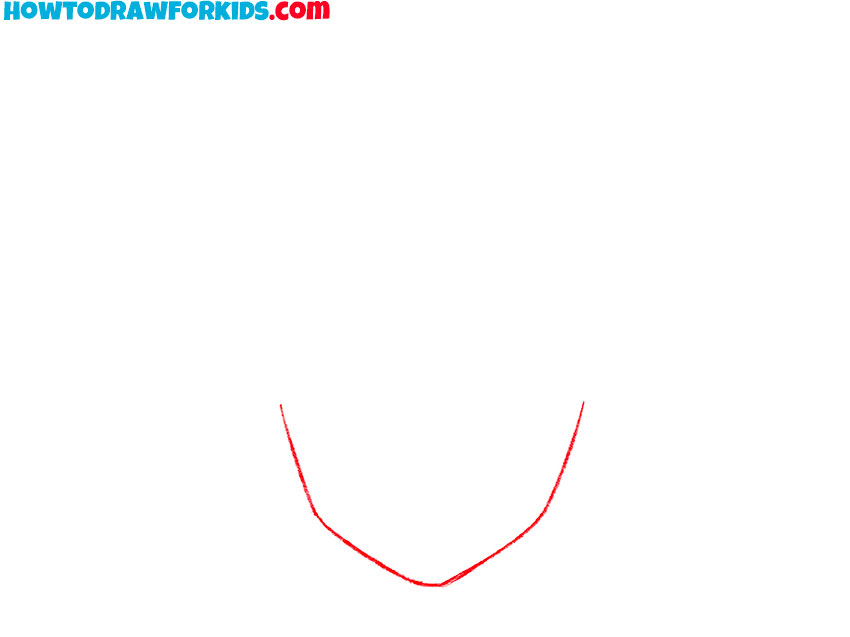
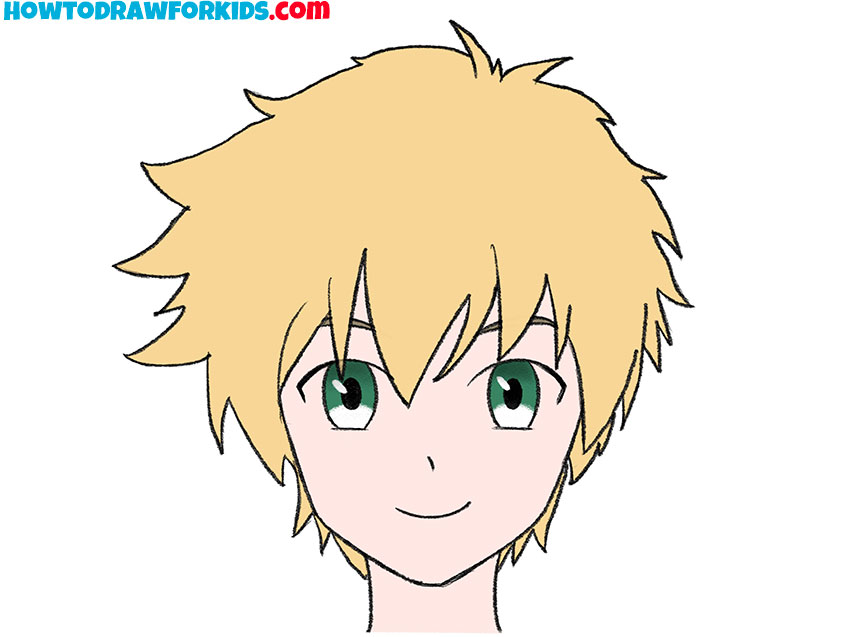
The shape of a manga face starts with a narrow jaw and a pointed chin. This part of the head should be symmetrical.
After the face shape is in place, pay attention to the eyes. They usually sit lower than many beginners expect, leaving enough room above them for the hairstyle.
The hair covers part of the head outline, so you do not need to complete the top of the head first. Focus on the direction of the hair strands. Don’t try to make every strand exactly the same.
Manga Face Drawing Tutorial
Materials
- Pencil
- Paper
- Eraser
- Coloring supplies (beige, light brown, and green)
Time needed: 30 minutes
How to draw a manga face step by step
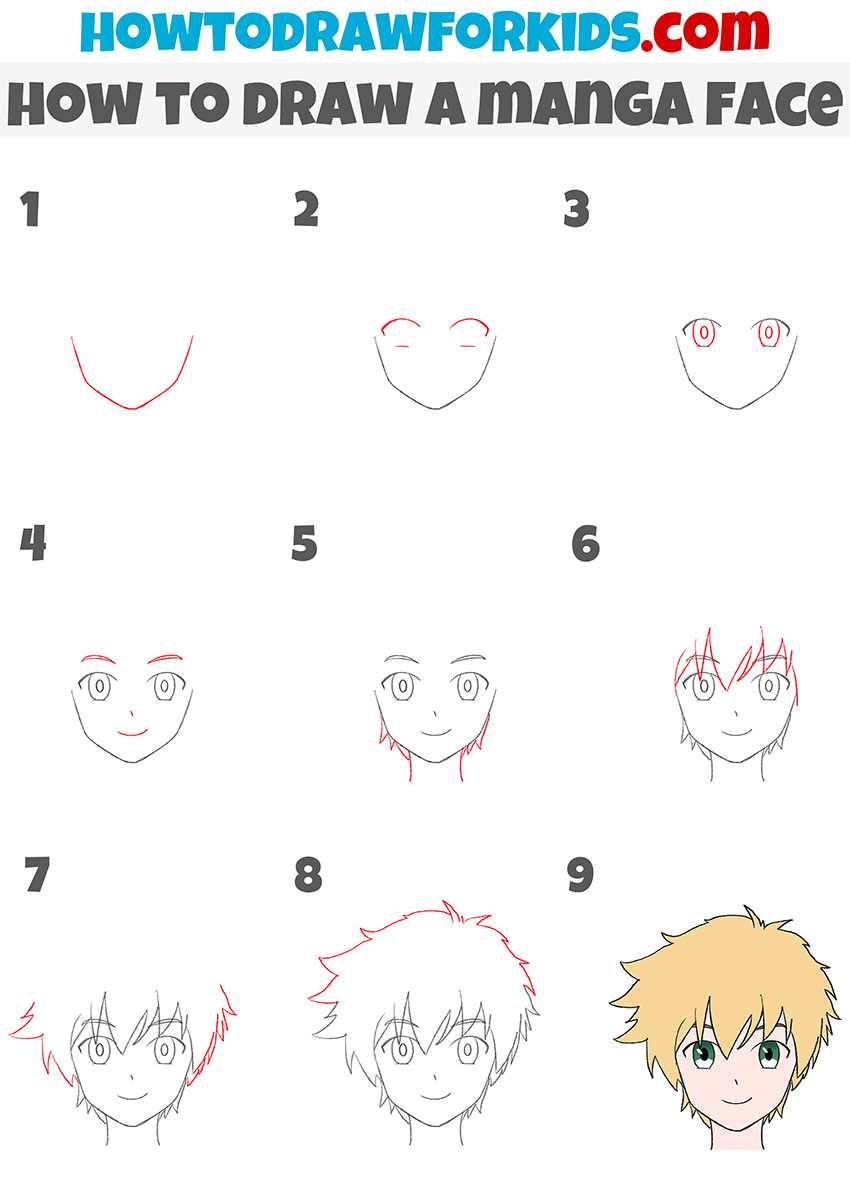
- Outline the lower part of the manga face.
Sketch one smooth line for the cheeks and pointed chin. Let the sides narrow gradually toward the center, and leave the top open because the hairstyle will cover that area later.
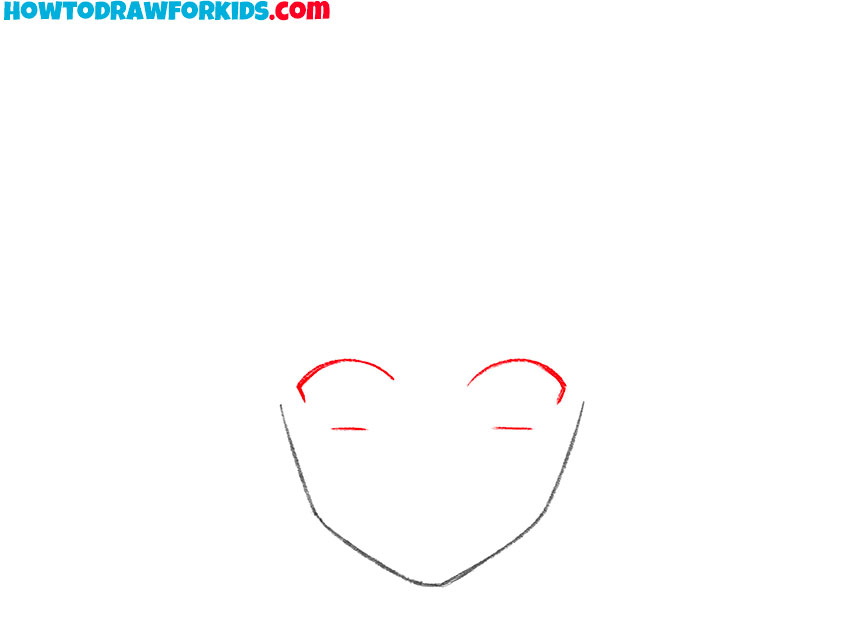
- Add the manga eyes.
Place two large eye shapes near the upper part of the face. Use arched lines for the upper eyelids and shorter lines below them, leaving an even space between the eyes.
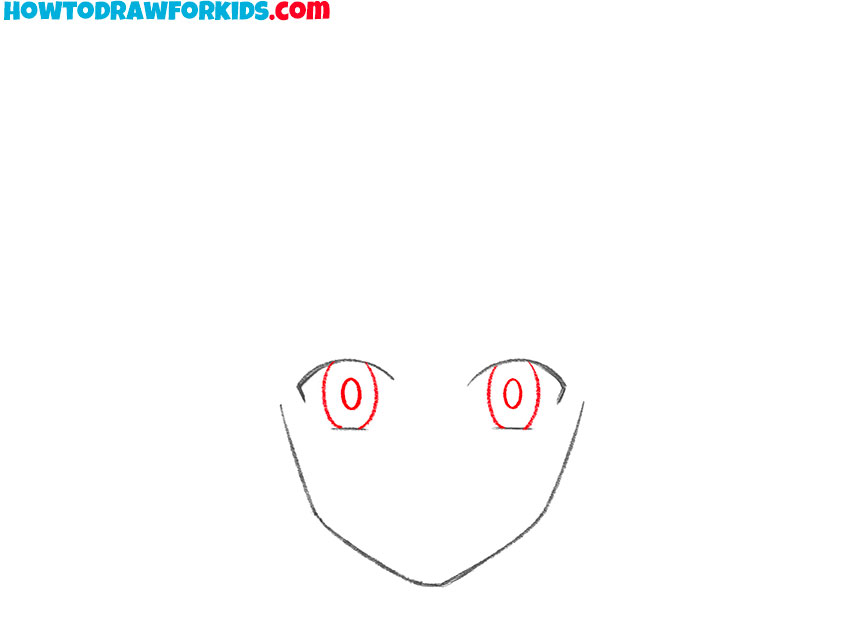
- Draw the irises and pupils.
Add a large oval inside each eye, then draw the pupils. Place the details at the same height so the manga character looks straight ahead.
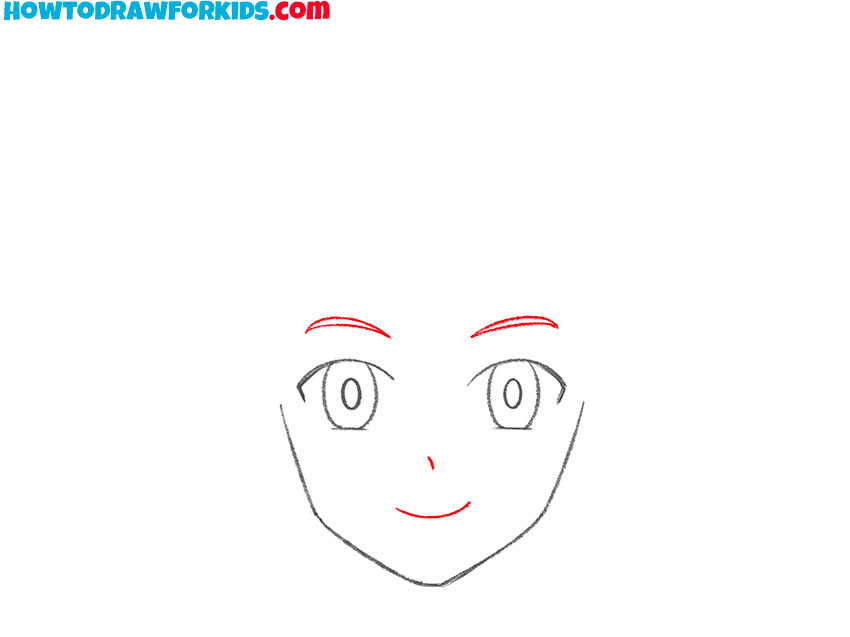
- Sketch the remaining facial features.
Draw the eyebrows above the eyes with two short arches. Add a small line for the nose and another curved line for the mouth, placing each feature along the center of the face.
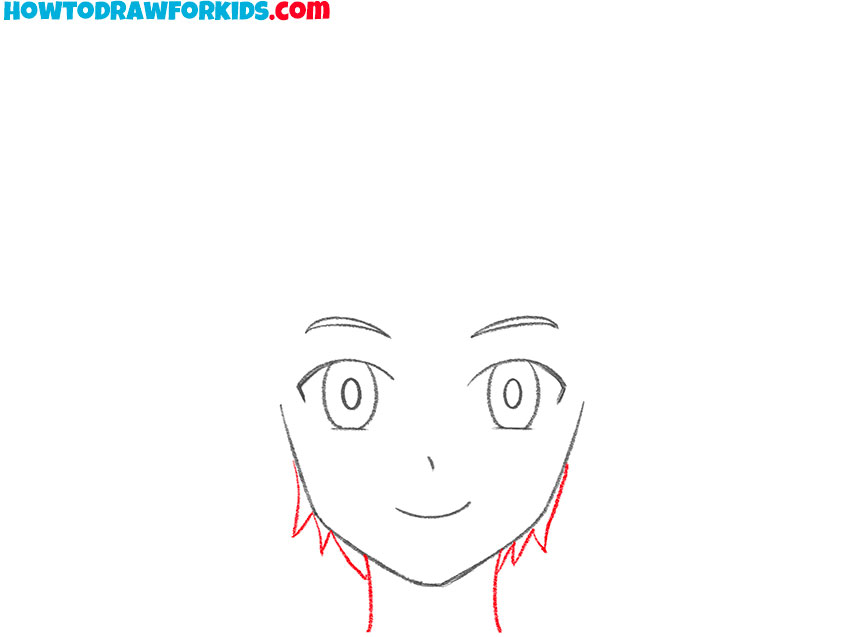
- Add the neck and lower hair.
Extend two short lines below the jaw to form the neck. Around them, sketch several pointed hair sections that curve outward and frame the lower part of the manga face.
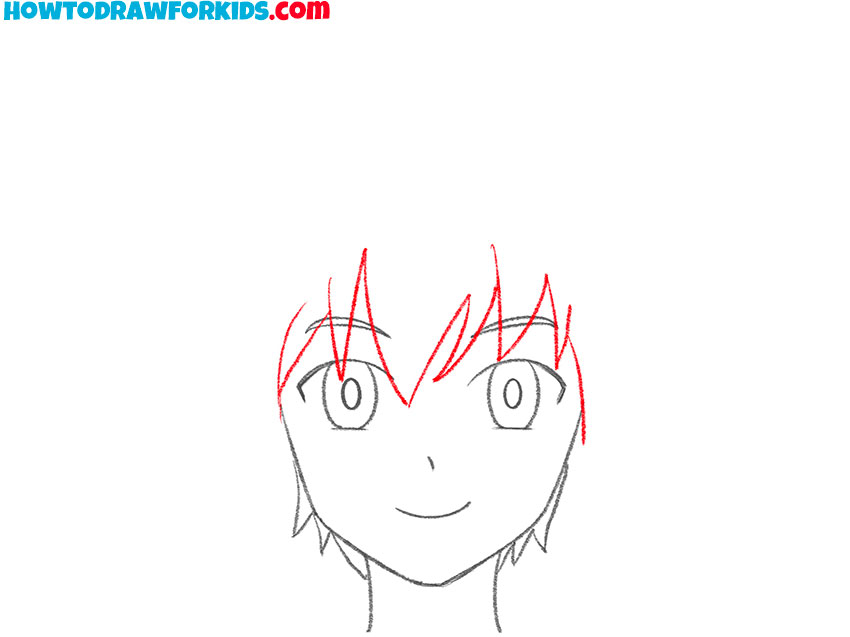
- Draw the bangs across the forehead.
Sketch a row of pointed bangs above the eyebrows. Vary the length of the strands and angle them toward the center so the hair overlaps the upper part of the face.
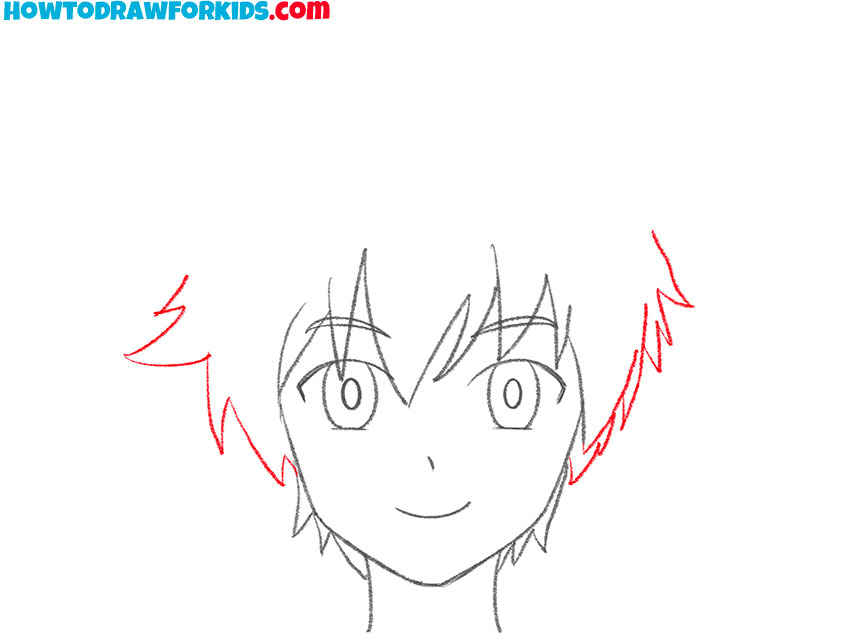
- Outline the hair beside the manga head.
Add larger hair sections on the left and right sides of the head. Point the ends outward, and connect them to the lower strands drawn near the neck.
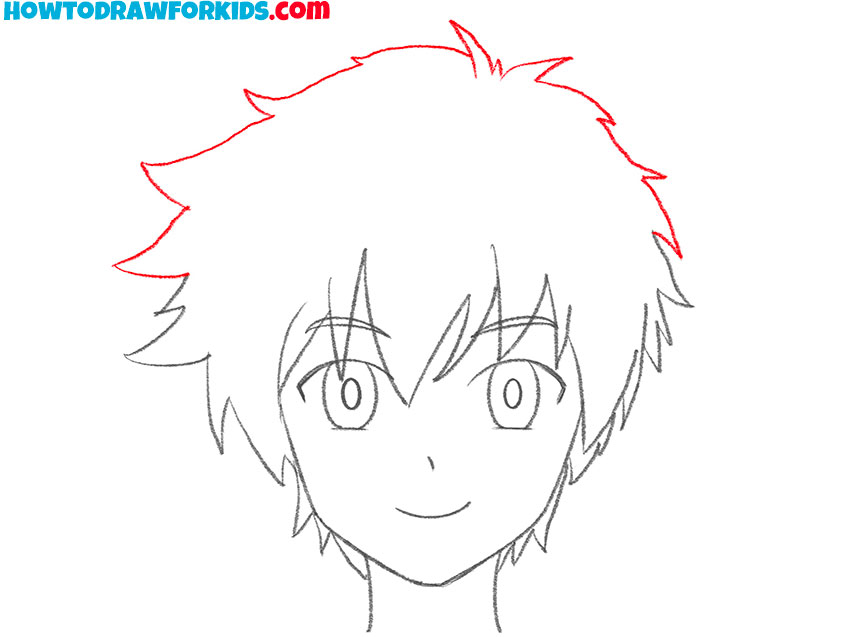
- Complete the top of the hairstyle.
Close the hairstyle with pointed sections across the top of the head. Use lines of different lengths so the hair does not form one stiff or even edge.
- Color the manga face.
Use beige for the skin, light brown for the hair, and green for the irises. Fill the pupils with black, but leave the small highlights white.
Manga Face Drawing Printables
Download the printable version of this manga face drawing tutorial if you’d like to practice away from the screen. The PDF includes the drawing steps along with tracing, coloring, and grid worksheets.
Bonus: Manga Head Drawing Tutorial
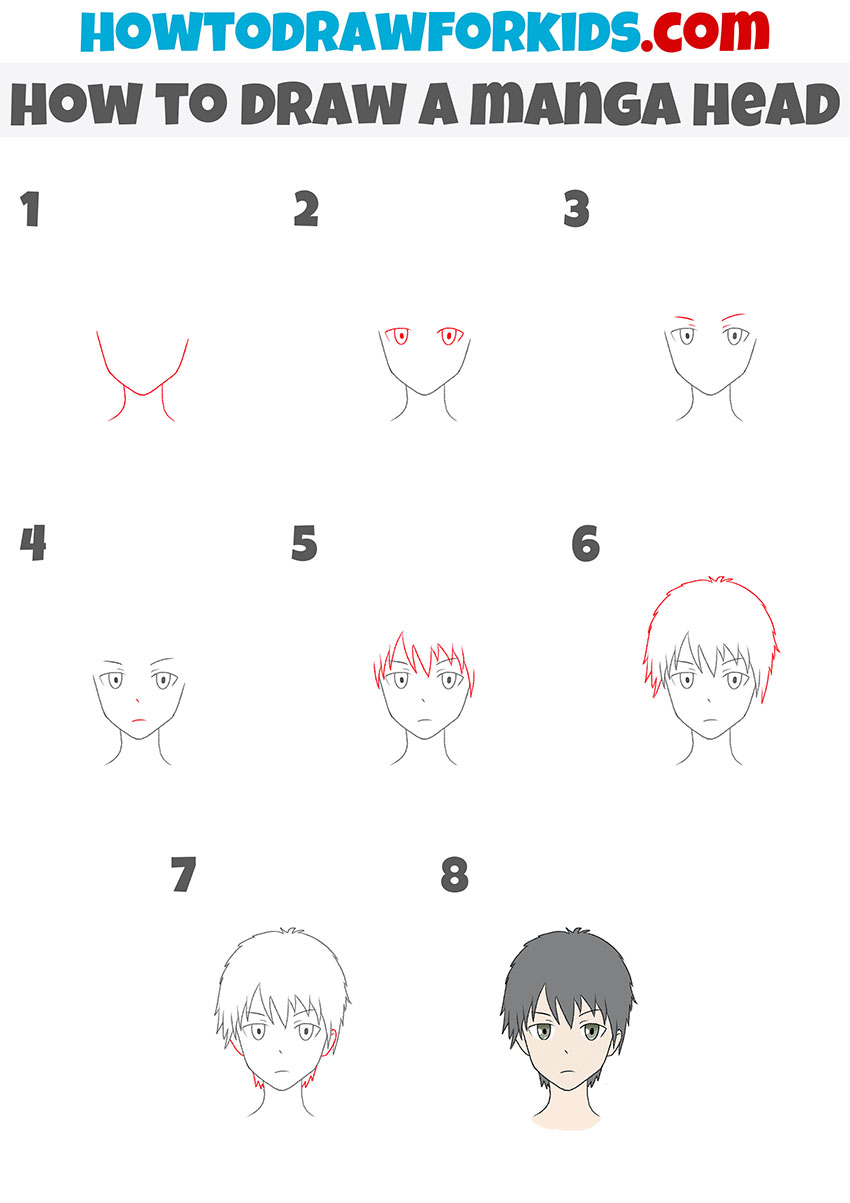
Once you’ve finished this drawing, try another approach. The next tutorial uses a similar style but spends more time on the overall head shape and hairstyle.
This version begins with the same chin shape. It gives you another way to practice placing the eyes, nose, and mouth while working with a different hairstyle.
After drawing a few manga heads, it becomes much easier to create your own characters by changing the hairstyle, eyes, or expression.
Conclusion
Drawing manga faces becomes much easier once you get used to placing the eyes, shaping the jaw, and building the hairstyle. Those same ideas will appear again in many other manga characters.
If you’d like to continue drawing in the same style, try drawing a manga head using different shapes and details.
You can also practice drawing an anime eye or drawing an anime ear. These small studies make it easier to create your own manga characters later.
Return to this tutorial whenever you want to practice the basic manga face again, then experiment with different expressions and hairstyles to create new characters.