How to Draw a Minion
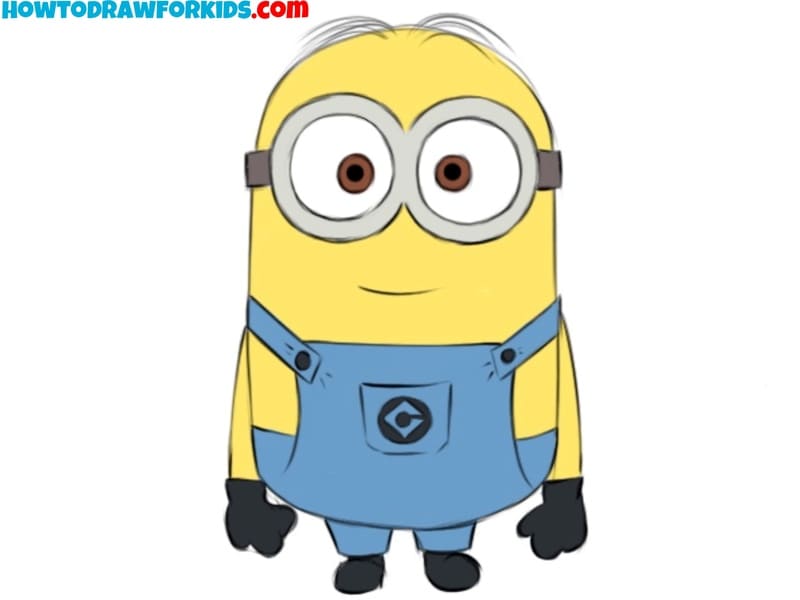
Welcome to my guide on how to draw a Minion, one of the most beloved characters from modern animation. On this page you will find two methods of drawing this cartoon character. Try both options and decide which method suits you best.
How to Draw a Minion: Basic Information
If you’re eager to learn how to draw a Minion, you’ve come to the right place. My specially tailored lesson is here to guide budding artists through the process of creating one of these lovable characters from scratch. With a few easy-to-follow steps, you’ll soon master drawing the Minion’s distinct look.
In fact, this Minion drawing lesson is just a basic instruction, to which you can add all sorts of details. You can depict one of these cute characters with two eyes or with one, you can change their hairstyles and other features.
Also, in this tutorial I will share with you how to avoid the most common mistakes when drawing minions. This will help you avoid them and create sketches of these cute characters with more confidence.
Minion Drawing Tutorial
Materials
- Pencil
- Paper
- Eraser
- Coloring supplies
Time needed: 40 minutes
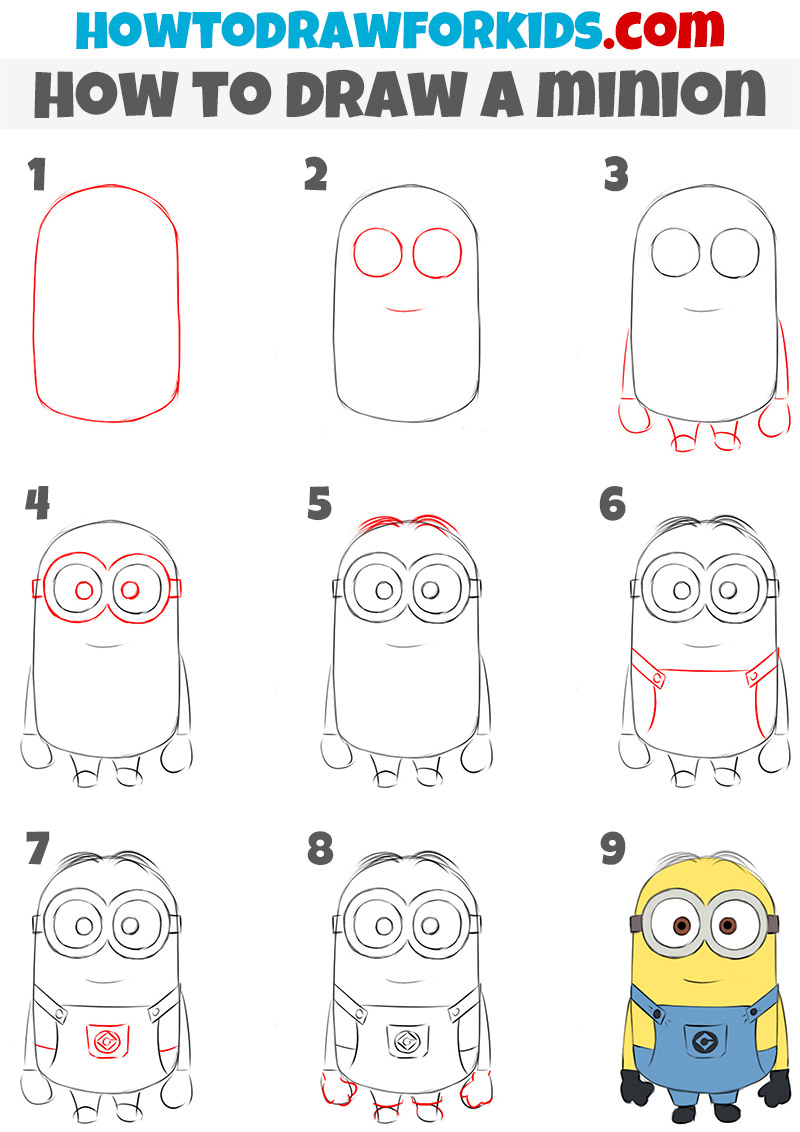
How to Draw a Minion
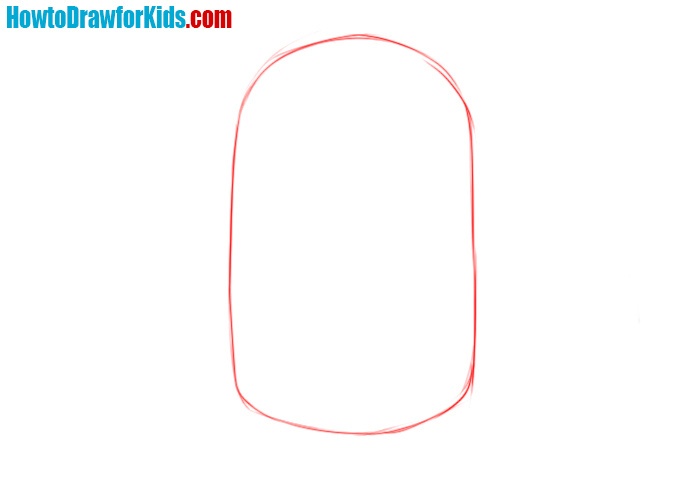
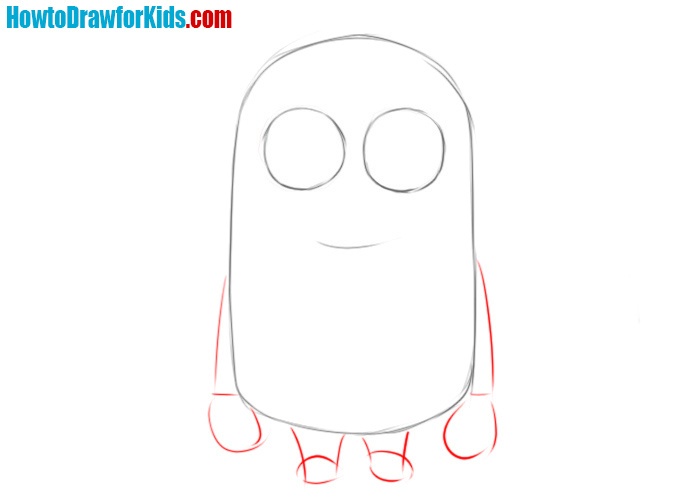
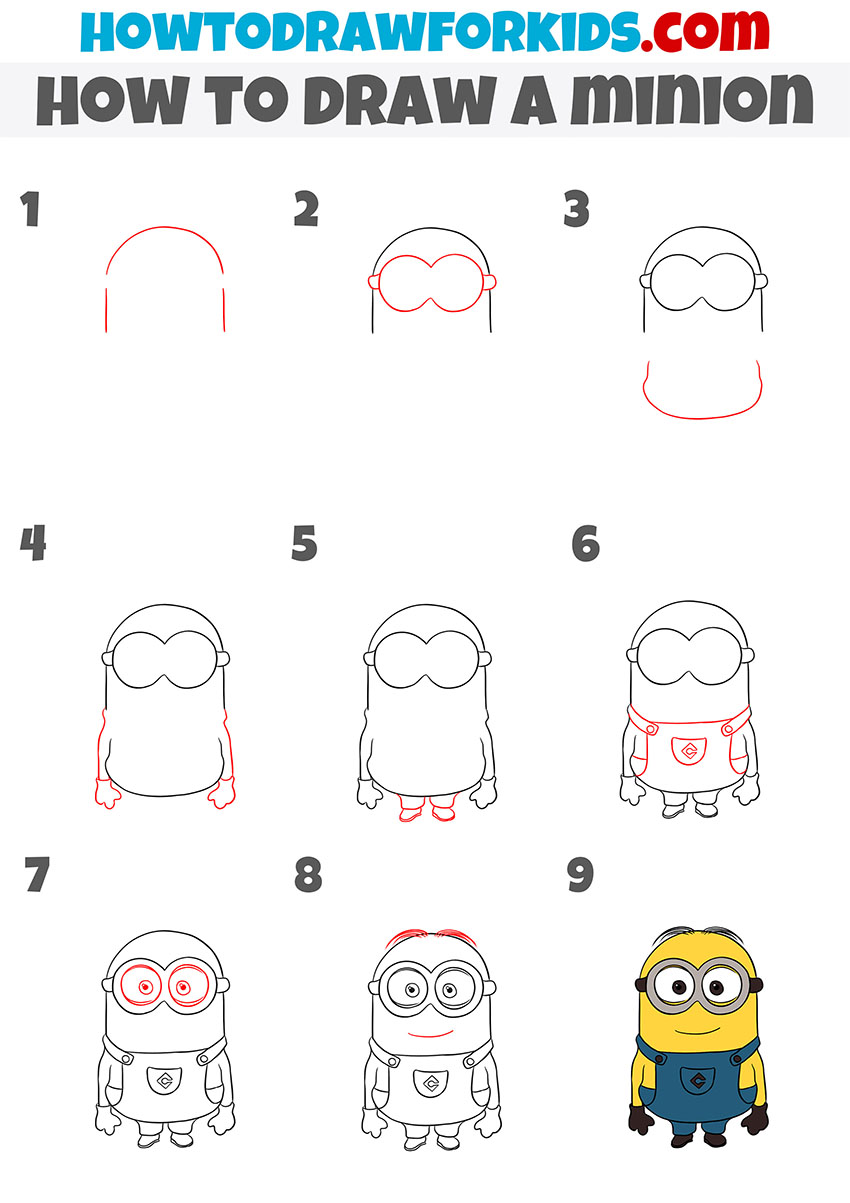
- Sketch the basic outlines.
Start by sketching an oval shape for the Minion’s body. The oval should be slightly rounded at the edges, resembling a pill or capsule shape or a potato. This forms the foundational shape of the Minion, serving as the main structure for adding other features.
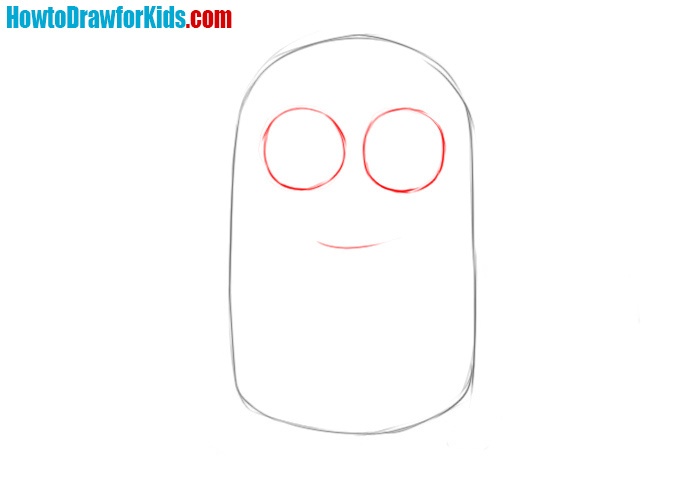
- Draw the eyes and mouth.
Inside the oval, draw two large circles near the top for the eyes. The eyes should be in the shape of perfect circles. Below the eyes, add a simple curved line to create the Minion’s smile. You can change the expression of your minion by slightly changing the curvature of the mouth.
- Add the limbs.
Extend two lines downward from the bottom of the body of the Minion to form the legs, ending in oval shapes for feet. On each side of the body, draw two lines outward to form the arms, ending in small ovals to represent the hands of the Minion.
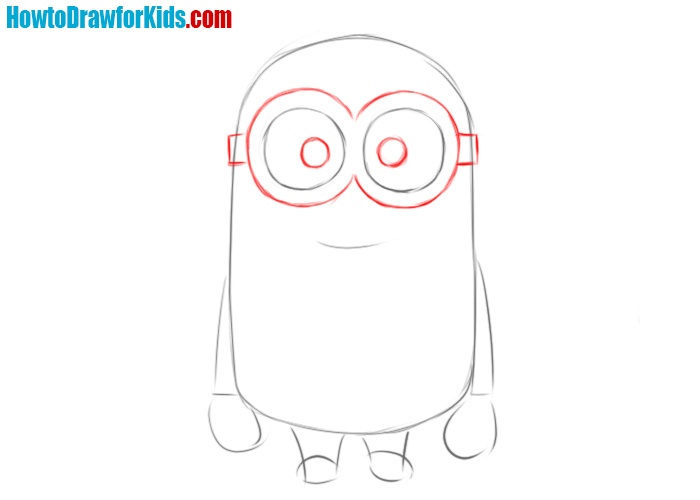
- Sketch the glasses.
Around the eyes, sketch two concentric circles, representing the frames of the Minion’s glasses. Connect these circles with a horizontal bar for the bridge. Add small lines at each side to form the straps that secure the glasses.
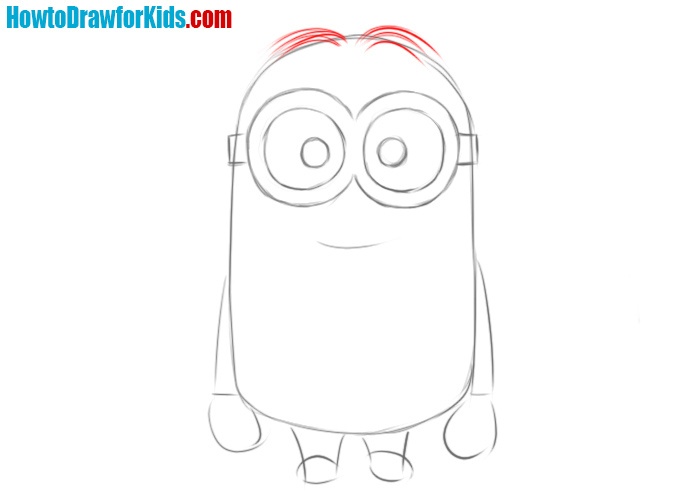
- Draw the hair.
On the top of the Minion’s head, draw several small curved lines, giving the appearance of spiky hair. Vary the direction of these lines for a natural, random look. You can draw the hairstyle as in this tutorial or illustrate a completely different hairstyle.
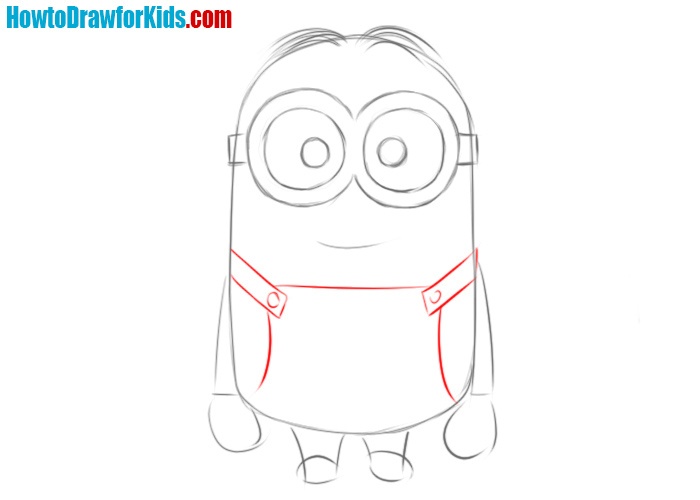
- Draw the overalls.
Draw shoulder straps connected to a square patch on the chest, adding buttons to each strap. Extend the overalls down to the hips, outlining pant legs. This step creates the classic Minion outfit, essential to its look. Add small stitching lines for added detail.
- Add the pocket and logo.
Inside the square patch, draw a small square pocket with a circular logo or design of your choice inside. This adds authenticity to the Minion’s outfit, allowing for customization. The logo could match a known design or reflect the artist’s view.

- Detail the Minion’s legs and arms.
Detail the arms and legs by drawing individual fingers on each hand and shoes on each foot. Use curved lines or small ovals to create simple designs. This step finalizes the Minion’s appearance, completing its recognisable look.
- Erase the guidelines and refine the drawing.
Start by going over the primary lines with a darker pencil or pen, ensuring smooth, continuous strokes. Remove any light guidelines or overlapping lines that were part of the initial sketch. Focus on tracing the main features, including the eyes, glasses, mouth, and limbs.
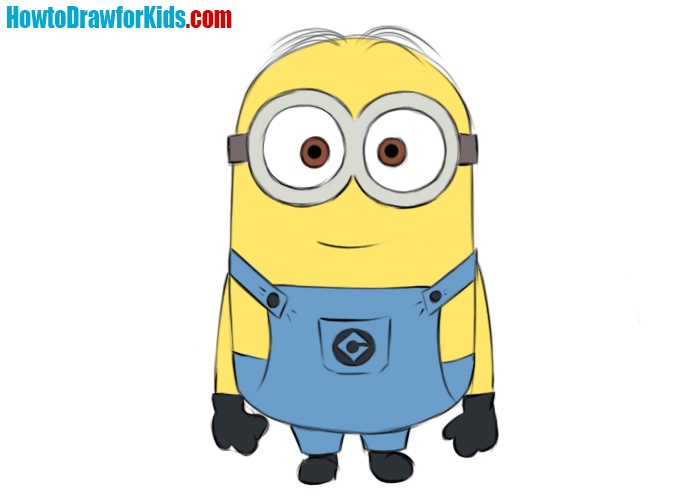
- Color the minion drawing.
Fill in the Minion’s body with yellow for its skin, blue for its overalls, and black for its gloves, shoes, and glasses. Add brown for the eyes, and any other colors needed for details. This step completes the Minion’s look, bringing all elements together and making it ready for display.
Additional Content
For those who have enjoyed the steps of our Minion drawing lesson, I have crafted something extra – a detailed, free PDF file that encapsulates the entire tutorial. This guide is the bridge between your creative impulses and their realization on paper, meant to accompany you wherever you go.
It’s a distilled essence of the lesson, designed to be at your fingertips without the constraints of having to be online. Whether you find yourself under the shade of an old oak tree or in the quiet of your room, this PDF is your silent tutor, ready to guide your pencil at a moment’s notice.
Alternative Drawing Technique
To provide a comprehensive artistic experience, I’ve put together yet another technique for drawing Minions, giving you the chance to flex your creative muscles even further. This alternative strategy is crafted to build upon what you’ve learned, introducing new steps that focus on different aspects of the Minions’ features.
As you alternate between the original and this new method, you’ll be honing your skills, reinforcing what you’ve mastered, and discovering more about the art of character drawing. It’s a fantastic opportunity to practice, perfect, and polish your Minion masterpieces, enhancing your journey as an artist.
How to Draw a Minion: More Practice
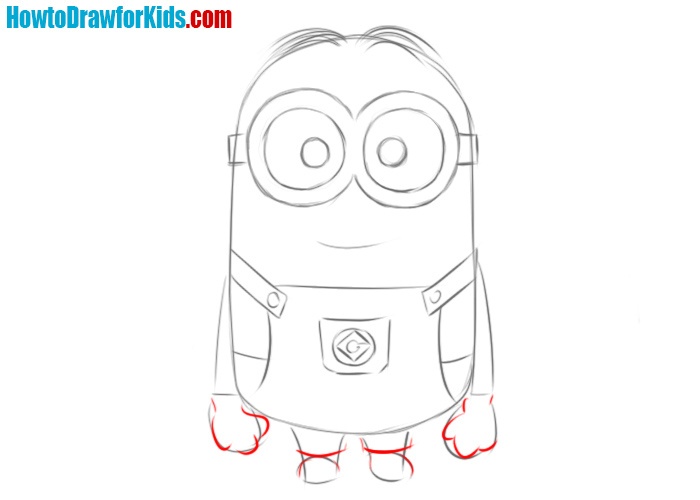
This alternative method for drawing a Minion starts uniquely with the construction of the head, a fundamental difference from our first technique. We begin with a broad, curved line to outline the top of the head, a foundation that’s going to define the Minion’s shape.
Next, instead of diving straight into facial features, we add structure by sketching the Minion’s goggles and side straps, giving us anchor points for the rest of the drawing. This approach is deliberate; by defining the goggles early on, we ensure that the facial expressions align symmetrically within the contours of the face.
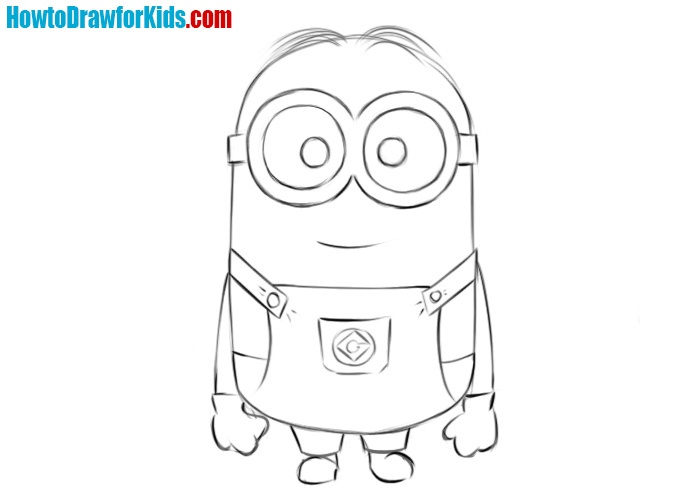
The final steps to draw a Minion using this method involve detailing the lower half of the face, then the body, and lastly, adding the signature overalls and limbs. This sequence allows for a clear focus on each part, minimizing the need for corrections later on. It’s a step-by-step progression that gradually brings the cheerful Minion to life.
Correcting Common Minion Drawing Oversights
As we bring our Minion drawing tutorial to a close, it’s valuable to shine a light on some of the common mistakes that can sneak into an artist’s work. Being aware of these can help you sidestep potential drawing detours and keep your Minions looking their mischievous best.
- Disproportionate Goggles: A slip that’s easy to make is drawing the goggles too large or too small, which can throw off the Minion’s iconic look. Keep a keen eye on their size relative to the head.
- Eyes Misplacement: Placing the eyes incorrectly within the goggles is a common error. They should be centered to maintain the Minion’s endearing gaze.
- Ignoring Overalls’ Pockets and Logo: Skipping the details on the Minion’s overalls, like the front pocket and the Gru logo, can result in a less recognizable character. These elements are signature to the Minion’s attire.
- Uneven Limbs: Drawing one arm or leg longer than the other is a mistake that can disrupt the Minion’s overall appearance. Ensure that limbs are of equal length and proportion.
In summary, being mindful of these common mistakes will greatly enhance the quality of your Minion drawings. Keep practicing, and with each new sketch, aim for consistency and accuracy in proportions, placement, and details. Remember, every artist has room to grow, and every mistake is a lesson in disguise.
How to Draw a Minion: Conclusion
With the final stroke of this Minion masterpiece complete, I encourage you to keep this momentum going. This is just one of many adventures in drawing that await you. I warmly invite you to explore the array of tutorials on my website, where subjects as thrilling as rockets or as adorable as Pikachu are waiting for your artistic touch.
And for the latest updates and new lessons that will fuel your creativity, be sure to follow me on social media. Your artistic path is unique, and your feedback is invaluable; let me know in the comments what you’d love to draw next. Together, we will continue to create magic on the canvas of our shared passion.


minions R cool
Yeah, they really are, simple shapes and very easy to draw.
It’s GREAT
Many thanks, Haylee!
Minions are awesome. 😎
True, and always interesting to draw too.
I loveeeeeeeeeeee the minions
Glad you’re into them!
helps a lot thanks
Glad it made drawing easier for you.
It turned out so good ☺️😎
Nice result then – that’s what I like to hear.