How to Draw a Police Officer
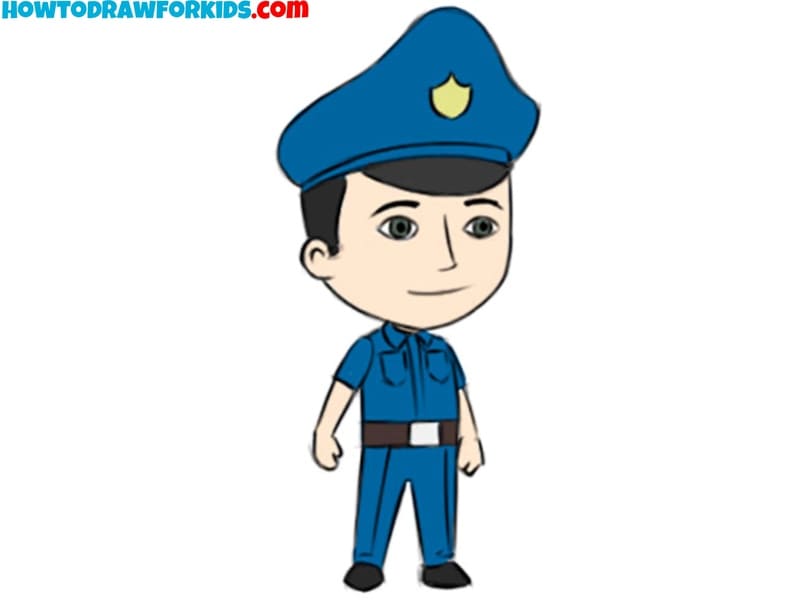
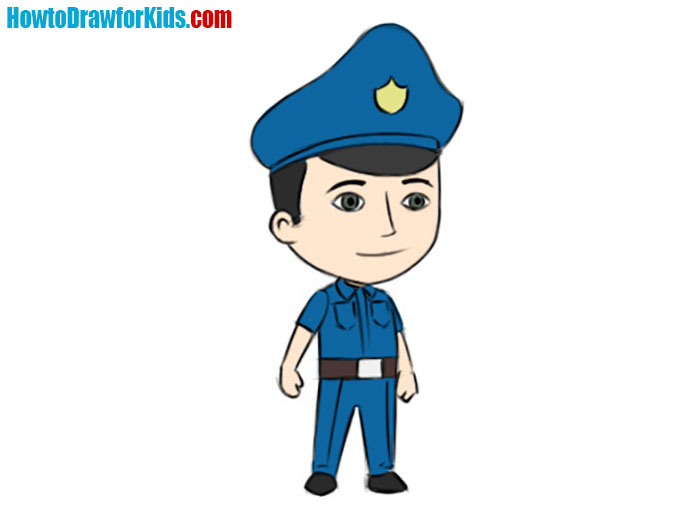
Let’s take our art supplies and learn how to draw a police officer – a representative of one of the most important professions in any society.
How to Draw a Police Officer: Basic Information
In this super simple cartoon drawing instruction, I will show you how to draw a police officer. Police officers are an important part of the state. These brave persons protect our peace and make our lives safe.
As you can imagine, all people are drawn the same way. On the pages of Howtodrawforkids.com, I show how to draw people in the most simplified form, and in this instruction, everything will also be unrealistically simple.
Drawing a police officer as part of this tutorial offers a focused exercise in character design, teaching young artists how to combine different elements to create a simplified but natural figure.
Practicing character design in this way helps artists develop their creativity and their ability to convey the profession of the person through visual elements. This is a key skill for any artist interested in animation, comics, or any field that involves character creation.
Police Officer Drawing Tutorial
Materials
- Pencil
- Paper
- Eraser
- Coloring supplies
Time needed: 50 minutes
How to Draw a Police Officer Step-by-Step
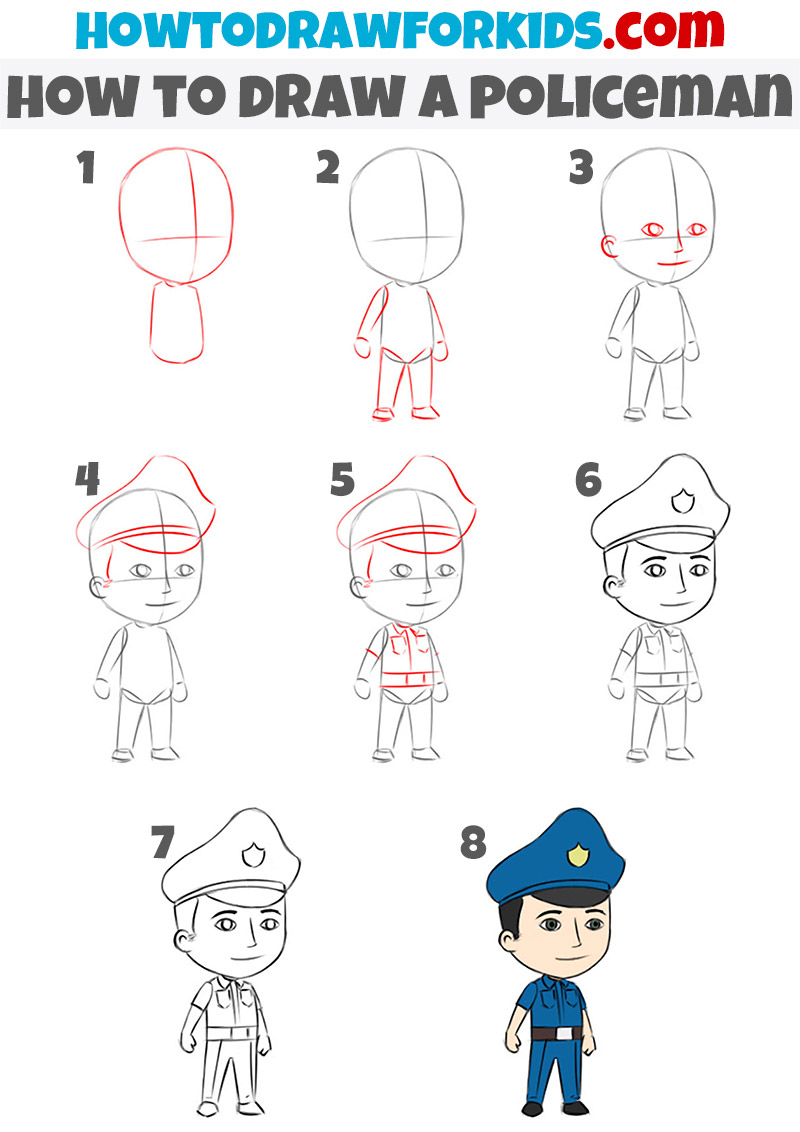
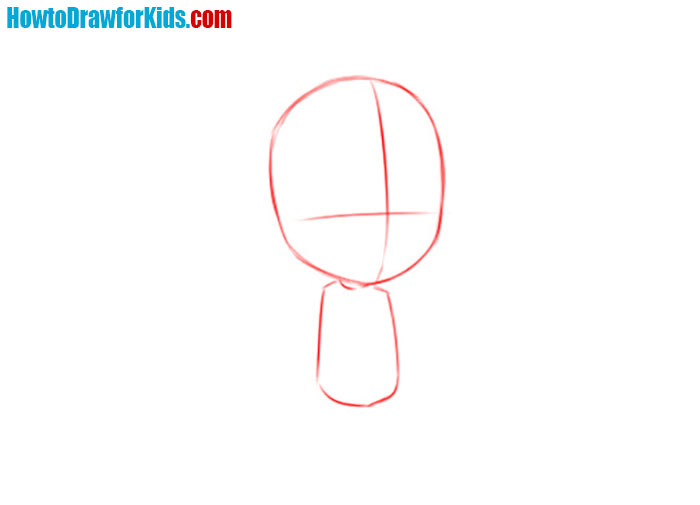
- Sketch the basic head and body shapes.
Begin with an oval shape for the head, which is slightly wider at the top and narrows towards the bottom. Then, draw a small, rectangular shape beneath the head for the body. Then, add a vertical line down the center and a horizontal one across the middle to help position the facial features.
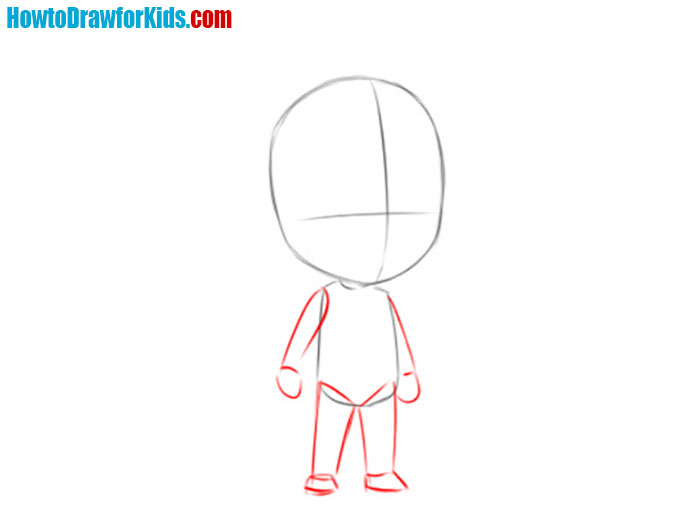
- Illustrate the arms and legs of the police officer.
Sketch the limbs of the police officer with basic shapes. First sketch the arms with simple limes. Then draw the legs with similar lines. The legs should be slightly longer than the arms. Add small ovals at the ends of the limbs to represent the hands and feet.
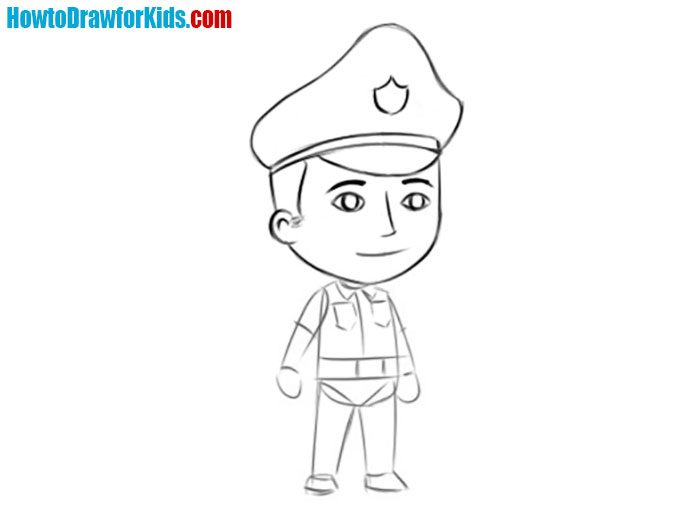
- Add the facial features.
Begin by drawing the eyes on the horizontal guideline you sketched earlier, placing them symmetrically on each side of the vertical line. Add a small nose and a curved line for the mouth just below the eyes. Next, draw the ear with a couple of simple curves.

- Sketch the police hat.
Start by sketching the outline of the hat on top of the head. The hat should be wide and slightly curved at the edges, with a band across the front. The hat should also extend slightly beyond the sides of the head, giving it a prominent appearance. Add a curved line on top to represent the crown of the hat.

- Detail the uniform.
Begin by drawing the shirt collar just below the head, adding a slight curve to each side. Then, sketch the outlines of the shirt, including the sleeves and buttons down the center. Add pockets on each side of the chest, with small flaps. Draw a belt around the waist, making sure it is centered and aligned with the body.

- Refine the hat and add the badge.
Start by detailing the hat’s shape, making sure the lines are smooth and the proportions are correct. Next, draw a small shield-shaped badge in the center of the hat’s front band. This badge should be simple, with a noticeable outline to make it stand out.
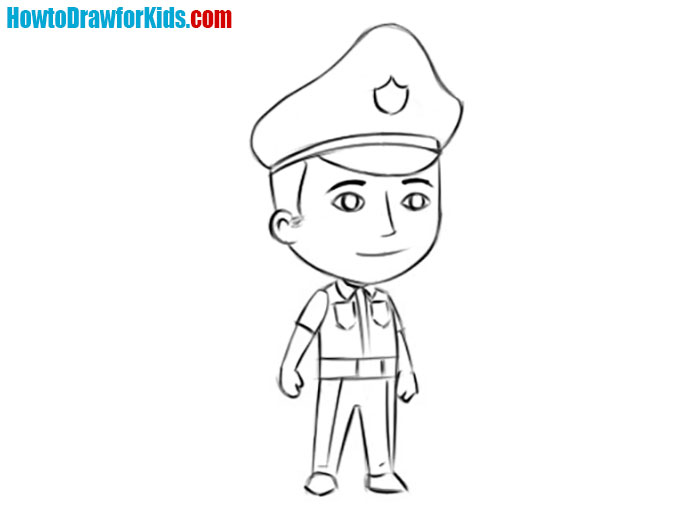
- Finalise the drawing and prepare for coloring.
Now, turn your attention to the body, erasing all unnecessary guide marks to leave a clear and distinct outline. Finalize the shape of the policeman’s uniform, making sure the contours are smooth and the details such as the pockets, belt, and badges are clearly defined.
- Add some colors to the artwork.
Begin by choosing a color scheme for the police officer’s uniform. Typically, the uniform is blue, so use varying shades of blue for the hat, shirt, and pants. The belt and shoes can be black or dark brown. Color the skin with any natural tone, and add any additional colors for the badge or other details.
How to Draw a Police Officer: Advanced Advices
Once you’ve mastered drawing a basic standing police officer, challenge yourself by experimenting with different dynamic poses. Practice drawing the officer in action, such as running, directing traffic, or using equipment. This will help you improve your understanding of anatomy, movement, and how clothing interacts with the body during various actions.
To add more personality and emotion to your police officer character, try drawing them with different facial expressions. Practice conveying emotions like determination, friendliness, surprise, or seriousness. This will enhance your character’s relatability and improve your skills in facial anatomy and expression.
Study real police uniforms from different countries or regions and incorporate various elements into your drawings. You can also create your own uniform designs, experimenting with different styles, badges, and accessories. This will help you develop a better understanding of costume design.
To give your drawing more depth and realism, focus on how light and shadow interact with the figure. Practice adding shading to the uniform, hat, and face, paying attention to where the light source is coming from. This will help you create more three-dimensional and lifelike drawings.
Place your police officer in a relevant environment to tell a story with your drawing. You could draw them in a city street, a police station, or any other setting related to their role.
Conclusion
And as always I want to say, that this tutorial on drawing a police officer not only teach to draw a particular character, but offers a structured and detailed approach for young artists to develop their foundational drawing skills.
By following each step, kids gain practical experience in basic techniques such as proportion, symmetry, and creating simple lines. These skills are really important for creating well-balanced and visually appealing characters, whether in a cartoon style or more realistic forms.
Please share this tutorial with your friends and motivate them to try drawing as well. Don’t forget to subscribe to my social media channels to stay informed about new content and updates. By following, you’ll ensure you never miss out on the latest tutorials.

