How to Draw a Pond
For anyone practicing nature drawings, this guide on how to draw a pond will be the best way to start creating simple landscapes.

How to Draw a Pond: Introduction
Now I will show you how to draw a pond. This lesson will be very interesting and useful for you. The acquired skills will definitely come in handy in the future when you want to draw a landscape.
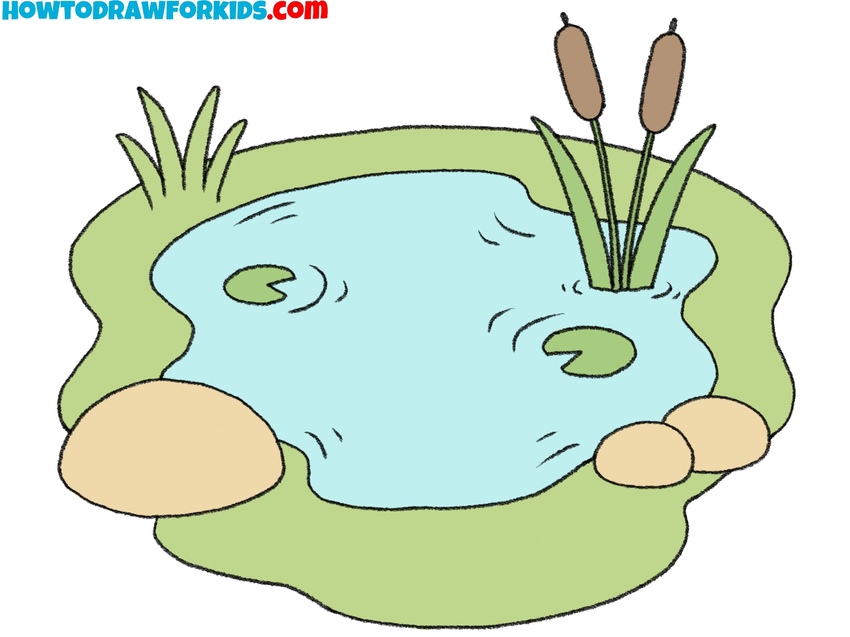
A pond is a small body of water. A pond can be natural, that is, it has arisen in nature independently, and there is an artificial pond, which was created by man for some purpose.
Usually, the pond is intended for fishing and storage of water supplies. This natural object has a shallow depth, so reeds and other plants always grow around the pond. Plants can also be seen on the surface of the water. All this is present in the figure.
This tutorial is for beginner artists, so all the steps are very simple. Simple elements are used here that you can draw without difficulty. Freehand lines are allowed in this lesson, so it is not necessary to repeat all the elements exactly. The most important thing is to remember all the stages of drawing. You will like the result of the work and you will gain confidence in your creativity.
Pond Drawing Tutorial
Materials
- Pencil
- Paper
- Eraser
- Coloring supplies
Time needed: 30 minutes
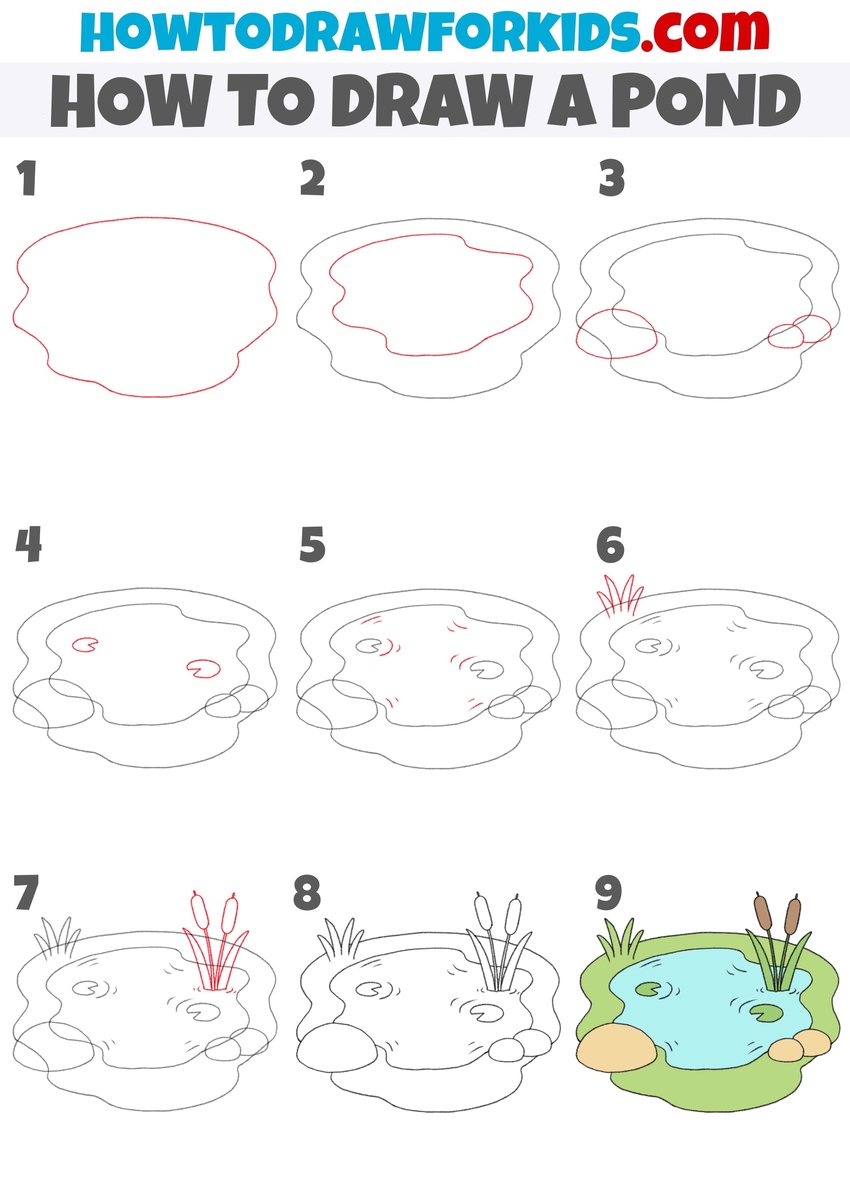
How to Draw a Pond
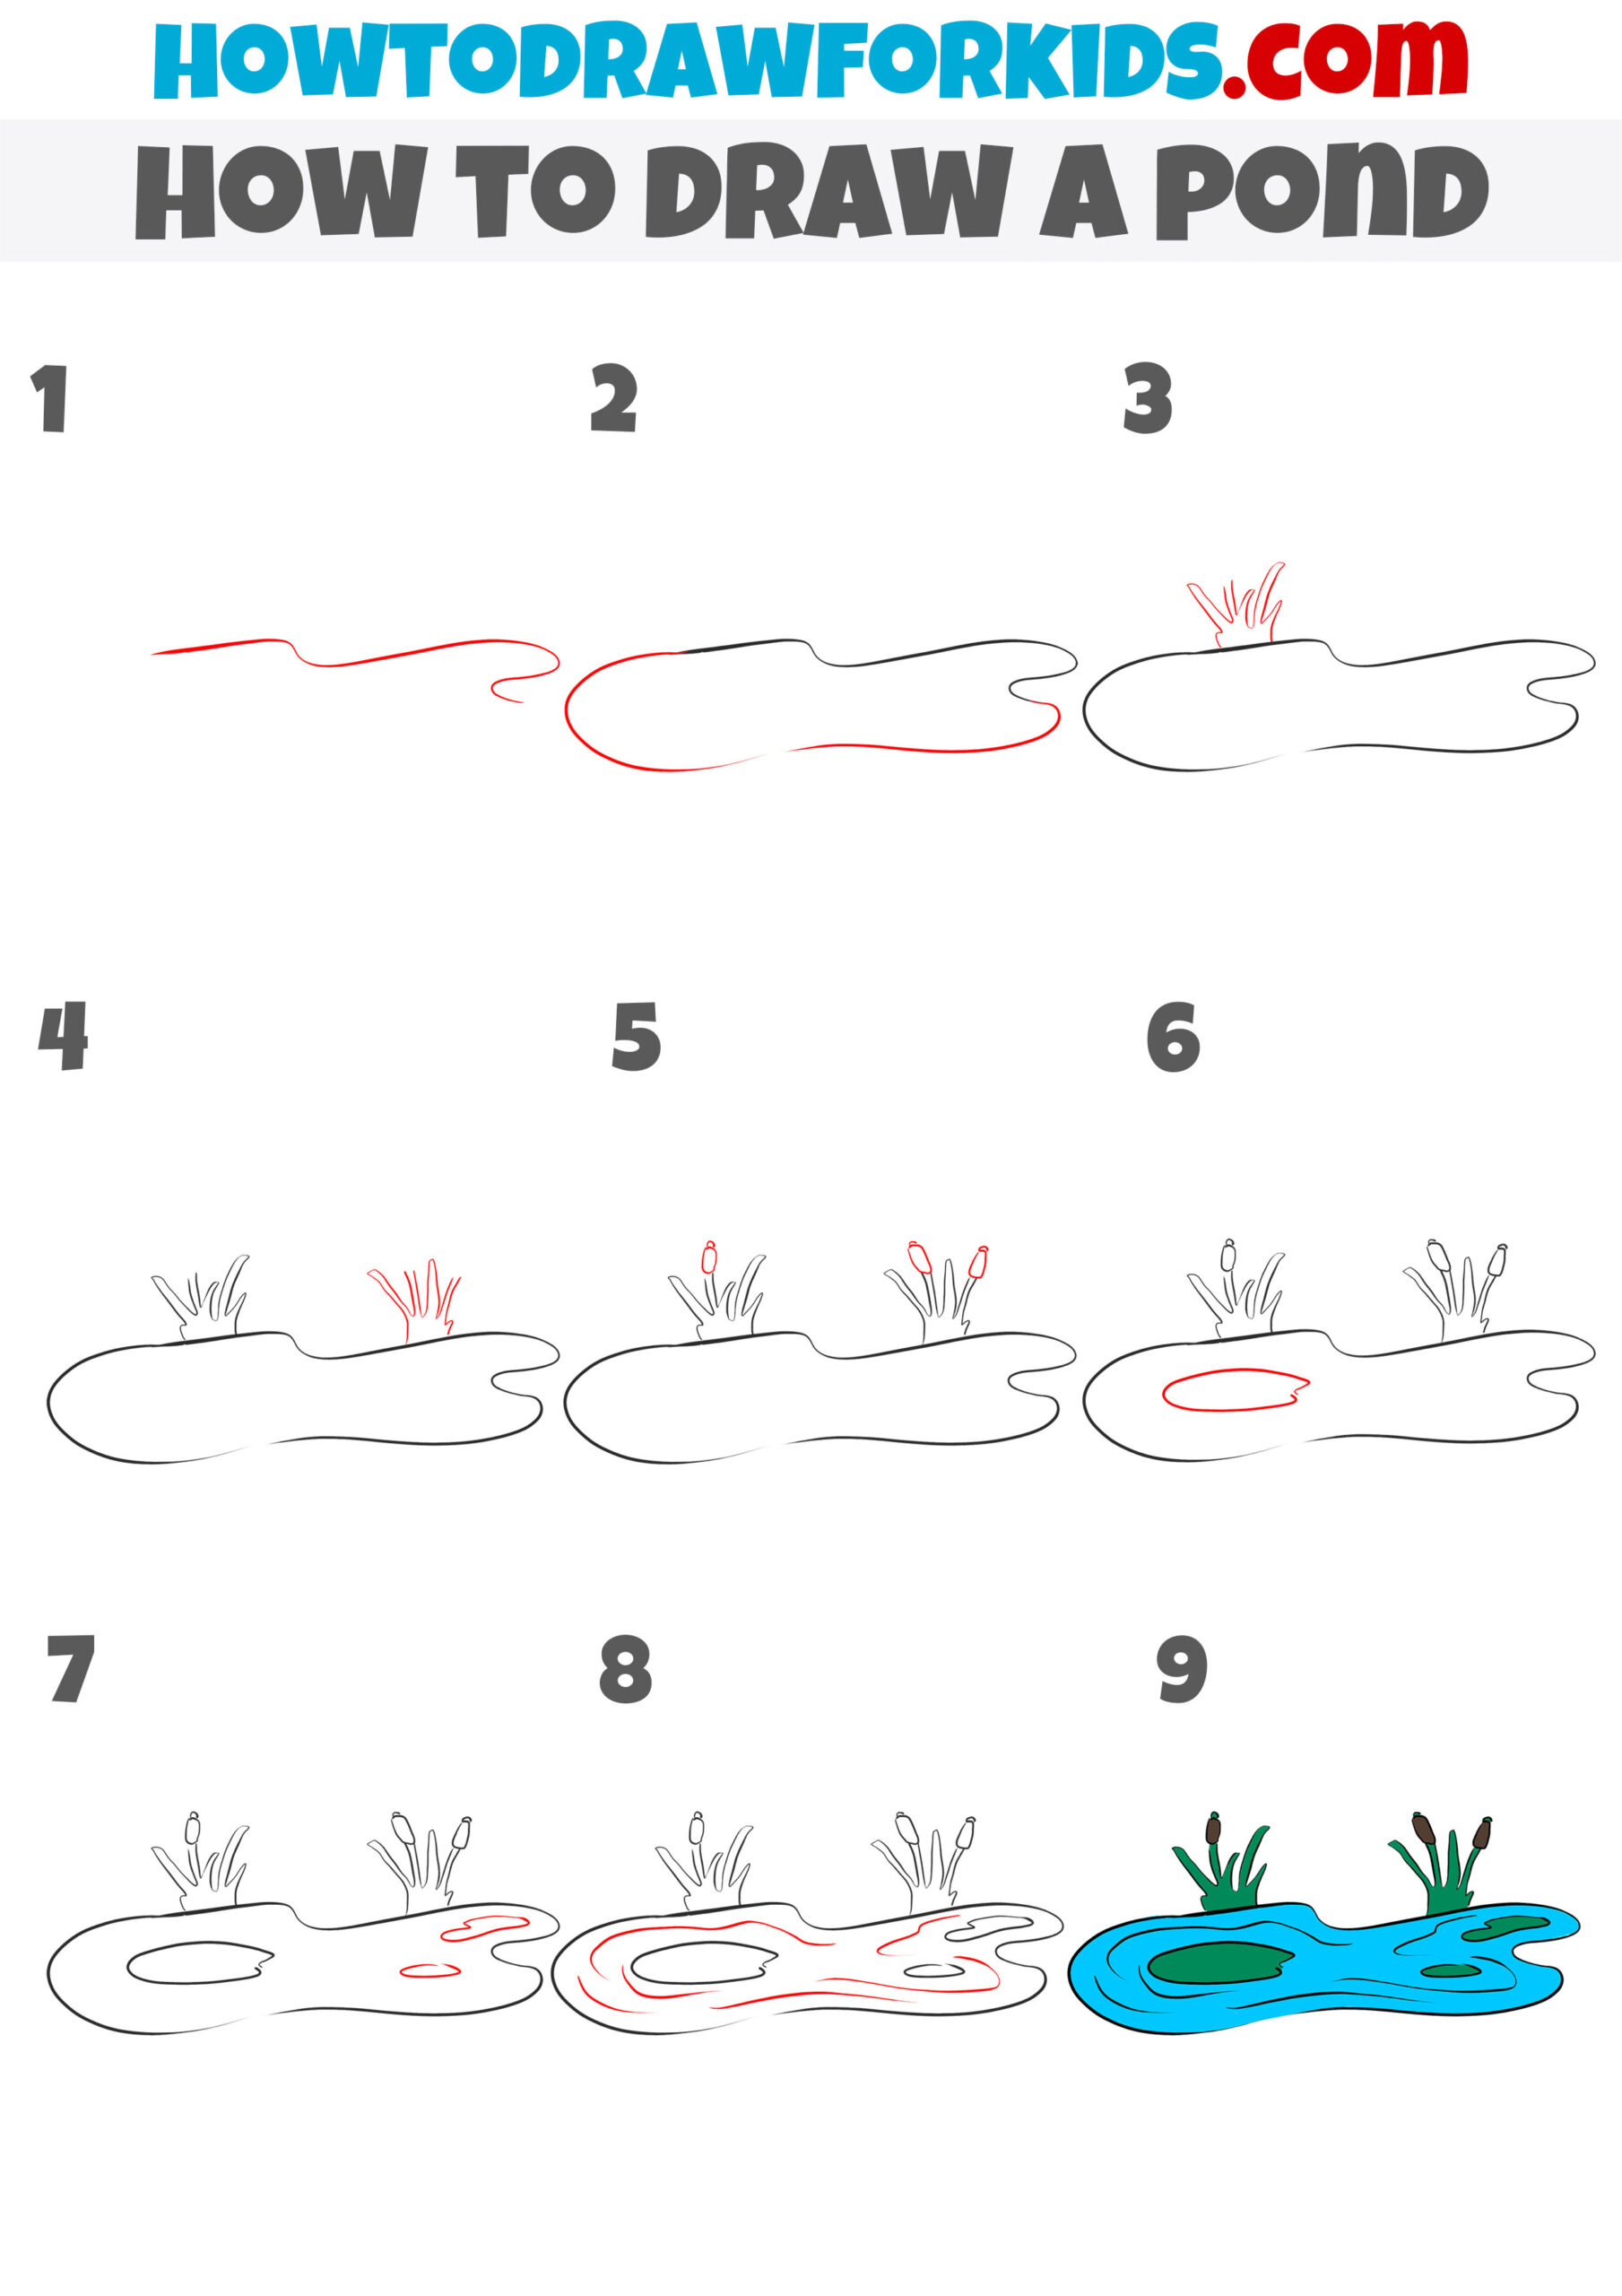
- Sketch the gourd around the pond.
A pond usually has an irregular, natural shape, so start with a large wavy line that will serve as its outer edge of the ground around. Try to use very smooth and organic lines. Don’t be afraid to vary the bumps and curves. Leave enough space inside the shape for the outlines of the pond itself.

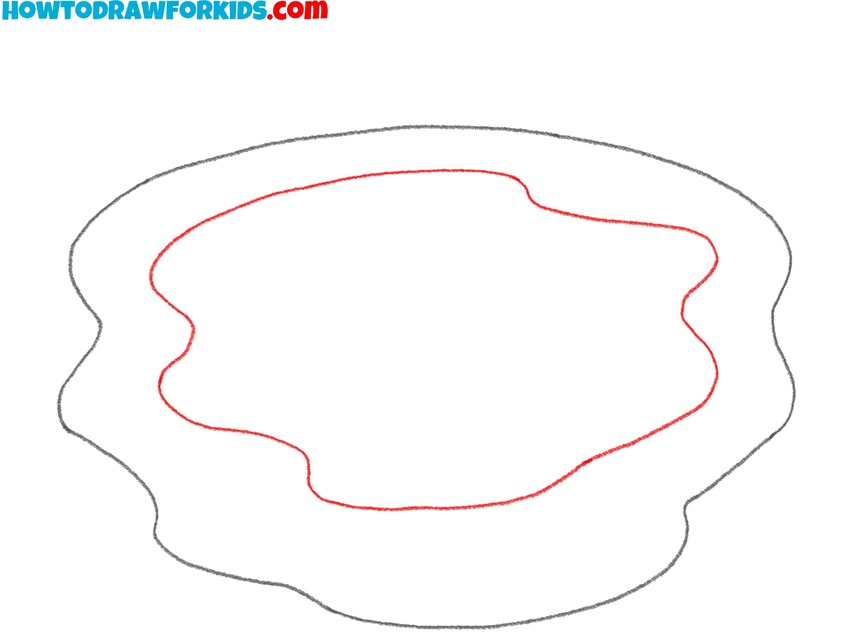
- Draw the pond edge.
To show the edge where the water meets the bank, sketch another wavy line inside the first one. This smaller shape can roughly follow the contour of the outer outline but sit a little lower, leaving a band of land between the two. At the same time, don’t make the inner line identical.
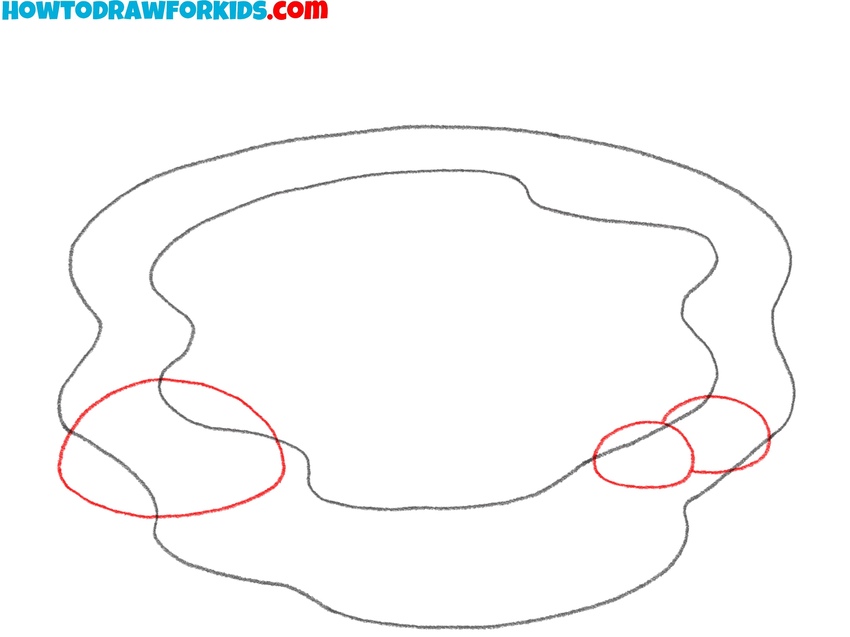
- Add stones to the composition.
Natural ponds often have rocks around them, so add a few oval and round shapes along the edge. Place some overlapping slightly with the inner line so they look like they’re sitting half in the water, half on land. Vary the sizes of the stones to make them look realistic and authentic.
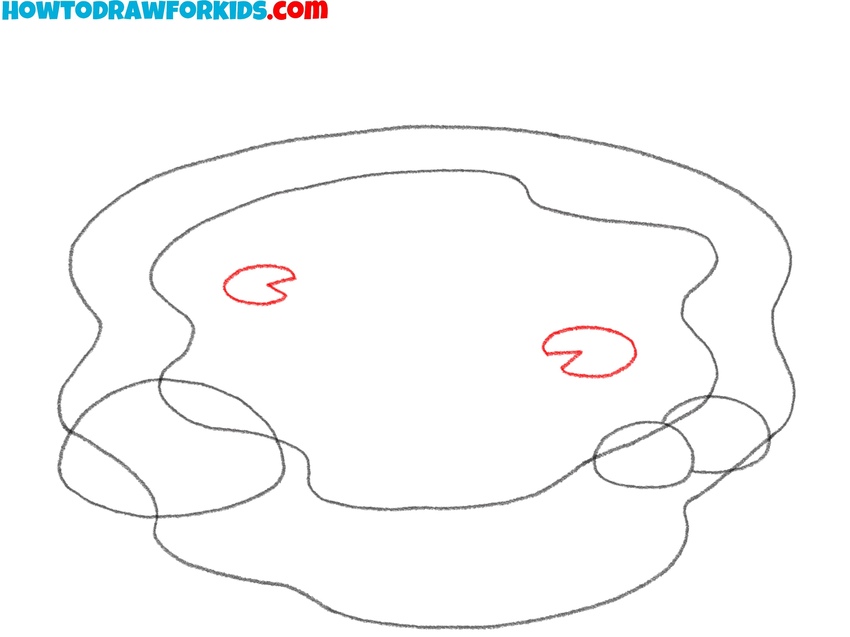
- Sketch the lily pad shapes.
To make the water surface more interesting, sketch a couple of lily pads floating in the pond. So, draw the lilies small rounded shapes with a notch cut out on one side to represent the leaf split. Place them apart to create an interesting composition in your pond drawing.
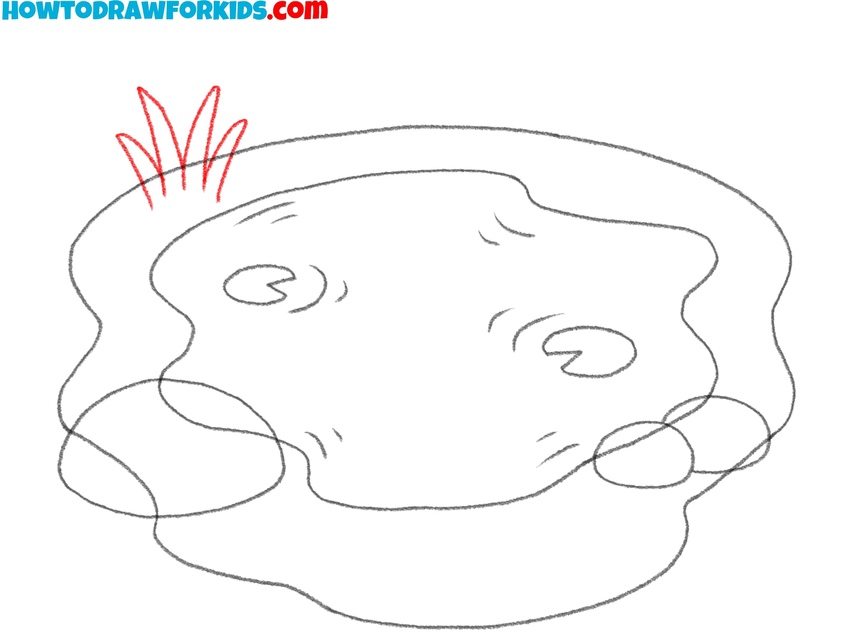
- Add ripples in the water.
Water always looks more convincing when it has movement, so add small curved lines inside the pond to illustrate ripples. Draw them around the lily pads or near the stones to show where the water is disturbed. Keep these marks short and light.

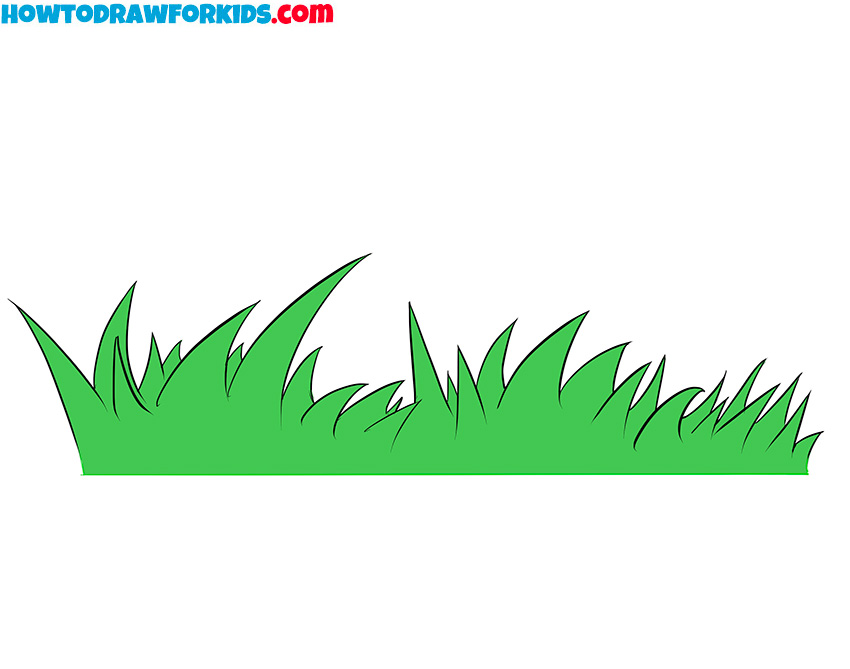
- Draw grass near the pond.
Ponds are usually surrounded by plants, so sketch some tufts of grass along the edge. Use sets of long, narrow strokes that taper to points, and group them together in small clusters. Draw grass around the waterline sketching the blades of different lengths.
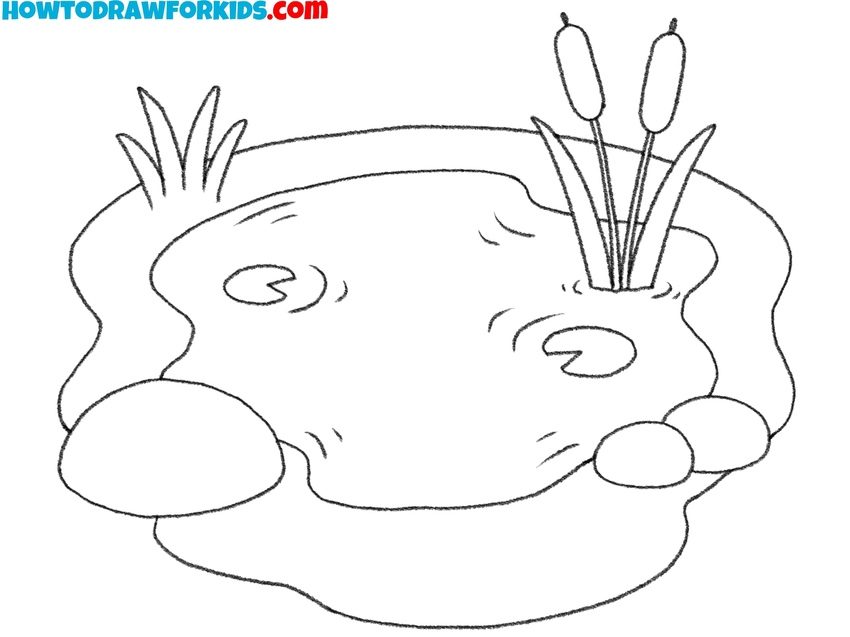
- Add tall cattail plants.
Cattails are tall plants often found near water, so draw several vertical stems rising from one area of the pond’s bank. Each stem should be straight and topped with an oval shape to represent the distinctive brown flower head.

- Correct the outlines.
Before finishing, clean up your drawing by erasing extra lines or overlapping marks that are no longer needed. Trace the important outlines of the pond’s edge, stones, lily pads, and plants. After that, correct anything that looks unbalanced or incorrect.
- Paint in the pond and surrounding part.
The last step is adding color, to make the composition look finished. Fill the water with a light blue or turquoise shade. The outer bank can be green to convey grass, while the stones are shaded in light browns or grays. The lily pads should be green, and the cattails can be given green stems with brown tops.
Easy Pond Drawing Tutorial
Sketch the outer contour of the pond using an irregular oval-like line with soft bends to imitate a natural water edge. Add reed plants at one side by drawing clusters of narrow pointed leaves, then place cattails on top with elongated ovals.
Balance the composition by adding a second group of plants on the opposite side. Draw an oval inside the pond to represent a water plant, then add additional irregular curved lines across the surface to suggest ripples.
Erase any extra marks and refine the contours. For coloring, use blue tones for the water, green for the reeds, and brown for the cattails. Also, you can draw a fish jumping out of the water or add your own unique details.
Conclusion
The lesson is over, and you can evaluate the result of your work. Now you have learned how to draw a wildlife object and can use these skills in the future. Try making the pond the centerpiece of your drawing and add some surroundings such as shrubs.
Also, you can draw a tee at the background, or make the comparison more complex by drawing clouds above the pond. Or you can add some animals or other additional elements to make your sketch look more unique.