How to Draw a Santa Bag
Today in this tutorial you will learn how to draw a Santa bag in just nine very easy steps with helpful tips.

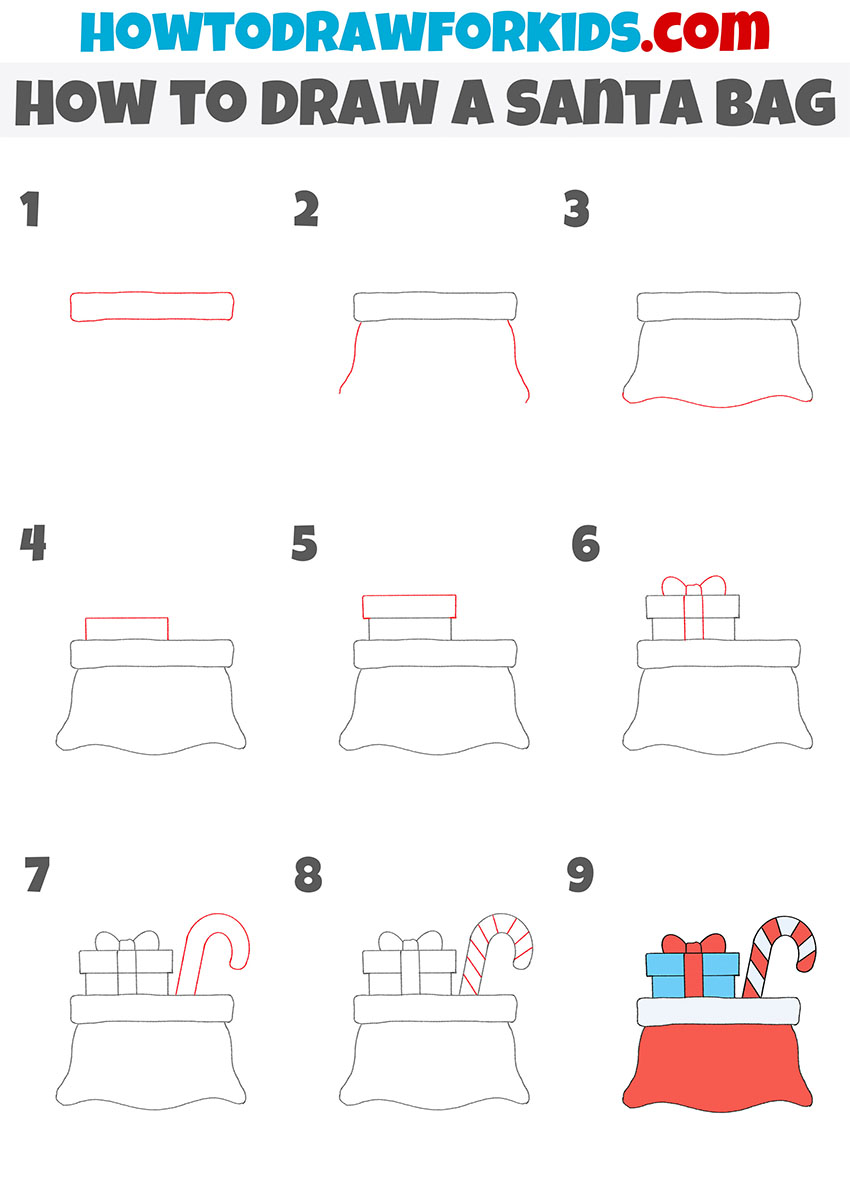
I suggest you complete a new exciting lesson in which you will learn how to draw a Santa bag. This is another simple lesson that is dedicated to drawing holiday attributes.
Now I will show you how to draw a Santa bag step by step. Traditionally, the Santa bag has a red color and white trim along the top edge. You can see that the bag contains staff and a gift in a beautiful box with a bow. It looks very nice!
With the help of simple instructions, you can easily draw this beautiful picture and be satisfied with the result. Each step in this instruction is visualized and supplemented with a small hint so that you correctly depict the next element.
Materials
- Pencil
- Paper
- Eraser
- Coloring supplies
Time needed: 30 minutes
How to Draw a Santa Bag
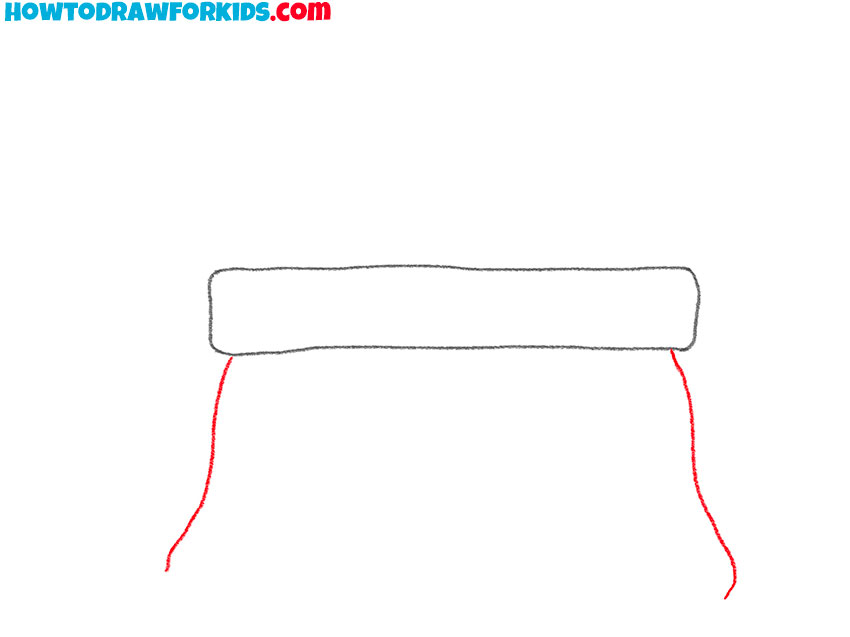
- Add the top trim to the bag.
With the help of smooth lines draw a narrow strip of a rectangular shape.

- Sketch out the sides.
Depict smooth, curved lines on each side.
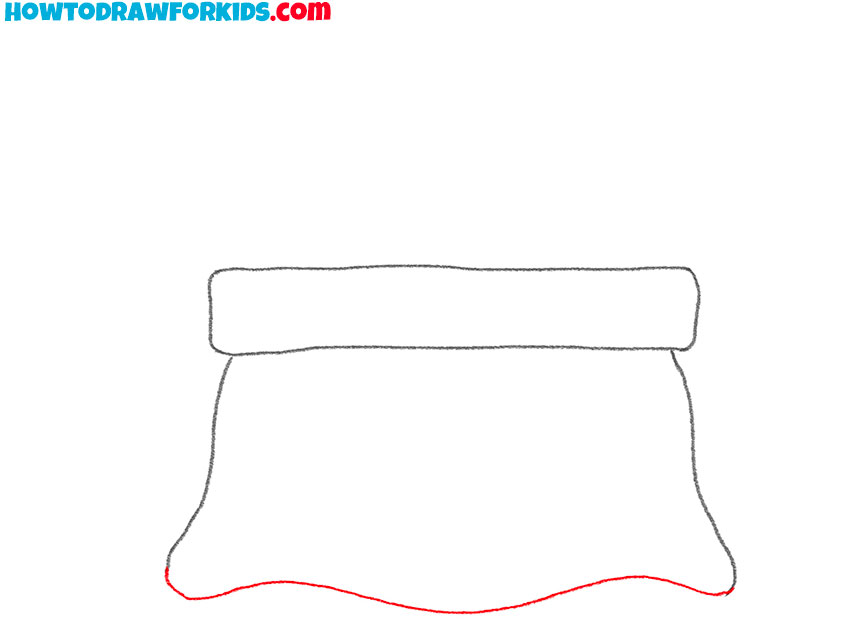
- Add the bottom outline of the bag.
Draw a smooth wavy line at the bottom.
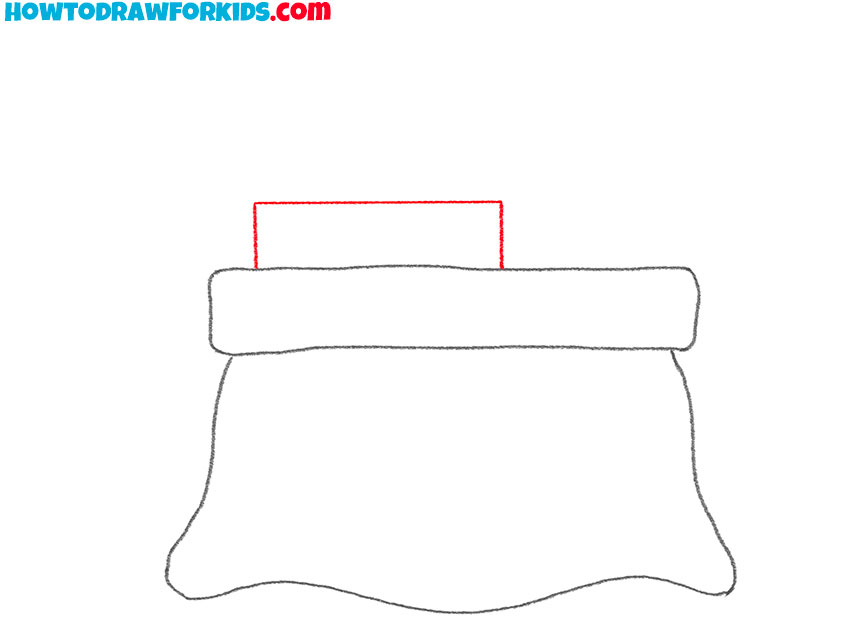
- Sketch out the box.
Use straight lines to draw the box inside the bag.
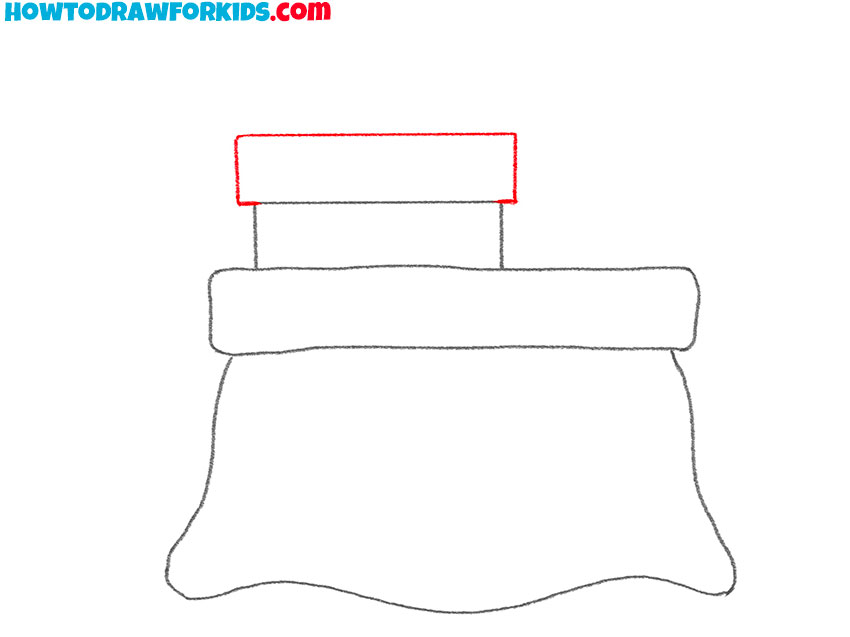
- Draw the lid on the box.
Add the tall lid that is shaped like a rectangle.
- Depict the bow on the box.
With the help of several straight and rounded lines draw the bow.
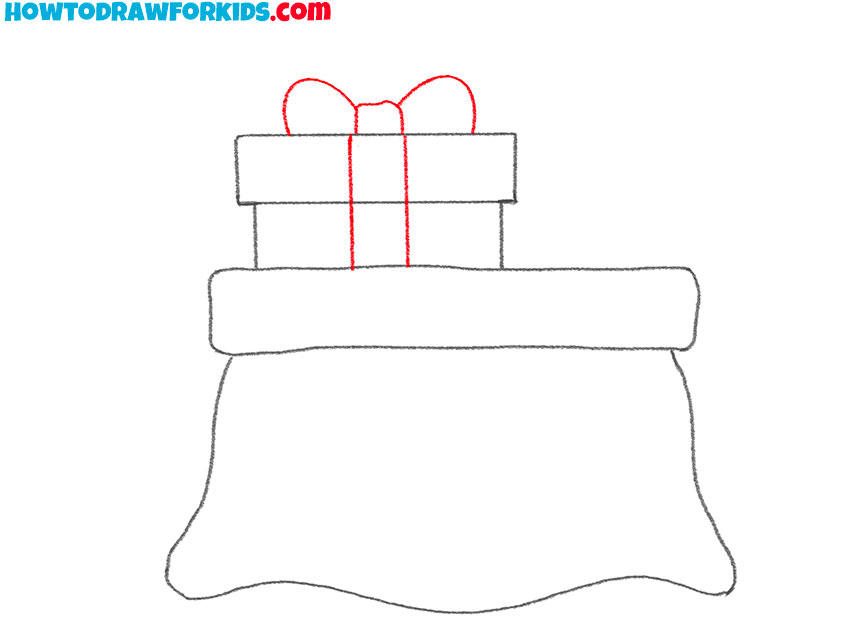
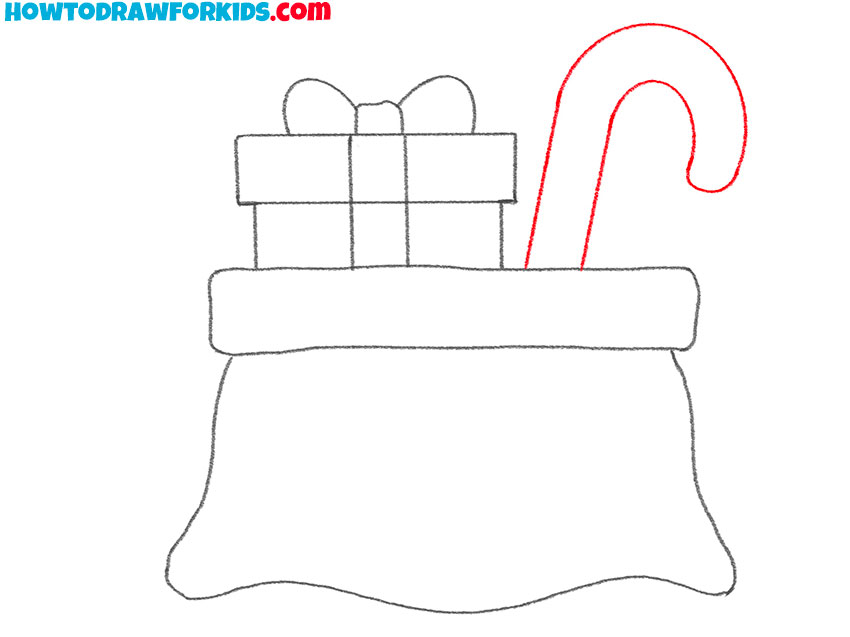
- Sketch out the staff.
On the side of the box, draw the staff using smooth, curved lines.
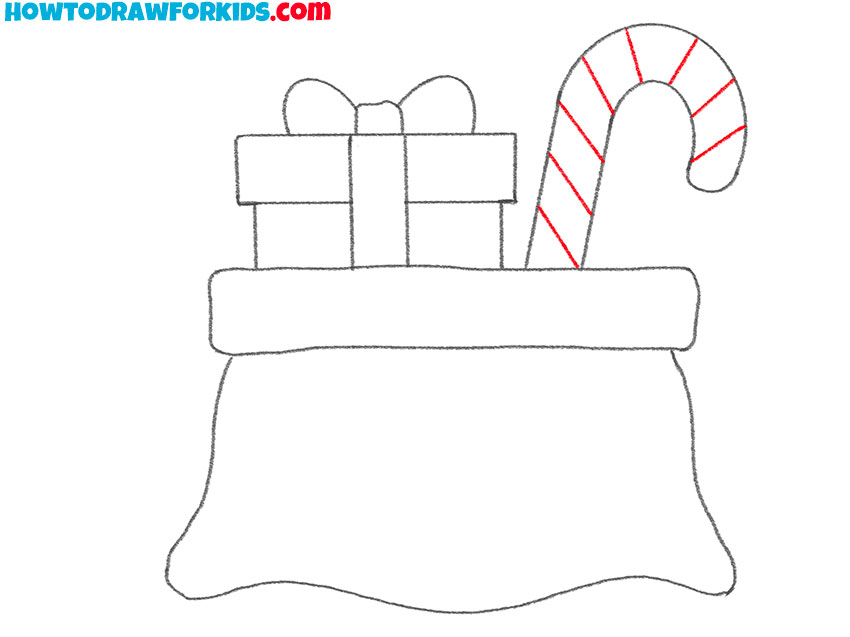
- Detail the staff.
Consistently draw stripes on the staff.
- Color the drawing.
You will need red and blue.

Another lesson completed! I hope that this creative task gave you pleasure and you had a good time. Share your impressions in the comments.
By tradition, at the end of the lesson, you can download a PDF file for free, which contains brief instructions and other useful tools. Save this file and use it whenever you want.

