How to Draw a Scrunchy
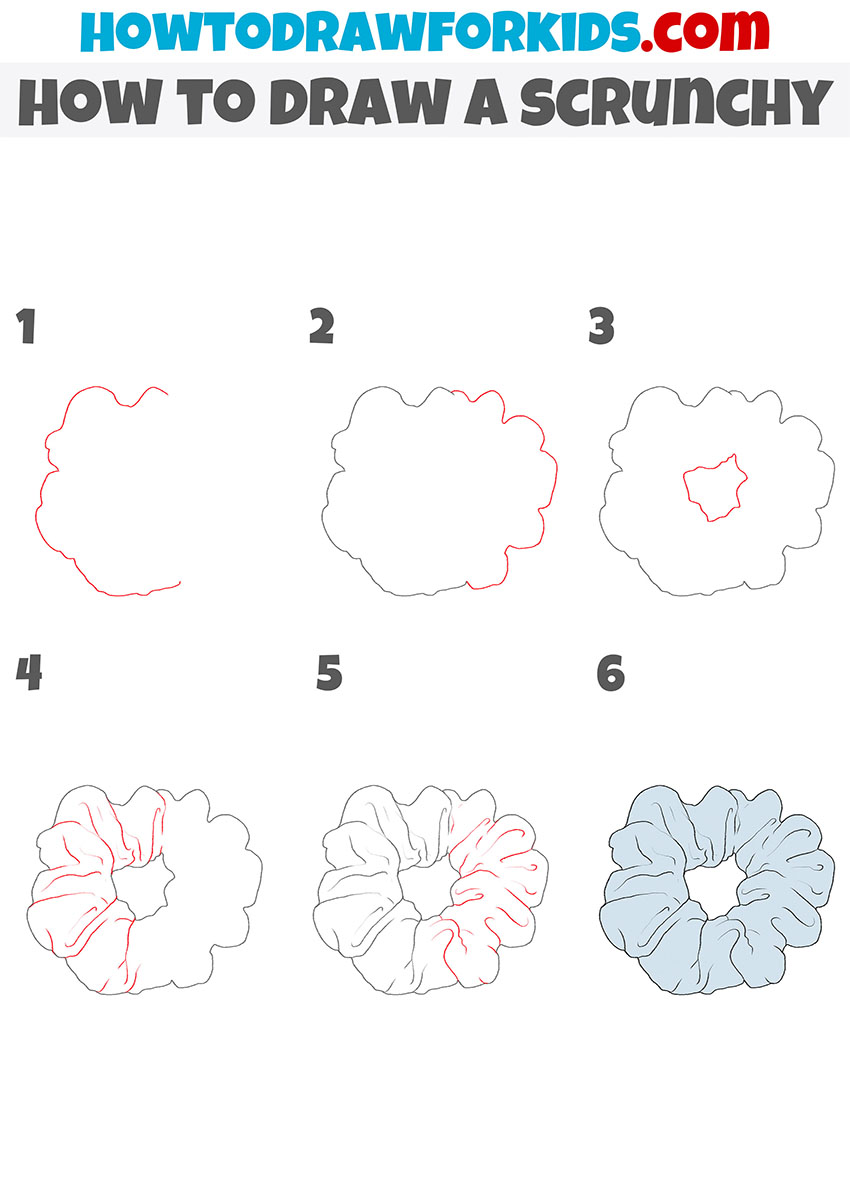
In this simple tutorial for kids, I’ll show you how to draw a scrunchy in six easy steps. Follow along and create your own colorful, realistic hair accessory!

How to Draw a Scrunchy: Basic Information
Drawing a scrunchy involves understanding how fabric behaves when gathered and compressed. This tutorial provides an opportunity to study fabric dynamics, helping young artists learn how different materials react under various conditions.
By observing and replicating the folds and creases of the scrunchy, artists can better understand how to portray fabric in other contexts, whether it’s clothing, drapery, or accessories. This knowledge trains their ability to draw more complex subjects with realistic fabric textures.
A scrunchy’s design balances between symmetry and asymmetry due to its circular shape and irregular folds. Practicing with a scrunchy allows kids to experiment with maintaining a symmetrical overall form while incorporating asymmetric details, a skill that is useful in many aspects of drawing and design.
To enhance and solidify your knowledge, I will provide tips on making your artwork even more captivating. Additionally, I will share free supplementary PDF materials with you.
Scrunchy Drawing Tutorial
Materials
- Pencil
- Paper
- Eraser
- Coloring supplies
Time needed: 30 minutes
How to Draw a Scrunchy
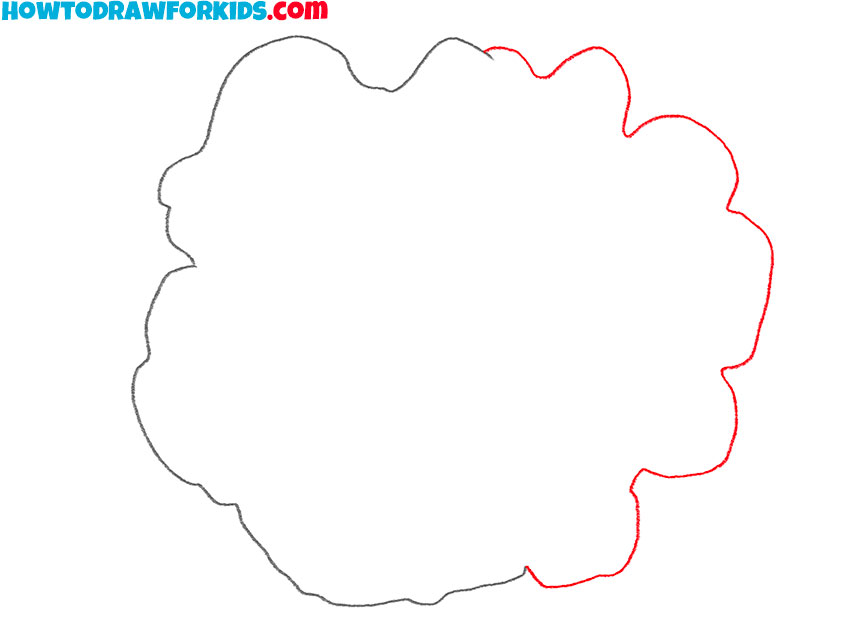
- Draw the left side of the outer contour.
Start with an irregular, wavy line that forms approximately half of a loose, fluffy circle. This line should have a natural, organic feel, mimicking the soft, gathered texture of the fabric. Use light, flowing strokes to create the appearance of gentle folds and crinkles.

- Create the right side of the outer contour.
Next, complete the outer contour by drawing the right side. Connect this to the left side drawn in Step 1, ensuring the wavy, irregular pattern continues seamlessly. This part of the outline should also reflect the gathered, crumpled fabric, with variations in the curvature to maintain a natural look.
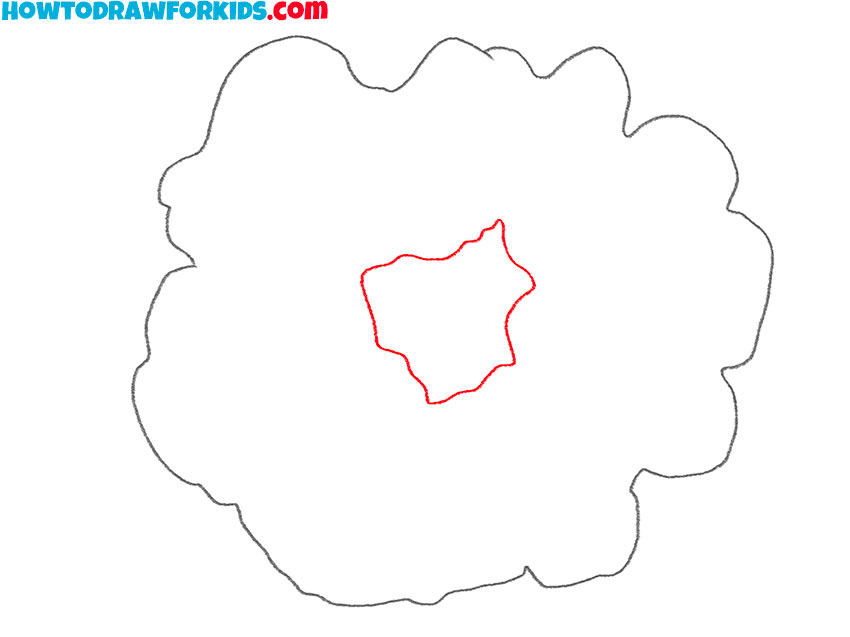
- Add the inner contour.
Now, draw the inner contour of the scrunchy, indicating the central hole. This inner shape should also be wavy and irregular, much like the outer contour but smaller. Place it roughly in the center of the outer contour, maintaining the gathered fabric look.
- Add texture to the left side.
Begin adding texture to the left side of the scrunchy. Draw lines radiating from the inner contour towards the outer edge, focusing on the left half. These lines represent the folds and creases in the fabric. Vary the length and curvature of these lines to create a natural, gathered look.
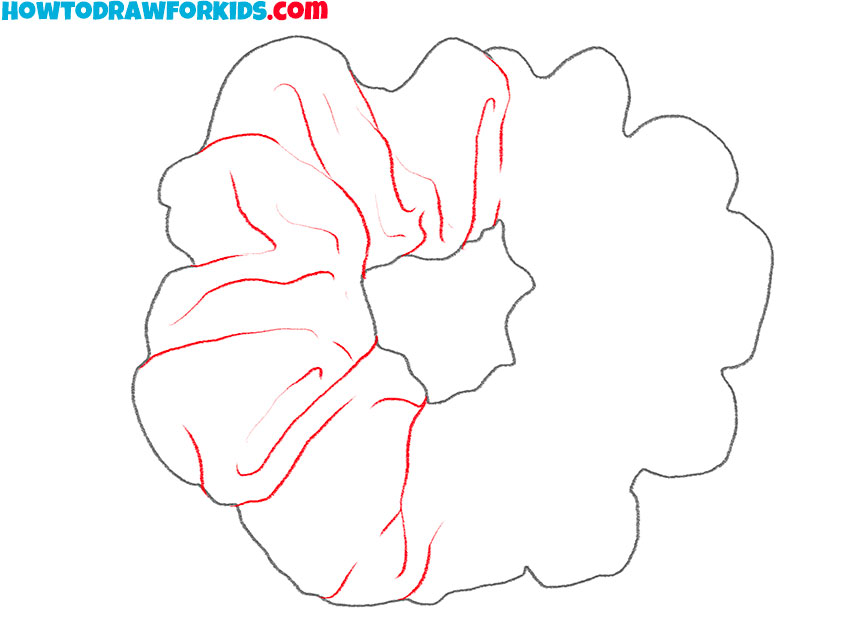
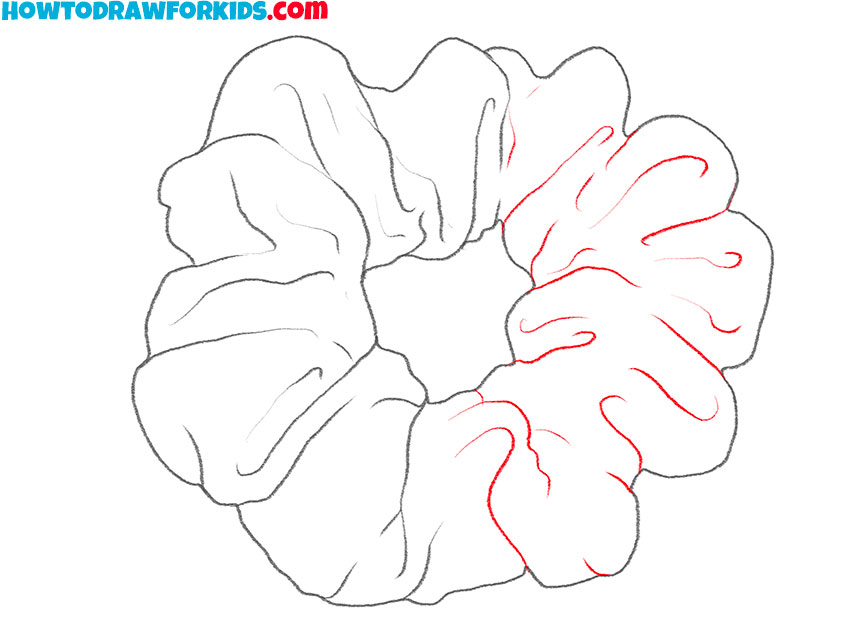
- Add texture to the right side.
Continue by adding texture to the right side of the scrunchy. Just like on the left, draw lines radiating from the inner contour towards the outer edge, focusing on the right half. These lines should also vary in length and curvature, representing the natural folds and creases in the fabric.
- Color the scrunchy drawing.
Choose a color that you prefer for the scrunchy and apply it evenly across the entire shape. You can use shadows and highlights to improve the depth and dimension created by the folds and creases. Darken the areas where the fabric overlaps and highlight the raised sections.

Additional Content
I’ve put together a special present for you – a downloadable PDF guide for the scrunchy drawing, absolutely free of charge. It’s packed with all the steps from my drawing lesson, so you can take your pencils and train whenever the mood strikes, no matter where you are.
This file also offers a coloring page, a tracing worksheet, and a grid drawing worksheet, all designed to reinforce your learning and practice.
How to Draw a Scrunchy: Tips and Tricks
Scrunchies come in various designs, including plain, patterned, and embellished with accessories like bows or beads. Try drawing different styles to challenge yourself and train your skills.
To create a three-dimensional effect, use layered shading. Start with a light base layer to illustrate the general shape and then add successive layers of darker shading to indicate deeper folds and creases. Be mindful of the light source and how it affects the shading and highlights on the fabric.
Adding subtle highlights to your scrunchy drawing can make the artwork more realistic. Use a white pencil or eraser to gently lift areas of the paper where the light hits the fabric. This technique is particularly effective for depicting shiny or glossy fabrics like silk or satin. Highlighting these areas creates a sense of light reflection, adding volume to your work.
Add background elements to your scrunchy drawing. Consider placing the scrunchy on a surface like a vanity, or add complementary objects such as brushes or other hair accessories. Including background elements can make your drawing more interesting. This practice helps you think about composition and how objects interact within a space.
Conclusion
And just like that, you’ve drawn a cool hair accessory. You’ve learned to observe and replicate complex shapes, understand the dynamics of gathered fabric, and create stylised but realistic textures and shading. These techniques are very important in developing a strong foundation in drawing and can be applied to various other subjects and styles.
the skills you’ve trained in this tutorial are not just limited to drawing scrunchies. The principles of line work can be applied to countless other projects. Continue to train yourself by drawing objects with varying textures and forms, and always pay attention to the small details that make your drawings more complex.
You’ve also explored different textures and materials, training your ability to depict realistic details. Additionally, the tips at the end about light and shadow have improved your understanding of how to create dimension in your drawings.
And I want to mention that there’s a whole bunch of cool things to learn to draw. Want to try a crown next? Or how about a beautiful braid? You can draw these and other object and accessories with my simple drawing instructions.