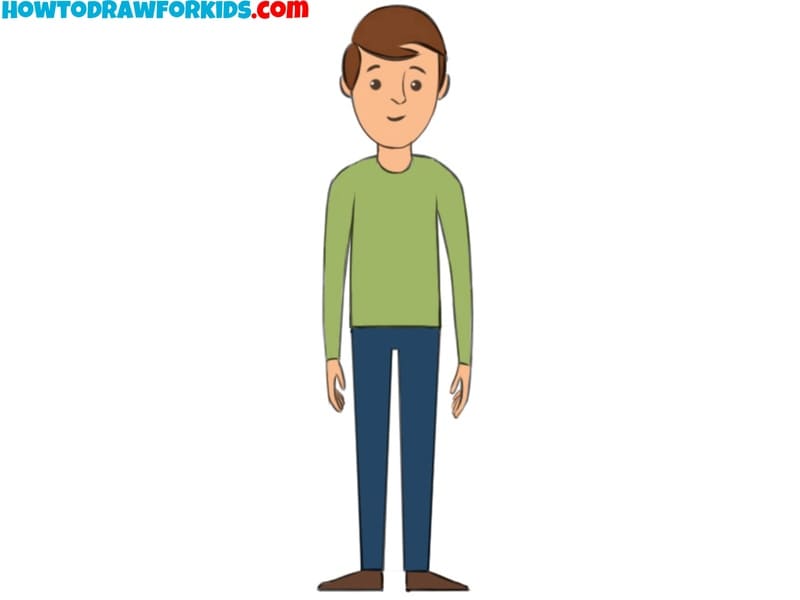
How to Draw a Person
To learn how to draw a person, you need to know the most basic drawing principles, which I will tell you step by step in this simple guide.
How to Draw a Person: Basic Information
Drawing a person is one of the most important skills for any artist. To do it right, you need to know many tricks and techniques.
In this tutorial I have collected for you the simplest ways to draw a person. We will learn how to do this using really basic steps and the simplest lines.
Using the basic tutorial, we will build a simplified but convincing human figure step by step. Next, I will share with you additional methods to sharpen your skills and cover some basic principles of drawing the human figure.
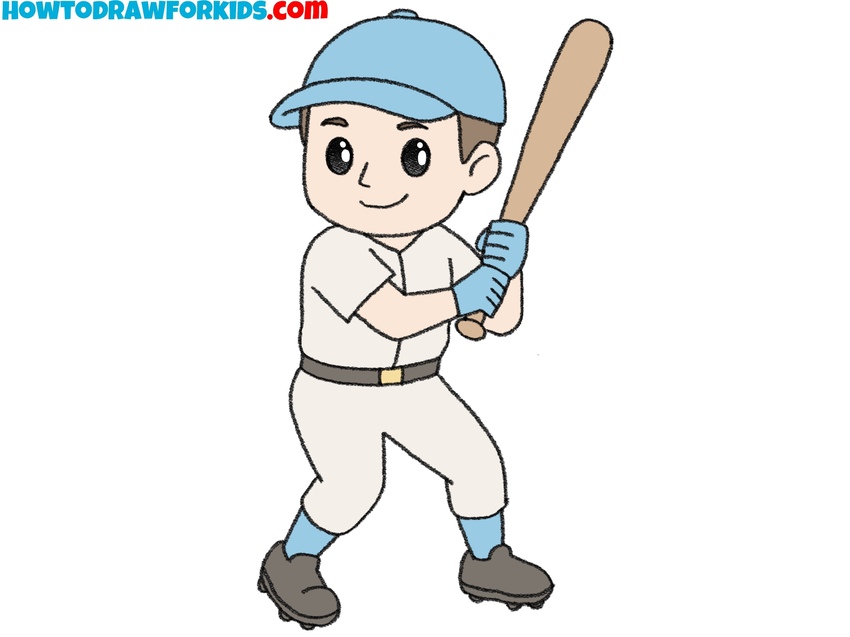
Earlier on the pages of Howtodrawforkids.com, I have already shown you how to draw a man for kids. These two instructions are quite similar to each other, except that this guide is laid out in much more detail, which means this instruction will be easier.
Person Drawing Tutorial
Materials
- Pencil
- Paper
- Eraser
- Coloring supplies
Time needed: 45 minutes
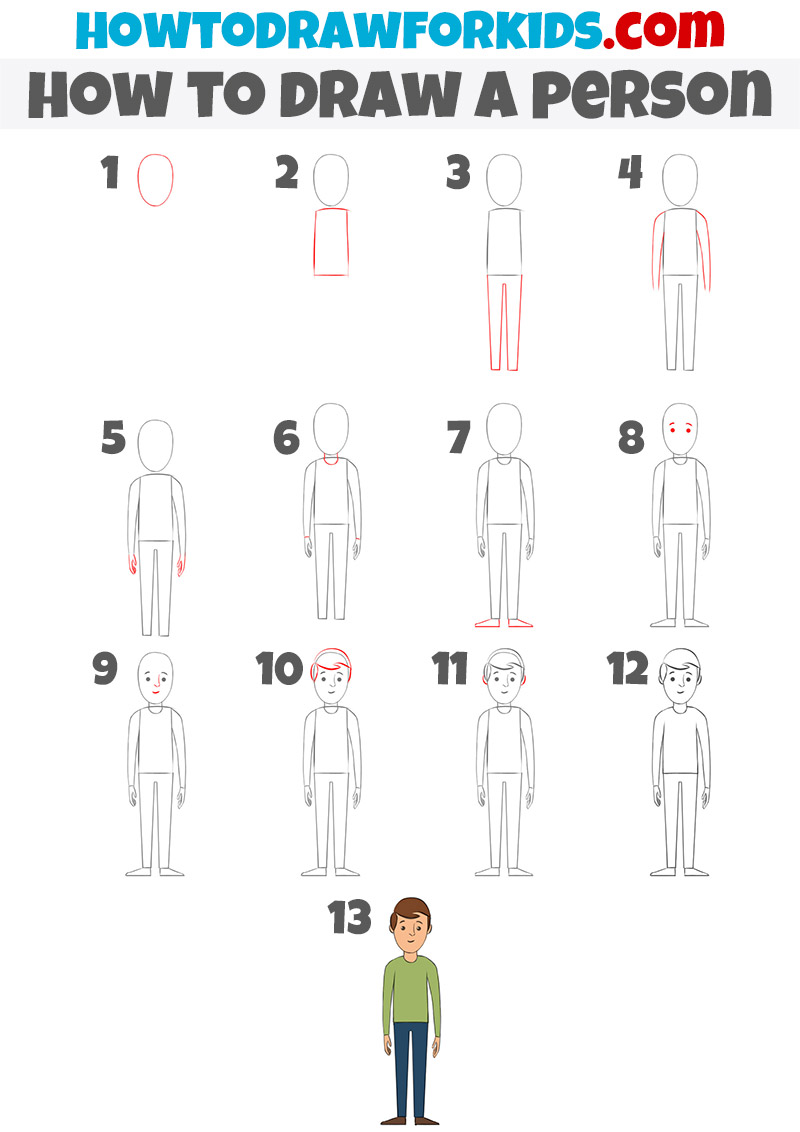
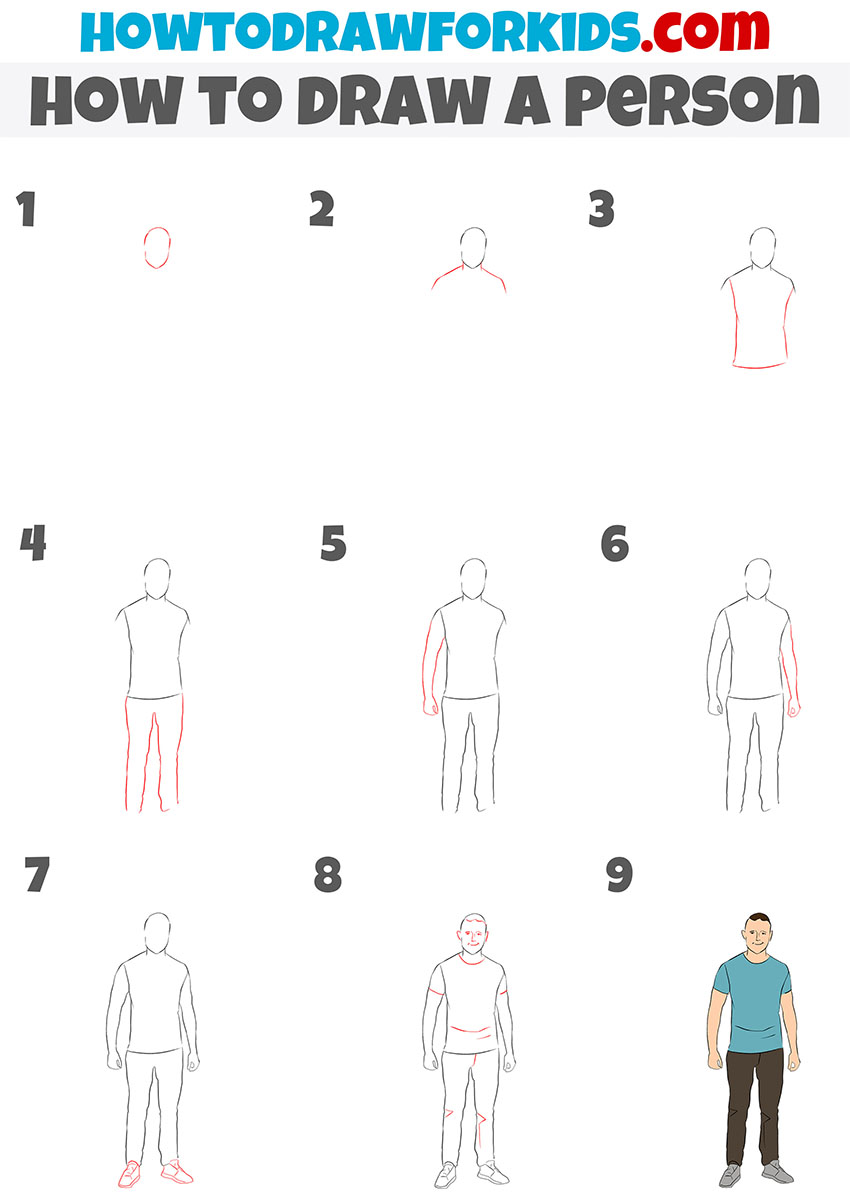
How to Draw a Person
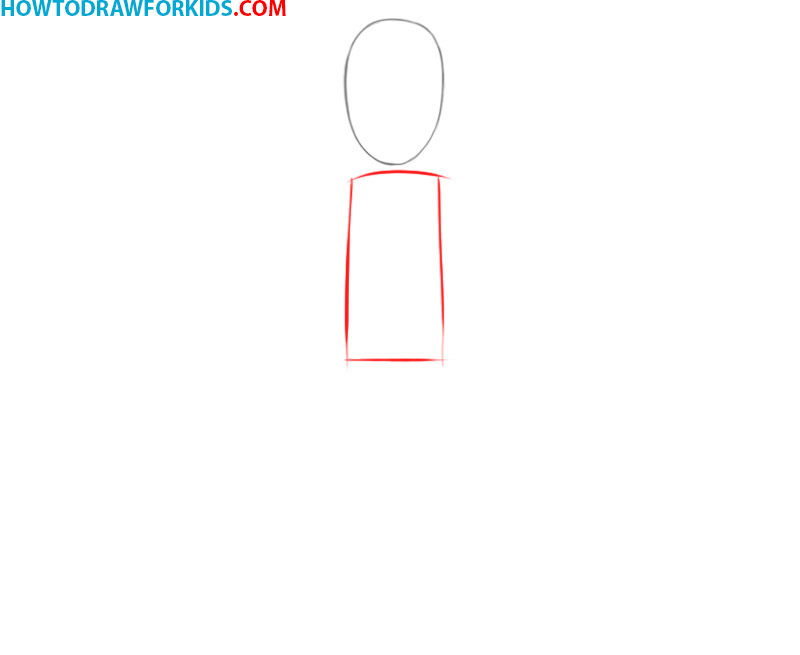
- Start drawing the head of the person.
Start by drawing an oval shape for the head. This oval should be slightly elongated vertically to accurately represent the proportions of a human head. Make sure the outline is smooth and even, as this will form the base for adding facial features later. Keep the lines light so you can easily adjust them if needed.

- Create the outlines of torso.
Below the head, draw a rectangular shape for the torso. The rectangle’s width should be slightly wider than the head to maintain a natural body proportion. The torso’s length can vary depending on how tall or short you want the person to be.
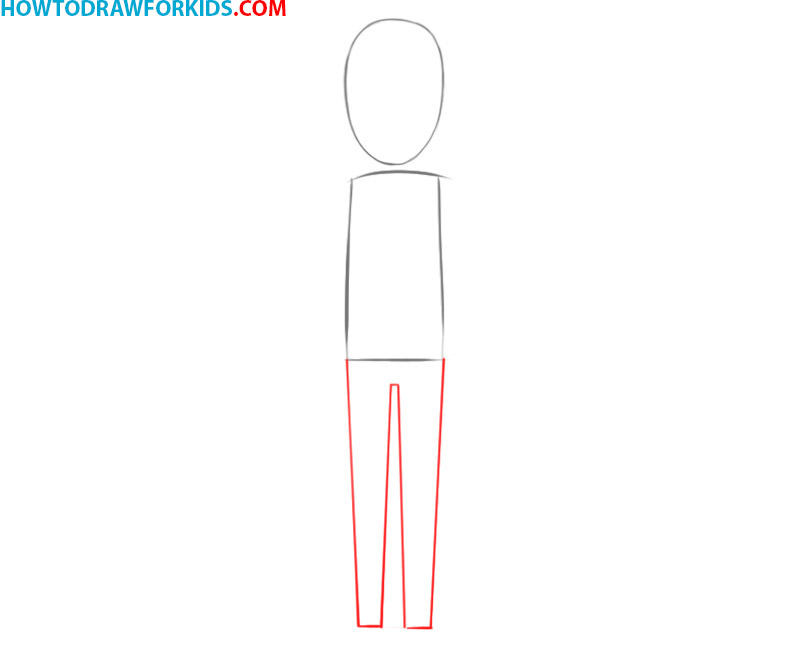
- Create the contours of the legs.
For the legs, extend two straight lines downward from the bottom corners of the torso. Then, draw two parallel lines next to these to form the legs, making sure they are of equal length. For your convenience and accuracy of the drawing, you can correlate the proportions of the legs and torso.
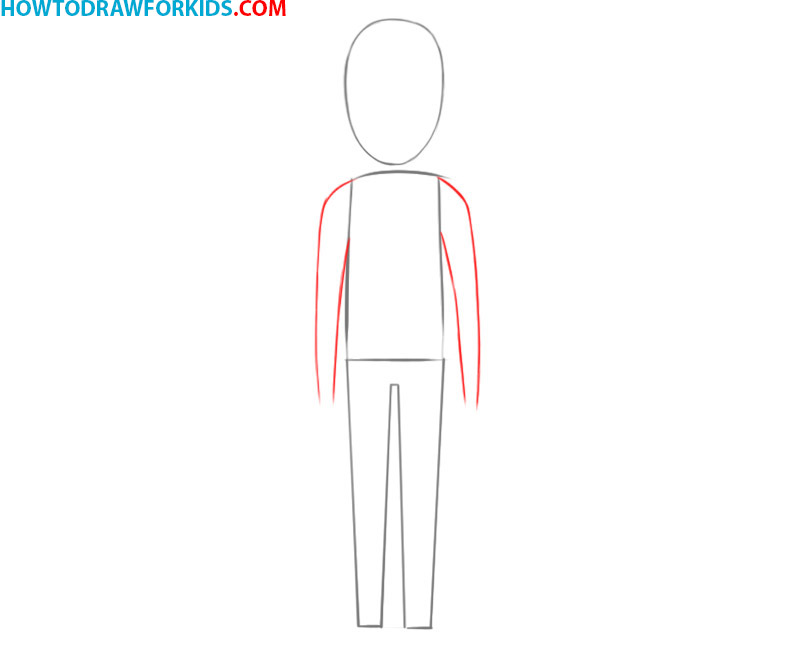
- Draw the arms of the person.
Add arms to the person by drawing lines downward from each shoulder. These lines should run parallel to the body, ending slightly lower the bottom of the torso to create a natural posture. Most often, it is the position of the hands that conveys the mood of the character and the entire drawing as a whole.
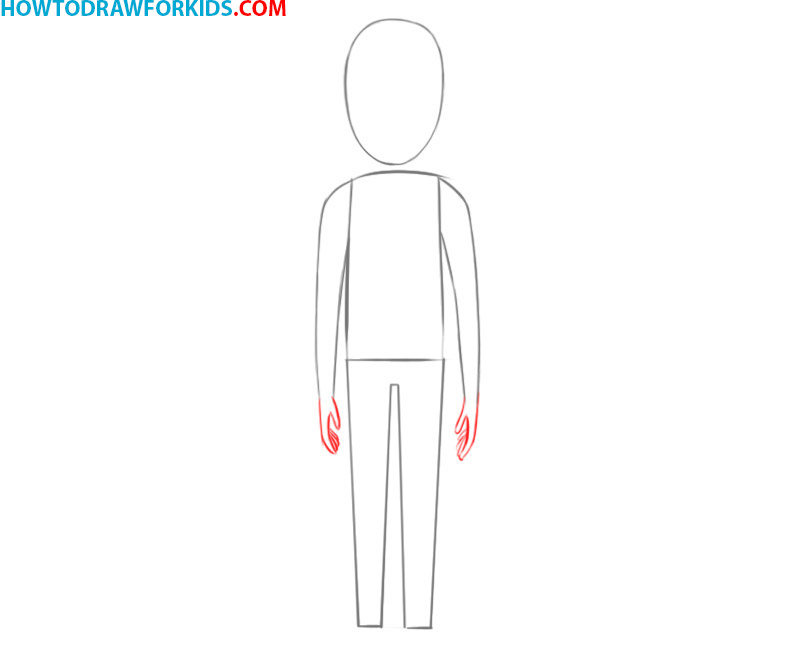
- Create the contours of the hands.
To detail the arms, add lines or small rectangular shapes at the ends to form the hands. These shapes should be proportional to the arms and match in size. To avoid confusion, draw the thumb and index finger first and then add the rest.
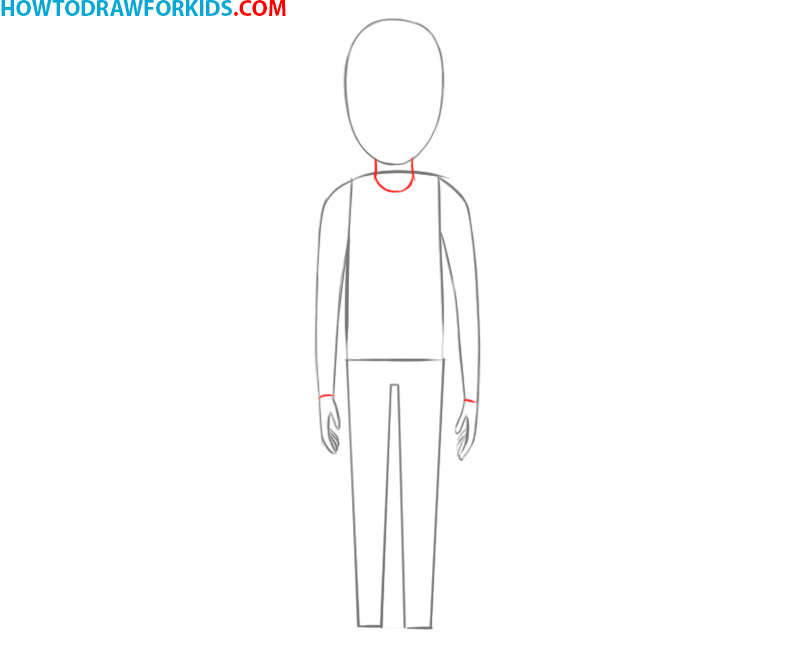
- Draw the person’s neck.
Add a small, slightly curved line between the head and torso to represent the neck. This line should connect the base of the head to the top of the torso. The neck should be narrow and not too long, providing a smooth transition between the head and torso.
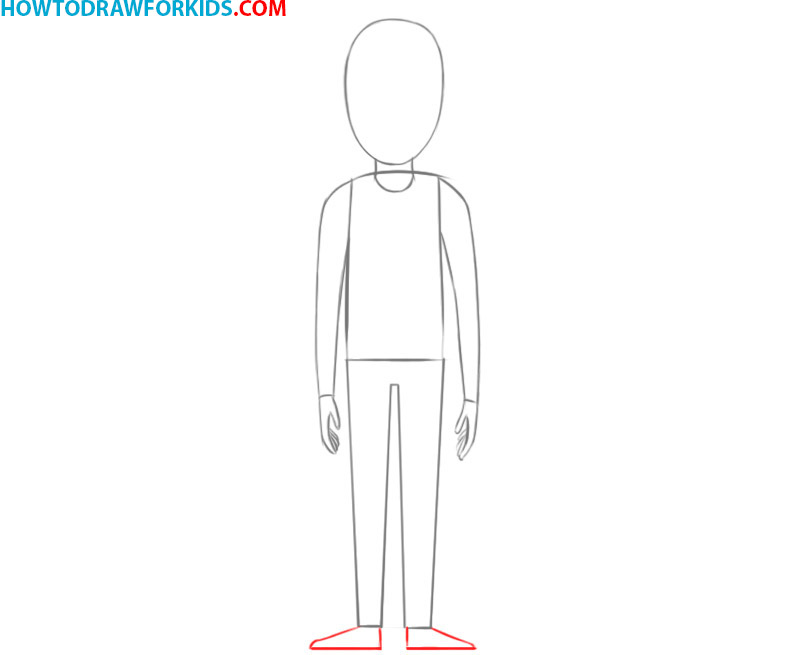
- Illustrate the shoes.
Begin by extending horizontal lines at the ends of each leg to represent the feet. These lines should be parallel to the ground and equal in length to each other. Consider the angle and width of these lines, as they will form the basis for the shoes or other footwear.
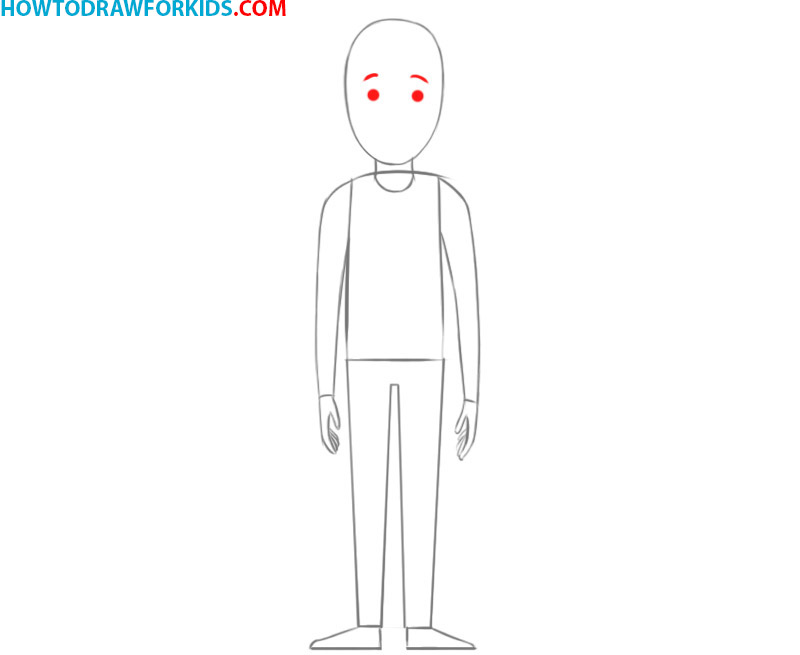
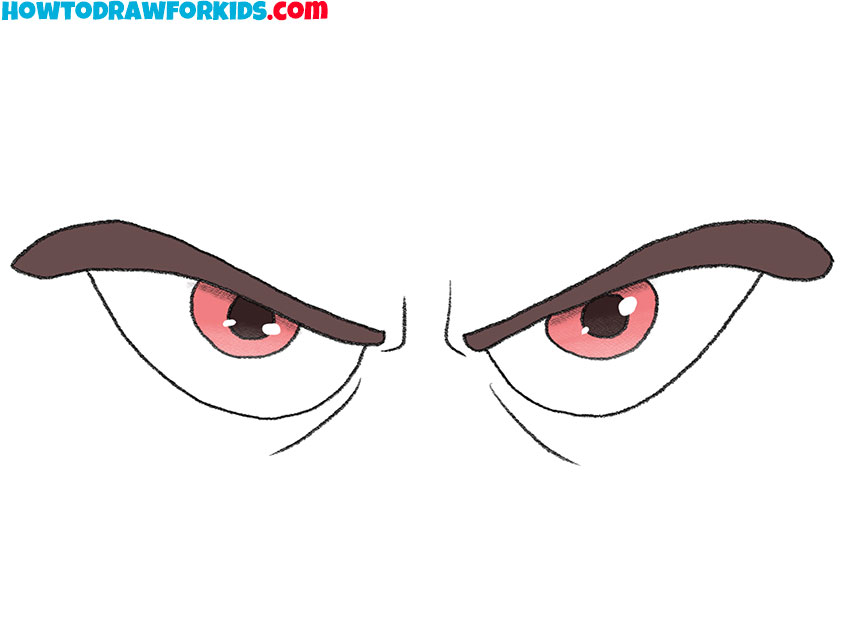
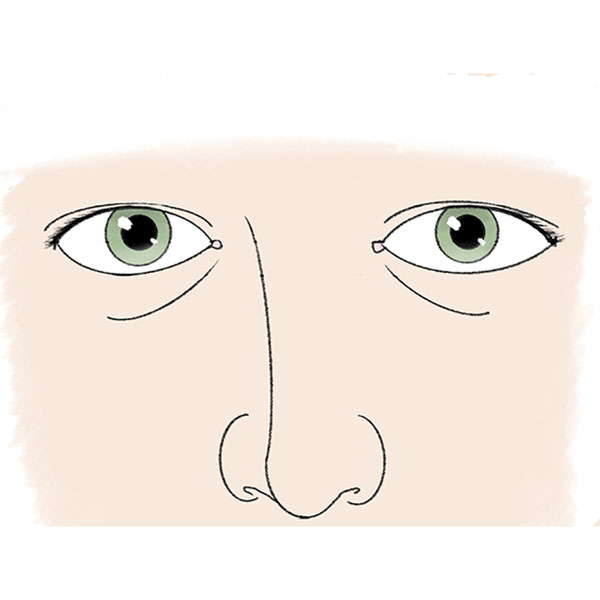
- Draw the facial features.
Start with the eyes, drawing two small circles or ovals in the upper half of the head, spaced evenly apart. For further detailing, add eyebrows above the eyes to complement the expression. The distance between the eyes and their placement play a very important role in expressiveness, even if it’s just two dots.
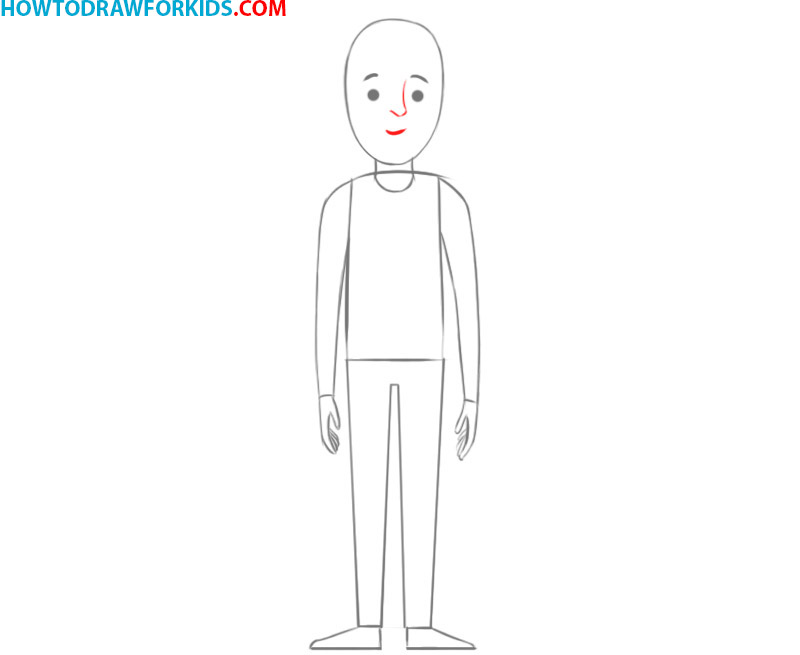
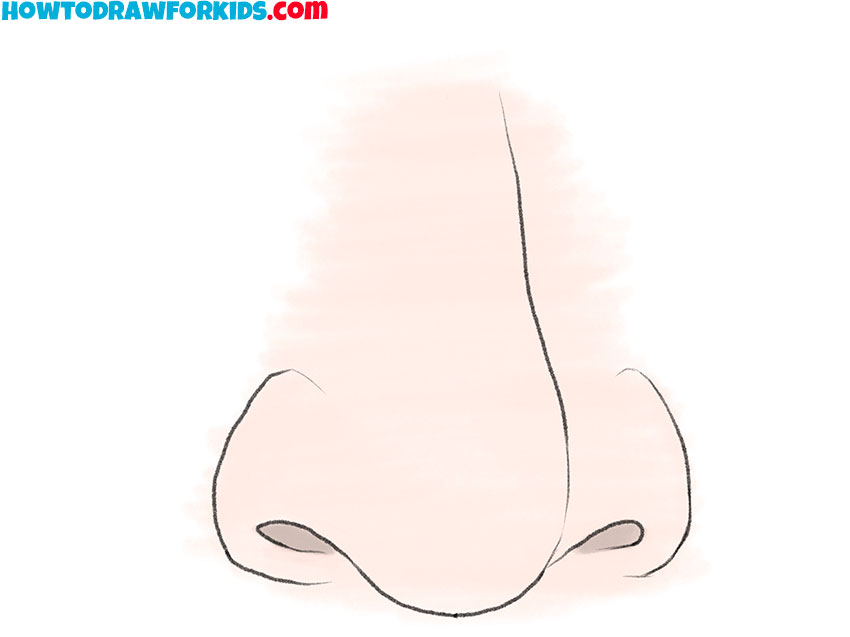
- Add the nose and mouth.
For the nose, draw a small curved line or a dot below the eyes, centered on the face. Complete the facial features by sketching a simple smiling line or a more detailed curve for the mouth, positioned below the nose.
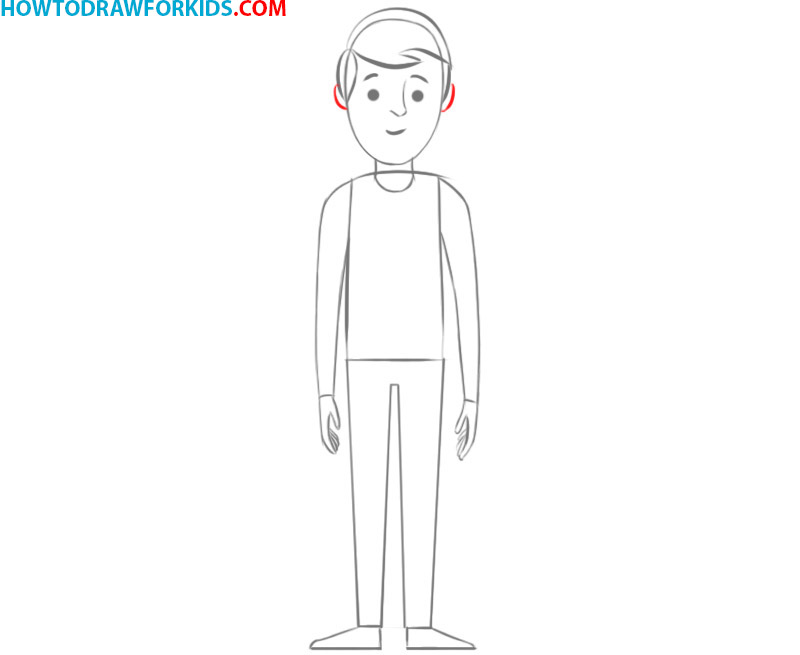
- Sketch the contours of the hair.
Draw the hair around the head by creating lines or a solid shape. For a short hairstyle, sketch lines close to the scalp, following the natural curvature of the head. For longer hair, extend the lines downward or outward, depending on the style.

- Sketch the ears of the person.
Draw small curved lines on each side of the head to form the ears. The ears should align with the eyes and be proportional to the head. To ensure symmetry, you can lightly draw a guideline connecting both sides of the head at ear level, then sketch the ears along this line.
- Remove the extra-lines.
Go over the entire figure, refining any remaining areas. Smooth out the lines of the arms, legs, and torso, making sure they are proportionate. Then, remove all unnecessary lines and finalize the outline of the person drawing.

- Add colors to the person.
The colors choices can vary depending on the desired look. Choose appropriate colors for the skin, hair, and clothing. You can use shading to make the figure look more three-dimensional. You can also decorate the person’s clothes with any patterns and art you like.

How to Draw a Person: Alternative Techniques
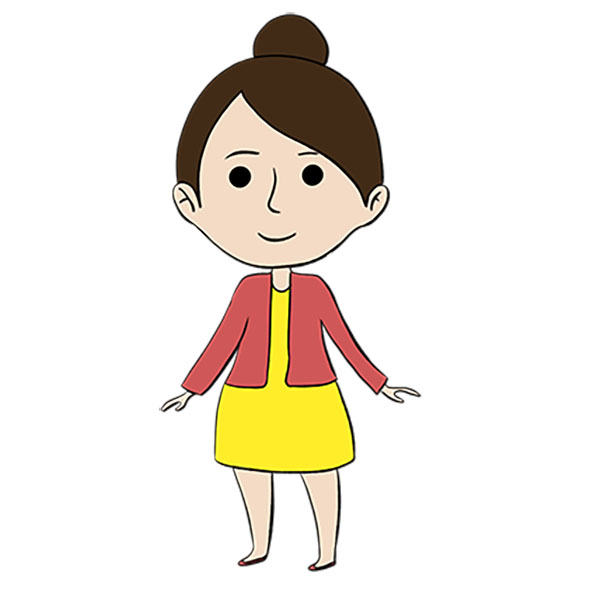
Drawing a Simple Person
Start by drawing a small, rounded shape for the head and add a simple hairstyle on top. Next, outline the neck and upper body with basic, smooth shapes. Add the arms by drawing simple, curved lines extending from the shoulders, with the hands resting on the hips.
Draw the lower body with two straight lines for the legs, making sure they are slightly tapered towards the feet. Add small ovals at the bottom for the feet. Finally, draw a simple face with two eyes, a nose, and a smiling mouth, and finish by coloring the figure.
You can paint a person in the same colors, or you can show your imagination and use any other colors for skin, hair, and clothes.
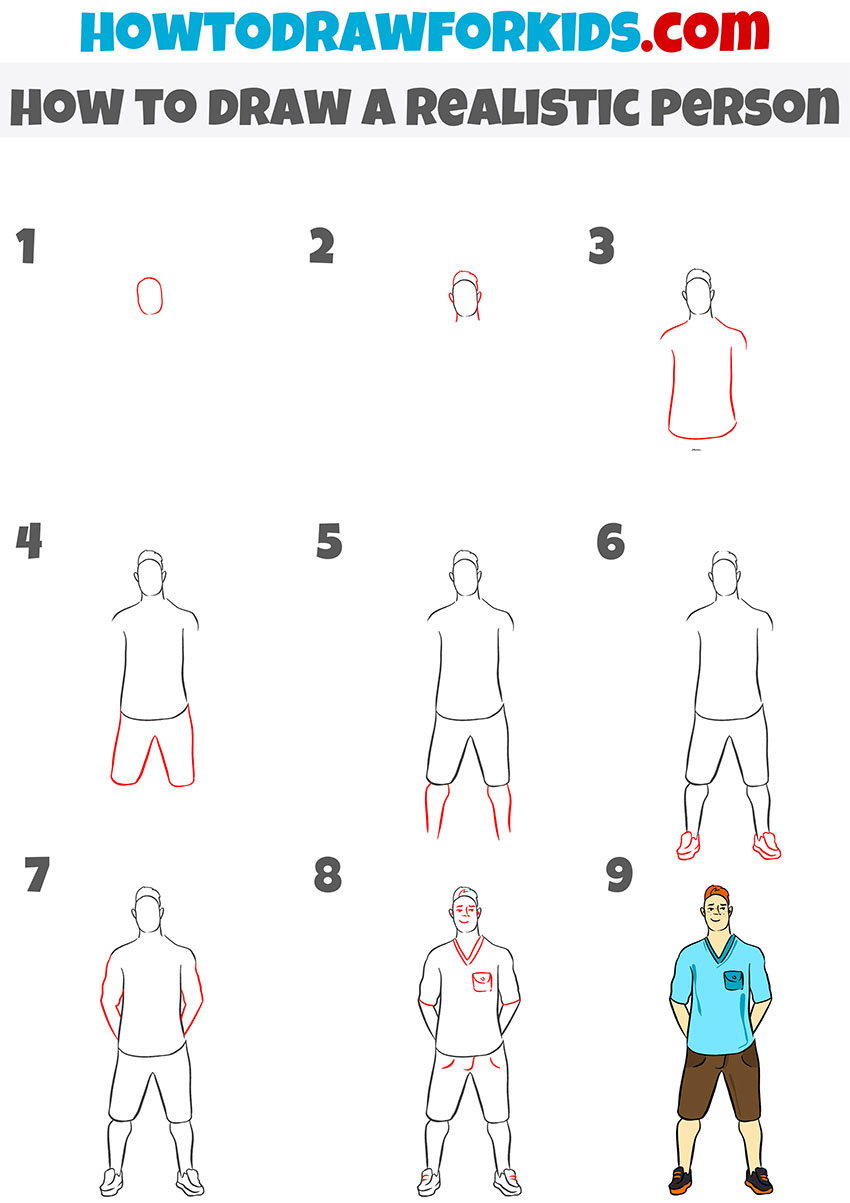
Drawing a Person With Realistic Proportions
For your convenience, the tutorial is divided into several steps and each drawing step has a little hint for you. Be attentive and careful. Do not hurry. If something doesn’t work out the first time, don’t despair. Keep drawing and over time you will be great at drawing a human figure.
Begin by sketching an oval for the head. Then, draw lines to indicate the shoulders and outline the torso, ensuring the proportions are accurate. Next, add the legs by drawing two straight lines from the torso, shaping them to indicate the thighs and calves. Draw the arms next, extending them from the shoulders, making sure to include slight bends to represent the elbows.
Add details to the torso and limbs to define muscles and joints, adding some the realism of the figure. Finally, sketch the facial features and add clothing details. Finish by coloring the drawing in colors you like.
Drawing a Detailed Person
If you think this tutorial will be too difficult for you, then you should not worry. I have prepared this guide especially for children and aspiring artists. Therefore, I am sure that you can handle it, even if you have no drawing experience at all.
First sketch an oval for the head. Then, add lines to illustrate the shoulders and outline the torso. Then sketch the legs by extending two straight lines from the torso, shaping them to represent the thighs and calves. Next, add the arms, extending them from the shoulders of the person.
Refine the torso and limbs with additional details to define muscles and joints. Finally, sketch the facial features and add clothing details. And as before, you can add any colors to paint your person drawing.
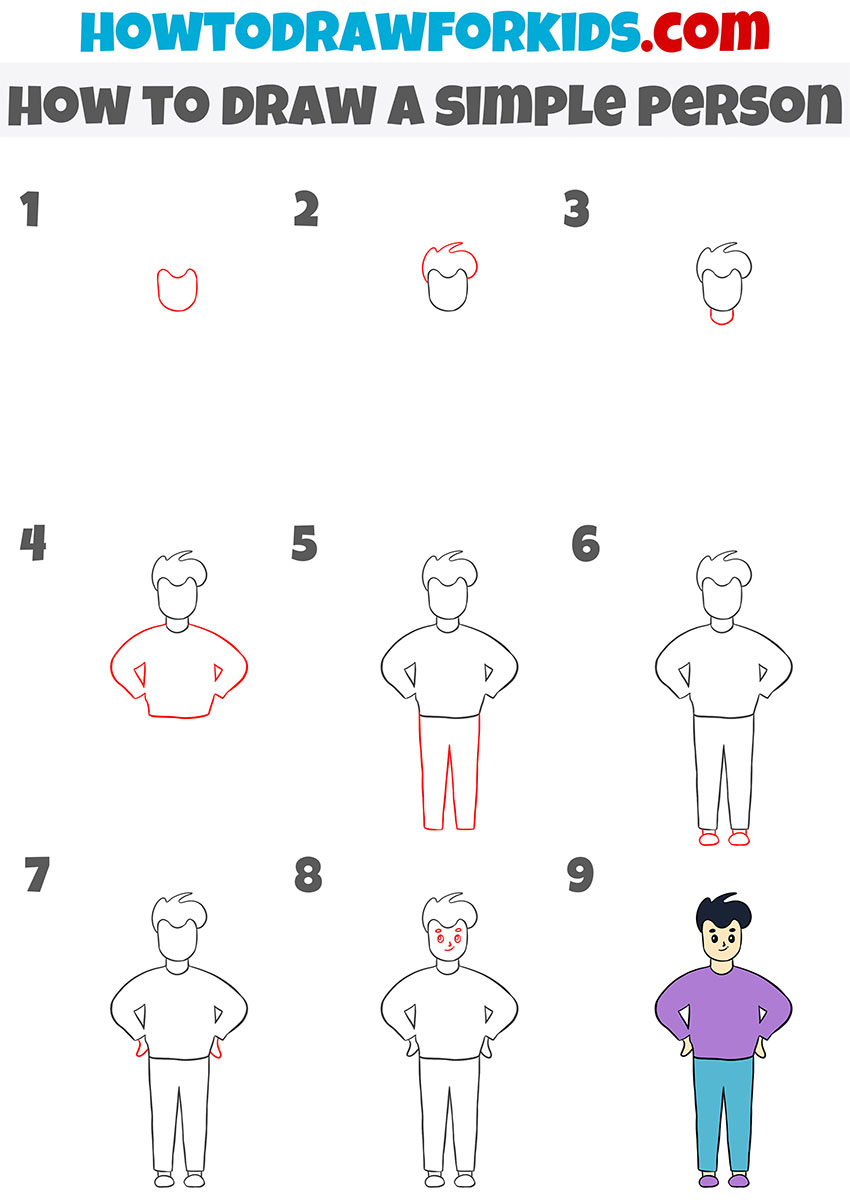
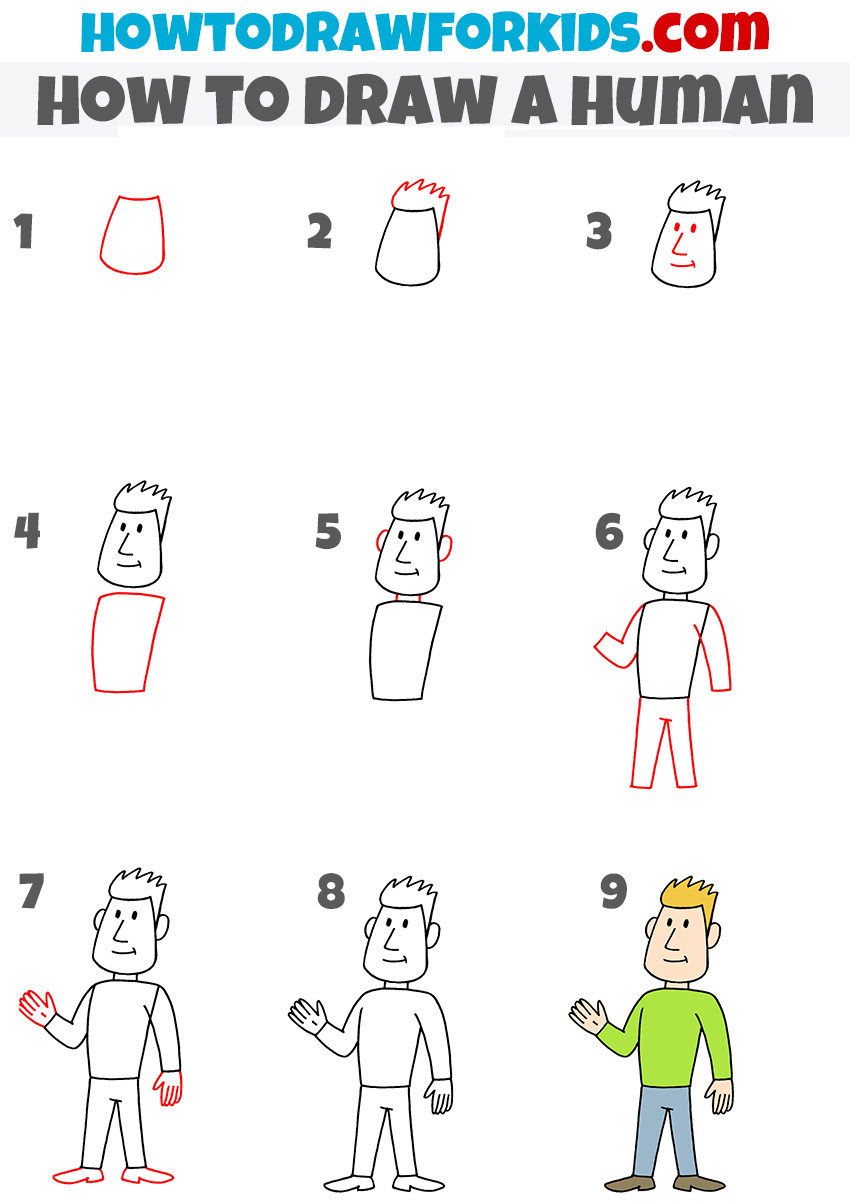
Simplified Version
Repeating all the steps of the lesson after me and turning on your imagination a little, you will get an excellent result. You can show off your drawing even if you are drawing a person for the first time.
Begin by drawing an inverted U-shape for the head, followed by adding spiky hair on top. Next, outline the face with simple features such as eyes, a nose, and a smiling mouth. Draw the rectangular body below the head, and add the ears on both sides.
Extend the arms from the shoulders, with one arm bent and the other hanging down. Sketch the legs with straight lines, ensuring they are slightly apart. Add simple hands and feet with basic shapes. Finally, complete the drawing by coloring it, adding a green shirt and blue pants.
Cartoon Proportions: Method 1
If you complete this lesson, then you will learn an easy way to draw a human figure. Start with simple objects, practice as often as possible and in the future you will learn how to draw a more realistic human figure.
Start by drawing an oval for the head and a smaller oval below it for the body. Next, add simple facial features like eyes, a nose, and a smiling mouth. Draw small circles for the ears on either side of the head. Add a simple hairstyle using curved lines.
Then, sketch the legs by extending two lines down from the body and adding small feet at the bottom. Draw the arms by curving lines outward from the body, ending with small hands. Finally, color the drawing, using basic colors for the hair, clothing, and facial features.

Cartoon Proportions: Method 2
The simple person that you draw with the help of this instruction will be made in a cartoon style. Note that the human’s head looks quite large compared to the proportions of his body, this way of depicting makes your drawing more cute.
Start by drawing a large oval for the head and a smaller oval below it for the body. Then add simple facial features such as large eyes, a small nose, and a smiling mouth. Draw the hair with basic curved lines, giving it a simple look. Extend the legs downward from the body using straight lines with small shoes at the bottom.
Next, draw the arms extending from the sides of the body, ending with small hands. Add eyebrows and refine the face to make it more expressive. Finally, color the drawing, using basic colors for the hair, clothing, and facial features.

Conclusion
If you enjoyed this tutorial on how to draw a person for kids, i encourage you to explore more. Check out the People category on my website, where you will find a lot of exciting and detailed drawing instructions.
Be sure to follow me on social media to stay informed about site updates, and feel free to leave a comment below this article with suggestions for future drawing lessons you’d like to see.
hundy p the best way to learn
thankyoooooooooooooooooooooooooou xxxxxxxxxxxxxxxxxxxxxxxxxxxxxxxxxx
Many thanks, Ronald!
I still don’t know how to draw this person
No problem, Addyson, just keep practicing and you will draw a person!
All of these are SUPER!
Glad you think so, Bob.
i love to draw and color.
Nice combination, that’s how most good drawings start.
Thanks for this drawing tutorial
No problem, Joe. Happy it came in handy.
me too i still do not know how to draw.
maybe that is for a good drawers they can draw it nicely.
Don’t worry about that. Just keep drawing, skill builds up faster than you think.
This helped me do my assignment alot its amziiiiiiiiiiiiiiiiiiiiiing
Good to hear it worked for your assignment.
I love this bro
Thanks!
this drawing tutorials is just great!
Appreciate that.
hi, im a 12 year old student and found these very helpful! i used this for my school project and got an A+ on my drawing skills, and my comic. Thank you so much!
That’s a solid result, Tyler!