How to Draw a Star
This tutorial on how to draw a star is perfect for anyone looking to depict the night sky or create a star for a Christmas tree.

How to Draw a Star: Basic Information
When learning how to draw a star, there are a few key aspects to focus on that will help ensure your final result looks neat, balanced, and well-proportioned.
First, focus on symmetry. A five-pointed star relies on equal spacing between each point, so it’s important to make sure your lines are evenly placed. If the points of the star are uneven, it can throw off the entire shape, making it look lopsided. You can lightly sketch guiding lines or use a ruler to help maintain even distances before committing to the final lines.
Another important tip when learning how to draw a star is to use soft pencil strokes at the beginning This way, if you need to make adjustments, it’s easy to erase without leaving marks. Gradually build up your lines as you become more confident in the shape of the star. This also allows you to fix any points that might not align as well as you’d like, ensuring the final version looks symmetrical.
Drawing a star, pay attention to where your lines cross. The points where the lines intersect should form sharp, clean angles. If the intersections are off-center or too curved, the points of the star will lose their crispness. You can practice drawing a few stars in different sizes to get comfortable with the proportions and the way the lines connect. Over time, this will help your stars appear more polished.
Lastly, consider the overall size of your star and how it fits into the larger context of your drawing. Whether you’re adding the star to a holiday card, a night sky scene, or a craft project, make sure the star’s size complements the rest of your design. Starting with basic shapes and then refining them can help you visualize the result more effectively.
Star Drawing Tutorial
Materials
- Pencil
- Paper
- Eraser
- Coloring supplies
Time needed: 20 minutes
How to Draw a Star
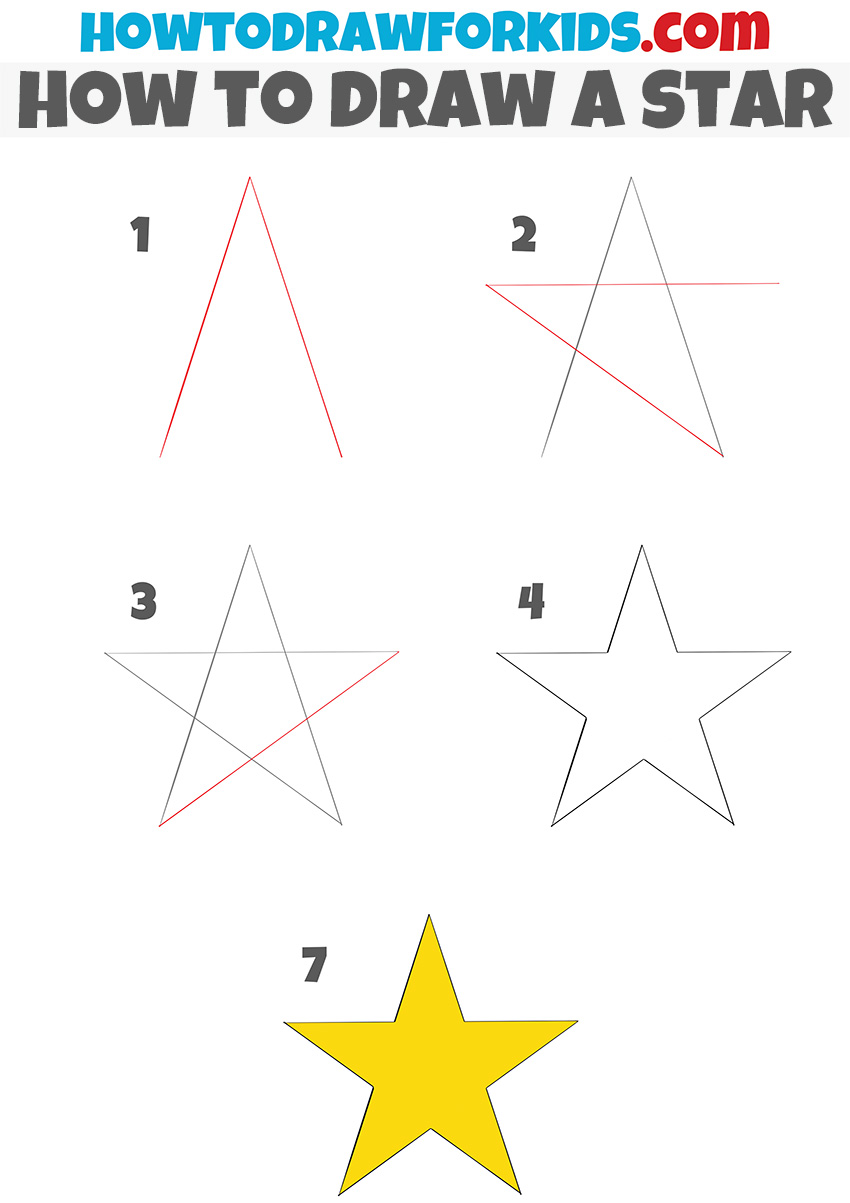
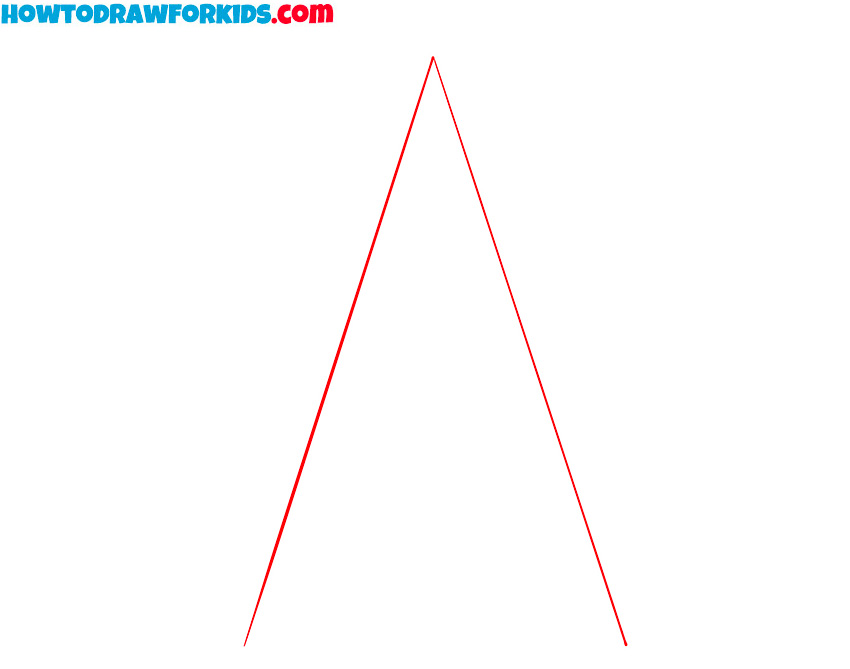
- Draw the first two lines of the star.
Start by drawing an upside-down “V” shape in the center of your paper. This will form the central part of the star. Make sure both lines are evenly angled, as this is really important for the star to look balanced. The lines should be of equal length, and the angle at the top point of the “V” should be sharp.
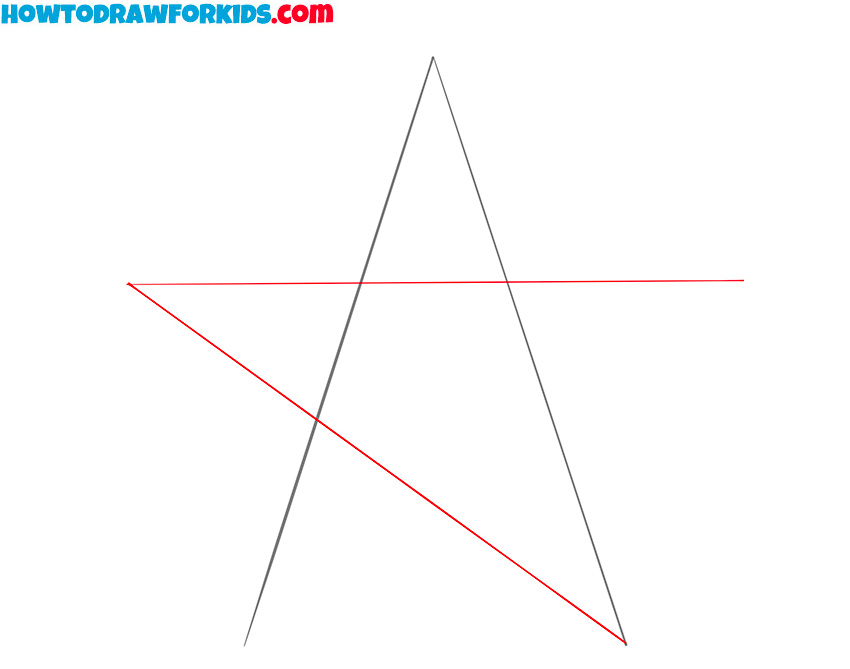
- Add two more lines.
Next, add a diagonal line starting from the right endpoint of the “V” shape you drew in the previous step. This new line should cross through the center of the triangle, slanting upward toward the left. Next, continue this line horizontally to the right. The goal here is to start forming the left horizontal arm of the star.
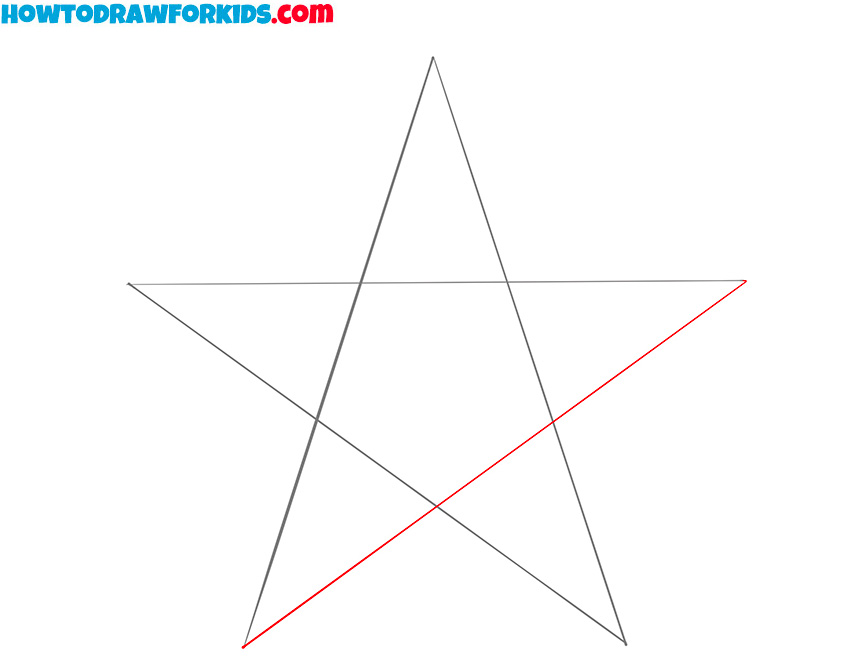
- Complete the shape of the star.
Now, draw another diagonal line starting from the lower left endpoint of the original “V.” This line will cross the middle of the star’s shape and meet the right endpoint of the horizontal line you drew in step 2. At this point, you will see the full five-pointed star beginning to form.
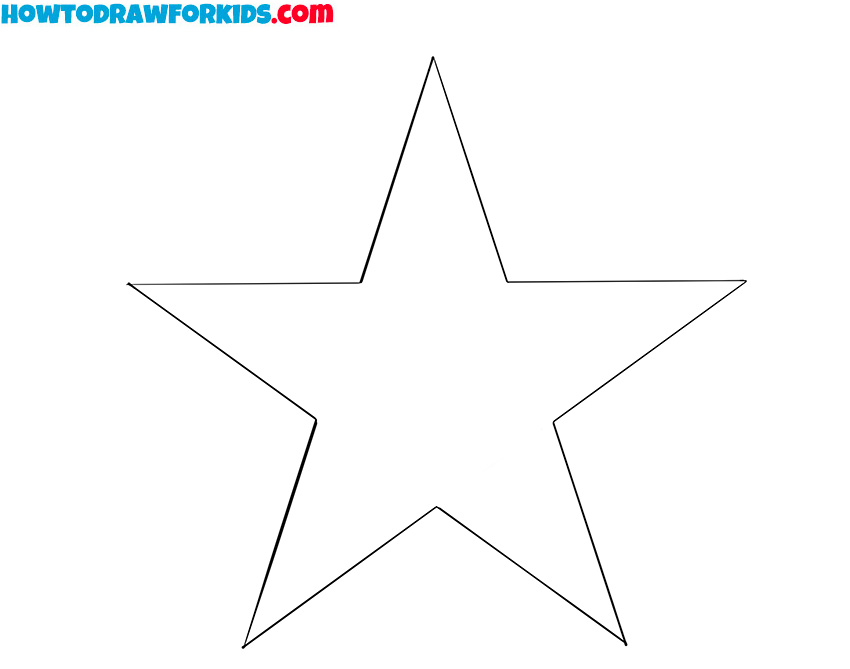
- Erase the guidelines.
Using the lines you’ve just created as your guide, carefully trace around the outer edges of the star to define its final shape. You’ll need to ignore the internal intersecting lines and focus only on the points and outer edges. After outlining, take a moment to erase any internal or overlapping lines.
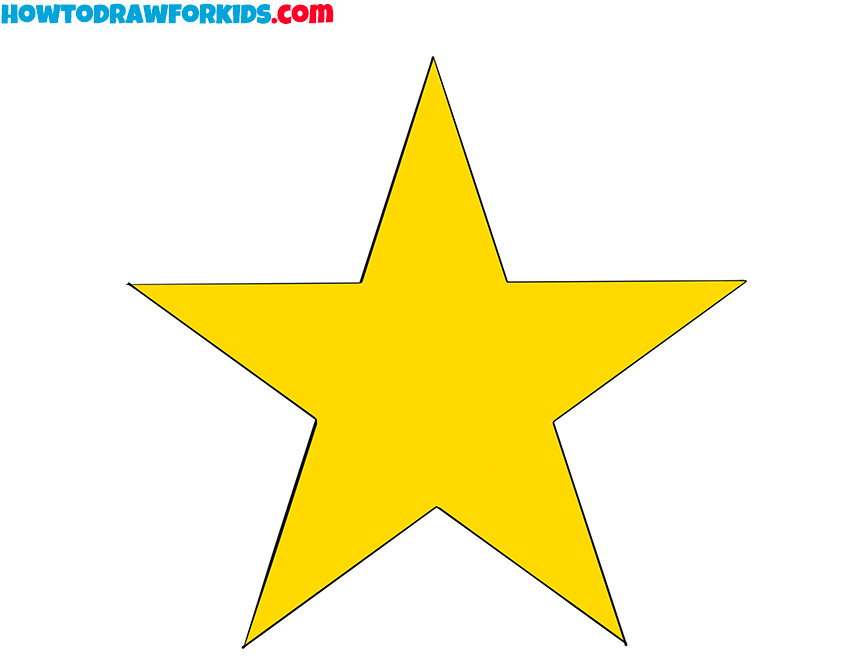
- Color the star drawing.
Yellow is the classic choice for a star, especially if you’re using it for a night sky or holiday-themed drawing. However, feel free to use other colors that suit your design. You could also add some shading or highlights to give the star more dimension.
Additional Content
For young artists who want to continue practicing drawing even without an internet connection, a PDF version of this lesson has been made available. This file can be downloaded, allowing you to follow the drawing steps anytime and anywhere without needing to be online.
This resource is a useful way to keep improving your star drawing skills, as it includes all the necessary steps clearly organized in one convenient guide. Also, this PDF file includes a coloring page, a tracing worksheet and a greed drawing worksheet.
How to Draw a Star: Art Project Ideas
A star drawing can be part of a wall art project, used for home or classroom decor. Stars can be drawn in patterns or scattered randomly to create a simple night sky design. These can be used in children’s bedrooms, classrooms, or for seasonal displays. The stars can also be outlined in glitter glue or metallic pens to give a reflective quality.
Star drawings can be used to create paper holiday ornaments. By drawing a star on cardstock or thick paper and then cutting it out, students can create simple hanging decorations. The stars can be left plain or decorated with glitter, paint, or stickers. A hole can be punched at the top of the star, and a string or ribbon can be threaded through it for hanging. This project can be used for holiday trees, classroom decorations, or as part of a winter arts and crafts session.
Stars can be drawn and used as markers on an achievement chart for classrooms. Teachers can create a chart with students’ names, and stars can be added next to their names to signify completed tasks or goals. The stars can be drawn and cut out ahead of time or made directly on the chart as students achieve milestones.
Stars can be drawn and used to decorate party hats for birthdays or other events. Students can create a plain party hat template out of paper or cardstock, then draw stars on the surface of the hat before folding it into shape. The stars can be colored or left as outlines, and glitter or metallic pens can be used to add extra decoration.
Students can create a space-themed collage using drawings of spaceships, stars, and planets. Begin by drawing and cutting out various sized stars, planets, and simple spaceship designs on paper or cardstock. These elements can then be arranged and glued onto a dark-colored background, such as black or navy blue, to represent the night sky or outer space.
Conclusion
You have now completed the steps for drawing a star, but this is just one of many drawing lessons available. You can check out additional tutorials on the website that cover various subjects. For example, you could try drawing a cow as your next project or perhaps follow the guide on drawing Sonic. These lessons are created to give you a range of topics to work on at your own pace.
To stay informed about new lessons and other updates, consider following on social media. This will allow you to access new drawing tutorials and coloring pages and continue practicing different drawing and coloring techniques.

so mad and sad and sorry
No, it’s fun!
Hmm… not at all