How to Draw a Sunset
The allure of a sunset has captivated artists for centuries, and mastering how to draw a sunset can be a serene and fulfilling experience. In this lesson I’ve developed, I aim to guide you through the process with a simple and enjoyable approach. The beauty of a sunset lies not just in its colors, but in its tranquil transitions.

How to Draw a Sunset: Basic Information
The magic of a sunset is universal, and learning how to draw a sunset brings its splendor onto your canvas. As the creator of this method, I’m thrilled to share it, ensuring that anyone can render the quiet spectacle of the day’s end. A sunset’s charm is in its ephemeral nature, and we’ll capture that together.
In depicting this sunset, we focus on the harmonious blend of shapes and lines that compose the scene. The method I’ve created eases you into sketching the outlines of mountains and the curvature of the sun. This provides a strong foundation for the vibrant hues that will later signify the day’s end.
To draw a sunset is to layer warmth upon tranquility. As this lesson concludes, you’ll have the tools to create a harmonious balance between the sun’s glow and the evening sky. The process is designed to be meditative, allowing you to lose yourself in the hues of the closing day.
Sunset Drawing Tutorial
Materials
- Pencil
- Paper
- Eraser
- Coloring supplies
Time needed: 20 minutes
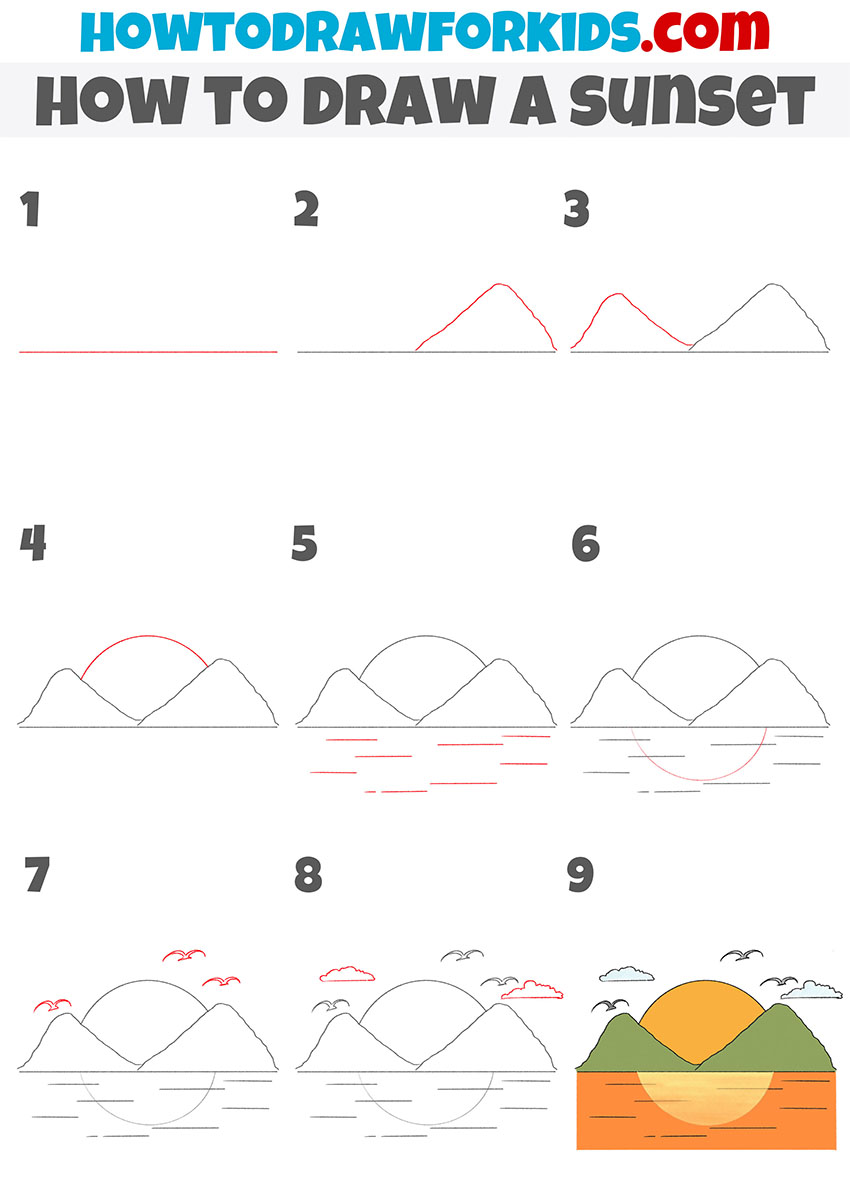
How to Draw a Sunset
- Draw the outline of the water body.
Depict one straight horizontal line to complete this simple step.

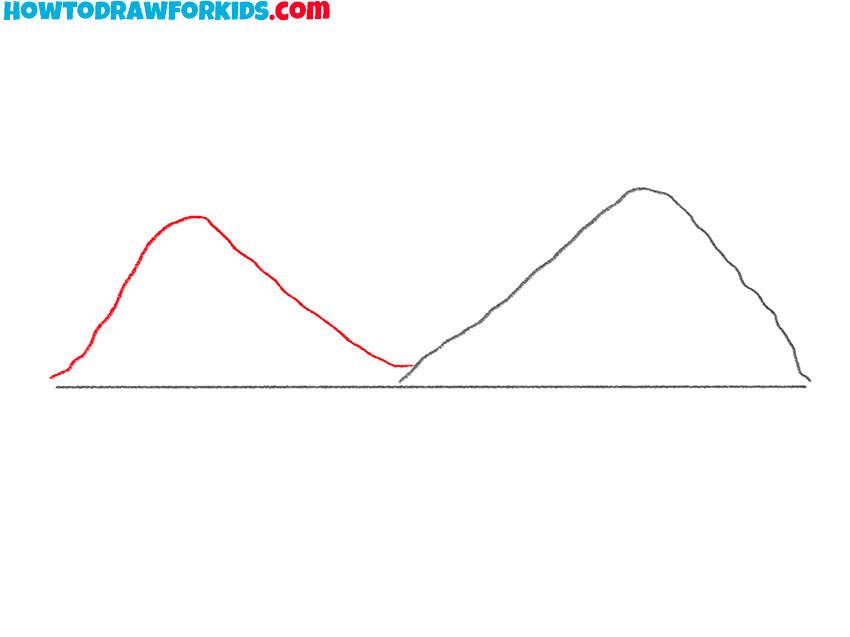
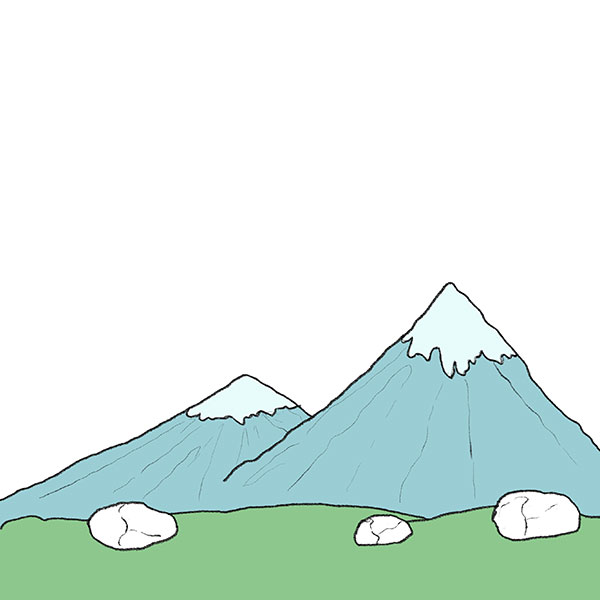
- Add an outline of one mountain.
On the right side, draw one mountain using a curved line.

- Add the outline of the second mountain.
Picture this mountain on the left side using the curved line.
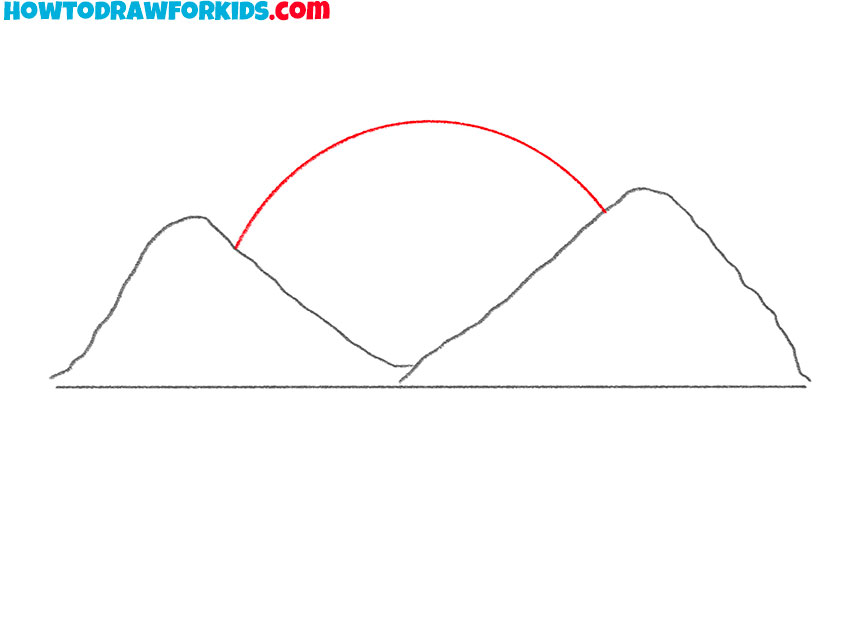
- Draw the sun.
Between the two previously drawn mountains depict the arch to represent the sun.
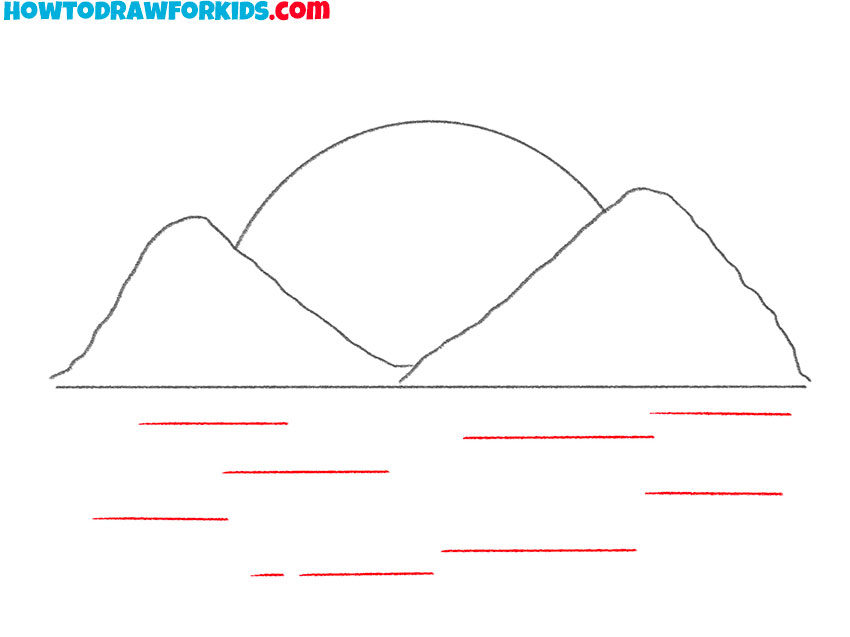
- Add the elements to the surface of the water.
To draw the surface of the water, draw several straight lines of different lengths.
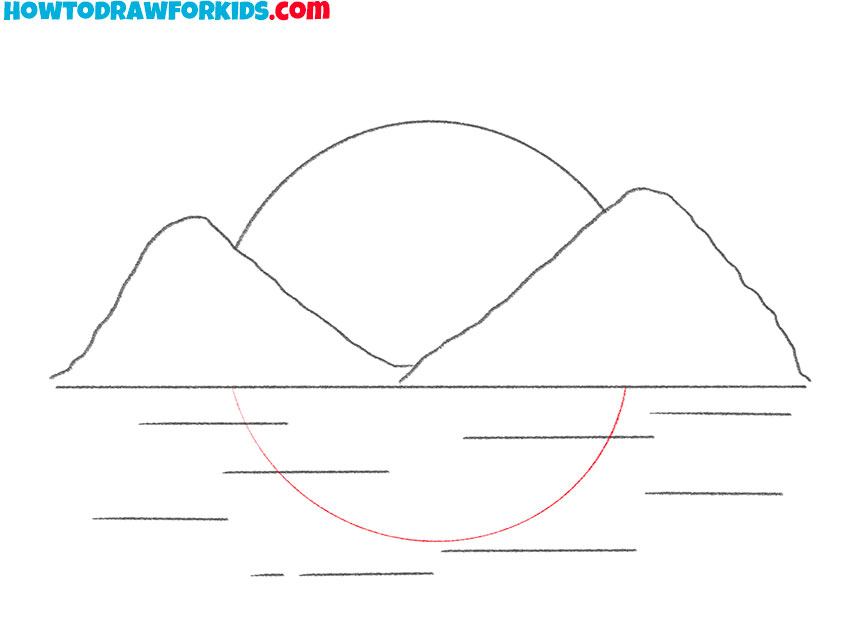
- Draw the reflection of the sun in the water.
On the surface of the water, draw an arc using a thin curved line.
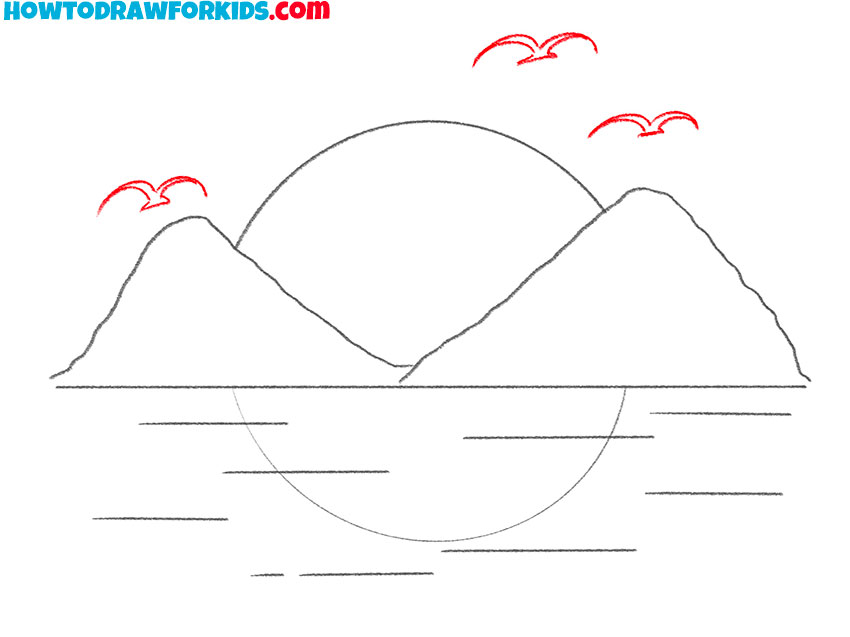
- Depict the birds.
Over the previously drawn mountains and the sun, add the outlines of birds using curved lines.
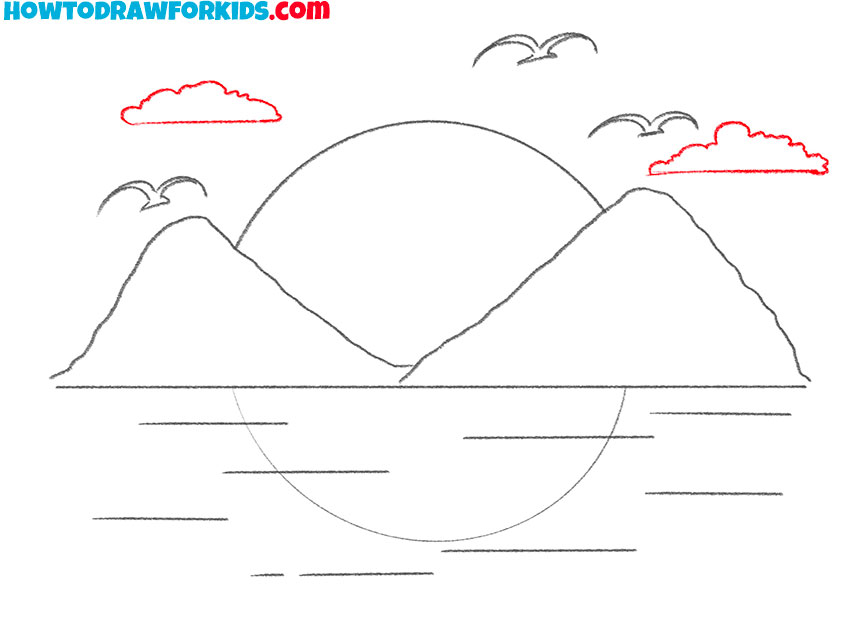
- Picture the clouds.
On the sky, draw two clouds using straight, curved, and wavy lines.
- Color the drawing.
To color this drawing, use blue, gray, green, yellow, and shades of orange.

Additional Content
For those who seek to weave the practice of drawing into the fabric of their daily lives, I’ve created a downloadable PDF file that succinctly captures the essence of our sunset drawing lesson. This free resource is an invitation to immerse yourself in the art of sunset, irrespective of your online status.
Whether you’re nestled in a cozy corner of a café, lounging in a park, or taking a break on a hike, this guide is there to inspire you to perfect your drawing skills. It’s a testament to the belief that art should be an omnipresent joy in life, inviting you to seize those spontaneous moments of inspiration to create something beautiful.
It’s a testament to the belief that art should be an omnipresent joy in life, inviting you to seize those spontaneous moments of inspiration to create something beautiful. With this PDF, the serene practice of drawing a sunset is always just a page-flip away.
Alternative Drawing Technique
Recognizing that practice is the key to improvement, I’ve created an additional, simpler method to draw sunsets that complements the main tutorial. This alternate technique is tailored for artists seeking a less complex approach, providing a solid foundation for beginners or a quick study for more experienced artists.
It focuses on the basic shapes and strokes that form the structure of a sunset, enabling you to refine your skills and grow more confident in your artistic journey. By offering this simplified version, I hope to encourage continuous practice, allowing you to explore various facets of sunset drawing and find your unique artistic voice.
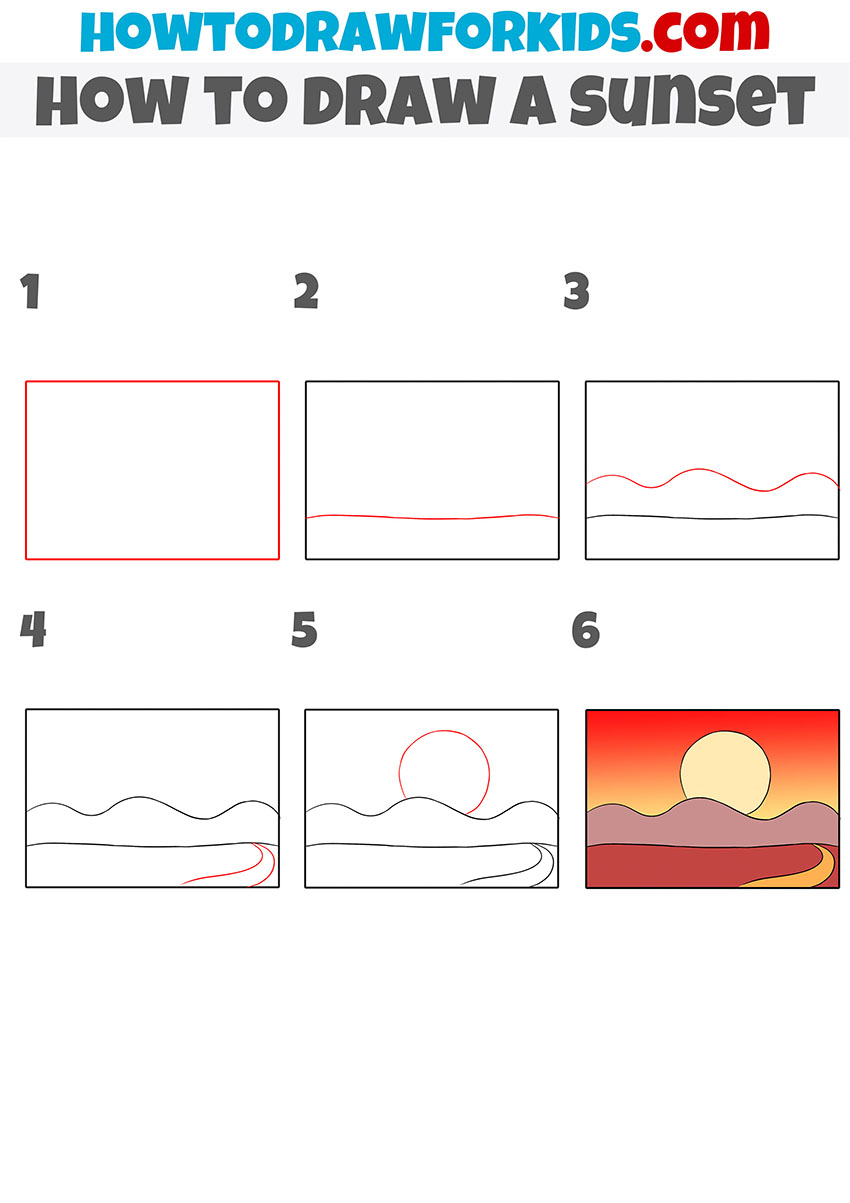
How to Draw a Sunset for Kindergarten
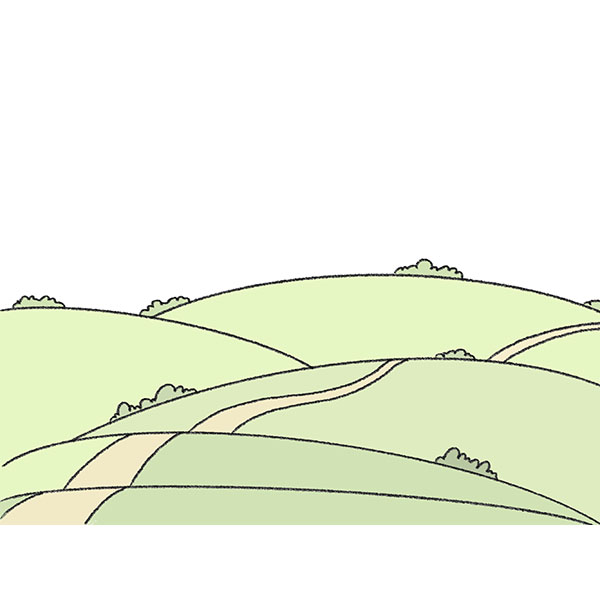
This super simple drawing method for kindergarteners unfolds with an engaging sequence of steps. We begin by drawing a rectangle which will serve as the window to our scenic sunset. We then sketch soft curves that rise and fall just above this line, suggesting the rolling hills that often silhouette a setting sun.
After the hills, we gently sketch a path, a road that leads to the sunset. This road is a ribbon, winding towards the horizon, adding depth and story to our scene. Then, we add a round shape atop the hills, half visible, as if it’s shyly sinking into the horizon’s embrace. This will be the centerpiece of our scene, the sun in its glorious descent.
Finally, the sixth step brings the scene to life with color: warm yellows and oranges fill the sky, while the hills are shaded with darker tones to complete the sunset. This method is engaging for young children, allowing them to create a vivid sunset scene with just a few simple shapes and colors.
Advancing Your Sunset Drawing Skills
As the sun dips below the horizon in our sketches, so we reflect on the strides we’ve made in this lesson. Improvement in art, as in the sunset, is gradual and beautiful. To continue refining your skills in capturing the majesty of a sunset, I offer these nuggets of wisdom to carry with you on your artistic journey.
- Practice Consistency: Set aside a few moments each day to draw; consistency is the golden thread in the tapestry of skill-building, much like the sun reliably graces the horizon each day.
- Experiment with Colors: Venture beyond the familiar palette. Sunsets are a kaleidoscope of shades; experiment with unexpected combinations to find the perfect gradient that speaks to the end of the day.
- Embrace Patience: Approach each line with intention and care. The patience you apply to every curve and color is the quiet power that grows the depth and emotion in your work.
- Seek Inspiration: Allow the world’s canvas to guide you. Each sunset offers a unique lesson in color, form, and transition – observe and incorporate these lessons into your drawings.
Keep these tips as a palette of possibilities from which to draw, and may your journey in art be as rich and evolving as the ever-changing sunset.
Environments That Transform Sunset Scenes
Creating an engaging environment around your sunset can transform your drawing from a simple sketch to a captivating scene. Here are several environments you could consider adding to your sunset drawings:
- Ocean Vista: Draw a tranquil beach where the waves gently meet the shore under the sunset, with perhaps a silhouette of a sailboat on the horizon.
- City Skyline: Illustrate the outline of a bustling city‘s skyline with buildings silhouetted against the fading light of the day.
- Safari Scene: Add an exotic touch with the silhouette of acacia trees and animals like giraffes or elephants in the savannah under a vast sunset sky.
- Rural Countryside: Capture the essence of the countryside with a farmhouse, a barn, and fields stretching towards the horizon.
- Forest Edge: Depict the edge of a forest, with the sun peeking through the trees, casting long shadows and beams of light.
Use my tutorials on the site to create these scenes. Each environment can add its own story and emotion to your sunset drawing, inviting the viewer to step into a moment captured in time.
Conclusion
Now that we’ve captured the sunset’s fleeting beauty, it’s not the end but a pause before the next creative wave. The dialogue between artist and canvas is ongoing, and your voice is a vital part of that conversation. Stay connected with me on social media, where the story of art unfolds every day in vibrant, inspiring ways.
Your contributions, thoughts, and feedback are what make this journey rich and rewarding. So, if there’s anything you’d like to express or suggest for our collective creative exploration, please leave a comment below. Together, we’ll continue to sketch out not just art, but the narrative of our shared experiences.


Very easy and simple I love it