How to Draw a Treasure Chest
The subject of this drawing tutorial is something any of us would like to find in the yard, as we learn how to draw a treasure chest.

How to Draw a Treasure Chest: Introduction
Now you will find an interesting lesson in which I will show you how to draw a treasure chest. Surely you have seen such a chest in books or cartoons. And you’ve seen my main chest drawing tutorial, so this one will deepen your knowledge and help you to create an interesting composition.
The treasure chest is the dream of many people, so they went on trips, overcame long distances and various obstacles to get such wealth. Such a treasure chest is usually associated with some kind of exciting adventure, where there are secrets, excitement, and risk. I think that during the execution of this lesson you will experience the most pleasant emotions.
Drawing a treasure chest will not be difficult. The main thing is to correctly draw the outer contour, and you will draw the contents of the chest quickly and easily because arbitrary lines are allowed here.
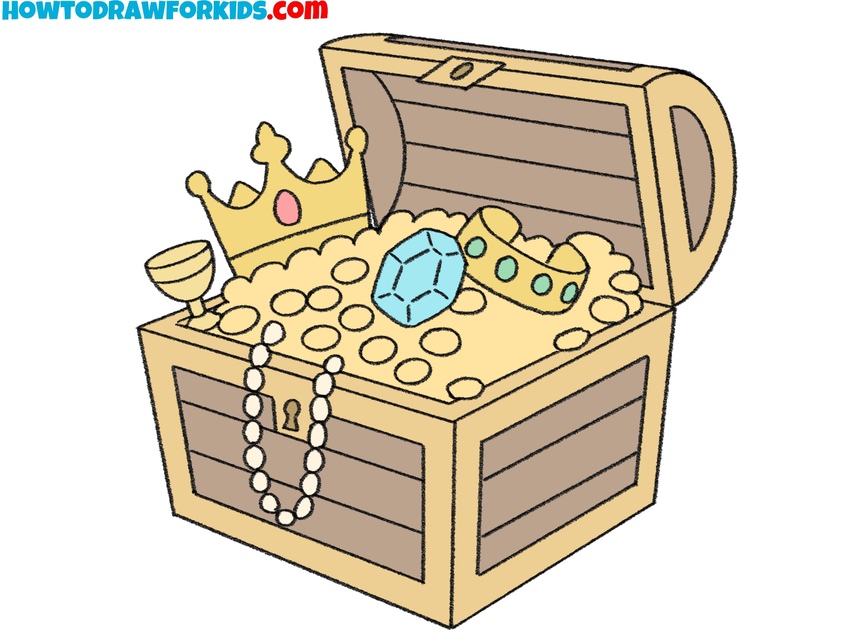
In the drawing, you can see that the chest is made of wood, and inside there are gold coins, gold bars, and jewelry. It looks very attractive.
Treasure Chest Drawing Tutorial
Materials
- Pencil
- Paper
- Eraser
- Coloring supplies
- Ruler (optional)
Time needed: 25 minutes
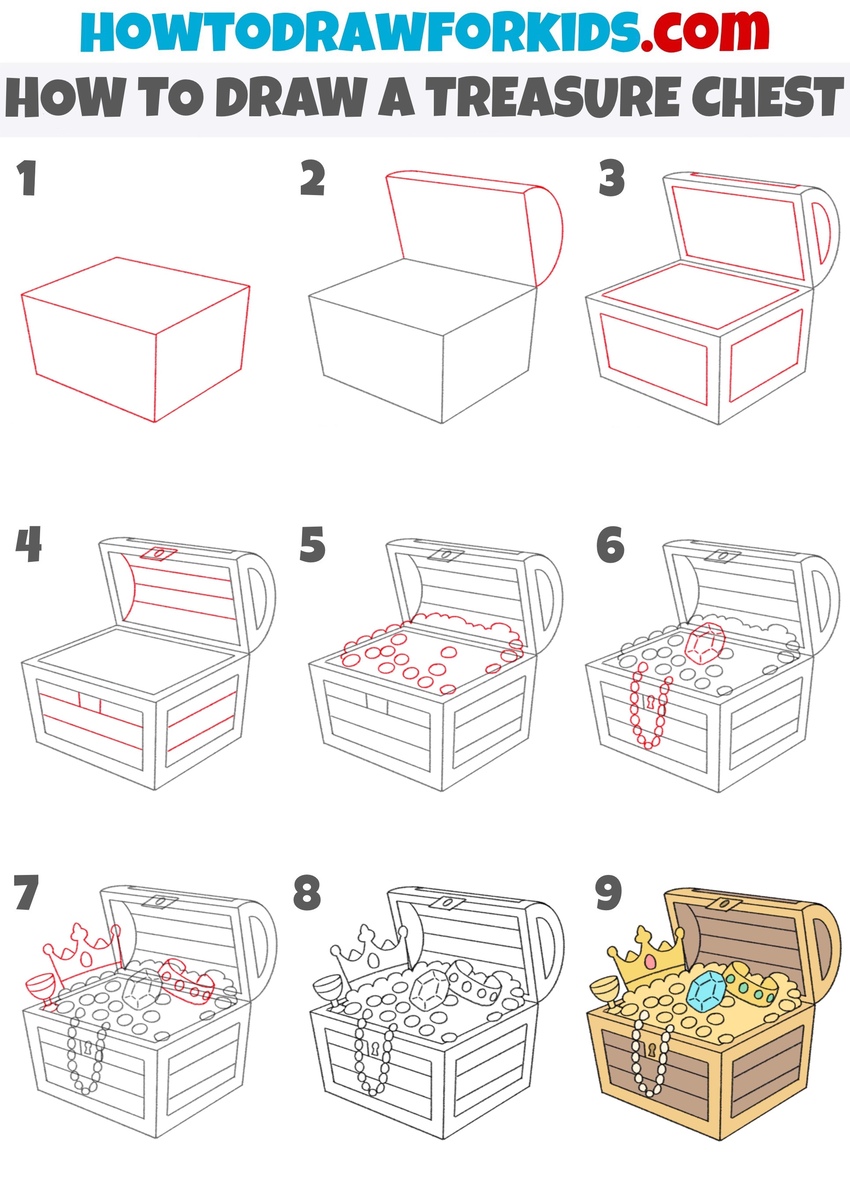
How to Draw a Treasure Chest
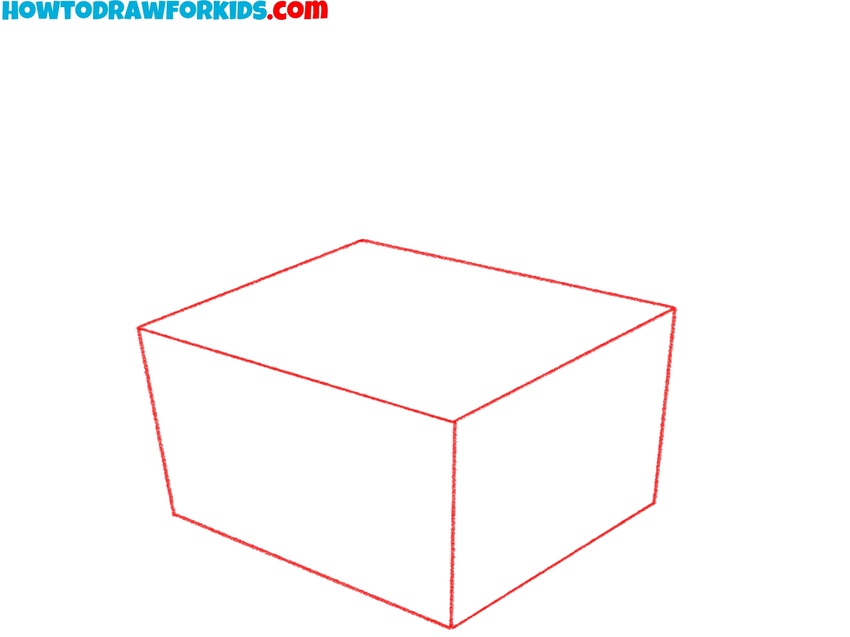
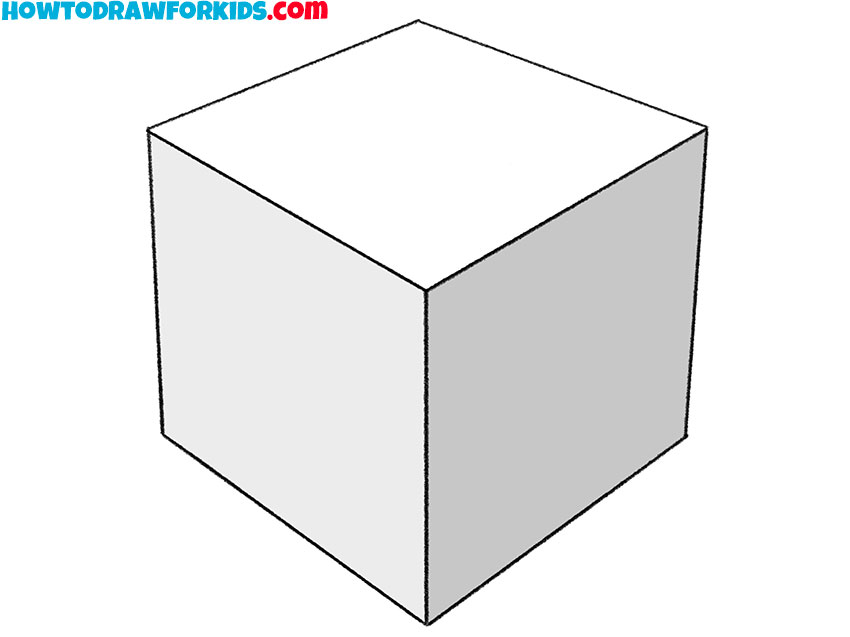
- Outline the main box form.
To create the base of the treasure chest, it’s important to begin with the overall box structure. Draw a cube stretched to the sides. This will serve as bottom part of the chest. Angle the side lines so the drawing feels three-dimensional. Keep in mind that in the later steps we will adjust some of these lines.
- Draw the treasure chest lid.
Now that the main part of the chest is ready, start illustrating the lid. Draw the top portion as a rectangle that appears lifted above the main box. On the right-hand side, sketch a rounded shape to represent the right edge of the lid.

- Illustrate the chest borders and panels.
With the basic parts are drawn, move on to sketching the outer panels that give the chest its recognizable wooden look. Draw rectangular frames along the front and sides of the chest. Make the lines parallel to the main lines of your chest.

- Sketch the wooden planks.
To make your chest drawing look made of wood, draw horizontal planks inside the panels. Since the lid is open, showing its interior structure adds realism. Sketch several horizontal lines along the inner part of the lid to represent wooden planks.

- Draw the pile of coins.
At this stage, it’s time to fill the chest with treasure. Draw a series of overlapping circles along the open top to represent gold coins spilling inside. Vary their size to create a more natural look, but keep them small enough to read clearly as coins. Draw some circles peeking over the edges of others.

- Sketch the gemstone and chain.
Now expand the variety of treasure by sketching a large gemstone and a beaded necklace. First, draw the gem, that can be created as a faceted shape, larger than the coins. Position it near the center of the pile. For the necklace, draw a chain of small circles that curve naturally over the coins.

- Draw the crown and goblet.
To enrich the drawing further, add larger, distinctive treasures like a crown, goblet, or extra jewels. Draw the crown tilted to the side, as if it’s resting casually on top of the pile. The goblet can be drawn with a simple bowl-like top and a stem, leaning against the coins.

- Correct the cheat shapes and lines.
With all main elements of the chest and treasures in place, refine the outlines and give the shapes cleaner appearance. Trace over the coins and adjust the shape of larger treasures for a more finished look. Add small details such as facets on the gem or little decorations on the crown.

- Color the cheese and treasure items.
Fill the chest panels with shades of brown to represent wood, and use yellow or gold for the coins. Add a bright blue or red for the gemstone, and color the necklace beads with a distinct shade so they stand out from the gold coins. Crowns and goblets can also be gold, but with small accents of red or green.
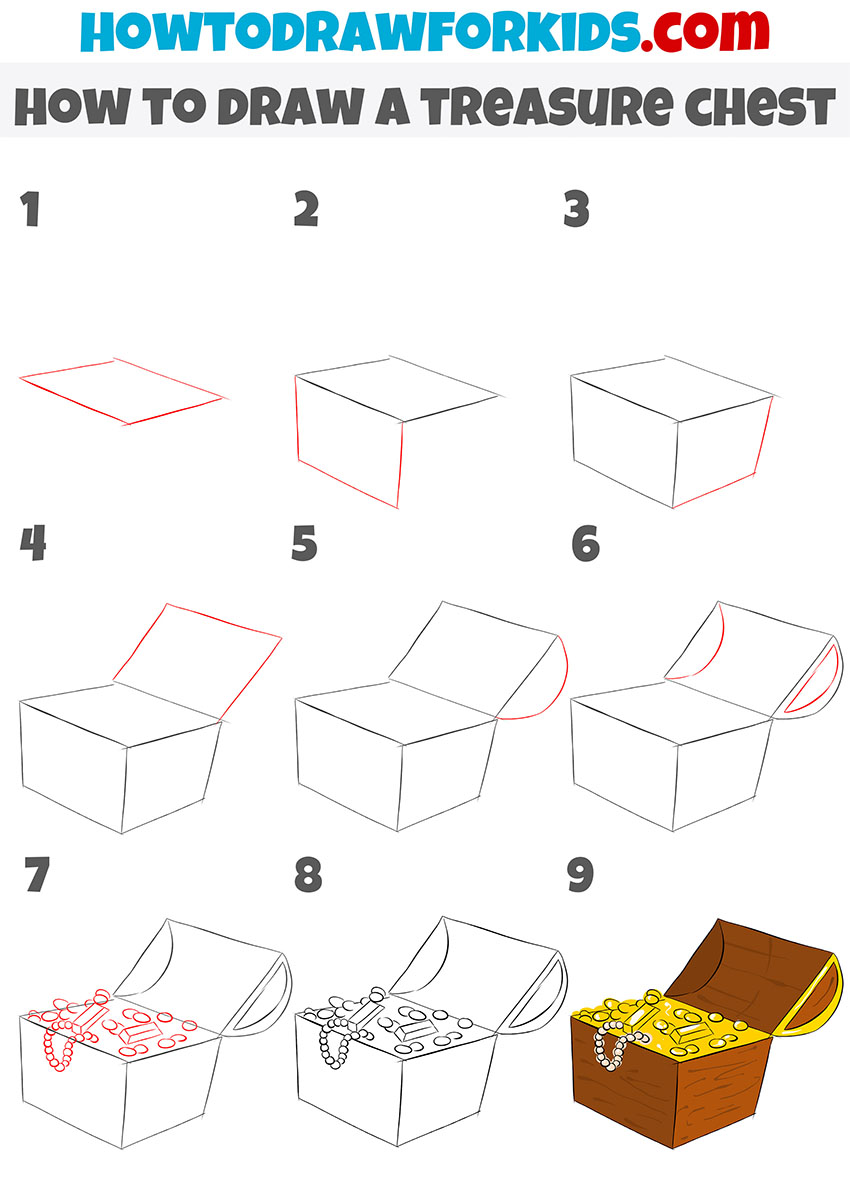
Bonus: Easy Treasure Chest Drawing Tutorial
This simplified version uses a completely different sequence of steps, and to draw a treasure chest in this method, first outline the top plane as a slanted rectangle. Add vertical lines downward from two corners to form the front side of the chest. Connect them with a horizontal line, and then extend additional lines to complete the box.
Sketch the lid as a tilted rectangle above the chest, attaching it along the back edge. To show volume, add a curved side panel to the lid. Once the main structure is in place, introduce interior details by drawing small ovals, rectangles, and circles for coins, gems, and jewelry spilling out.
Arrange them naturally, overlapping some shapes to convey volume. Keep the lines light while building the chest, and refine them once the proportions look correct. Finally, use color to separate the wooden chest from the bright treasure.


It’s very helpful for me please make a different application for this tutorial for different types of art so that it helps a lot to the people
Thank you, Ishan. I’m glad the tutorial was helpful for you. I’ll definitely keep your suggestion in mind for creating more lessons about different art styles.