How to Draw a Tree Silhouette
Let’s learn how to draw a tree silhouette step-by-step! Boost your drawing skills with this really simple but detailed tutorial, created for young artists and beginners.

How to Draw a Tree Silhouette : Basic Information
Drawing a tree silhouette involves sketching a tree without relying on details. This technique emphasizes the importance of overall structure, balance, and proportion.
Silhouettes also emphasize the importance of contrast between the subject and the background. By focusing on the stark difference between the dark silhouette and the lighter background, artists learn to create visually striking compositions.
Pay special attention to the trunk and root structure in the initial steps. These elements are really important for establishing a solid foundation for your tree. Ensuring the trunk has a natural taper and the roots are well-spread will give your silhouette more realism.
When outlining the branches and foliage, observe how these parts interact. The branches should flow smoothly from the trunk and support the foliage evenly. The foliage outline should be irregular and natural, mimicking the unpredictable patterns found in nature.
Tree Silhouette Drawing Tutorial
Materials
- Pencil
- Paper
- Eraser
- Coloring supplies
Time needed: 30 minutes
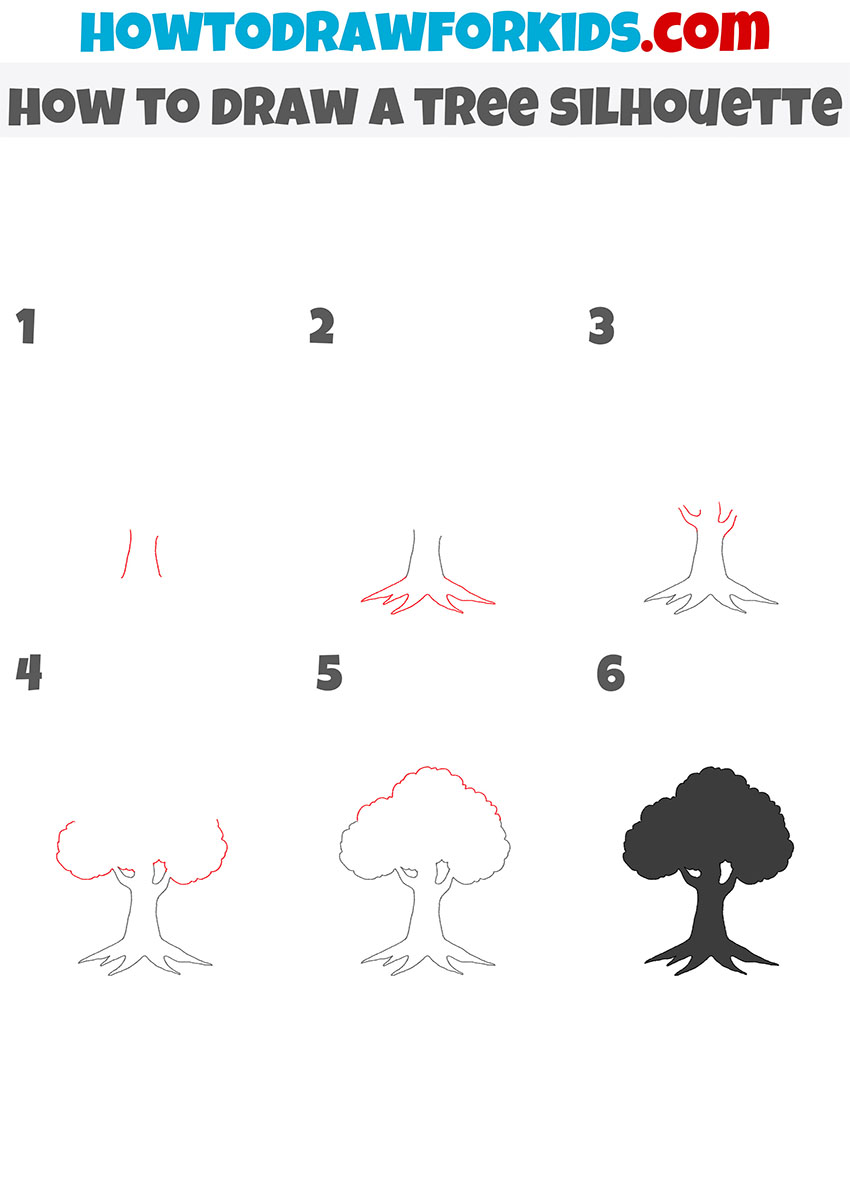
How to Draw a Tree Silhouette
- Draw the trunk of the tree.
Begin by sketching the base of the tree trunk. Draw two slightly curved, vertical lines that taper slightly towards the top. These lines will serve as the foundation of your tree silhouette, representing the sturdy trunk. Keep your lines light and easy to adjust as you’ll be refining this shape in the following steps.

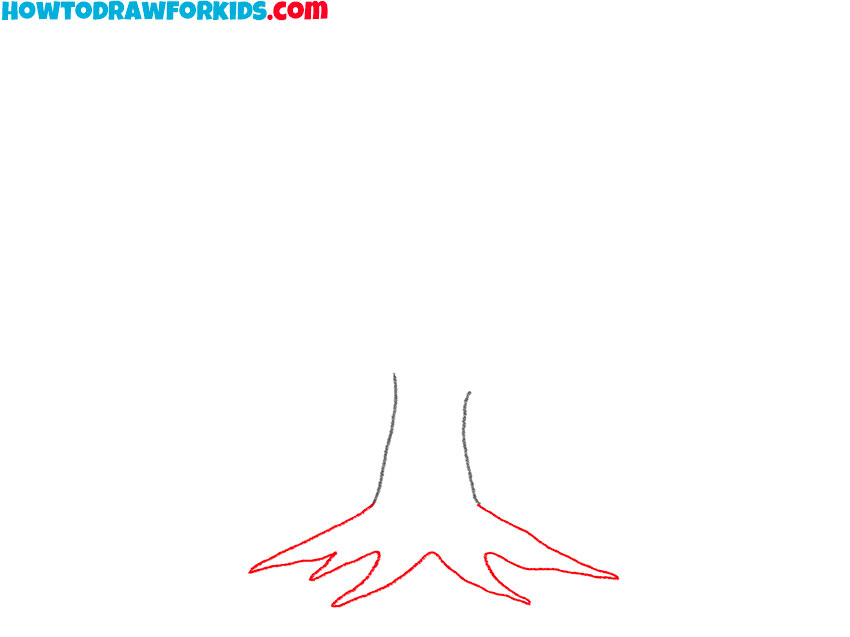
- Draw the roots of the tree.
From the bottom of each of the vertical lines, draw branching lines that extend outward and slightly downwards. These lines should resemble the spread of tree roots. The roots can have some curves and angles to mimic a natural, organic appearance.
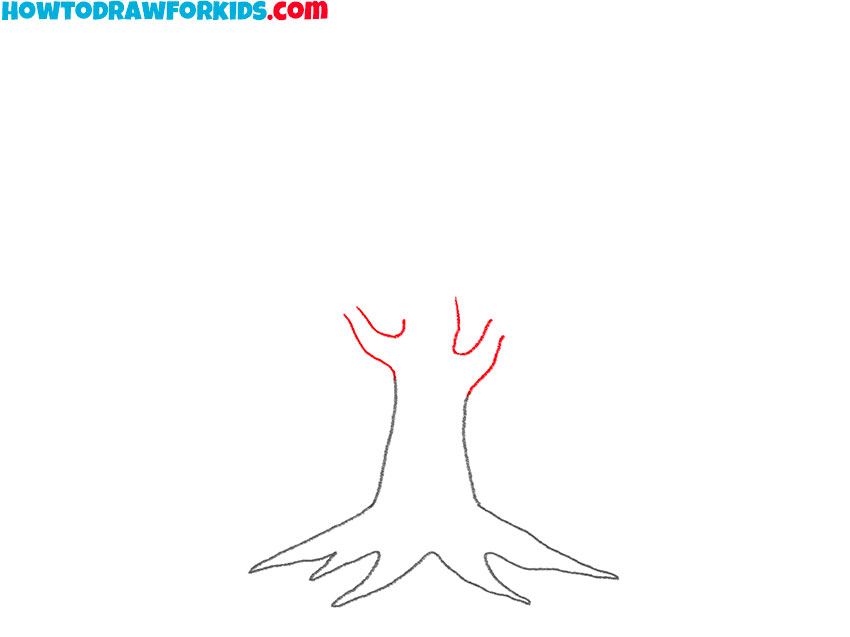
- Add the branches.
With the trunk and roots in place, it’s time to add the main branches. From the top of the trunk, draw upward-arching lines that start narrow and widen slightly as they extend upwards. Make sure they are balanced on either side of the trunk and have a gentle curve.
- Sketch the bottom of the crown.
Now, begin outlining the tree’s foliage. Draw a loose, cloud-like shape around the top of the branches. This shape should be irregular and fluffy, mimicking the natural clusters of leaves. Make sure it covers the top parts of the branches, creating a canopy.

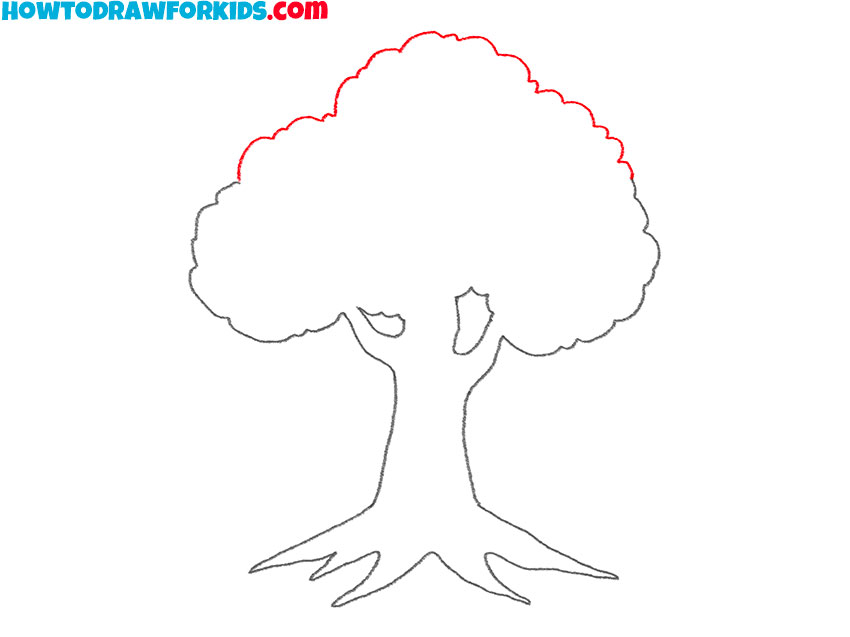
- Draw the top of the crown.
Continue the foliage by adding more detailed, scalloped edges to the cloud-like shape you drew earlier. These small, rounded curves will give the impression of individual clusters of leaves. Follow the initial outlines. Take your time to ensure the curves are varied and organic.
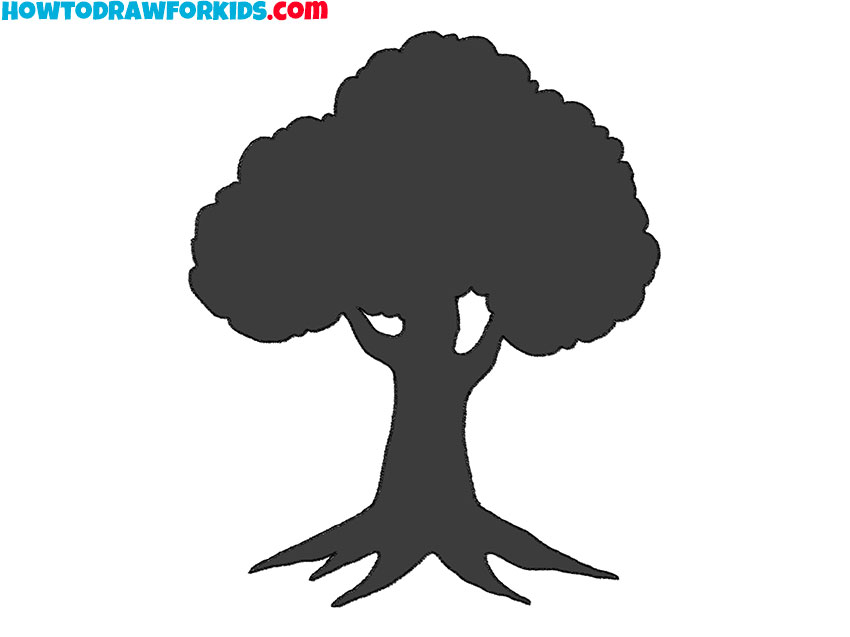
- Color the tree silhouette.
Finally, fill in the entire tree silhouette with a solid black color. This includes the trunk, branches, roots, and the refined foliage. Make sure the fill is even and covers all the outlined areas completely. This step transforms your detailed outline into a bold silhouette.
Additional Content
I’ve put together a handy PDF file with a quick version of my tree silhouette drawing. It’s all set for you to download, so you can carry it with you for a doodle session anytime, anywhere-no internet needed. Grab your copy and let the drawing lesson begin, whether you’re at home or outside!
Tips and Tricks for the Tree Silhouette Drawing
Congratulations on completing your tree silhouette! As you continue to refine and train your drawing skills, here are a few suggestions on how to make your tree silhouette even better and ideas for additional elements to add:
- Examine the edges of your silhouette closely. Smooth, clean lines will make your silhouette appear more polished and professional. Use a fine-tipped pen or a precise brush to go over the outline, ensuring that the edges are sharp and well-defined. Taking the time to refine the edges can significantly enhance the overall quality of your drawing.
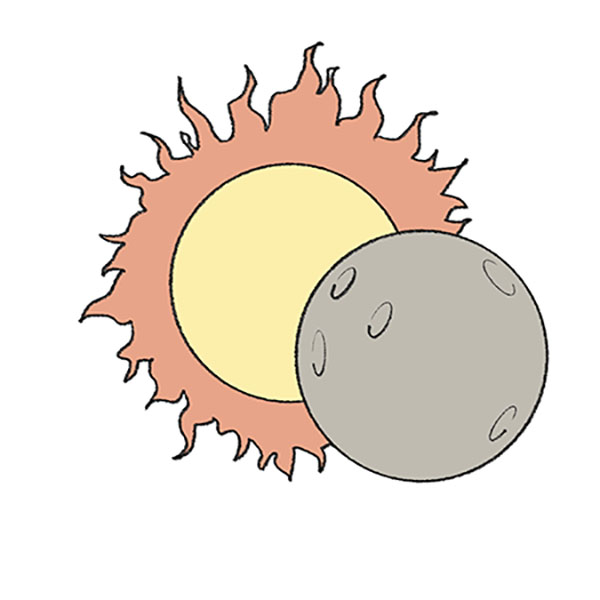
- Adding a background can significantly improve the overall interest of your tree silhouette. Consider incorporating a gradient sky, a moon, or a sunset to create a striking contrast with the dark silhouette. Background elements can make your drawing more interesting.
- Don’t hesitate to draw multiple trees, varying their sizes and placements to create a more dynamic composition. Overlapping silhouettes can create a more complex scene.
- Incorporating small birds perched on branches, a nest, or even distant deer silhouettes can add life and context to your tree. Consider the interaction between the tree and these elements to make the composition more complex.
- Drawing tree silhouettes representing different seasons can provide a wonderful series of artworks. A bare winter tree, a blossoming spring tree, a full summer canopy, and an autumn tree with falling leaves can show how trees change throughout the year.
Tree Silhouette: FAQ
As you continue to train your skills, you might have some questions about techniques, materials, and other aspects of this drawing tutorial. To help you further, I’ve compiled a list of frequently asked questions. Check these FAQs to gain more insights and tips to boost your drawing skills.
While traditional silhouettes are typically black, you can experiment with color to add a unique touch to your drawing. Consider using shades of gray or even vibrant colors for the background to make your silhouette stand out.
Choose a tree with a distinctive and interesting shape. Trees with broad canopies, intricate branches, or unique features like twisting trunks or hanging roots make excellent subjects for silhouette drawings. The key is to find a tree that has a recognizable and compelling outline.
Tree silhouettes can be incorporated into larger art projects as part of landscapes, backgrounds, or mixed media compositions. Experiment with combining silhouettes with other elements, such as wildlife, mountains, or water, to create complex scenes.
To create a night scene, draw the tree silhouette against a dark or gradient background, and add elements like a moon, stars, or clouds. Using a lighter color for the background can help the silhouette look more interesting. Adding subtle highlights to the silhouette can also suggest moonlight.
Conclusion
Wow, we’ve reached the end of my tree silhouette drawing tutorial! Isn’t it amazing what a few lines and a dash of creativity can create? Your tree looks wonderful, standing tall on your page.
Over on my website, a whole garden of drawing lessons is blooming, just for you. From the soft petals of a flower to to lush forests, each tutorial is a new seed of inspiration for your growing art skills.
Subscribe to my social media to stay updated with the latest content. By subscribing, you’ll receive exclusive insights and be the first to know about new tutorials, art challenges, and special events.
Share your thoughts about this tutorial in the comments section below. Did you find it helpful? Do you have any questions or suggestions? Your feedback is really important and helps me improve my tutorials.