How to Draw a Violet
Inspired by nature’s elegance, this tutorial on how to draw a violet will guide you through sketching this graceful flower with simple lines.
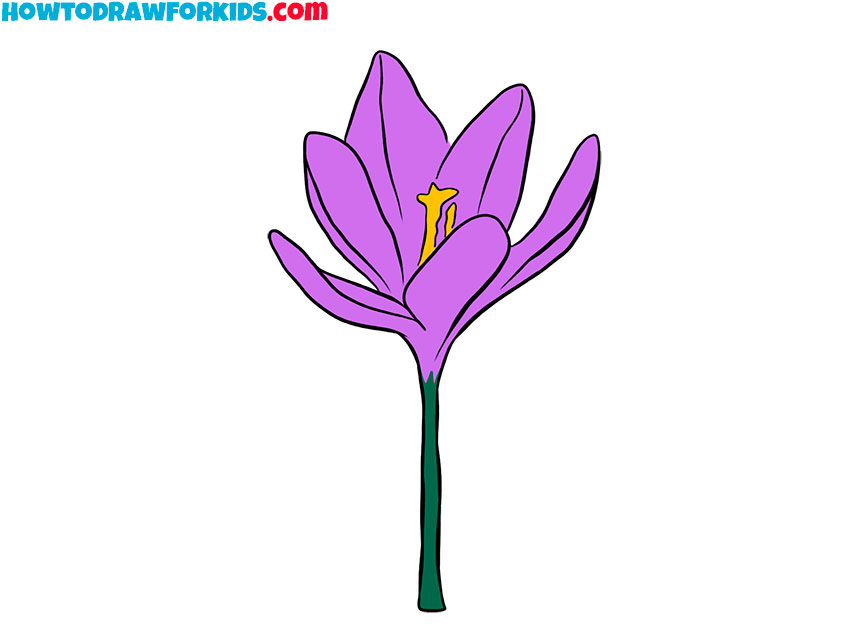

In this lesson you will learn how to draw a violet. This is a beautiful delicate flower that can grow naturally in wildlife and at home.
Many indoor plant lovers grow various varieties of violets. This plant is a true decoration of the interior. Violet comes in different colors – white, pink, lilac, purple.
But most often there is a violet of the same shade as in this picture. The violet flower consists of several small petals. In the center of the flower is a tall stamen. The stem is very thin.
This lesson includes nine simple steps, and any aspiring artist will quickly master this task. Use small hints as you progress through the lesson. Be careful so that you get a beautiful flower drawing.
Materials
- Pencil
- Paper
- Eraser
- Coloring supplies
Time needed: 20 minutes
How to draw a violet step by step
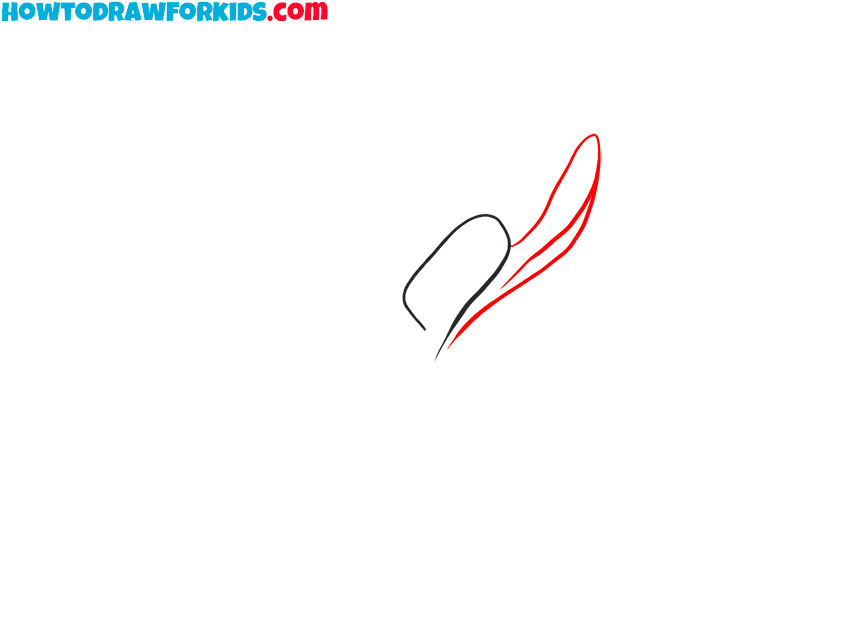
- Sketch the first petal shape.
Accurate placement starts with a single reference shape that sets size and angle for the whole violet. Draw a tall and smooth petal that looks like a soft rectangle with rounded corners narrowing at the bottom. Work with a light hand so adjustments are easy.

- Draw the right violet petal.
Sketch an arched petal on the right, starting near the base of the initial shape and sweeping upward. Keep its outer edge smooth and slightly narrower. Add short interior curves along the right-hand petal to indicate faint ridges and a fold. You can mark a small junction at the bottom where both petals converge into a short throat.
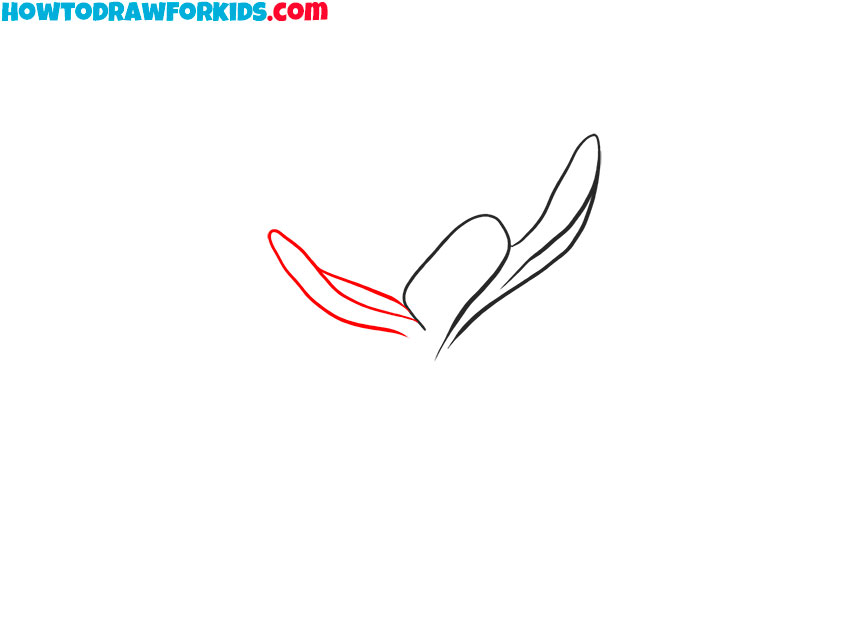
- Illustrate the lower left petal.
The corolla needs lateral symmetry and balance, so draw the uneven and simple left petal of the violet that spreads outward like a small paddle. Start from the same throat area, sweep a long curve left, then return with a shorter inner curve to close the form. Inside this petal, illustrate slender, parallel lines that follow its flow to represent venation and subtle ridges.
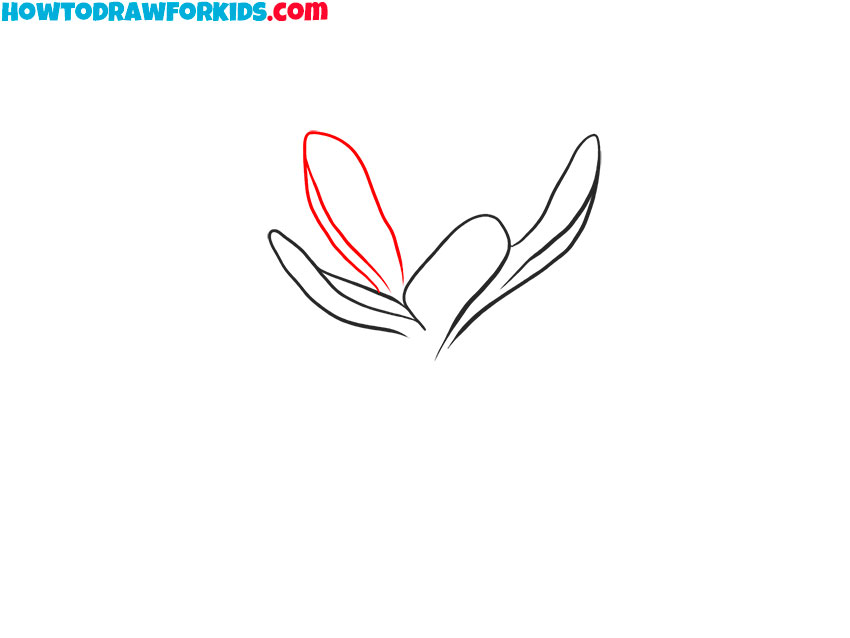
- Draw a tall petal above the left side.
To complete the left side mass, sketch a taller, narrow petal that rises above the previous one. Place a pair of interior strokes that run from base to mid-height, representing leaflike veins. Avoid perfect symmetry.
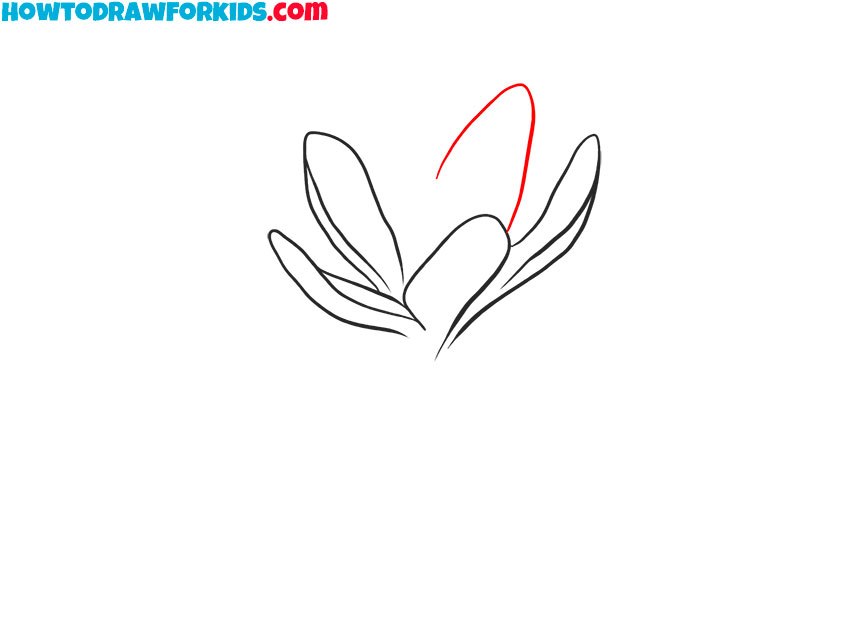
- Draw the violet large back petal.
Draw a large petal behind the first two by starting from the throat and arcing up and back in a tall teardrop. Do not let it overlap the front edges; it should read as sitting behind the forward petals. Keep the peak higher than neighboring shapes.
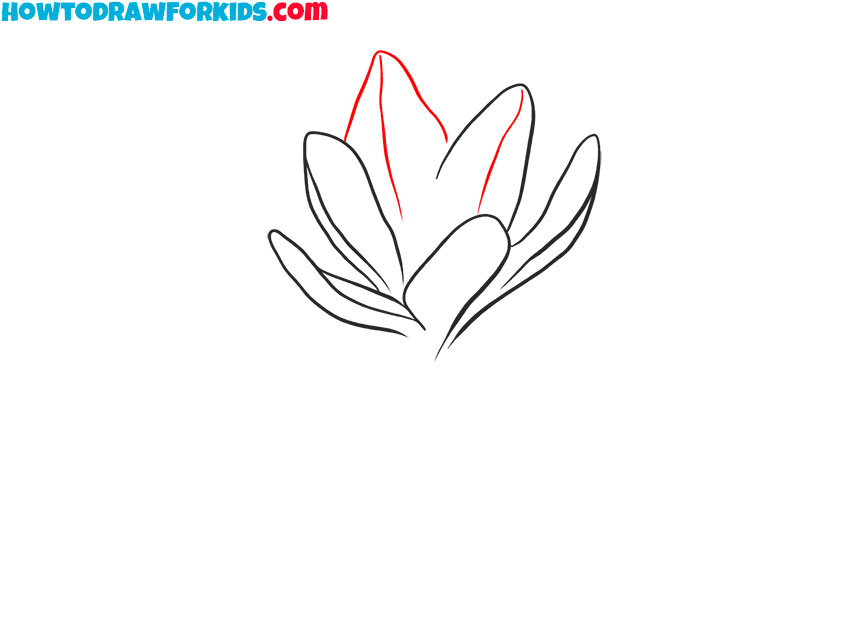
- Complete the shape of the bloom.
Inside the rear petal, add a clean, vertical-to-diagonal line that runs from the throat area toward the top, to indicate the fold. Keep the stroke thin and continuous. After that, draw the last petal of the violet to finalize the bloom.
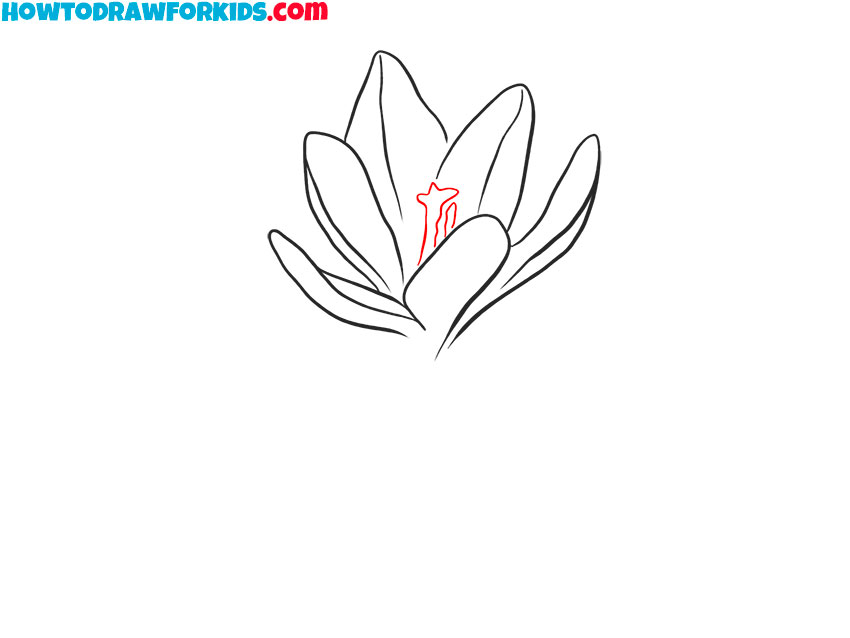
- Add the central pistil shape.
Identification of a flower improves when the center is clear. Illustrate the pistil rising from the throat: draw a short tube with a slightly widened, irregular stigma on top. Add one or two tiny side lobes to show the style branches.
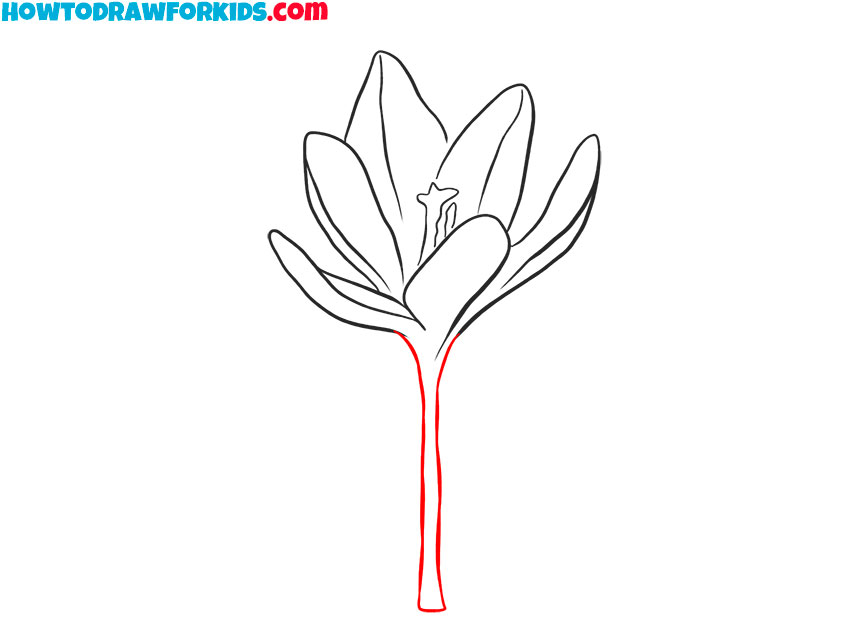
- Clean the sketch and draw the stem.
Now, erase any extra overlaps, remove stray guidelines, and tidy redundant sketch strokes. After cleanup, draw the slender stem of the violet. Start beneath the throat and pull a long line downward, then mirror it to form a narrow cylinder.
- Color the flower petals and stem.
Color clarifies forms without heavy rendering. Fill the petals with a mid purple or lilac. You can leave thin, lighter paths along ridges to represent sheen. Also, you can deepen the base of each petal with a darker violet. Color the stem a muted green. You can make it slightly darker near the bloom.

Now I suggest you download a short version of this lesson in PDF format. Rather, download the file and use it at any time, even if there is no Internet access.


this helped my daughter so much on how to draw
hi