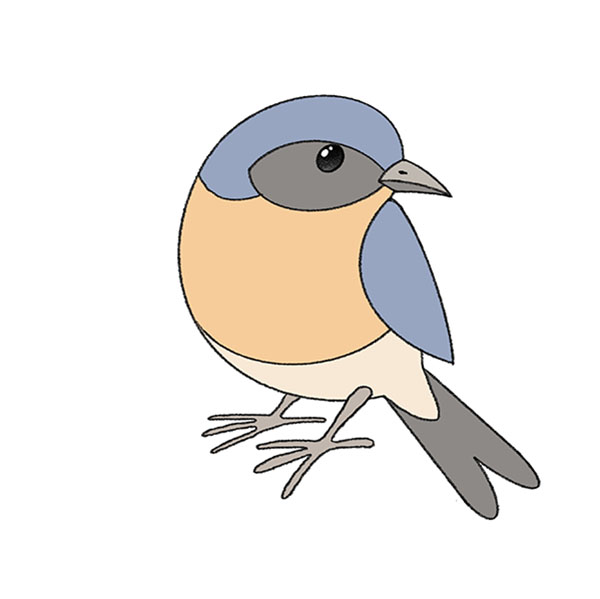
How to Draw a Woodpecker
In this step-by-step guide I will show you how to draw a woodpecker, one of the most fascinating and recognizable birds globally.
How to Draw a Woodpecker: Basic Information
Are you perched and ready to learn how to draw a woodpecker? These quirky birds are known for their rhythmic pecking and are a joy to watch and to draw. Today, we’re going to have a peck of fun as we are going to create our own woodpecker, from beak to tail.
One of the fundamental aspects of drawing is understanding proportions. When drawing a woodpecker, artists must pay close attention to the size relationships between the head, body, wings, and tail. This tutorial helps artists practice measuring and comparing different parts of the bird.
Accurate proportions are very important for creating a believable and lifelike illustration, and mastering this skill through the woodpecker drawing will benefit artists in their future projects.
Understanding bird anatomy is vital for drawing birds realistically. This tutorial provides insights into the really simplified anatomy of a woodpecker, such as its distinctive beak, feet, and tail structure.
Learning about these stylised anatomical features helps artists create more accurate bird drawings. This knowledge extends beyond woodpeckers to other bird species, allowing artists to draw various birds with greater confidence and anatomical correctness.
Woodpecker Drawing Tutorial
Materials
- Pencil
- Paper
- Eraser
- Coloring supplies
Time needed: 40 minutes
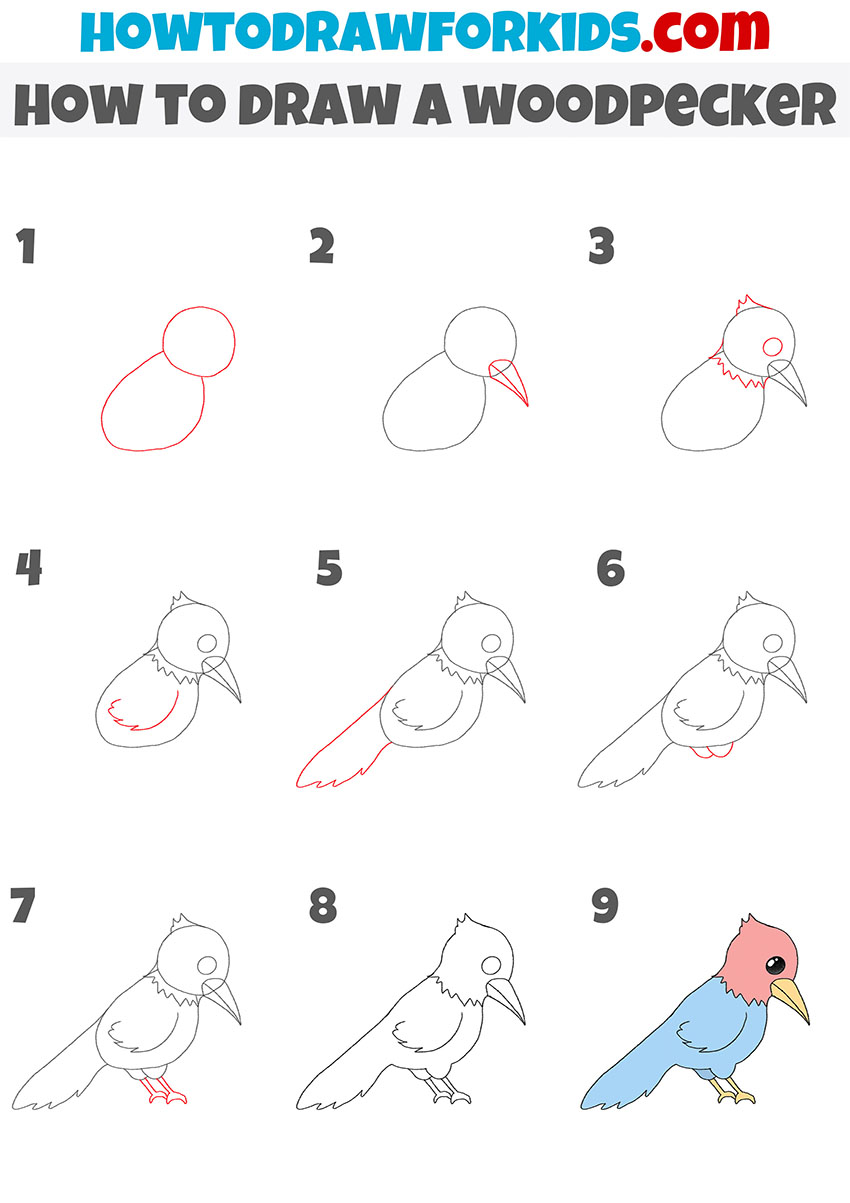
How to Draw a Woodpecker
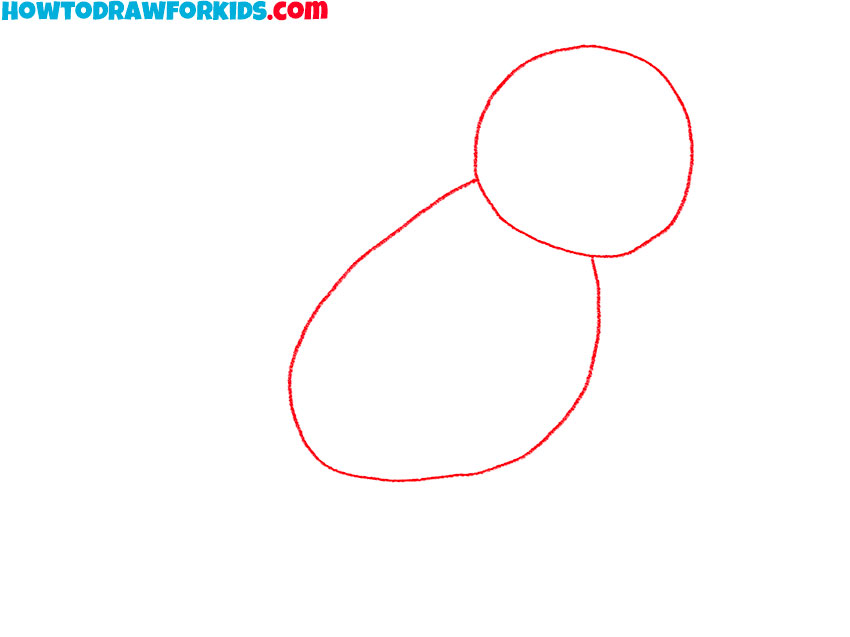
- Draw the head and torso of the woodpecker.
Draw a small circle at the top for the head and a larger, slightly elongated oval below it for the body. Position the oval so that it overlaps slightly with the bottom of the circle. Keep your lines light and smooth, as you’ll be adding more details and refining the shapes as you progress through the tutorial.
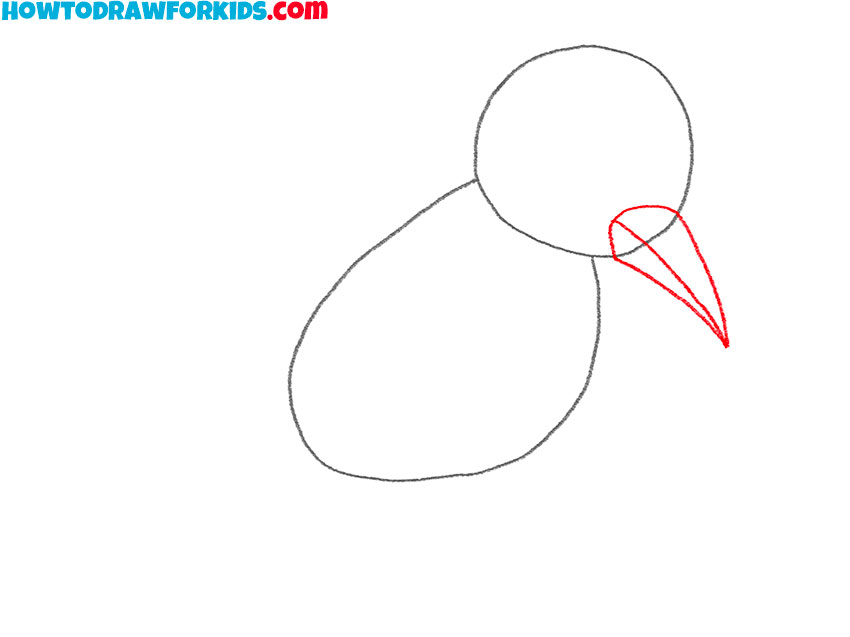
- Draw the beak.
Next, draw the woodpecker’s beak extending from the head. Starting from the front of the head circle, sketch a triangle shape that points outward. The beak should taper to a sharp point. Ensure the beak is slightly angled downward, illustrating the characteristic look of a woodpecker.
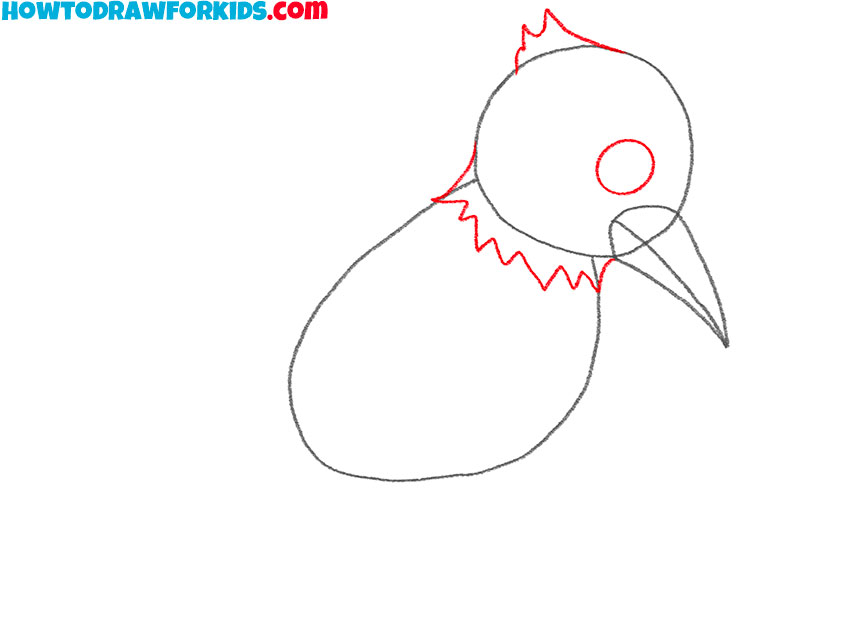
- Detail the head and neck.
Draw a small circle inside the head circle for the eye, positioned towards the top. Next, outline the feathered crest on top of the head by drawing jagged lines that extend slightly upwards. Around the base of the head circle, sketch a series of small, curved lines to represent the neck feathers.
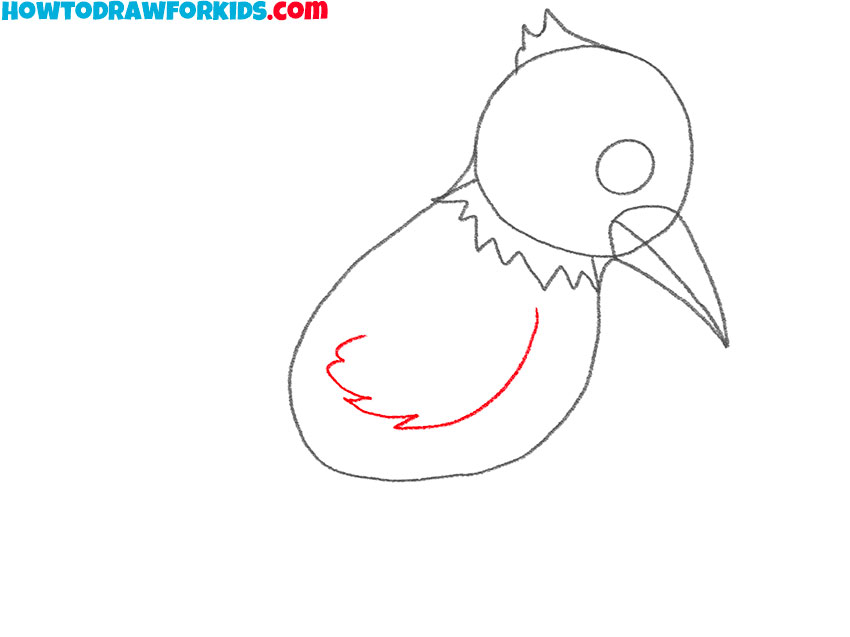
- Add the wing.
From the middle of the body oval, draw a curved and rugged line that extends towards the back and then curves upwards, following the natural curve of the body. This line represents the bottom edge of the woodpecker’s wing. The edge of the wing should resemble a saw blade to represent feathers.
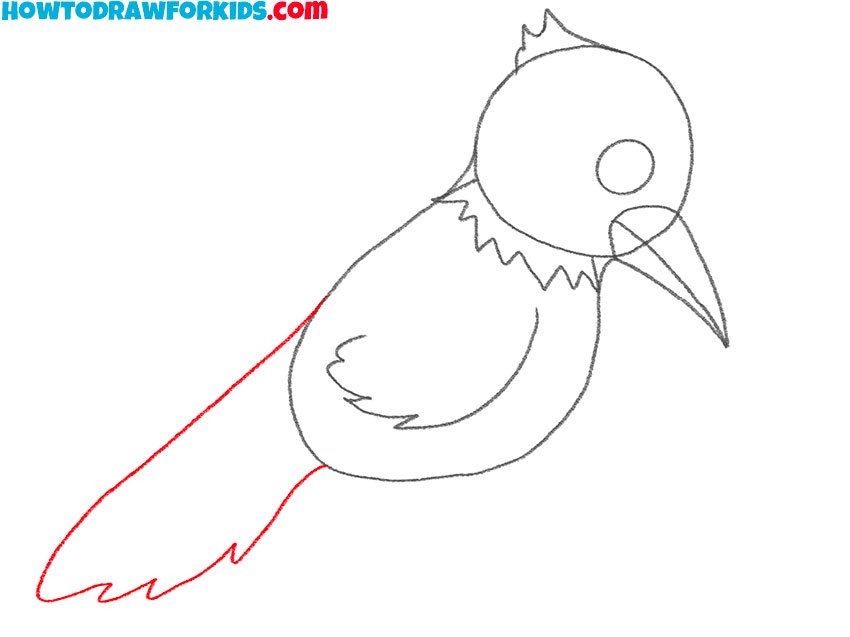
- Draw the tail.
From the lower back of the body oval, draw an elongated that fan out slightly. This shape represents the tail of the woodpecker. The top edge of the tail should be smooth and straight while the bottom edge should have a zigzag outline to convey the correct shape.
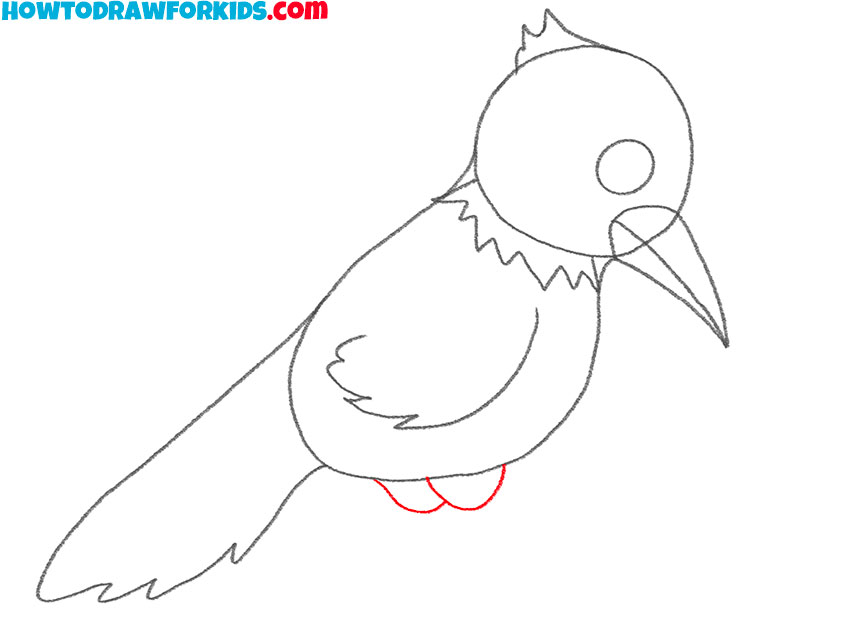
- Draw the upper parts of the legs.
From the lower part of the woodpecker’s body oval, draw two short lines extending downwards. These lines represent the thighs and should be slightly curved to follow the natural contour of the bird’s body. These initial lines provide the basis for adding more detailed leg and foot.
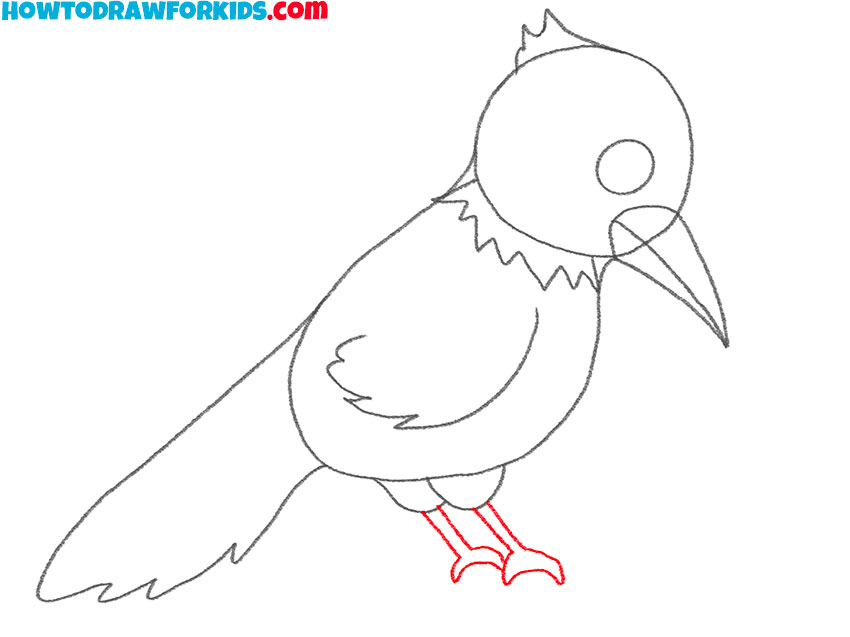
- Add the rest of the legs.
Continue by drawing the lower parts of the legs and the feet. Extend the upper leg lines downwards to form the lower legs. At the end of each lower leg, draw three thin, curved lines for the toes. Each foot should have two toes pointing forward and one toe pointing backward.
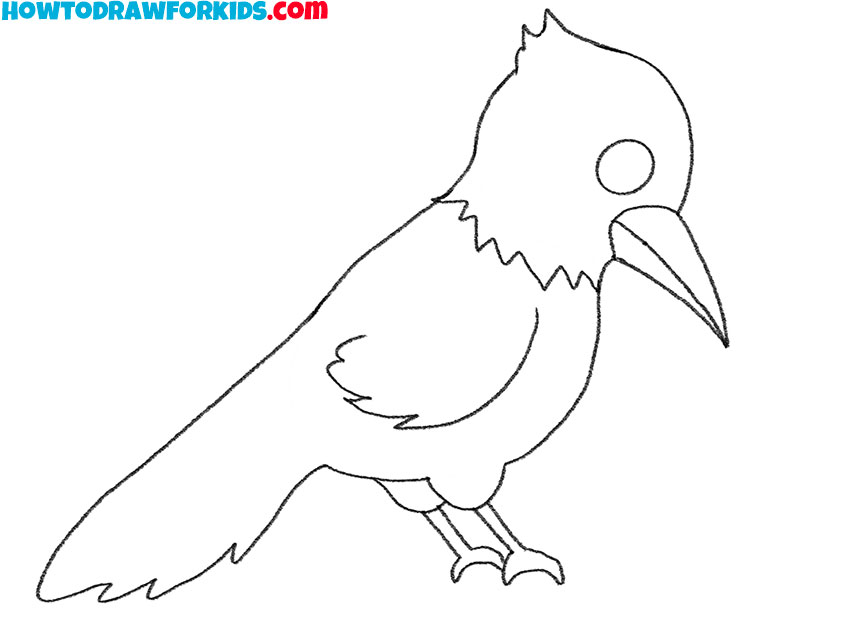
- Review the sketch and erase the guidelines.
Now, refine your woodpecker drawing by adding final details and erasing unnecessary guidelines. Smooth out the outlines of the head, body, wing, and tail, ensuring all shapes are correct. Erase any remaining construction lines from the initial shapes to clean up your drawing.
- Add colors to your woodpecker drawing.
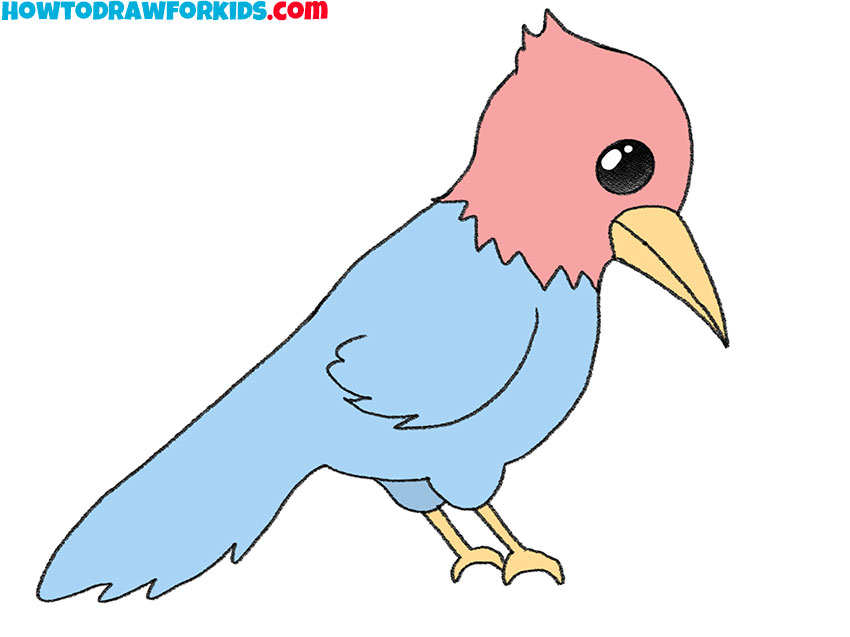
Use vibrant colors to highlight different parts of the Color the head red, the body with a combination of black and white, and the beak yellow. Fill in the eye with a dark color, leaving a small white dot for the highlight. Carefully color within the lines to ensure a neat appearance.

Additional Content
I’ve crafted a free PDF file specially for this drawing lesson, so you can take your art skills to new heights anytime you like! It’s packed with easy-to-follow instructions that will guide you through each step of drawing a woodpecker.
Download it for free and you can practice drawing this fascinating bird whenever inspiration strikes, even if you’re off on a family hike or just hanging out in your backyard. So grab your copy and let’s start sketching!
Drawing a Woodpecker: Tips and Tricks
To male your woodpecker drawing even better, focus on adding intricate feather details. Use fine, delicate lines to depict individual feathers, particularly around the head, neck, and wings. Vary the line direction to match the natural shape of the feathers.
Incorporating background elements can add context to your woodpecker drawing. Add details like tree trunks, branches, and foliage to create a natural habitat for your woodpecker. Consider the interaction between the woodpecker and its surroundings, such as peck marks on the tree or leaves disturbed by its movement.
Woodpecker wings often feature distinct patterns that vary by species. Carefully observe reference images to replicate these patterns accurately. Use a combination of short and long strokes to depict the layered feathers.
Make the drawing of your the woodpecker more dynamic by illustrating motion. Use dynamic poses and angles to illustrate movement, such as the bird in mid-peck or climbing a tree. Motion lines around the beak or wings can convey rapid action.
If your woodpecker is on a tree, pay attention to the texture of the bark. Use lines and shading to depict the roughness and grain of the tree. This detail adds realism to your drawing. The interaction between the bird and the tree, such as the positioning of the claws, can further improve the scene.
Conclusion
And there we have it, a fantastic woodpecker created by your amazing skills! But don’t forget that there’s a whole forest of drawing tutorials waiting for you on my website.
If you enjoyed creating our feathered friend today, you’ll absolutely love learning how to draw other majestic birds like owls and eagles.
Also, to make sure you’re subscribed to me on social media. That way, you’ll never miss out on any new and exciting tutorials I have in store.