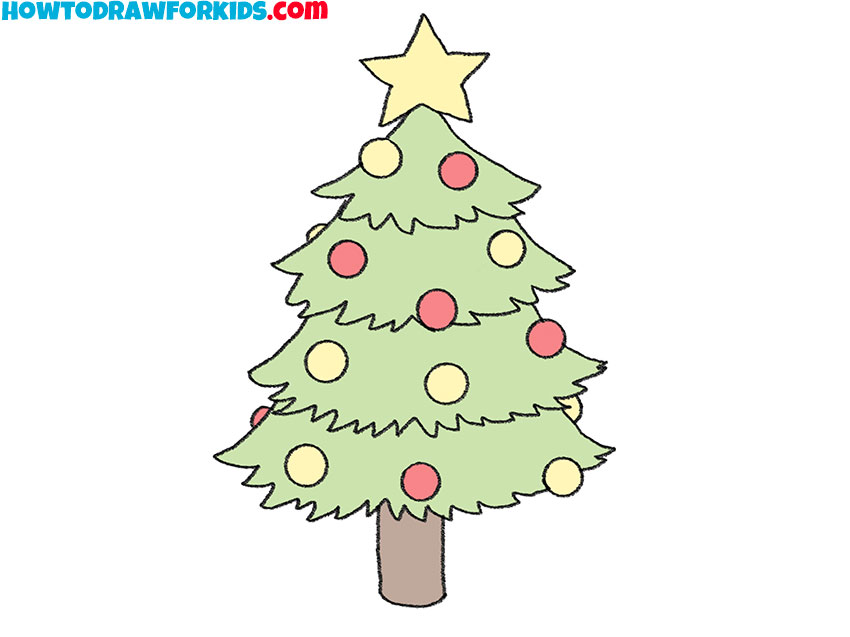
How to Draw a Christmas Tree
For the most significant holiday of winter, I created this lesson on how to draw a Christmas tree, a symbol of Christmas and New Year.
How to Draw a Christmas Tree: Introduction
There are many holidays in the world, and one of the coziest is Christmas. This holiday is associated with many objects, including the Christmas tree. To convey the essence of this holiday, today I will show you how to draw a Christmas tree in a simple style.
When drawing specific objects, it is important to remember certain distinctive features. In the case of a Christmas tree, this includes its triangular shape with layers of branches that gradually decrease in size. This characteristic sets the process of drawing a Christmas tree apart from drawing trees of other types.
Additionally, it is important to reflect the spirit of Christmas in the drawing. Decorations and a specific color palette, such as green and brown for the tree and red and yellow for the decorations, can help achieve this.
However, there are many ways to draw a Christmas tree, and we will cover these in this lesson. At the end of the article, I will demonstrate how to draw a Christmas tree in a pot and present another simpler method with a different sequence of steps and details.
Christmas Tree Drawing Tutorial
Materials
- Pencil
- Paper
- Eraser
- Coloring supplies
Time needed: 30 minutes
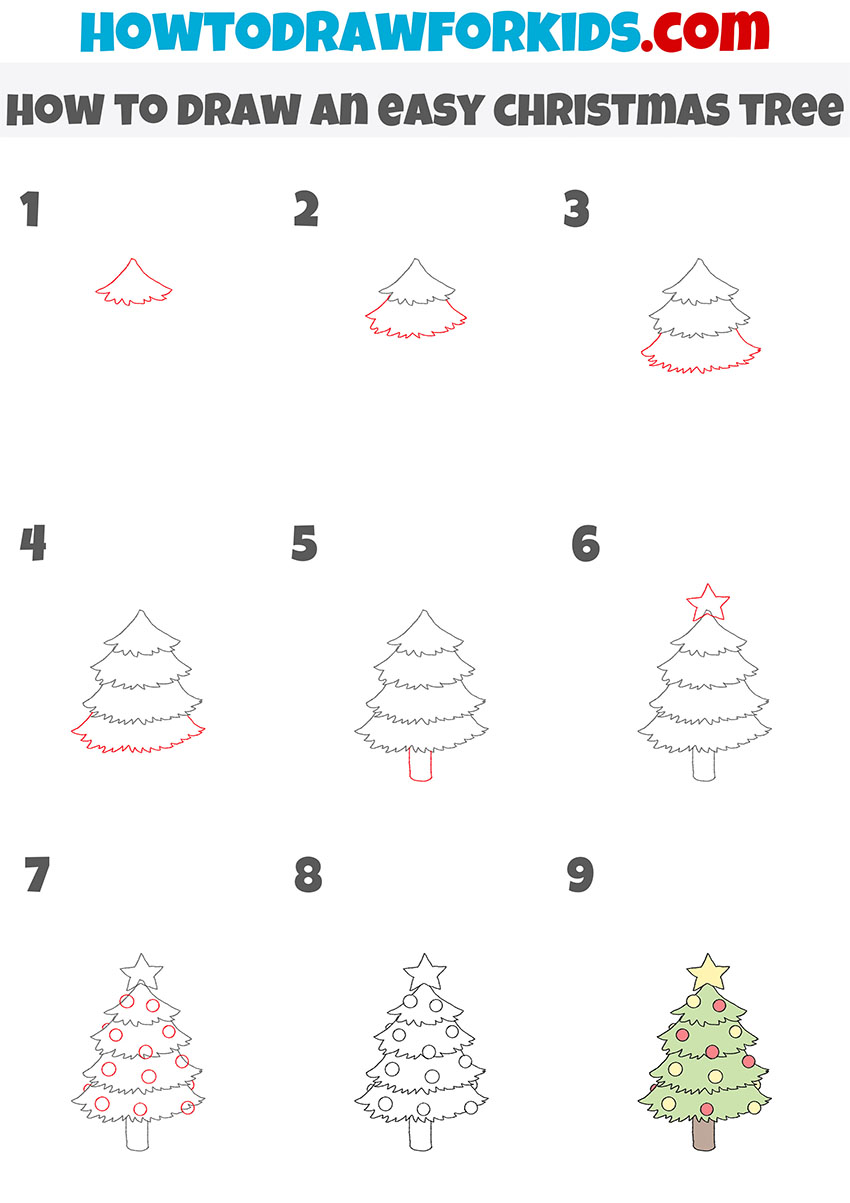
How to Draw a Christmas Tree
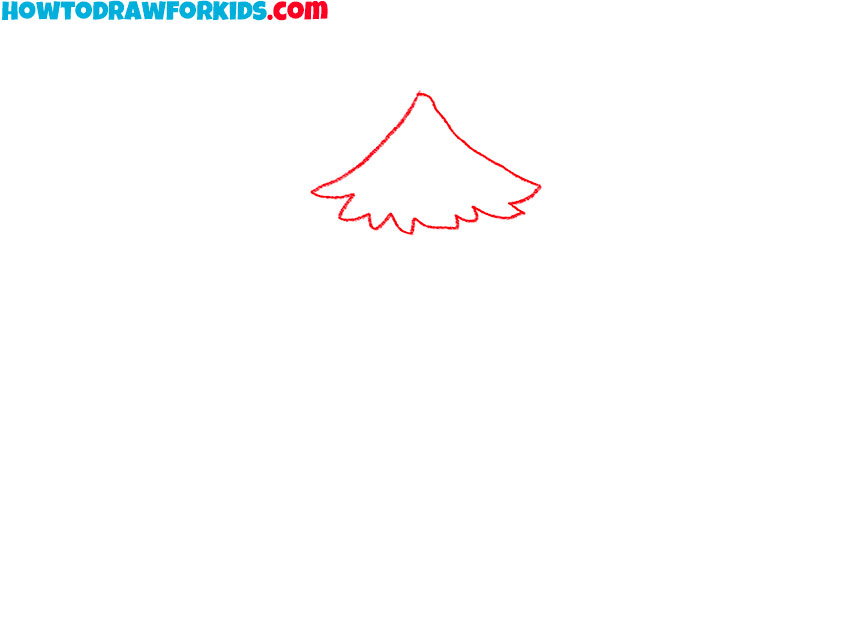
- Draw the top layer of the Christmas tree.
Begin drawing a Christmas tree by sketching the top section. This involves creating a triangular outline to represent the general shape of the tree. Then, add a jagged, wavy line at the base of the triangle to mimic the look of pine branches.
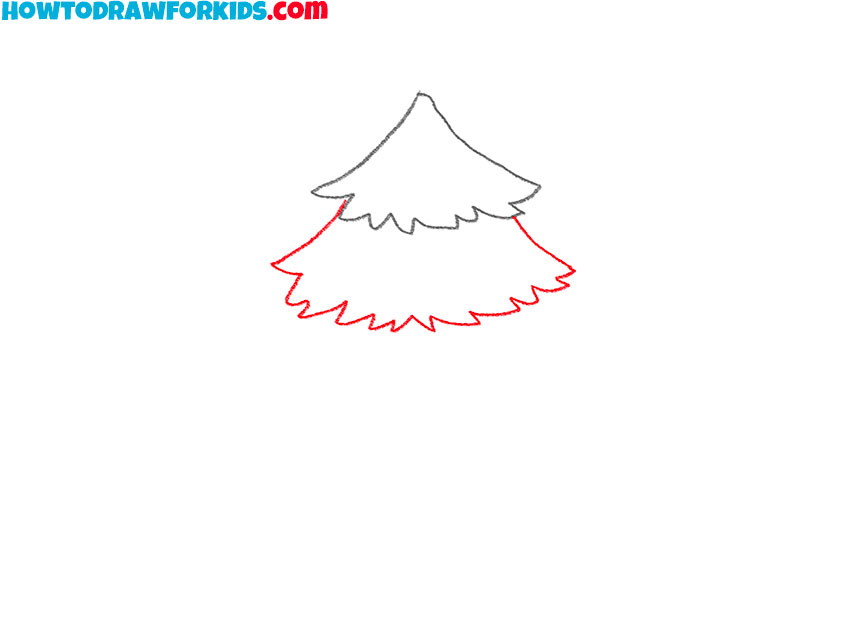
- Add the second layer of branches.
Sketch another triangular shape slightly larger than the first one. Then, add another wavy line at the base to represent overlapping branches. This layer should be wider than the first to show the gradual expansion of the tree.
- Illustrate the third layer.
Repeat the sequence of actions from the previous step, that is, draw a triangle shape without a top, then create a lower wavy edge for the branches. Try to make the expansion of the tree outlines gradual and uniform from top to bottom.
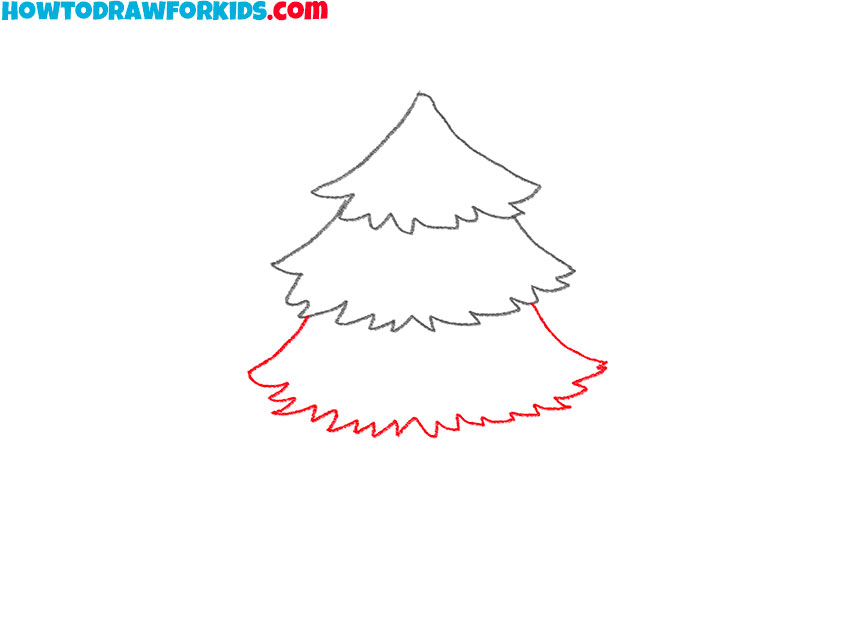
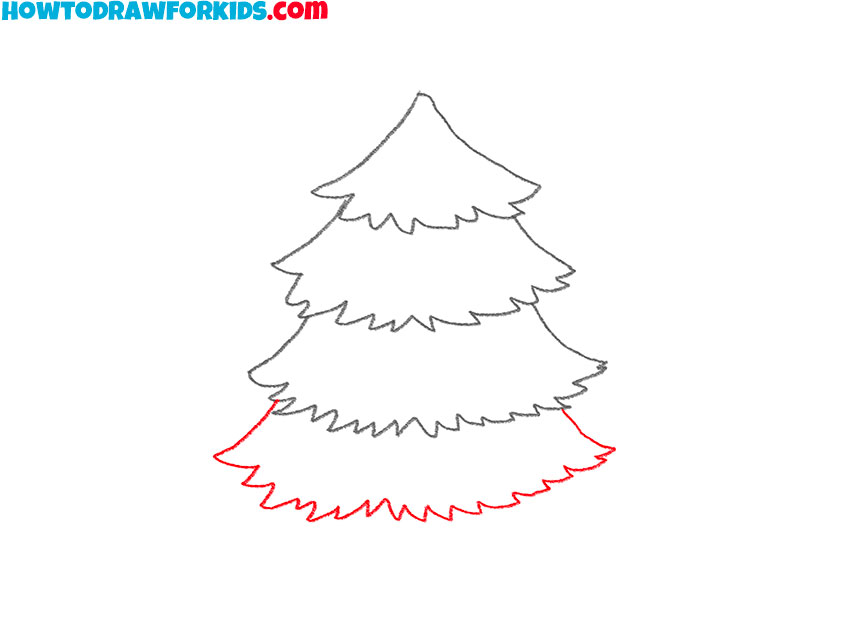
- Add the bottom layer of pine branches.
As before, draw a larger triangular shape below the third layer and finish it with a wavy line at the base for the largest branches. This section finishes the branches of the Christmas tree. The gradual increase in size from the top to the bottom layer gives the tree its characteristic triangular appearance.
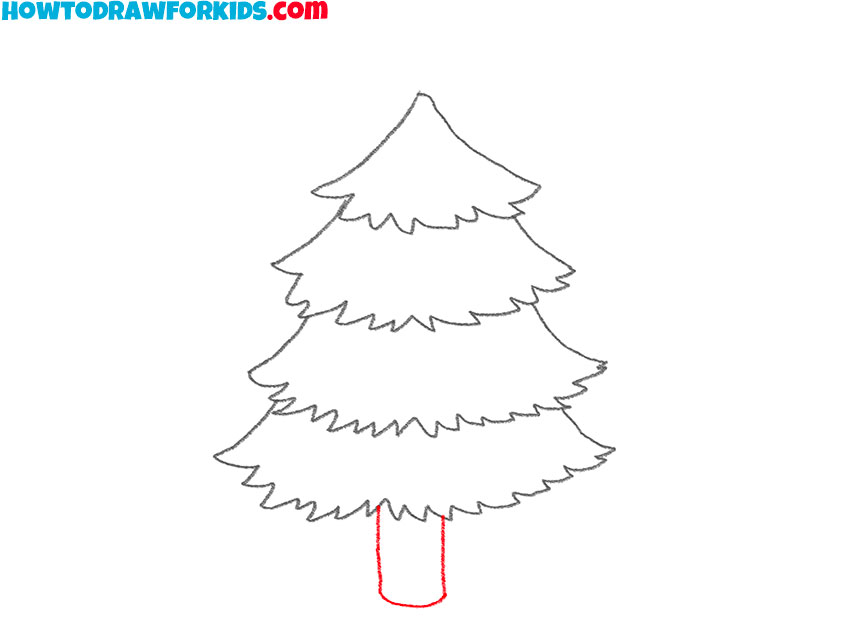
- Draw the Christmas tree trunk.
To do this, sketch a simple rectangle at the bottom of the pine. This trunk should be located right at the bottom center of the Christmas tree. The trunk of the tree, although it should be straight, can have slight, barely noticeable bends, so do not try to give this part of the tree a perfectly straight outline.
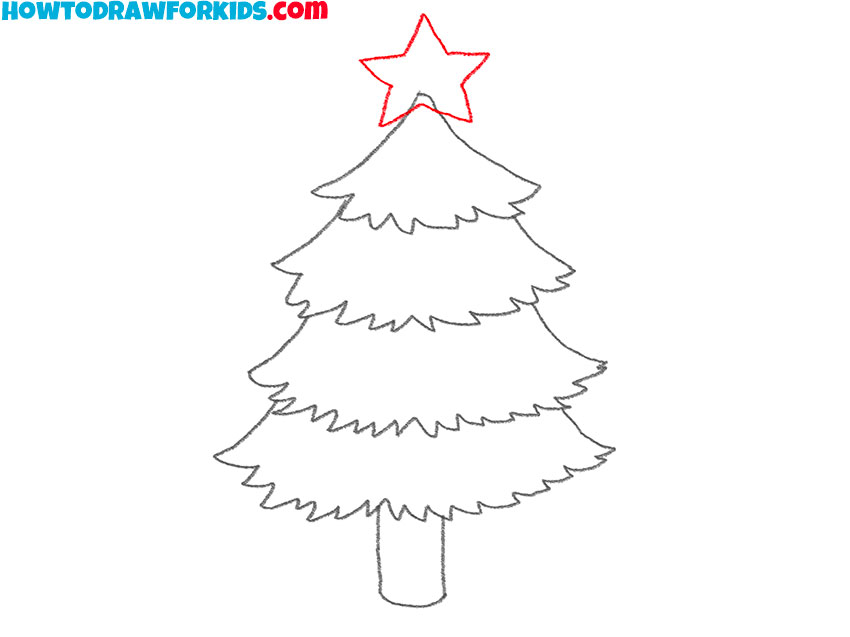
- Add the star to the top of the pine.
To demonstrate that this is a Christmas tree, draw a star at the very top. Using a series of straight lines, draw a simple five-point star, ensuring it is neatly centered on the topmost point of the tree. The most popular Christmas tree topper is the five-pointed star, but you can depict your star with any number of points.
- Decorate the pine with ornaments.
Sketch small circles evenly distributed across all three layers, to illustrate the ornaments. Space them carefully to avoid overcrowding any specific section of the tree. Additionally, you can draw Christmas lights, little angels and any other decorations to make your Christmas tree drawing more unique.

- Finalize the Christmas tree drawing.
Remove any remaining guidelines or unnecessary marks from your Christmas tree drawing. Check the details, such as the star, ornaments, and branch outlines. Make small adjustments to the lines, if needed, to ensure the tree looks symmetrical and polished.
- Color the Christmas tree.
Use green for the branches, brown for the trunk, and a combination of red and yellow for the ornaments. The star at the top should be colored yellow or red. You can add shading or slight variations in the green to the branches to give your Christmas tree more more realistic look.

Additional Content
For aspiring artists, I have prepared a free PDF file containing a simplified version of my lesson. This file also includes a coloring page, a tracing worksheet, and a grid drawing worksheet. It is easy to download and designed for use without an internet connection, providing an engaging way to practice and improve drawing skills.
Additional Drawing Techniques
The basic tutorial on how to draw a Christmas tree is complete, allowing you to illustrate this winter holiday symbol with a recognizable appearance. Now, it’s time to advance and develop new skills in drawing this object. I have prepared additional techniques for drawing a Christmas tree to provide more practice and refine your drawing skills. First, we will draw a Christmas tree in a pot, followed by a completely different style for this pine.
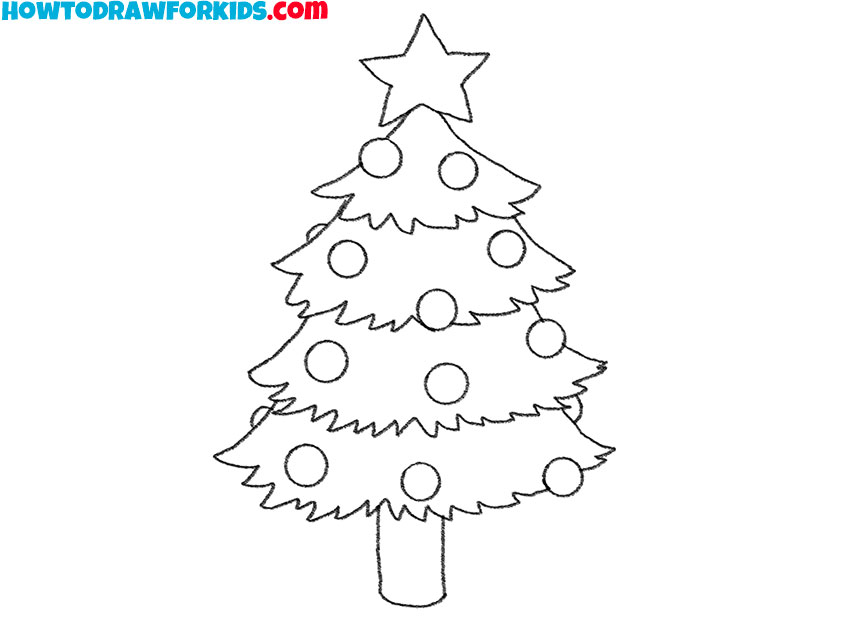
How to Draw a Christmas Tree in a Pot
As you can see, the differences between this tutorial and the first are the addition of a pot at the base of the Christmas tree and the simpler, more geometric design of the branches. Instead of focusing on detailed overlapping layers, this tutorial uses rounded, scalloped shapes for the branches. Additionally, decorations are introduced with a more minimalistic approach.
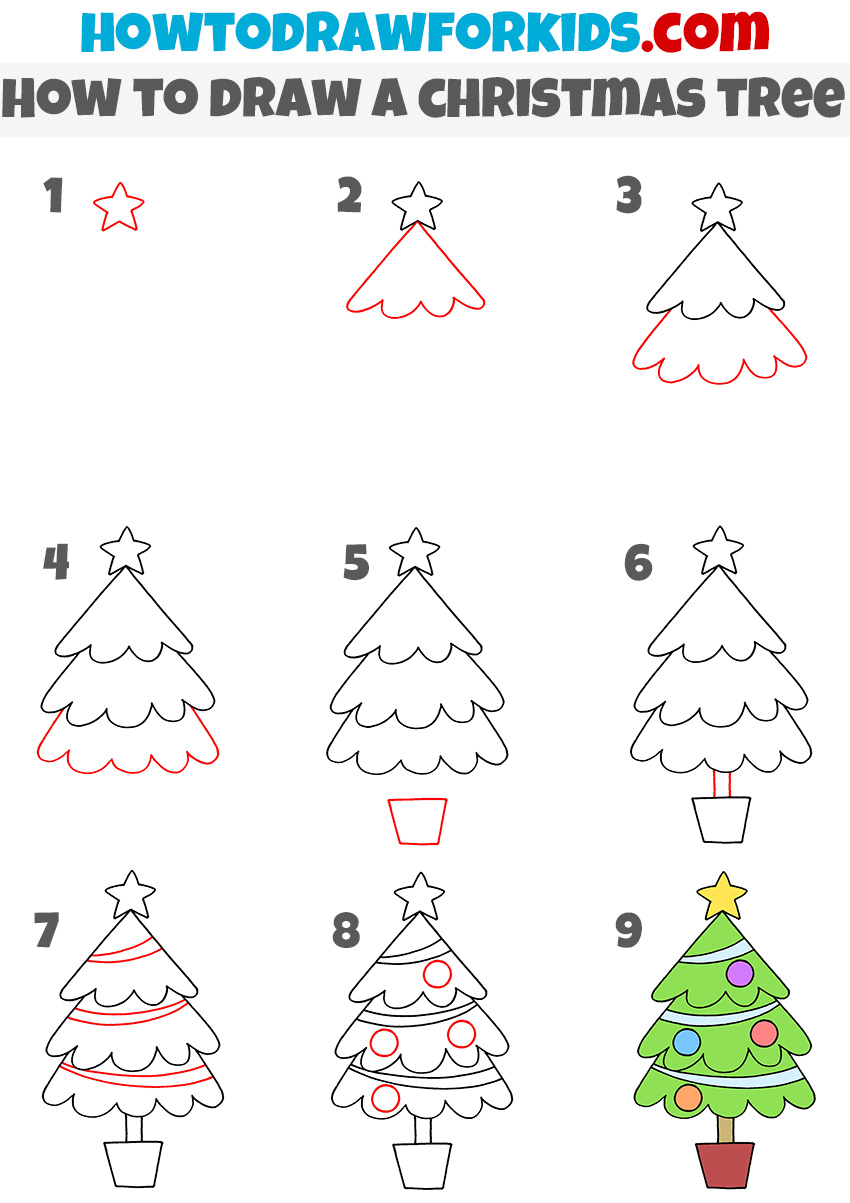
To draw a Christmas tree in a pot, sketch a star at the top of the pine. Below the star, sketch the triangular outline of the tree and add three layers of rounded scalloped shapes to represent the pine branches. Draw each layer slightly larger than the one above it to form the tree’s characteristic triangular shape. Add the bottom layer of the branches, ensuring it is the widest and completes the tree’s structure.
Below the Christmas tree, draw a small, trapezoidal pot to serve as the base. Add a thin rectangular trunk connecting the tree to the pot. Next, draw curved lines across the layers of the tree to represent garlands. Evenly distribute circles on the branches to represent ornaments. Finally, color the Christmas tree using green for the branches, brown for the trunk, red for the pot, and add bright colors for the star, garlands, and ornaments.
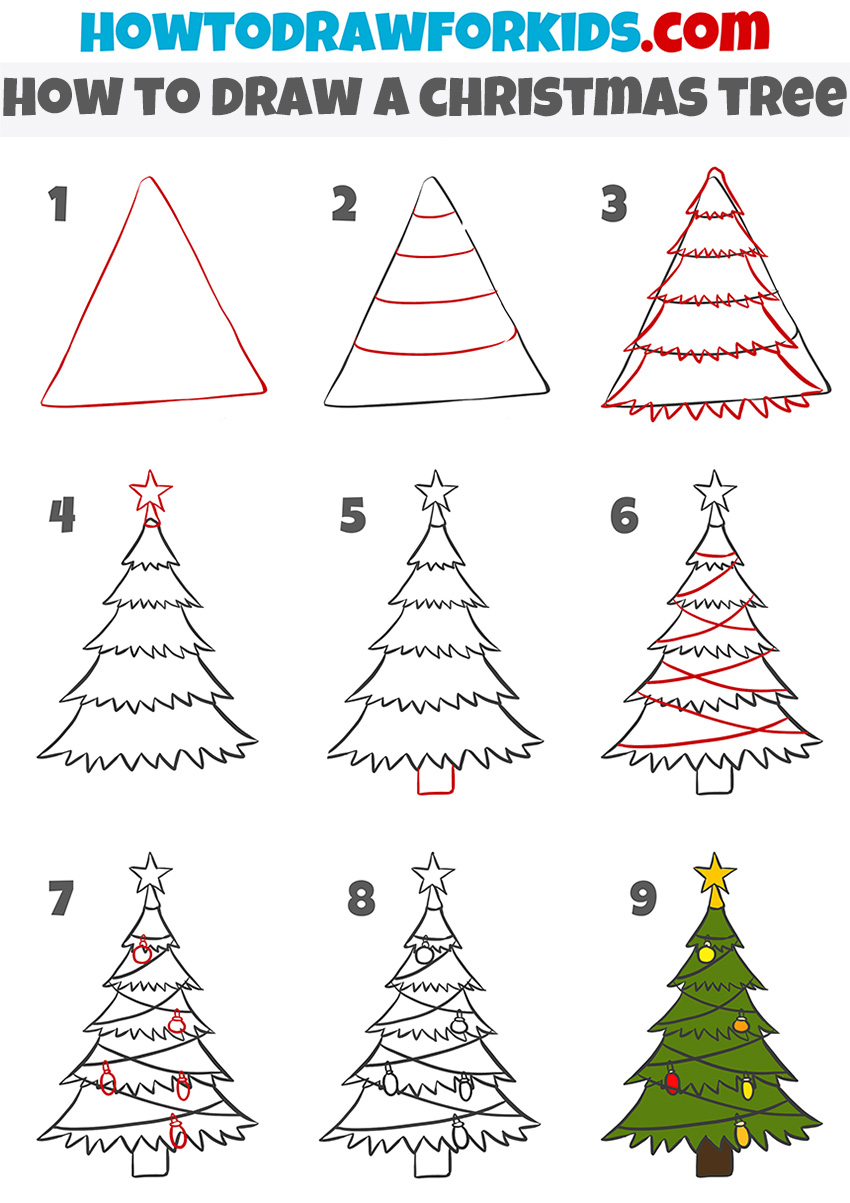
Alternative Christmas Tree Drawing Technique
This tutorial presents an entirely different approach to drawing a Christmas tree. Instead of building the pine tree from the top down, layer by layer, as in the first tutorials, here you begin by drawing a triangular guideline for the entire tree. Only after establishing this overall shape do you add the layers, branches, and details.
Start by drawing a large triangle to form the base shape of the Christmas tree. Divide the triangle into horizontal sections by drawing evenly spaced curved lines across it. Use these sections as guides to add zigzag edges along the sides of the tree, forming the branches. Make the edges sharp and pointed to create the look of pine needles. Add a five-point star at the top of the tree.
Below the Christmas tree, draw a small rectangular trunk to complete the basic structure. Next, sketch wavy lines across the tree to represent garlands draped over the branches. Add oval-shaped ornaments evenly distributed across the tree, varying their sizes. Finally, color the Christmas tree green, the trunk brown, and use bright colors for the ornaments, garlands, and star to give the tree a finished appearance.
Conclusion
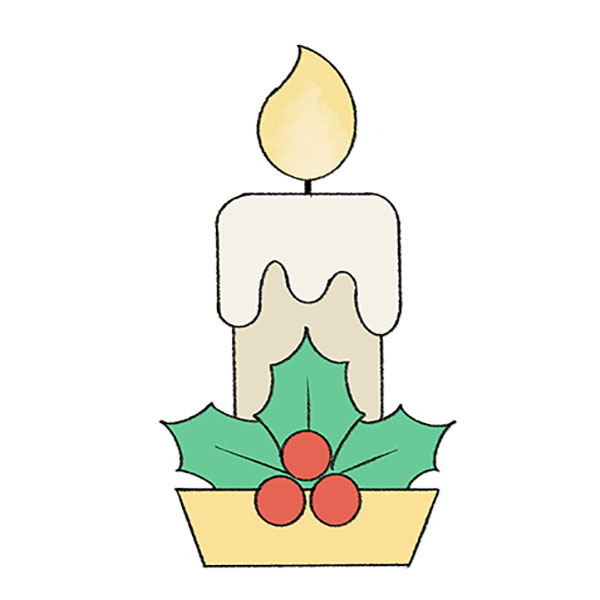
With that, you have added a Christmas tree to your collection of drawings. This is just one method to represent the holiday season on paper. My website provides various lessons for creating cool Holliday drawings. Consider trying a gift box with a bow or a snowman as your next project. To to this, check out my Hollidays section.
To stay updated on new drawing tutorials, follow me on social media. You will be notified about all the latest lessons. Subscribe to me on Pinterest and YouTube for video tutorials and bonus content. Keep your drawing materials ready for upcoming tutorials.

you aer good at this
This is the best app I have ever used it helped my kid a lot!
Many thanks, Aarish. Very nice to see this tutorial was useful for your kid!