How to Draw a Princess
If you want to learn how to draw a princess, you are in the right place. I’ll show you how to do this using several really simple methods.
How to Draw a Princess: Introduction
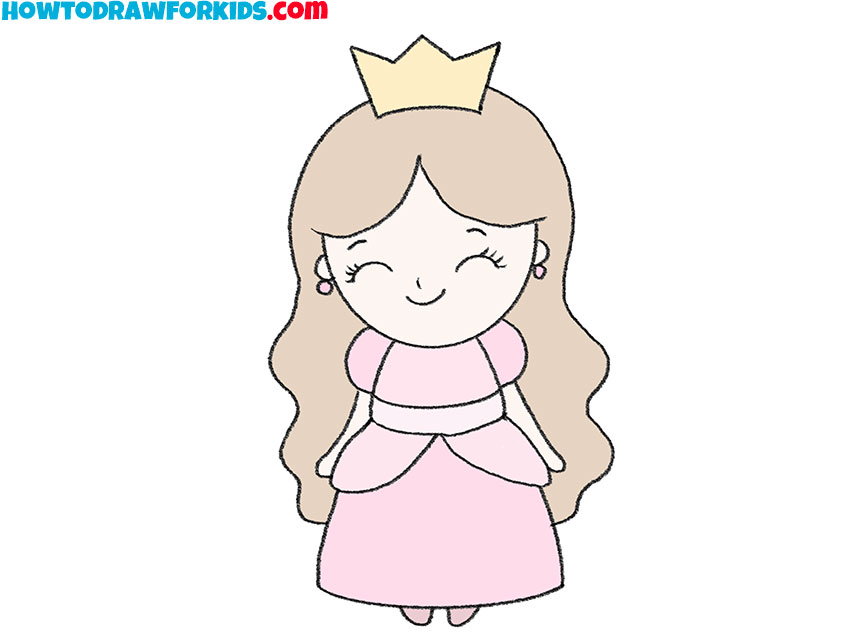
Since a princess is one of the most common images in world culture, you may have often thought about drawing one. This lesson on how to draw a princess will help you learn the basics, allowing you to depict almost any princess from any fairy tale, artwork, or even your imagination. To give the princess the appearance you want, simply adjust specific details, such as facial features or clothing elements.
You will complete this task in a simplified style, similar to what you encountered in previous lessons. For example, we recently learned to draw a girl using a very similar style and techniques. I intentionally omitted complex details, leaving only the most essential ones to simplify the lesson as much as possible.
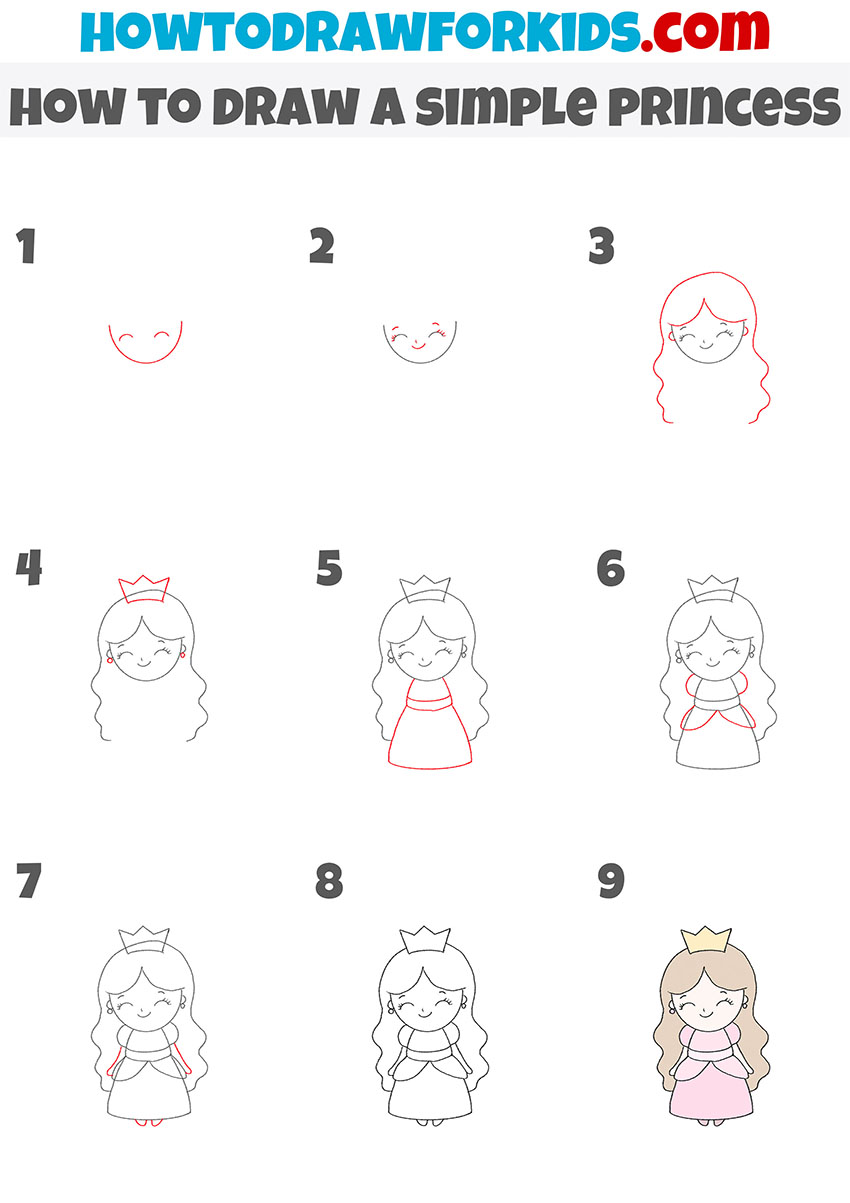
There is no complex construction involved. This princess drawing lesson is divided into several steps that are straightforward for any aspiring artist. In each stage, you will draw simple elements. You can easily complete this task, even if you have not drawn princesses before.
To help reinforce these skills, I have added supplementary instructions at the end of the article. Each additional drawing tutorial demonstrates how to draw a princess with a different approach, style, and unique details.
Princess Drawing Tutorial
Materials
- Pencil
- Paper
- Eraser
- Coloring supplies
Time needed: 40 minutes
How to Draw a Princess
- Sketch the chin and eyes.
To begin drawing your princess, start by sketching a simple face outline in the shape of a gentle “U.” This outline will form the lower part of the face. Next, draw the eyes of the princess in the form of two curved lines, resembling two semicircles.

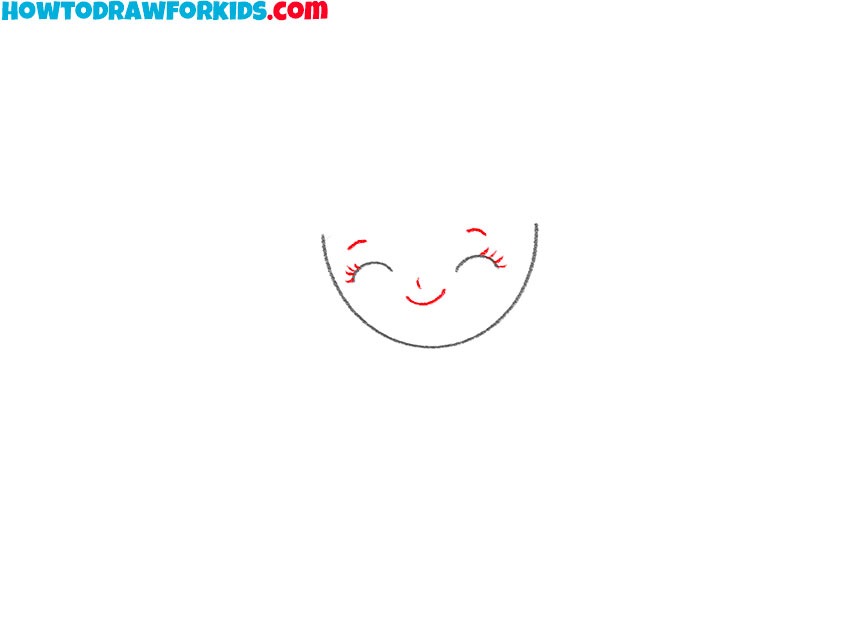
- Detail the face.
Start by drawing two small, curved lines above the eyes for the eyebrows. Then, add tiny, short lines at the ends of each eye to represent eyelashes. For the nose, draw a small dot or short line just below the center of the eyes. Finish this step by drawing the mouth as a slightly curved line.
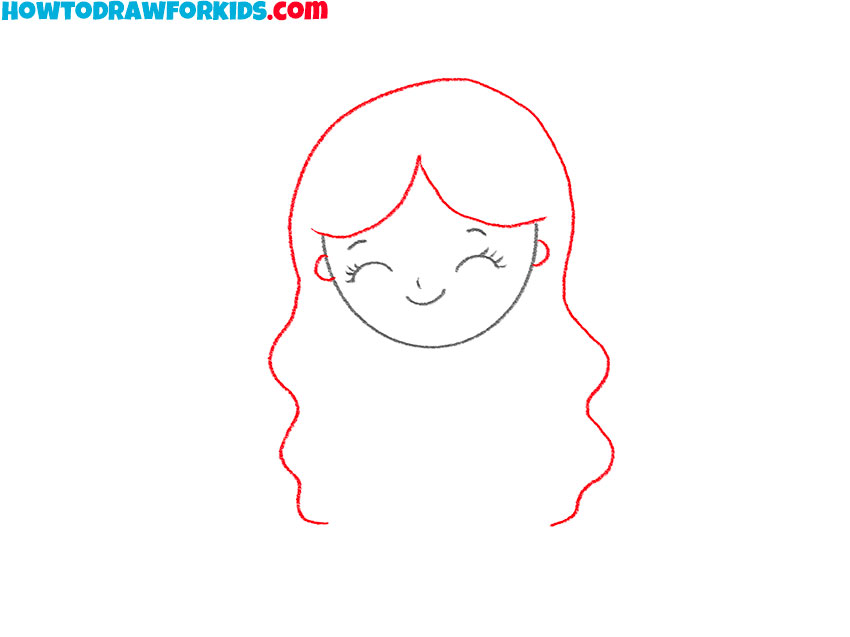
- Sketch the hair and ears.
Draw a curved line above the head to represent the top of the hair of the princess. Then, extend the hair down both sides of the face, using gentle curves to create a flowing, natural look. Next, draw the ears as small semi-circles on each side of the face.
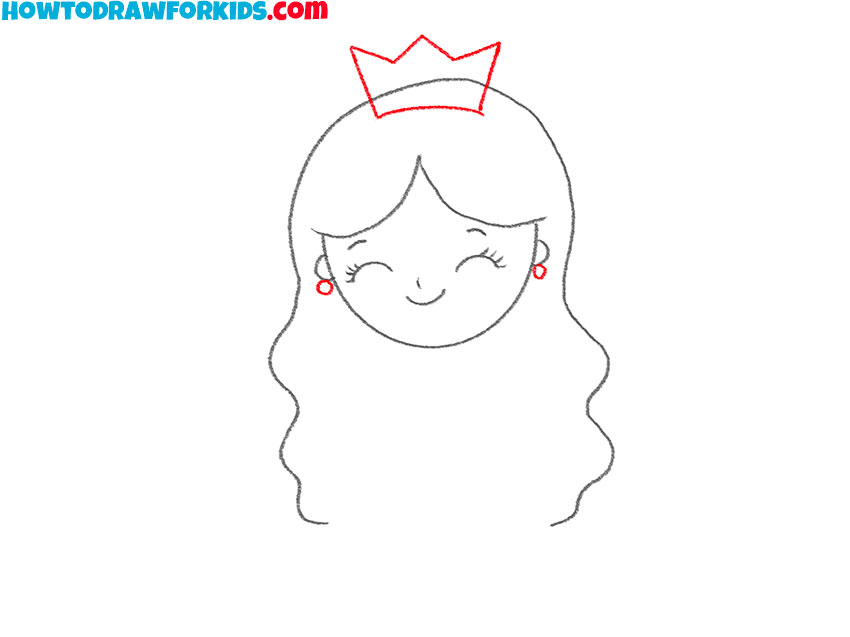
- Add the crown and earrings.
To draw the crown of the princess, sketch the bottom edge of the crown as a slightly curved line, then draw the side edges and finish the royal headdress with a shape with pointed ends. Then, add small circular shapes just below each ear to represent the earrings.
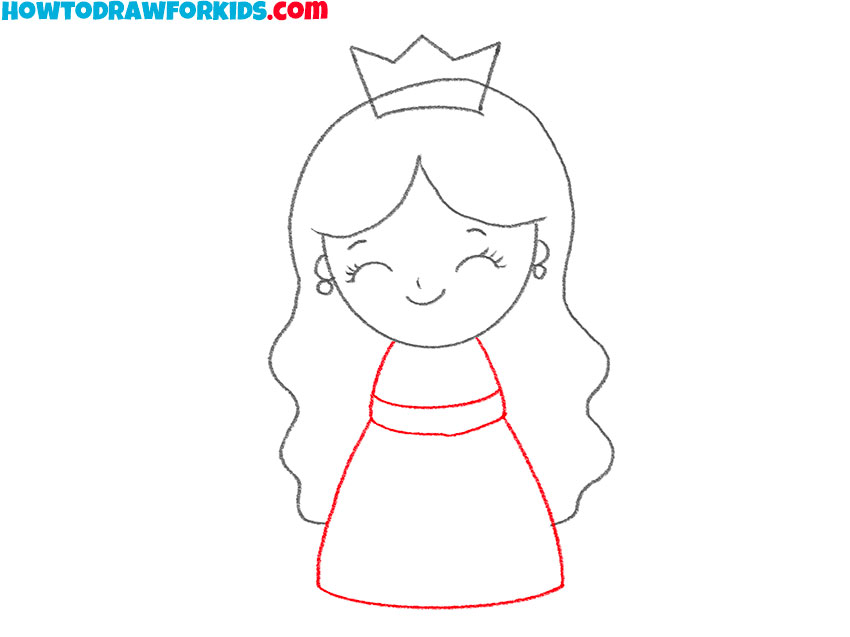
- Draw the dress of the princess.
For the top of the dress, draw the torso as a small trapezoid shape just below the head. Then, add the princess’s belt by outlining a long, narrow rectangle positioned just below the torso. Complete the main part of the princess’s dress by drawing the skirt, which should resemble a large and curved trapezoid shape.
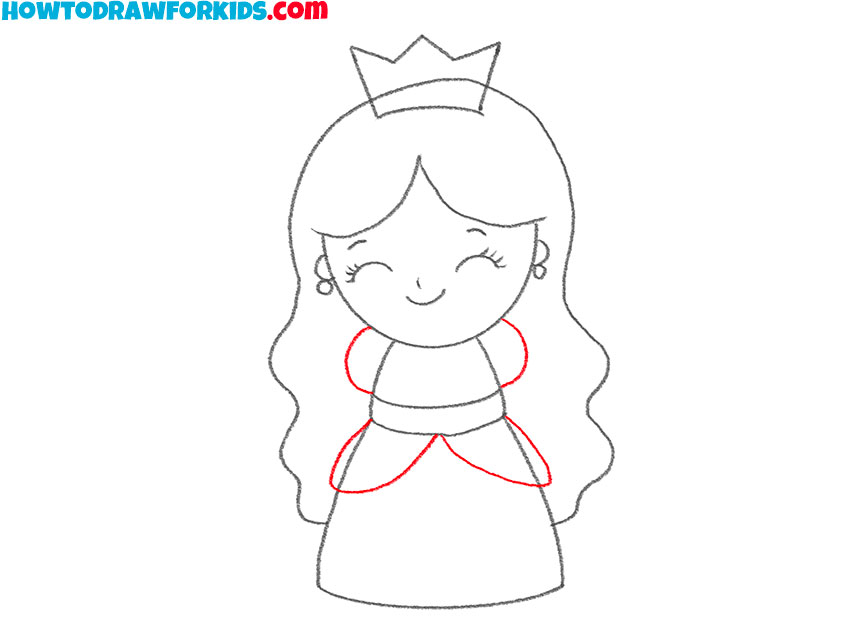
- Detail the dress.
Draw two curved lines on each shoulder to form the top of the sleeves, giving the outlines of the dress a finished appearance. Then, sketch additional details to the dress, like the decorative lines on the skirt, to give it a more finished and styled look.
- Draw the arms and feet.
For the arms of the princess, draw two simple elongated shapes on each side of the dress. Keep the lines of the arms soft and smooth. Then, draw two small ovals at the bottom of the dress to represent her feet, peeking out from under the skirt.
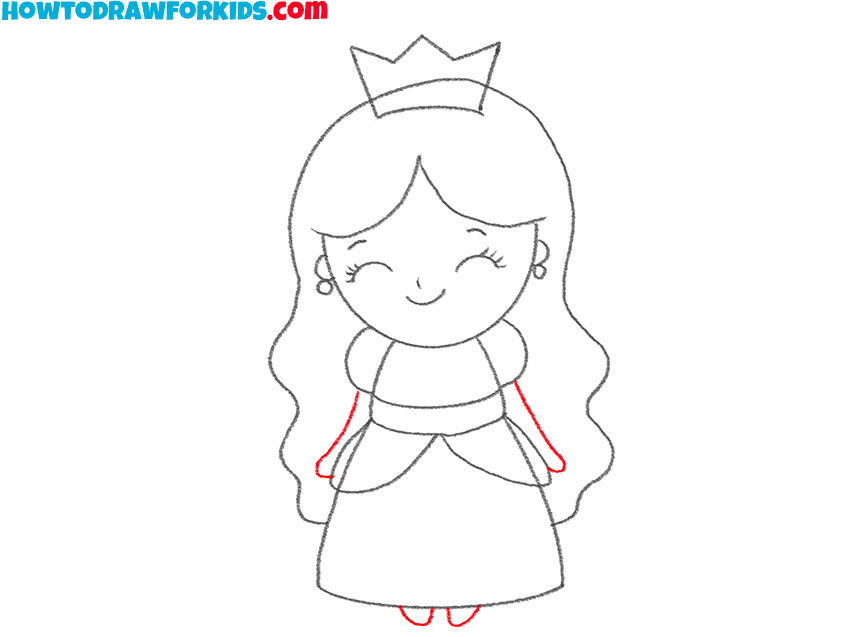
- Erase and refine the lines.
Carefully erase any extra lines that are no longer needed, then refine the existing lines to make them smooth and clear. This will give your princess drawing a polished, neat appearance, ready for the final touches. Additionally, you can add detail to certain parts of the drawing, such as adding diamonds to the crown.
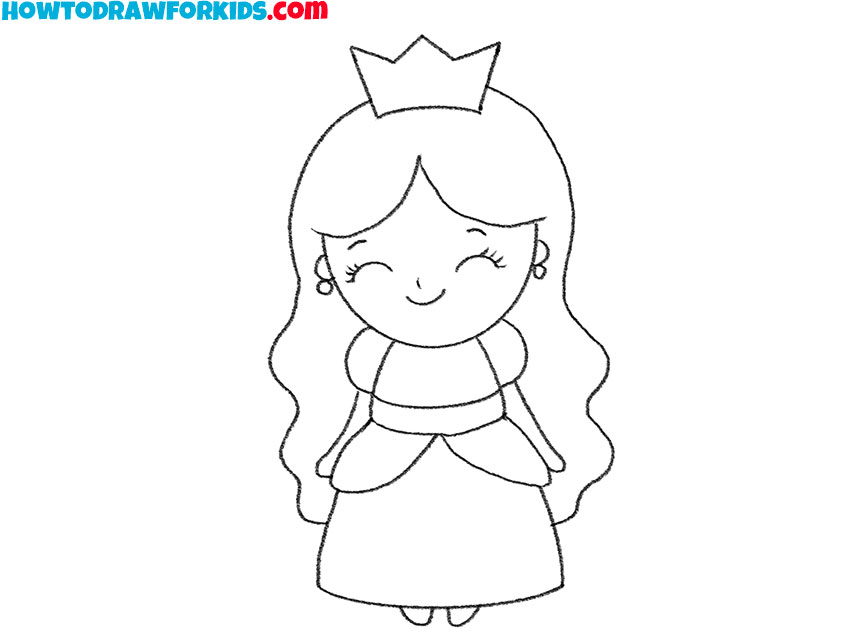
- Color the princess.
Use light colors for the dress, such as pink, blue, or purple, to give her an appropriate look. For the crown, choose yellow or gold to give it a look of a royal accessory. Color the hair in a natural shade, like brown or blonde, and add subtle colors to the skin and earrings.
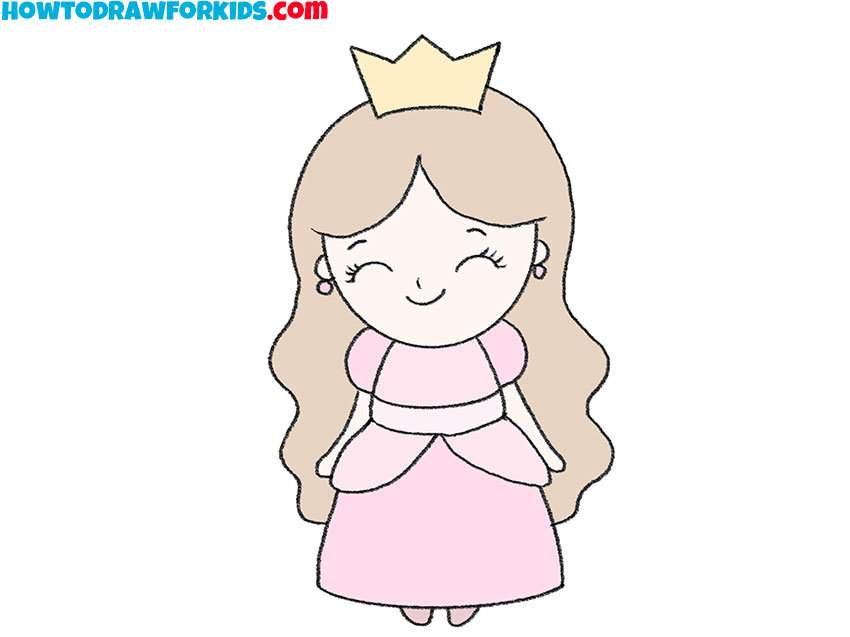
Additional Content
I have prepared a PDF file for you so that you can access the princess drawing lesson at any time. In addition to the steps of the tutorial, you will find additional materials, such as a coloring page, a tracing worksheets, and a grid drawing worksheets. Download this file and improve your drawing skills whenever you want.
Additional Tutorials
Now that you’ve completed the first tutorial on how to draw a princess, you have a solid foundation in creating a simple, elegant character. To build on these skills, check the additional tutorials, each offering a unique approach to drawing a princess with varied details, outfits, and styles.
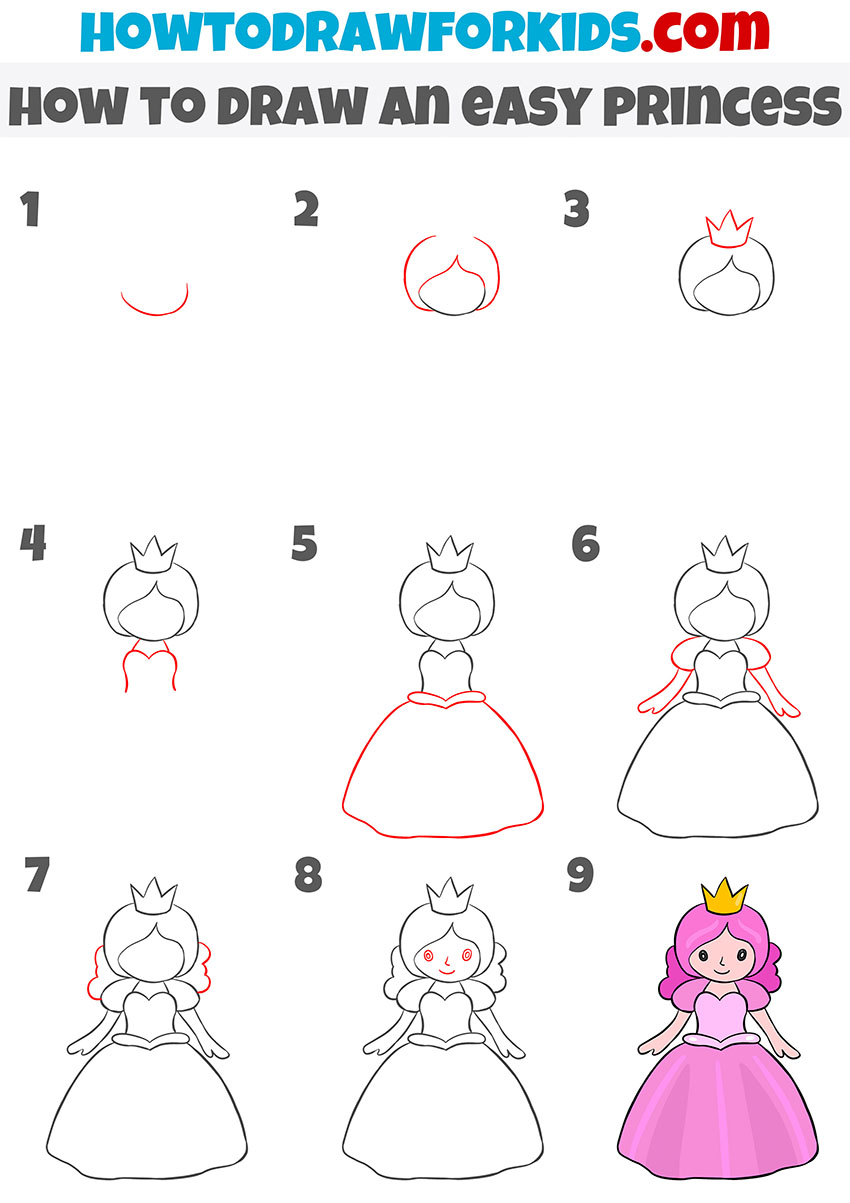
How to Draw an Easy Princess
Thanks to this step-by-step guide, you will easily draw a princess, even if you have not had to do it before. The lesson consists of several simple steps that can be easily repeated. The princess looks very cute. This is a young girl who has all the attributes of a princess – a golden crown on her head and a magnificent ball gown. The clothes have beautiful delicate shades.
This tutorial differs from the first by presenting a simpler and rounder design for the princess, demonstrating a more cartoonish style with fewer details. The dress here has a larger, rounded skirt, and the arms and sleeves are drawn as single, flowing shapes. The face lacks detailed features until the final steps, and the hairstyle is simpler, with soft, curved lines for curls.
To draw an easy princess, start with a curved line to outline the bottom of the face. Add the hair by drawing curved lines around the face, keeping it simple and smooth. Draw a small crown on top, with three points. Below the face, sketch the top of the dress by creating a heart shape. Add a rounded line below to form the large skirt.
Then, draw the sleeves and arms extending outward. Next, add curls to each side of the head. After that, draw the facial features with two dots for eyes, a small curve for the nose, and a smile. Finally, color the princess using bright colors.
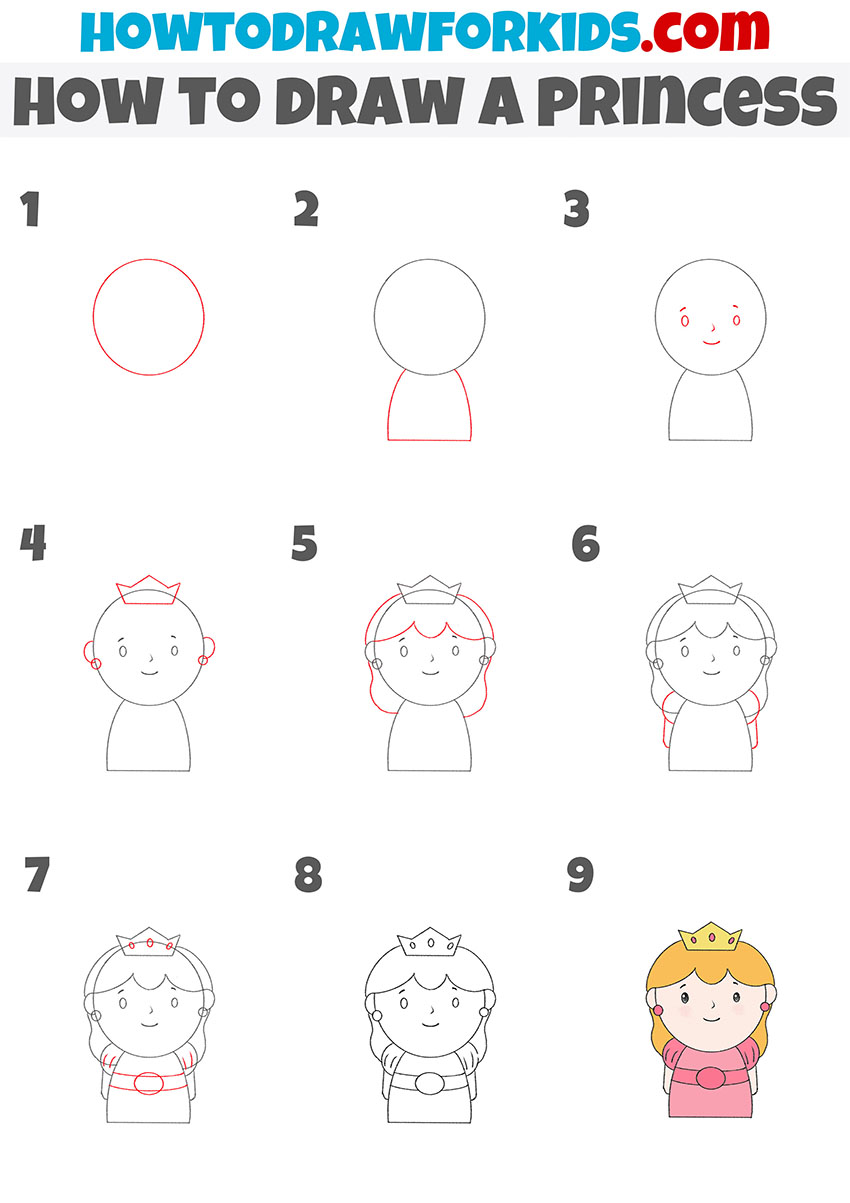
How to Draw a Little Princess
This tutorial differs from the first by presenting a simpler, more compact design for the princess with a rounded, childlike appearance. It uses basic shapes, such as circles and trapezoids, and minimizes details. The hairstyle is shorter, and the dress lacks detailed folds. This version of the princess features smaller facial details and a simplified body shape.
To draw a little princess, start by sketching a large circle for the head. Add a smaller trapezoid shape below the head to outline the body. Draw the facial features of the princess by adding two small circles for the eyes, a small curved line for the nose, and a gentle smile. Next, add small circles on each side of the head to represent the ears. Draw a simple crown on top, consisting of a basic shape with three pointed tips.
Then, outline the hair by drawing a curved line over the head and adding small waves on each side. Extend lines down from each side of the head to complete the hair. Add details to the dress of the princess by sketching two curved lines for sleeves and a belt with a circular buckle at the center. Finish by refining the lines, erasing any unnecessary marks, and adding color to the princess’s dress, crown, and face.
Alternative Princess Drawing Tutorial
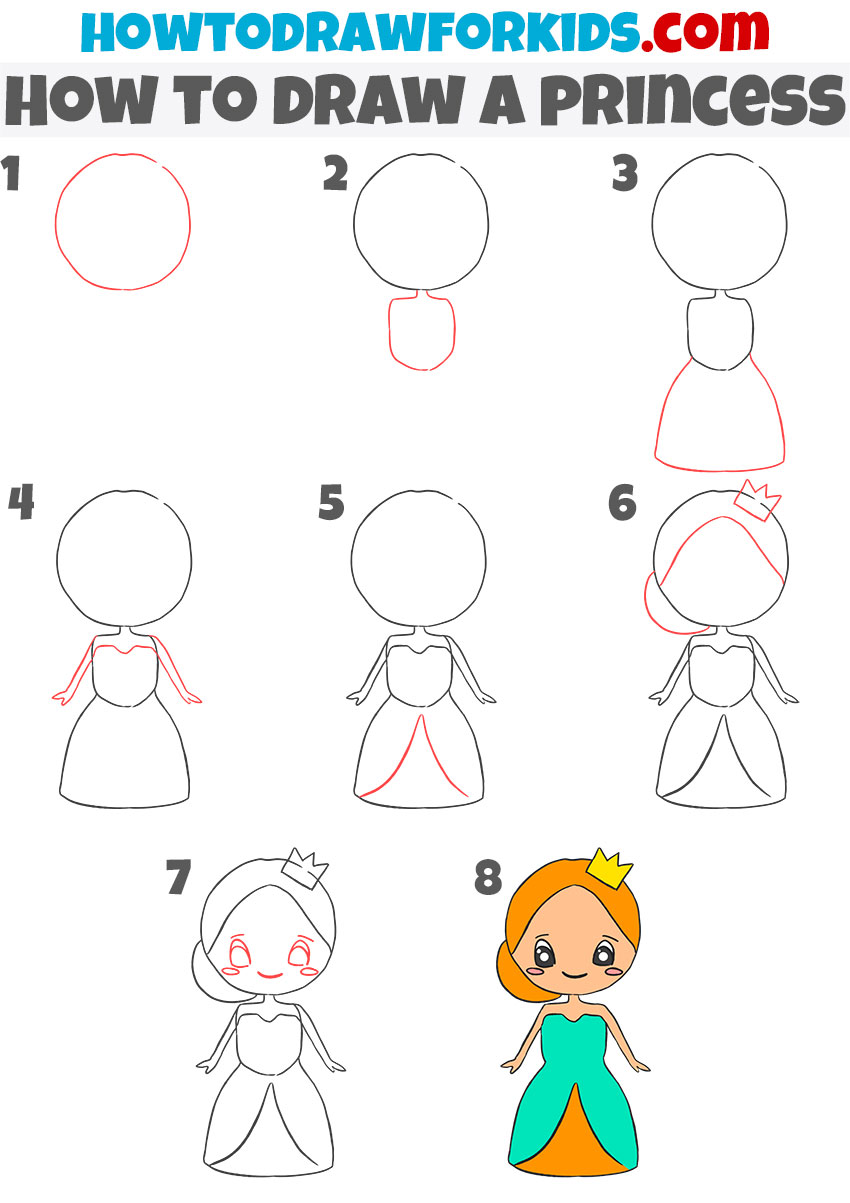
This tutorial differs from the first by offering a more stylized look for the princess. The head is also larger in proportion to the body, creating a chibi-like effect, and the hairstyle is asymmetrical with a side part and a bun. The dress design includes a sweetheart neckline and a layered skirt. Facial features are added in a cartoonish style with larger eyes and blush marks.
To draw a princess using this alternative method, start by sketching a large circle for the head. Below it, add a small, rectangular shape with rounded edges for the neck and shoulders. Draw a large, rounded triangular shape for the skirt under the torso shape.
Then, outline the top of the dress by drawing a sweetheart neckline that connects to the shoulders. Add simple arms extending downward. Detail the skirt with a couple of curved lines. Next, draw the hair with a side part and a bun on one side. Place a small crown on the top, tilting it slightly for a cute look. Draw large eyes, a small nose, and a smiling mouth with blush on the cheeks. Finally, color the princess’s dress, hair, and crown.
Conclusion
You have now learned how to draw a princess and can create drawings where the princess is the main character. Set up a background for the princess, such as beautiful nature or a palace scene. Add different details, like a new outfit for the princess. Experiment with these elements and appreciate the final result.
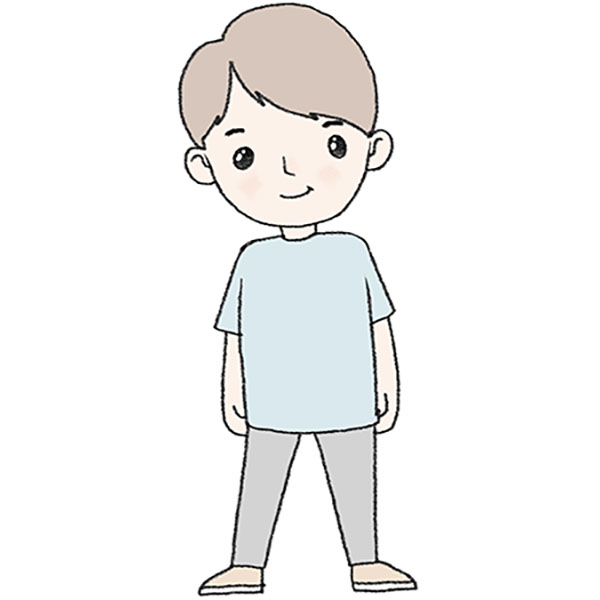
To continue learning and practicing sketching the human figure, consider checking out my lesson on drawing a person and other tutorials in the People category. Also, subscribe to my social media channels to stay updated on new lessons on this topic.

