How to Draw Bonnie
Let’s learn how to draw Bonnie, the big purple bear from the Five Nights at Freddy’s universe, using two step-by-step methods.

How to Draw Bonnie: Introduction
Five Nights at Freddy’s is one of the most talked-about games that quickly gained popularity through the internet and social media. It’s a franchise that captured the attention of many with its unique atmosphere and creepy animatronic characters. Previously, we already learned how to draw Freddy Fazbear, arguably the main character of this universe.
Today, we’re going to learn how to draw Freddy Fazbear using the same drawing style we used in the Freddy tutorial. All the lessons on my site related to this universe follow a consistent visual style. I intentionally designed them this way to add an extra layer of learning – helping you not only draw characters but also understand the importance of stylistic choices across related content.
In media – whether it’s a cartoon, video game, or movie – characters and environments are typically designed in a unified style. This visual consistency ensures the entire project feels cohesive. Artists working on such media are expected to maintain that shared style, so the characters feel like they belong to the same world. That’s why all the tutorials for the Five Nights at Freddy’s universe on my site are created in the same drawing style.
So, be sure to draw Bonnie using this lesson, and then check out the other tutorials from this series. Doing so will help you better understand how consistent visual styles are used in media projects, and how you can apply that knowledge when creating characters from the same fictional universe.
Bonnie Drawing Tutorial
Materials
- Pencil
- Paper
- Eraser
- Coloring supplies
Time needed: 40 minutes
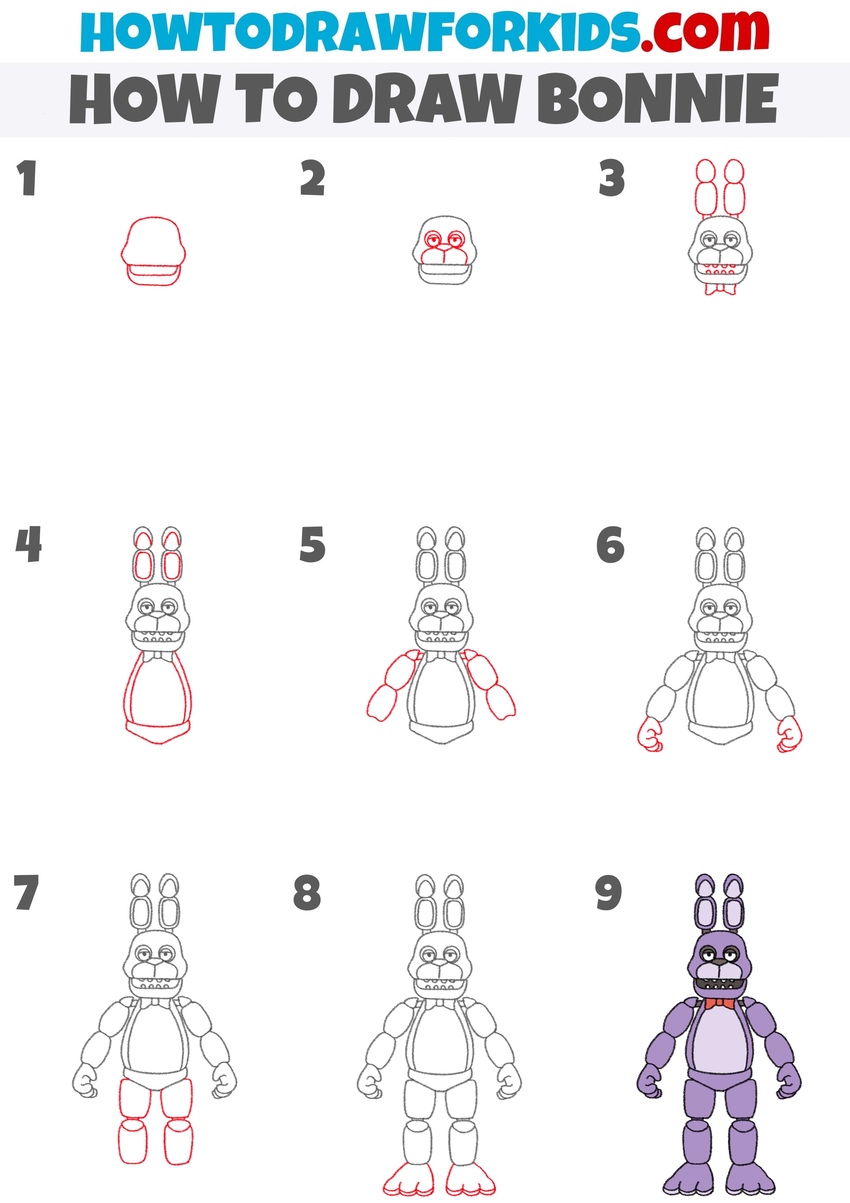
How to Draw Bonnie
- Draw Bonnie’s shape of the head.
Let’s start this tutorial on how to draw Begin by sketching the basic outline of the head. The shape should look a bit like a rounded trapezoid with a narrower top and wider bottom. Add a smaller, rounded rectangle underneath for the jaw area.

- Add the facial features.
Now begin shaping Bonnie’s facial features within the head structure. Start with two large, round eyes near the center of the face. Inside each eye, draw a smaller circle to represent the pupils. Next, draw Bonnie’s nose and mechanical muzzle by sketching two curved shapes below the nose.

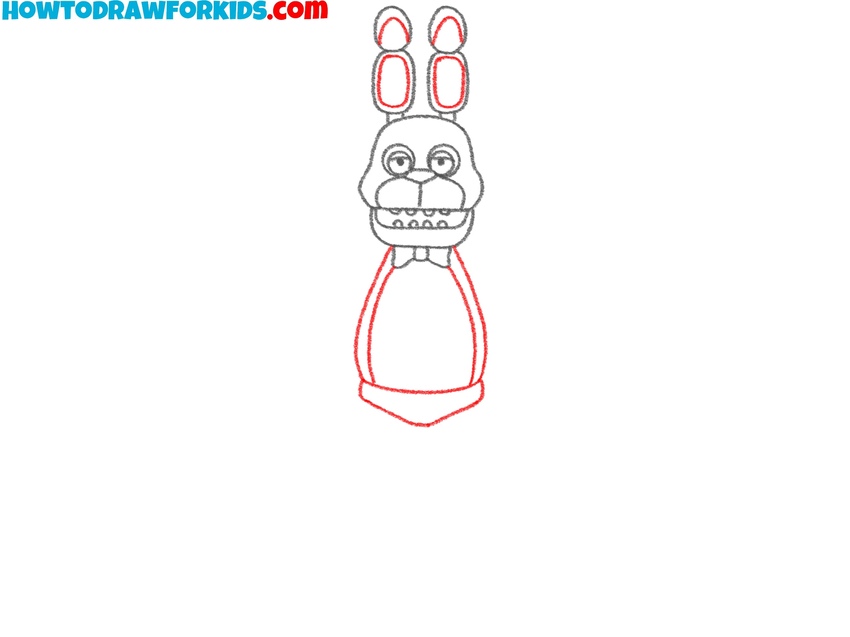
- Draw Bonnie’s ears and bow tie.
Bonnie’s ears are a really important visual feature, and in this step, you’ll draw his two long, vertical bunny ears on top of the head. Each ear consists of two oval shapes stacked vertically. Next, sketch Bonnie’s signature bow tie directly under the jaw. Then, draw the upper and lower teeth inside the mount.

- Sketch the torso and pelvis.
Now, draw the main part of the torso by sketching an oval or rounded shape that widens slightly toward the waist. Then, draw define the belly with a long oval shape. Below that, draw the pelvis using a wider, curved line shaped like an upside-down triangle or shield. Also, detail the ears of the character.
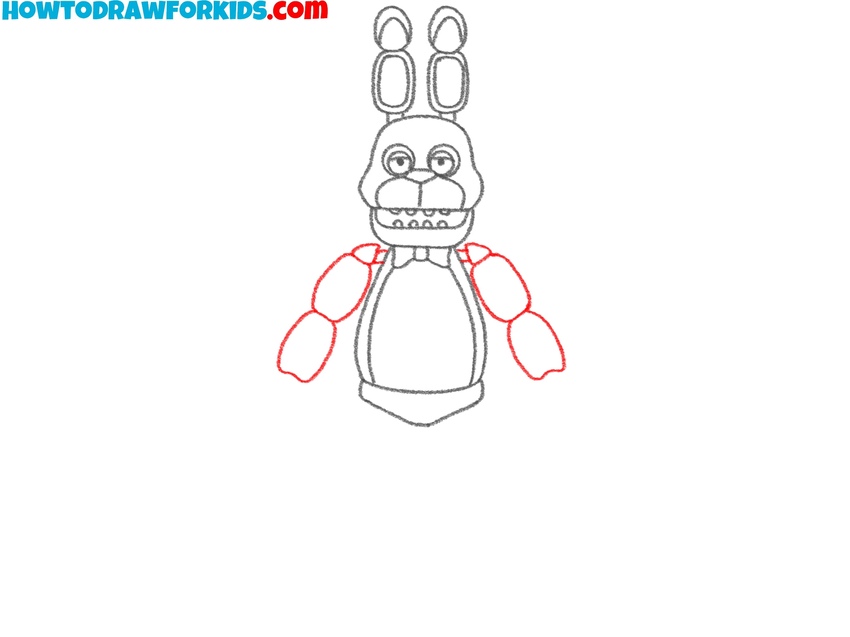
- Draw Bonnie’s arms.
Now, draw Bonnie’s upper arms as two oval shapes, connecting them to the sides of the torso just below the neck area. After that, draw two additional oval shapes just below them for the lower arms. Keep the shapes symmetrical and simple.
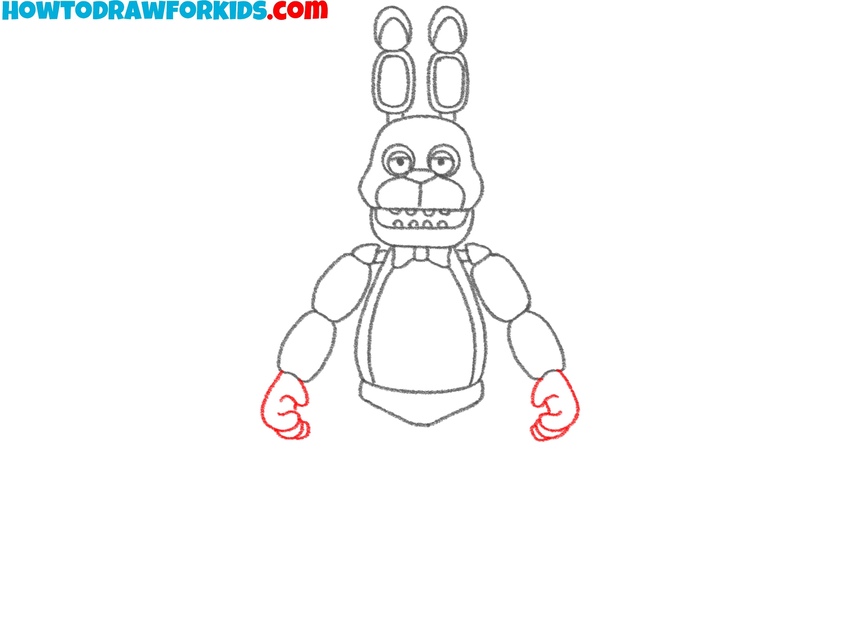
- Add the robotic hands.
At the end of each forearm, sketch in simplified hands. Each hand should be shaped like a rounded claw or mitten with visible finger separations. Since Bonnie is a robotic character, his fingers are slightly thick and rounded, resembling mechanical parts.
- Add the character’s legs.
To draw the upper part of Bonnie’s legs, sketch two rounded, vertical oval shapes beneath the pelvis. After that, draw Bonnie’s lower legs with similar oval shapes. Make sure each leg is the same length and shape to maintain a symmetrical look. These leg segments are part of Bonnie’s iconic robotic look.
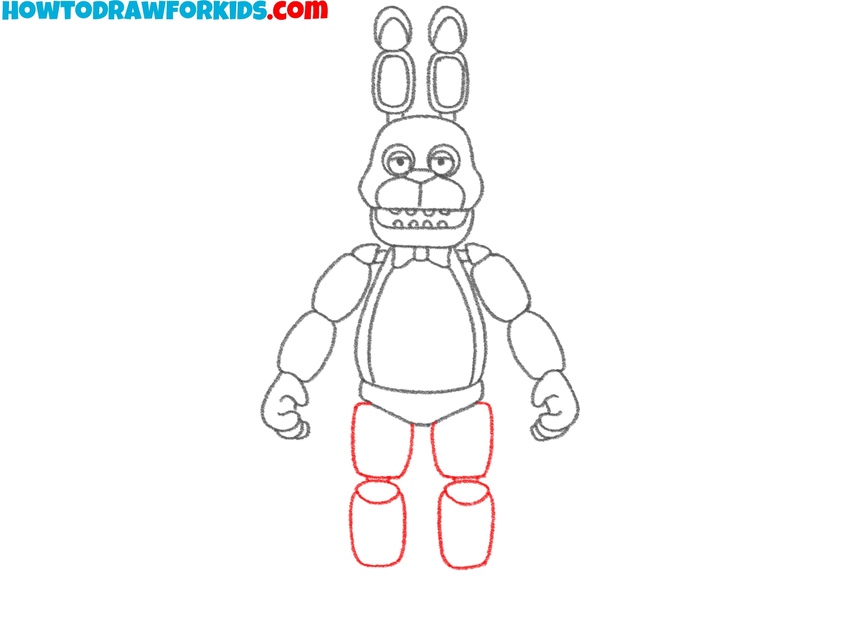
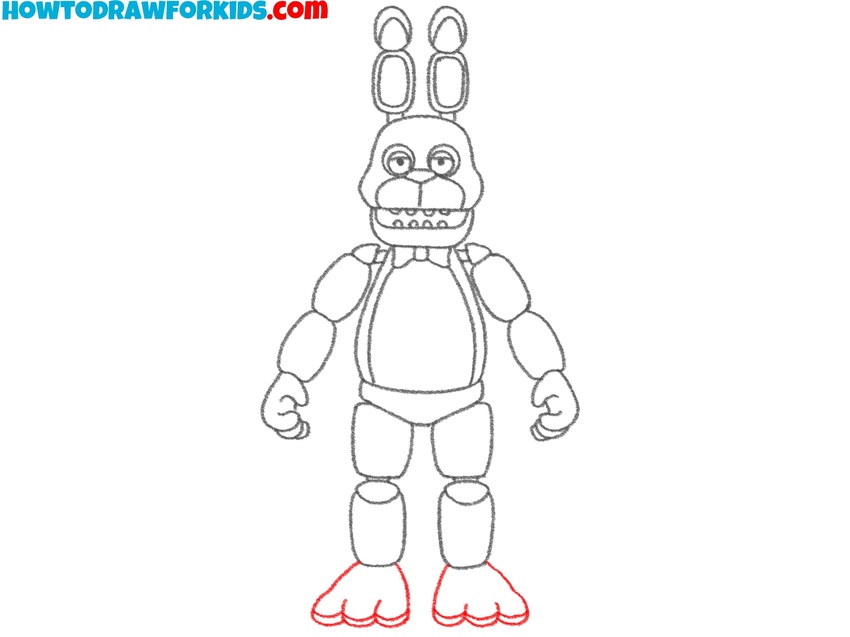
- Draw Bonnie’s feet.
Each foot should be wide and shaped with three rounded toes, almost like a paw but clearly robotic. Attach each foot to the bottom of the lower leg segments drawn earlier. Make the feet slightly wider than the legs. After that, you can erase any unnecessary guidelines to give your Bonnie drawing a finished look.
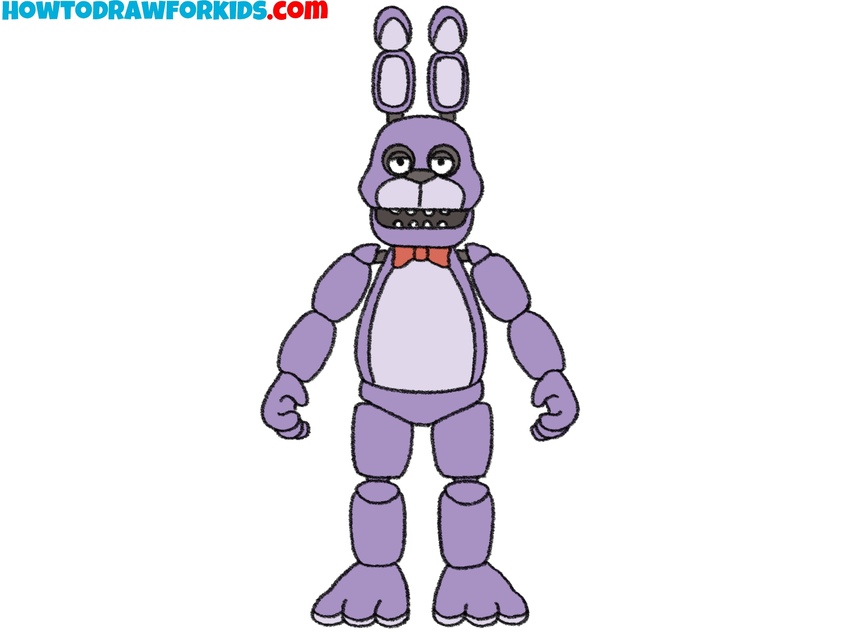
- Finalize and color the character.
To color the character, use a deep purple for the main parts of the body, including the head, arms, torso, legs, and ears. Color the inner part of the belly and the lower part of the face with a lighter purple or lavender tone. The eyes should remain white with dark pupils, and the nose should be black.
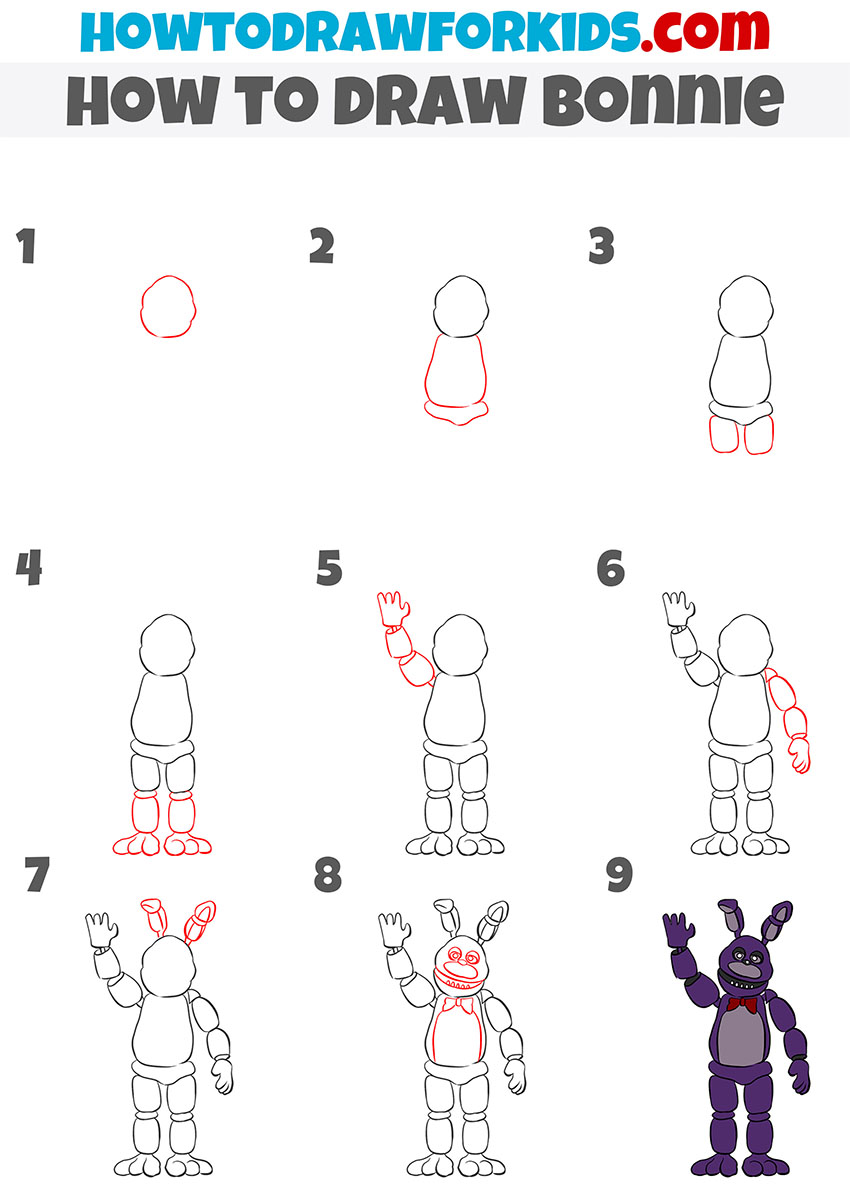
Simple Bonnie Drawing Tutorial
This version of the tutorial on how to draw Bonnie is a simpler alternative to the first one. It features fewer details, uses basic shapes, and shows Bonnie in a waving pose rather than a neutral stance. The overall body is constructed with a different forms. The steps are also arranged differently.
To start learning how to draw Bonnie with this technique, begin by sketching the shape of the head using a rounded oval. Add the body as a tall shape that narrows slightly toward the top, then draw the pelvis as a simple base beneath it. Continue by drawing the upper legs, followed by the lower legs and feet with three toes on each foot. Move on to the arms by drawing one raised arm with a waving hand, then the second arm lowered by the side.
Add the ears on top of the head, angled slightly outward. Draw Bonnie’s face with large round eyes, a wide mouth with teeth, and a small nose. Finish by adding the bow tie and coloring the entire drawing in shades of purple with red accents. This method is suitable for beginners looking for a more easy way to understand how to draw Bonnie.
A simplified PDF version of this tutorial is also available for download, which you can use as a reference at any time.
Conclusion
This concludes the step-by-step lesson on how to draw Bonnie from Five Nights at Freddy’s. If you followed along, you should now have a completed drawing of this character.
As mentioned earlier, one of the additional goals of this lesson was to show how to maintain a consistent visual style when drawing characters from the same media universe. If you’ve finished drawing Bonnie, I recommend continuing with the tutorial on how to draw Foxy, as well as other characters from the Five Nights at Freddy’s series.
This will help you practice drawing in a unified style and develop the ability to create consistent characters within a single media setting.
You can also visit the game drawing tutorial section on the site. There, you’ll find lessons on how to draw other popular video game characters, including a Mario drawing tutorial or a detailed Sonic drawing lesson. These tutorials will help you improve your skills and gain more experience in drawing figures from different game franchises while keeping their visual style consistent.
For updates and new tutorials, you can follow us on social media. If you found this lesson helpful, feel free to leave a comment and share your results.