How to Draw Gengar
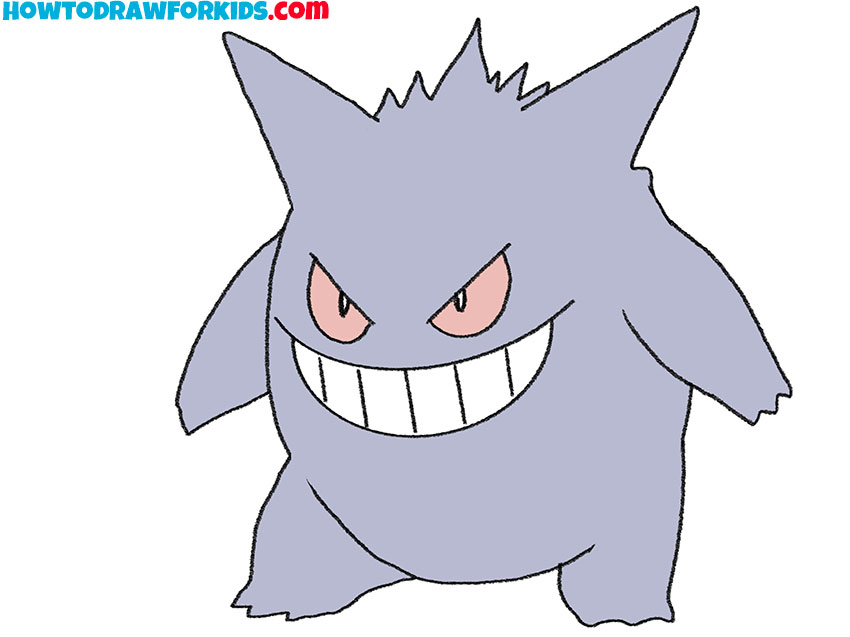
Learn how to draw Gengar from Pokémon in anime style with my simple step-by-step guide. Focused on teaching children through simple shapes, expressive features, and vibrant colors, this tutorial train drawing skills and color theory understanding.
How to Draw Gengar: Basic Information
Drawing in the anime style, especially popular characters like Gengar from Pokémon, offers a delightful entry point for children into the world of art. Anime characters are characterized by their expressive eyes, exaggerated features, and dynamic expressions, which make them appealing and fun to draw.
So get ready to learn how to draw Gengar, the mischievous shadow dweller of the Pokémon world. Your tutorial is here to guide you, ensuring every stroke and curve captures this Pokémon‘s infamous grin.
In addition to learning how to draw this Pokemon itself, the young artist will be able to learn many techniques from art with the help of this lesson.
Pokémon designs are often based on simple shapes like circles, triangles, and rectangles. Teaching children to recognize and use these shapes as building blocks for their drawings helps in developing their ability to break down complex images into simple parts.
Pokémon are known for their vibrant and distinct color palettes. Encouraging children to use specific colors correctly can train their visual recognition and memory. It also helps in understanding color theory basics, such as choosing complementary colors or understanding the emotional impact of colors.
Gengar Drawing Tutorial
Materials
- Pencil
- Paper
- Eraser
- Coloring supplies
Time needed: 30 minutes
How to Draw Gengar
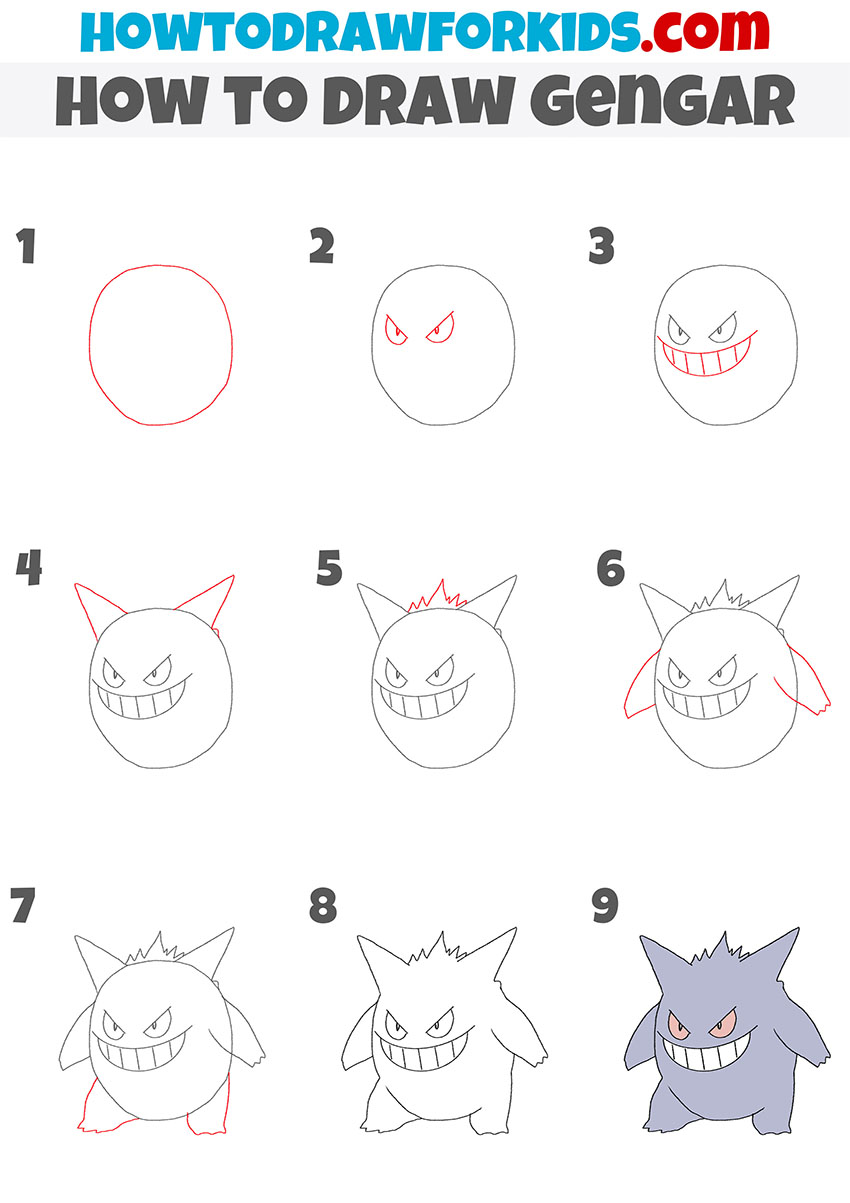
- Sketch the outline of the body of Gengar.
Begin your Gengar drawing by crafting a single, smooth, oval shape to draw both the head and body of this Pokémon character. Ensure that the circle is smooth and even. This initial shape is crucial as it forms the foundation for the remaining details that will be added in subsequent steps.

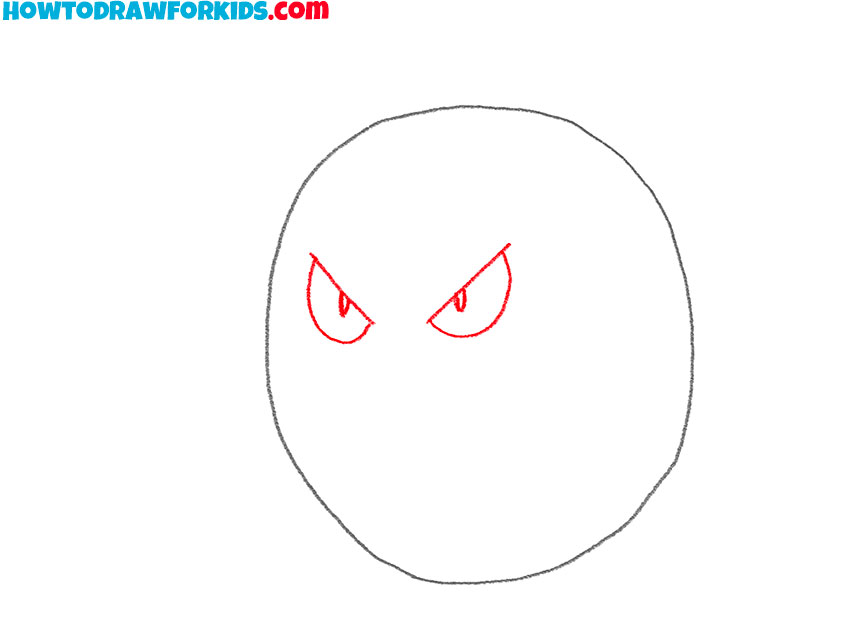
- Draw Gengar’s eyes.
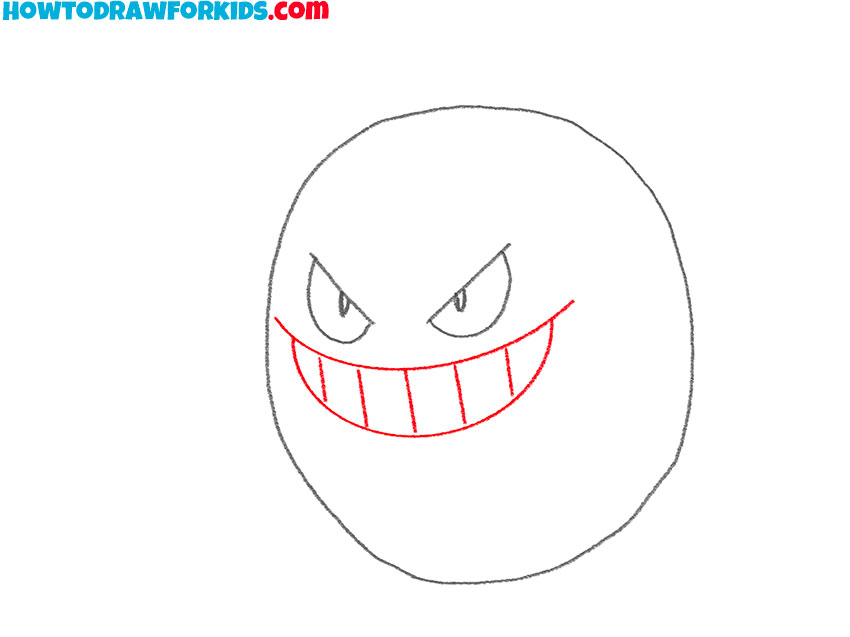
Position two identical, menacing eyes above the center of the oval, mirroring the shape shown in this example. Start with simple lines to outline the top of the eyes, making them slightly curved to convey a menacing expression.
- Sketch the mouth.
Draw the wide, mischievous smile across Gengar face using smooth, curved lines. First illustrate the upper lip in a longer and less curved line, then the lower lip in a slightly shorter and more curved line. Add a row of teeth within this smile, using simple vertical lines.
- Add the ears of Gengar.
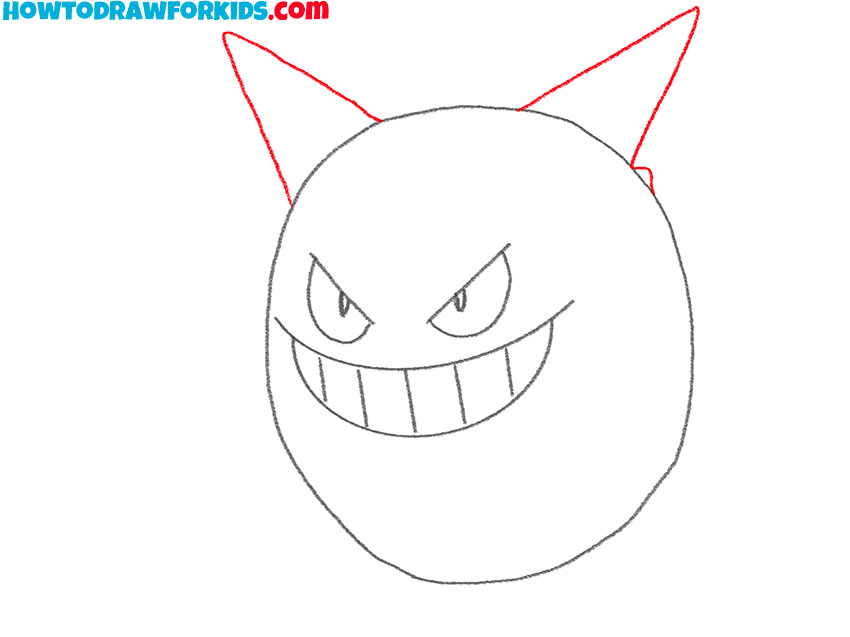
At the top of the head, draw two pointed ears protruding upwards. These should be symmetrical and fairly large in relation to the head, adding an animalistic element to the character. The ears also help in making the face appear fuller and more detailed.
- Add hair at the top of the head.
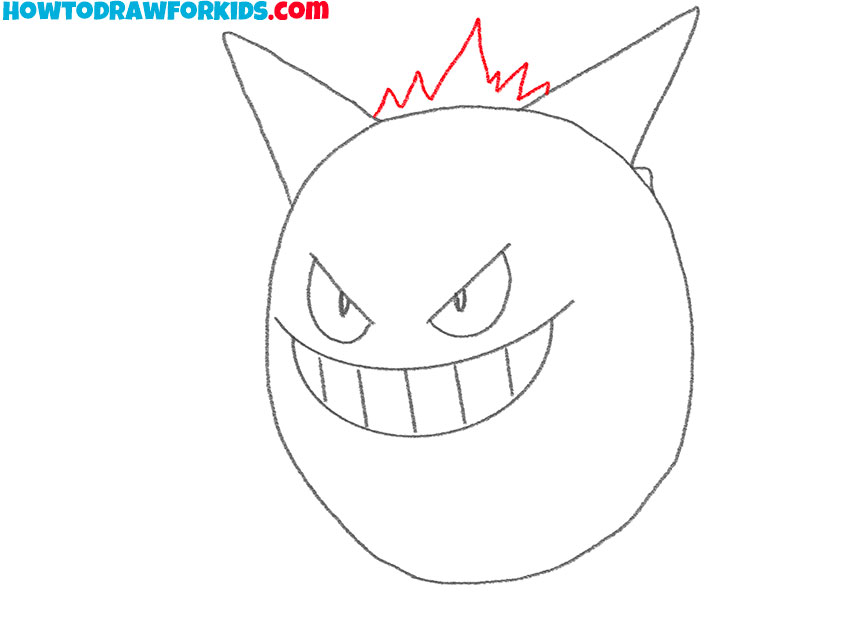
At the top of the Gengar’s head, between the ears, add a few spiky hair details. These should be simple, jagged lines that add texture and a touch of wildness to the character’s appearance. This small detail contributes to the overall menacing look.
- Draw Gengar’s arms.
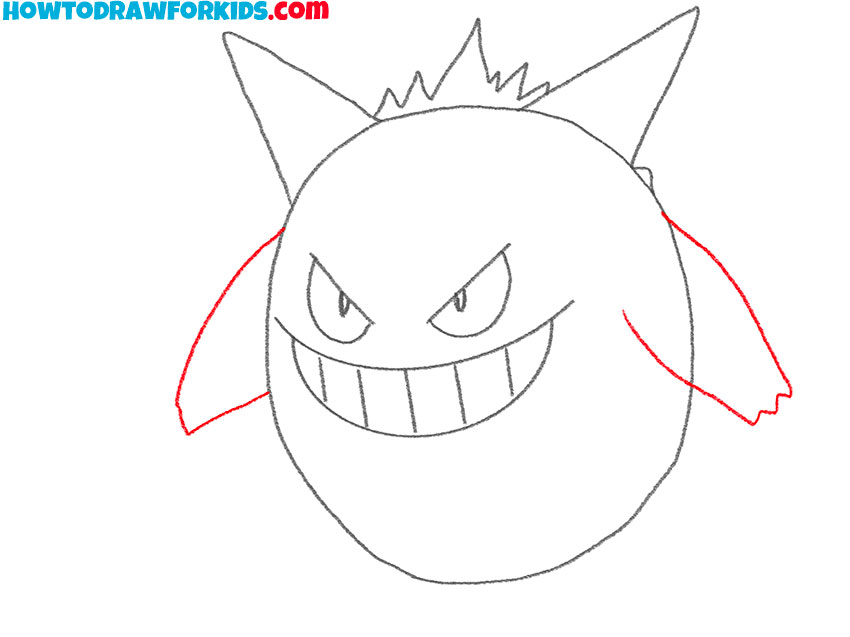
In the middle of the body, illustrate the Pokémon arms starting with a broad base at the shoulders, tapering down to the ends, resembling the shape of spades for that mischievous look. Draw the fingers of Gengar in a minimalistic manner using simple wavy lines.
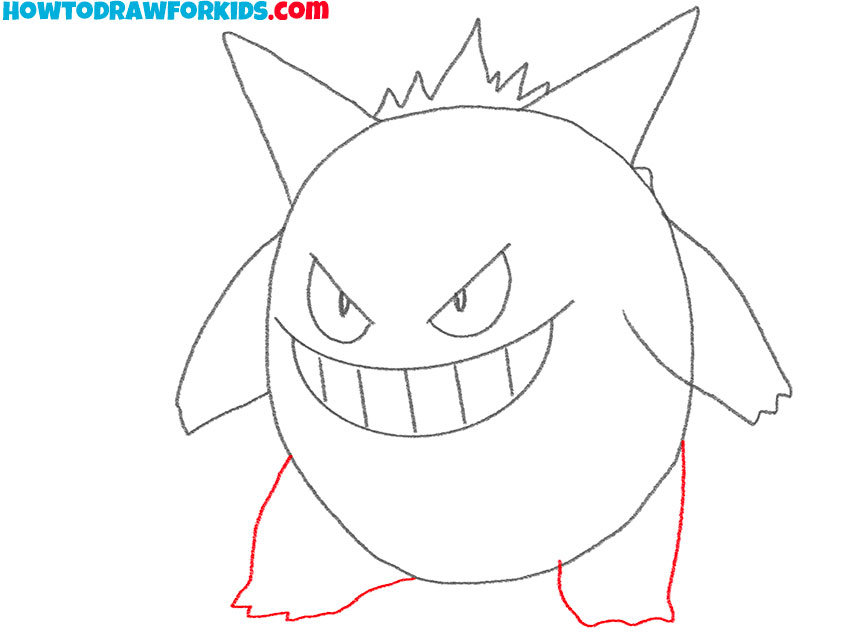
- Sketch the legs.
Add the lower half of the body, including short, stubby legs and small feet. The feet should be simple, with just a hint of separation to indicate toes. This step begins to bring your character into full view, adding a sense of volume and weight to the lower part.
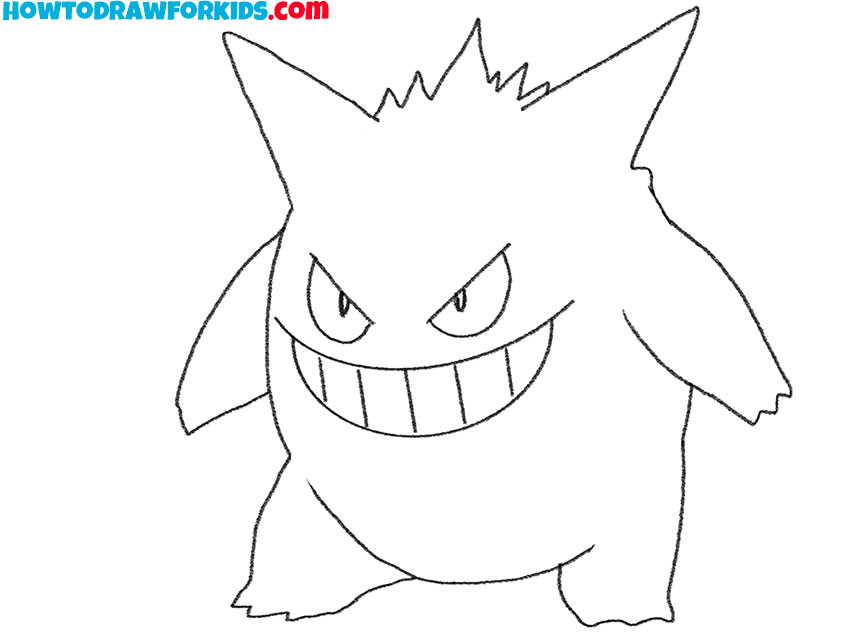
- Remove the extra lines.
Gently use your eraser to clean up your Gengar drawing, removing all superfluous lines to reveal a neat and tidy depiction, ready for the next creative step. You can also adjust the shape of the body to make it more dynamic and expressive.
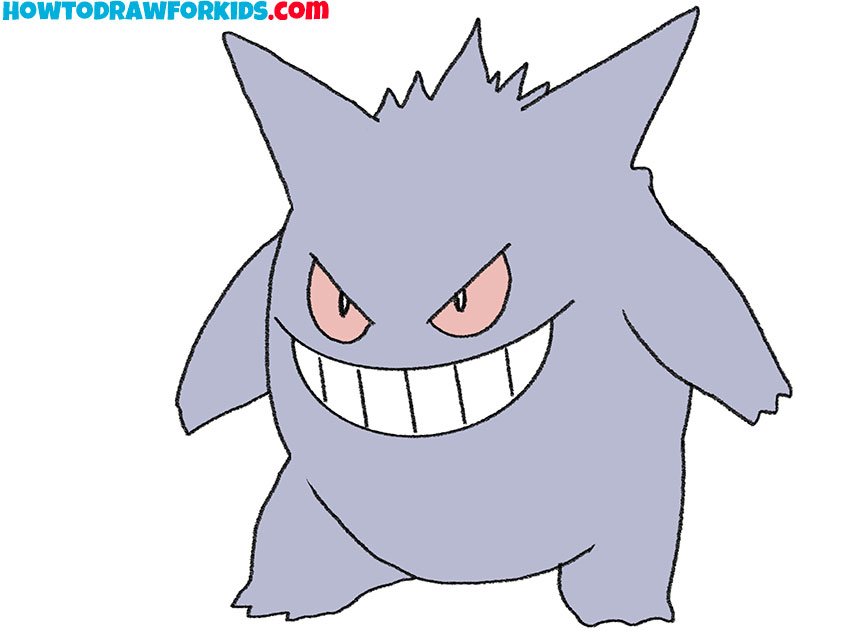
- Color your Gengar drawing.
Once satisfied with the inked or penciled outlines, you can proceed to color your character. Use a dark purple for the body. Next, color the eyes of Gengar red and draw highlights in the pupils. In addition, you can add shadows to your Pokémon drawing.
Additional Content
I’ve whipped up a super handy PDF just for you! It’s like a magic art scroll – a short and sweet version of my drawing lesson. And the coolest part? You can download it for absolutely free! Once it’s saved, you can peek at it anytime, anywhere, even if the internet decides to go on a vacation.
Make Your Gengar Drawing Even Cooler
Thus, your Gengar looks spook-tacular! So, here are some cool ideas to take your Pokémon to the next level:
Make your drawing more interesting by sketching a fitting environment for your character. Consider creating a mysterious cave with shadowy corners and eerie details, or perhaps a spooky nighttime setting with a moonlit sky and wispy clouds.
To build a more dynamic scene, introduce other Pokémon characters for Gengar to interact with. You might include popular figures like Pikachu with its electric spark or Charmander with its fiery tail. Position them in a way that reflects their relationships – whether they are friends or foes locked in a battle.
Draw your Pokémon in the midst of action. For Gengar, you can illustrate it unleashing its signature move, Shadow Ball. Show the energy and motion of this dark energy attack swirling from Gengar’s mouth.
Experiment with different facial expressions. Try drawing Gengar with a surprised look, its eyes wide and mouth agape, or depict it laughing mischievously, its mouth wide open and eyes squeezed shut in delight. Each expression can tell a different story and add layers of personality to your Pokémon.
Conclusion
And there you have it, champs! Your very own Gengar, drawn by none other than you! So, hop over to my website for more fun drawing lessons – why not try your hand at anime or sketching Goku next?
Finally, don’t forget to click that subscribe button on my socials to join our creative crew. By following along, you’ll never miss out on the next splash of fun. So, what are you waiting for? Let’s get your pencil moving on my next drawing tutorial!

