How to Draw Yoshi Face
Fans of classic Mario universe games will surely love this lesson, as here we will learn how to draw Yoshi face step by step.

How to Draw Yoshi Face: Introduction
Yoshi is essentially a cartoon dinosaur with distinctive features, and this lesson on how to draw Yoshi face won’t be difficult if you already know how to draw dinosaurs. But even if you haven’t learned yet, this lesson will still be very simple.
We will use a truly easy method consisting of simple shapes and lines. These parts will be very easy to follow. And of course, this tutorial will help you to draw Yoshi in more derail.
The most important thing in this lesson on how to draw Yoshi is to accurately replicate the shapes of the facial features to make the character instantly recognizable. To achieve this, try to carefully follow all the details and lines as shown in my example.
Once you’ve completed your first drawing of Yoshi’s face, you can try adding new elements and details to make it more unique.
Yoshi Face Drawing Tutorial
Materials
- Pencil
- Paper
- Eraser
- Coloring supplies
Time needed: 25 minutes
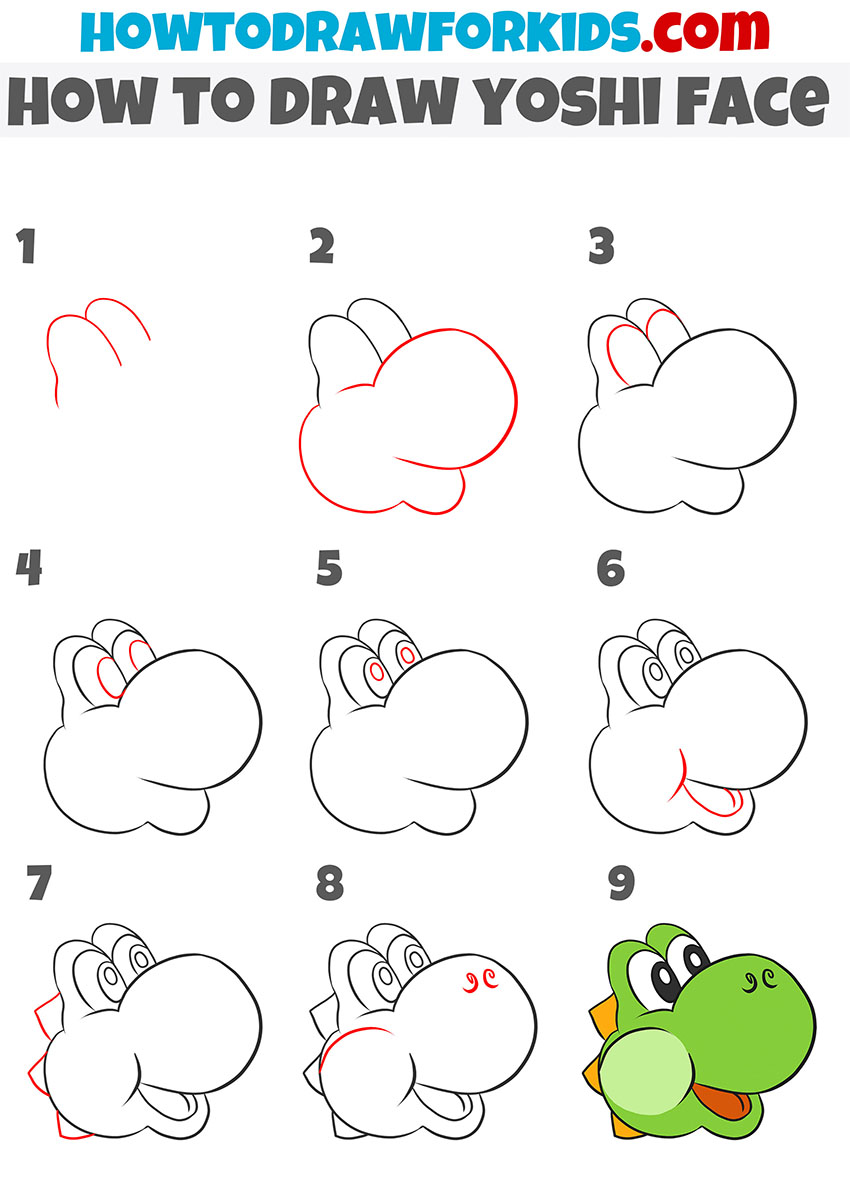
How to Draw Yoshi Face
- Draw the basic eye shapes.
To begin learning how to draw Yoshi face, start by sketching the outlines of his eyes, or brow ridges. Yoshi has large, oval-shaped eyes that are positioned closely together. Draw two slightly curved vertical shapes. These will serve as the foundation for his eyes.

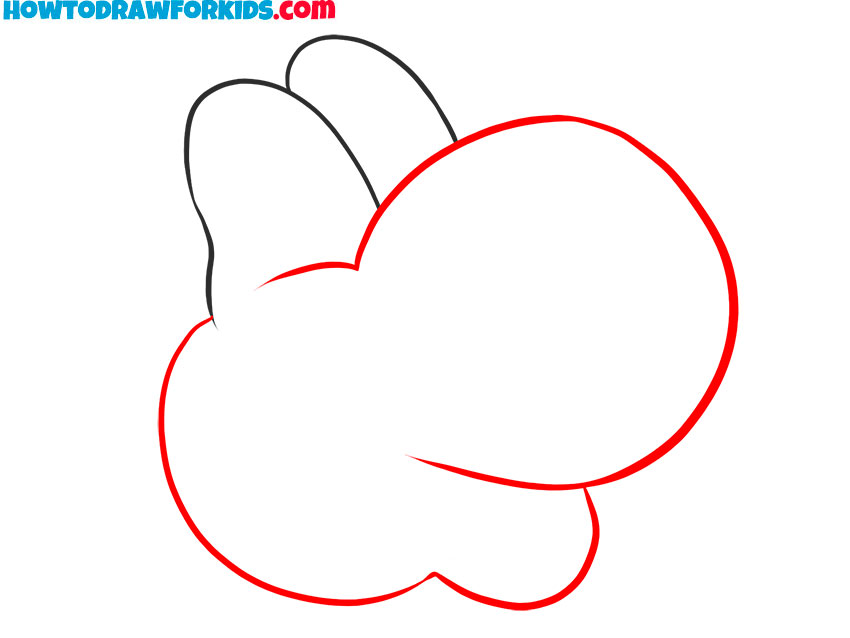
- Outline the snout and head.
Now, draw a large rounded shape that extends from the base of the eyes. This will form Yoshi’s distinctive snout, which is one of his most recognizable features. The snout should have a bulbous, rounded appearance. Below this, sketch a curved line that forms the bottom of Yoshi’s mouth.
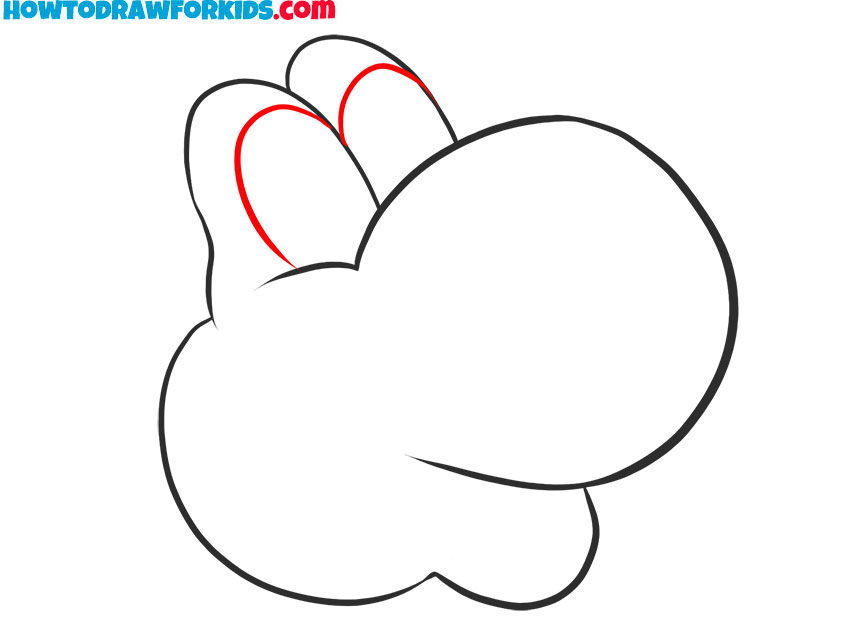
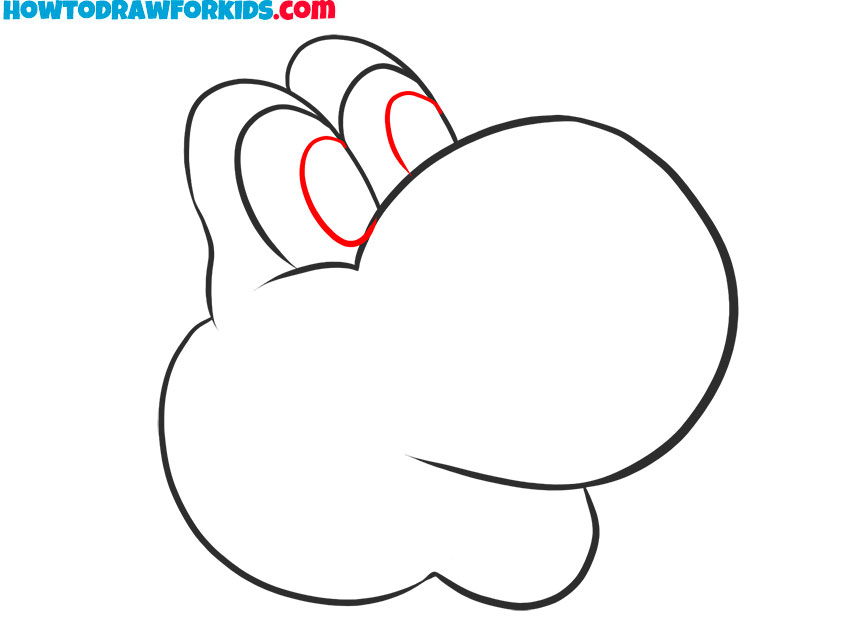
- Draw the eyes of Yoshi.
Now that the basic Yoshi head shape and brow ridges is in place, it’s time to refine the eyes of the character. In this part of the guide on how to draw Yoshi face, add the outline of the eyes. It is very important to make sure that the eyes are the same size and shape.
- Add the pupils inside the eyes.
In this step of of the guide on how to draw Yoshi face, work on adding the pupils of the character. Inside each eye, sketch two small ovals to create the pupils. These should be positioned toward the lower part of the eyes. Keep the shapes smooth and rounded.
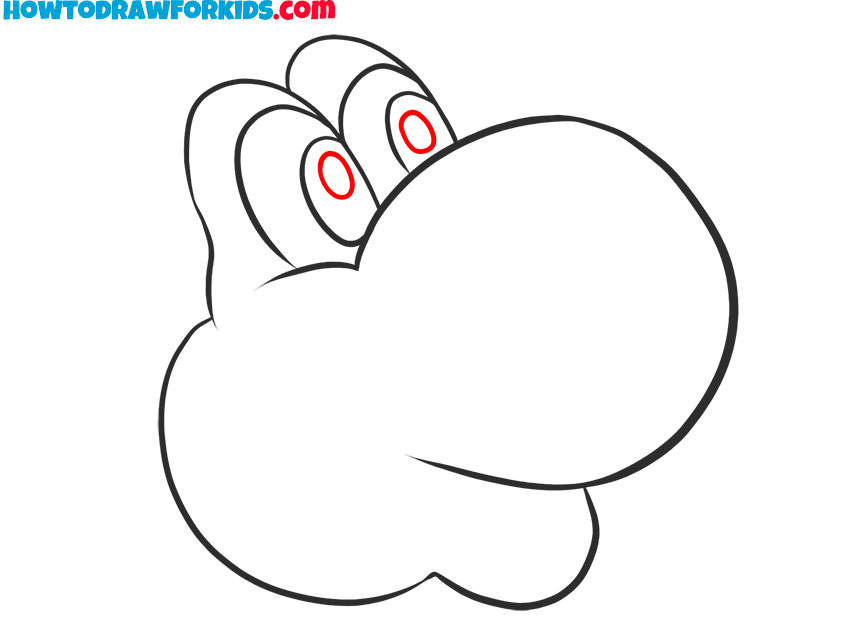
- Add the highlights inside the pupils.
This step will be very simple. Using two small circles, draw the highlights inside the pupils of Yoshi. The placement of the highlights depends on the light source, so you can adjust their position as you prefer. By the way, check out my cartoon eyes drawing tutorial for a more detailed explanation.
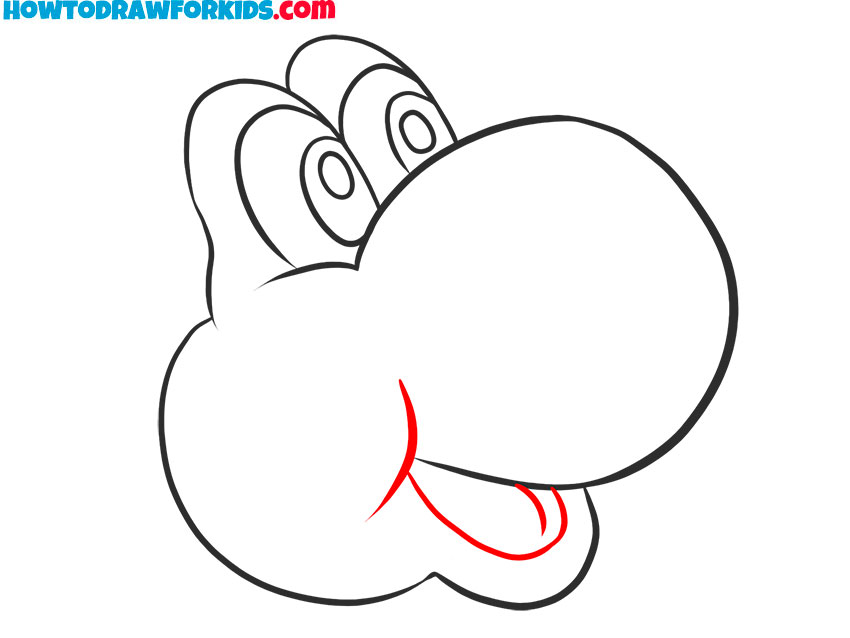
- Draw the smile on Yoshi face.
Draw a curved line on the lower part of the snout, indicating his wide smile. This line should flow naturally with the shape of the snout. Inside the mouth, draw another curved line to represent the tongue. To give the smile a more finished look, draw a short line at the corner of the mouth.
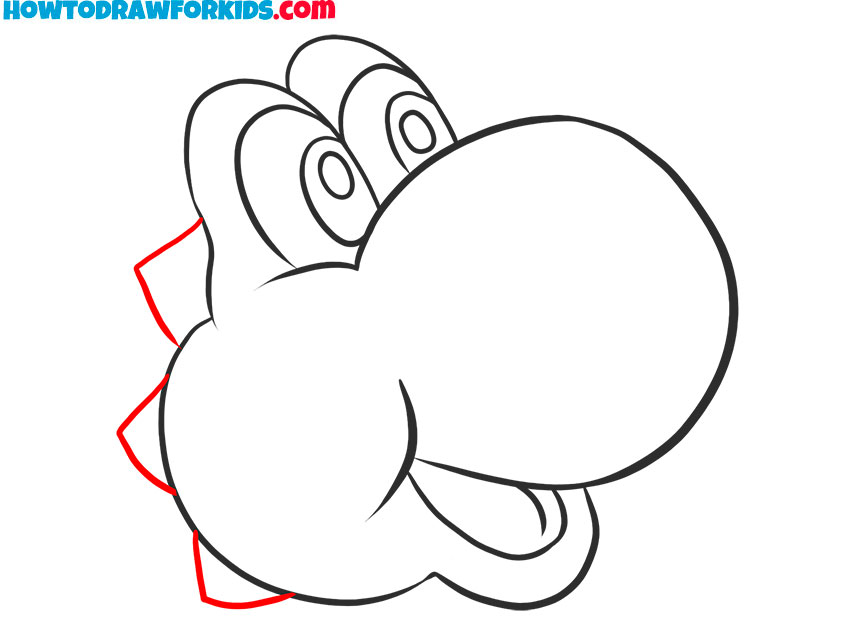
- Draw the spikes on the back of the head.
Yoshi has small, rounded spikes that add to his unique appearance. Draw three slightly curved triangular shapes extending from the back of his head. These spikes should follow the natural curve of the head. The spikes should be the same size, have the same shape and be spaced equally apart.
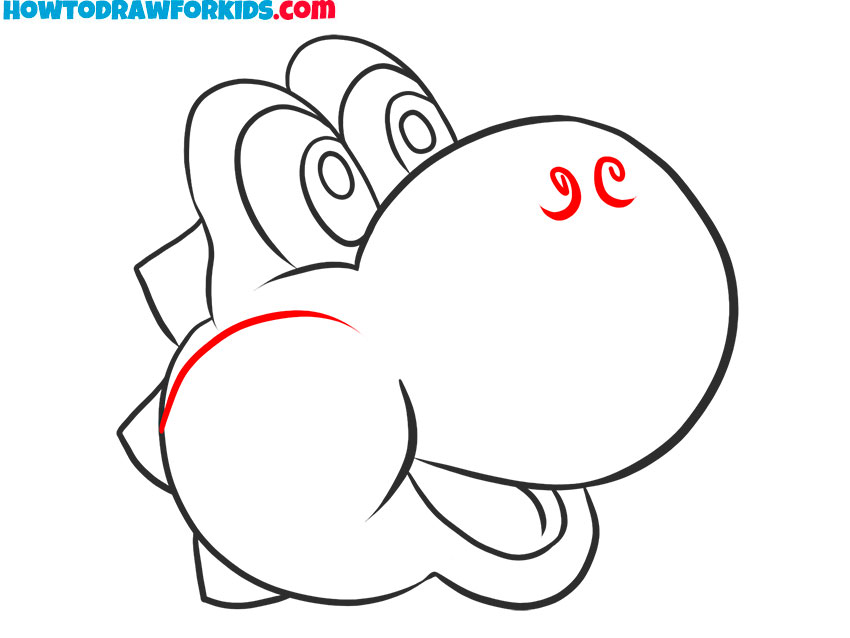
- Sketch the cheeks and nostrils.
Now, draw the rounded cheek shape on the side of the snout. Next, add two small curved lines on the snout to define his nostrils. These should be placed near the top of the snout and drawn as simple spiral-like shapes. If needed, adjust their placement.
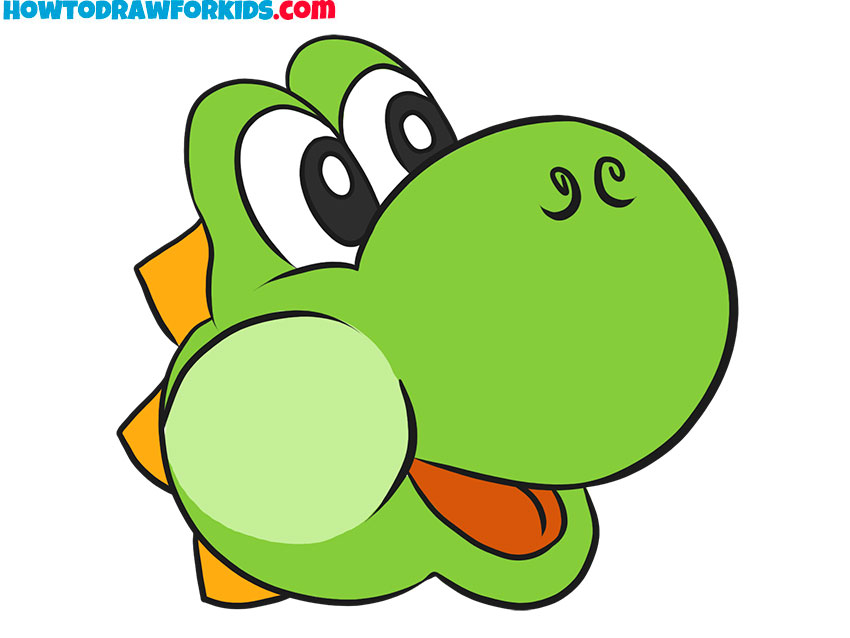
- Color Yoshi face drawing.
Yoshi’s face is primarily green, with a lighter shade on his cheeks. His eyes are white with black pupils and small white highlights. The spikes on the back of his head are orange, and the inside of his mouth is red. Use colored pencils, markers, or digital tools to add colors to your Yoshi face drawing.
Additional Content
For your convenience, I have prepared a PDF file that contains a short tutorial and some helpful drawing tools.
In this small PDF file, I have gathered the main steps of the lesson for you, so you can start practicing drawing Yoshi’s head at any time. In addition to the lesson steps, I have included some additional materials to help you improve your skills and enjoy your time.
The coloring page will let you have fun coloring this cute character from Mario. The tracing worksheet will help you practice your line drawing skills, and the grid drawing worksheet will help you strengthen your pattern repetition skills.
Conclusion
The lesson on how to draw Yoshi’s face has come to an end, and I sincerely hope you enjoyed it. If you were able to draw Yoshi’s face without any difficulties, be sure to let me know in the comments on this article. Also, feel free to share what new lessons you’d like to see on my website. I always read your comments because they are very important to me.
Don’t forget that on my site, you will find a huge number of lessons on drawing various characters from games. For example, you can learn how to draw Mario or Sonic in the same simple style.
Additionally, be sure to share this lesson with your friends and acquaintances. Don’t forget to subscribe to my YouTube channel for video versions of my lessons and follow me on Pinterest for announcements, collages, and interactions with other artists. In the comments section of my pins, you can share your artwork and see what others are drawing.