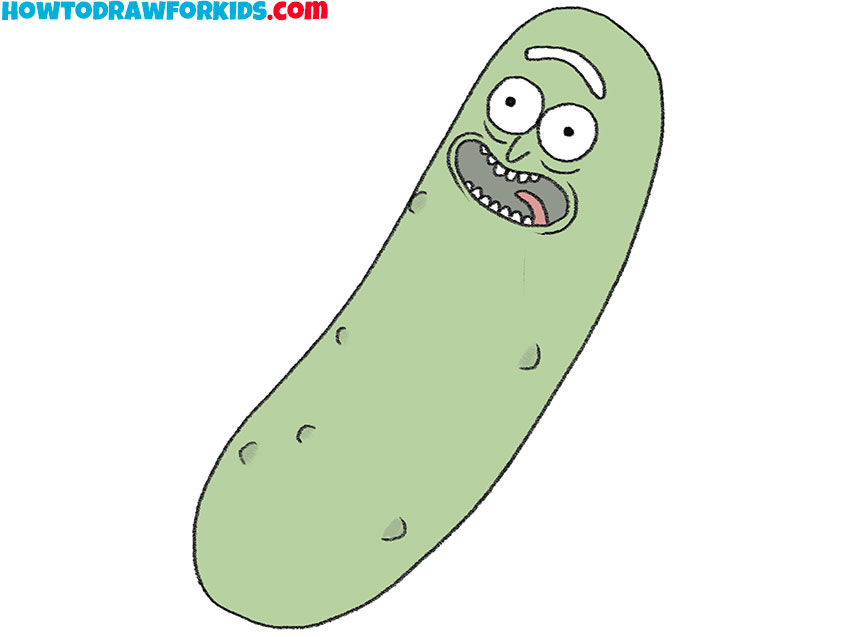
How to Draw Pickle Rick
Learn how to draw Pickle Rick from Rick and Morty with my super simple instructions designed for kids and fans of all ages
How to Draw Pickle Rick: Basic Information
Welcome to this step-by-step drawing tutorial where you will learn how to draw Pickle Rick from the popular animated series “Rick and Morty.” Pickle Rick is one of the most iconic and humorous transformations of the eccentric scientist Rick Sanchez, and sketching his unique look can be a really interesting experience for young artists.
Drawing Pickle Rick allows kids to draw a character they love, making the activity fun and motivating. Familiarity with the character can boost their interest and enthusiasm for drawing.
Adding pickle details like bumps and warts introduces kids to the concept of texture in drawing. This step helps them understand how to make their drawings more interesting.
Pickle Rick’s distinctive cartoon style introduces kids to the basics of drawing in a cartoonish manner, which often simplifies the process by focusing on exaggerated features and bold lines. This style is more accessible for beginners than realistic drawing.
Pickle Rick Drawing Tutorial
Materials
- Pencil
- Paper
- Eraser
- Coloring supplies
Time needed: 35 minutes
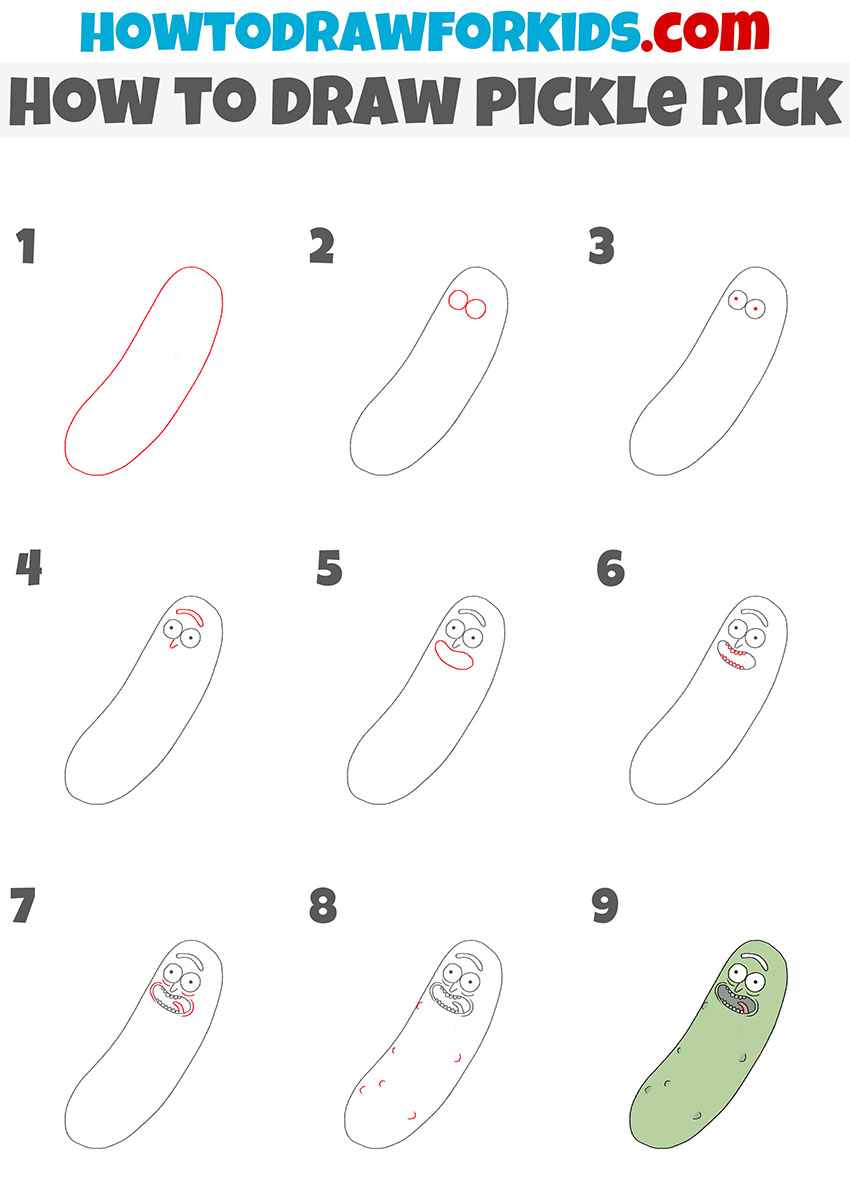
How to Draw Pickle Rick
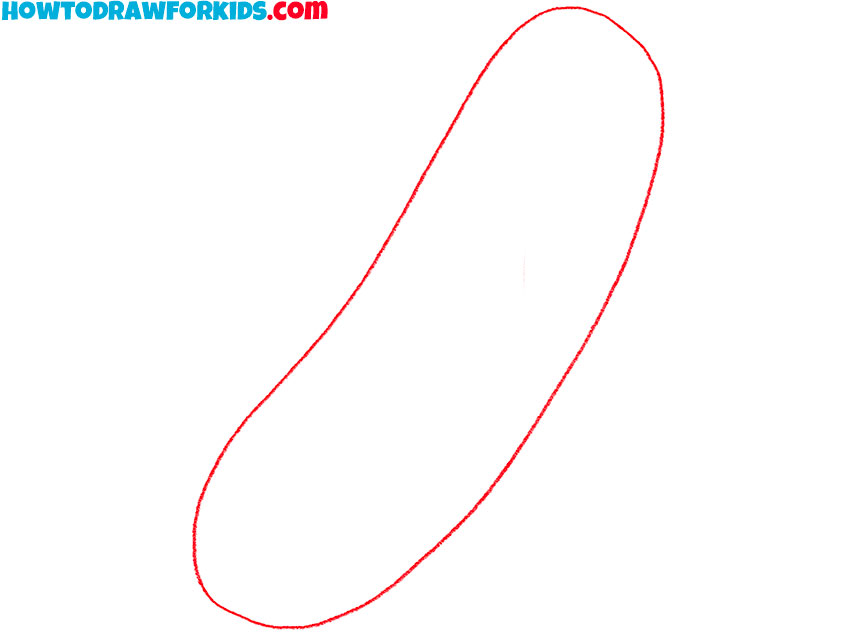
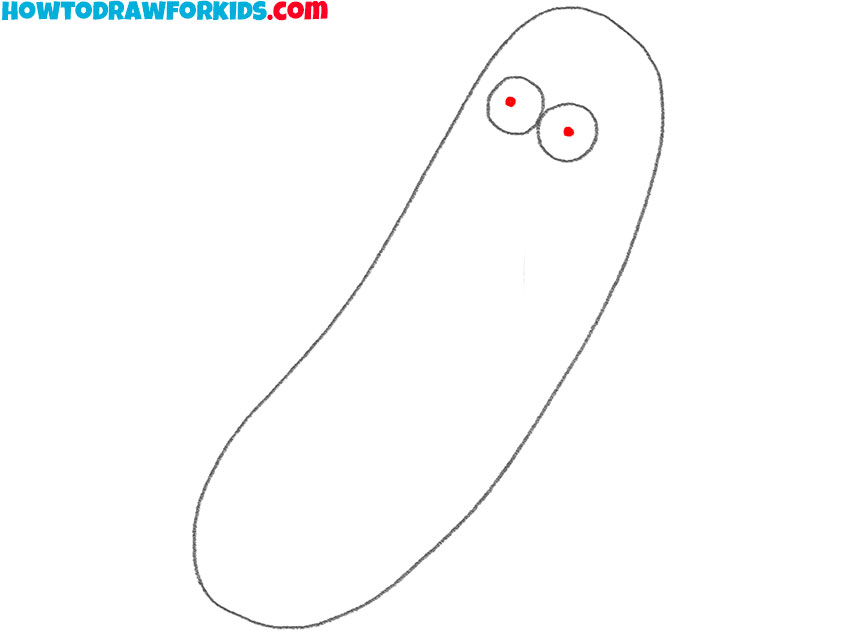
- Draw the basic shape of Pickle Rick.
Draw an elongated oval that slightly tapers at the top and bottom. This shape will serve as the body of Pickle Rick. Make sure the oval is smooth and evenly curved, resembling a pickle. Use light pencil strokes to outline this shape so you can easily make adjustments as needed.
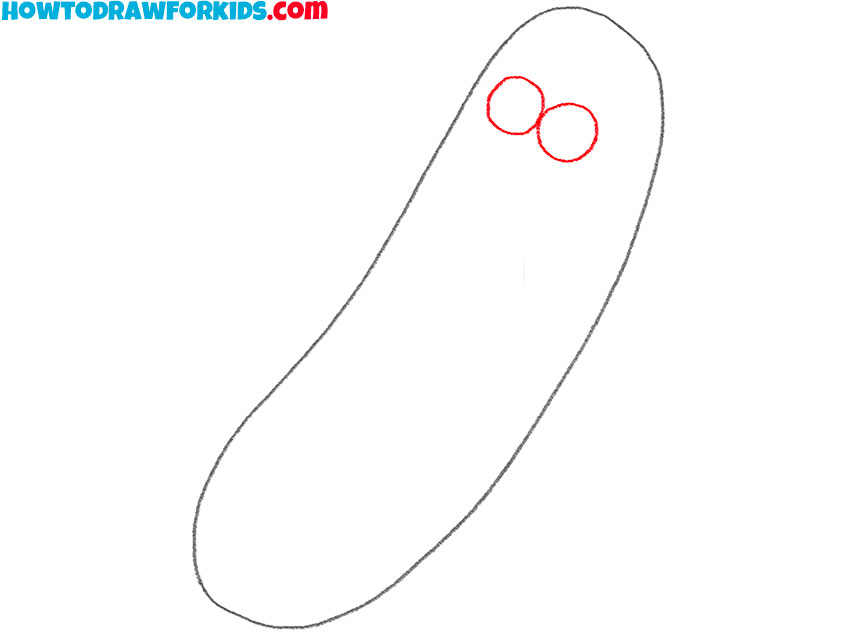
- Illustrate the eyes.
Start by placing two small circles near the top of the pickle shape. These circles should be touching each other. Position them slightly towards the right side to give a three-dimensional perspective. Ensure the circles are even in size and correctly aligned.
- Add the pupils to the eyes.
Inside each of the previously drawn circles, sketch a smaller circle or dot towards the upper left part. These smaller circles will represent the pupils. The placement should make Pickle Rick appear to be looking slightly to the side.
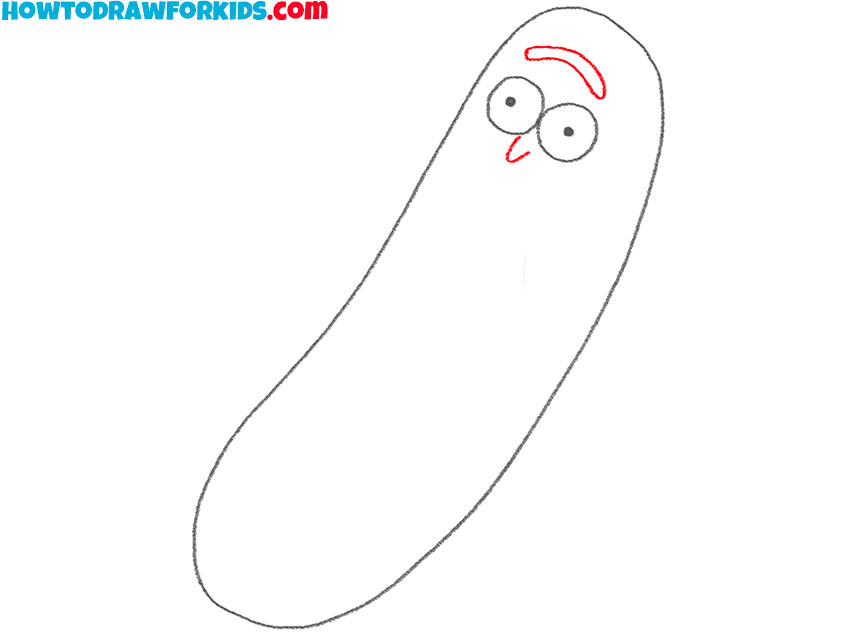
- Draw the eyebrow and nose.
Above the eyes, draw a curved oval to represent the eyebrow. This oval should curve slightly upwards and be positioned symmetrically. For the nose, draw a small, downward-facing triangle or a simple curved line between the eyes, just below them.
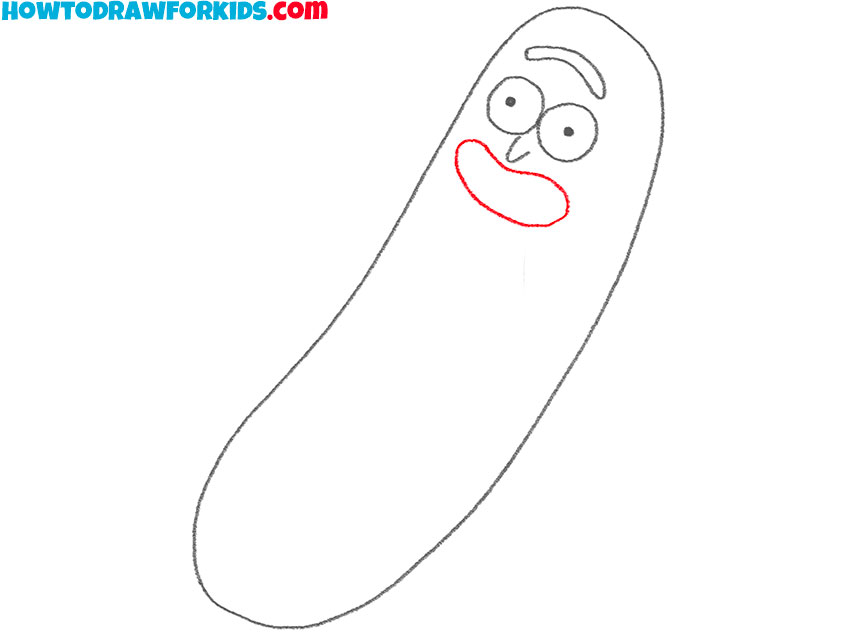
- Draw the mouth.
Below the nose, sketch a wide, curved line to represent the upper part of the mouth. This line should curve downwards on both ends. Underneath this, draw a smaller curved line to complete the lower part of the mouth, creating an open-mouth appearance.
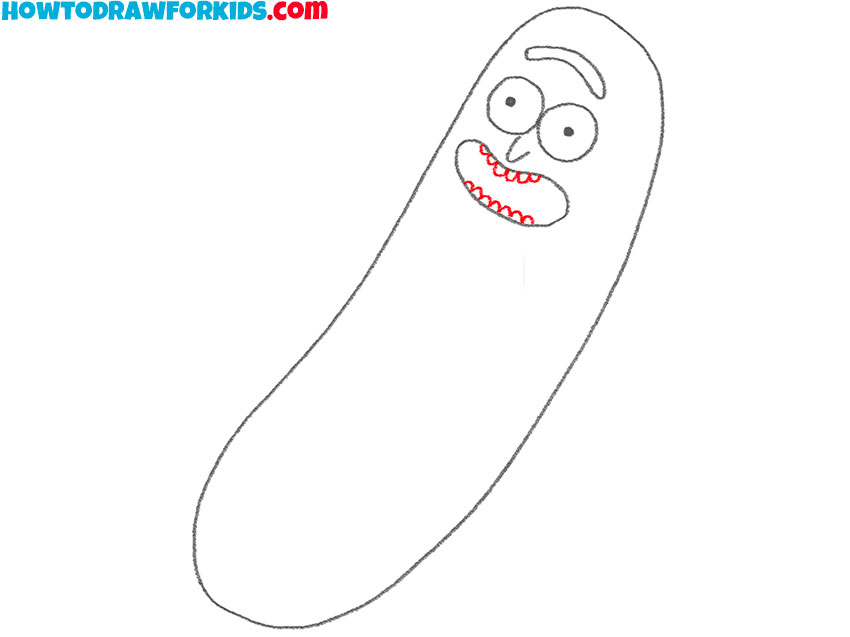
- Add the teeth.
It’s time to detail the mouth by adding teeth. Inside the mouth outline, draw a series of small, curved lines to represent the teeth. The teeth should be evenly spaced and fill the upper part of the mouth. Then, add a second row of smaller teeth below the first row, indicating the lower teeth.
- Add the tongue and creases.
Start by drawing a small, curved shape inside the mouth to represent the tongue. The tongue should be positioned at the bottom of the mouth. Draw short, curved lines at the sides of the mouth, indicating the folds of skin that form when Pickle Rick smiles.

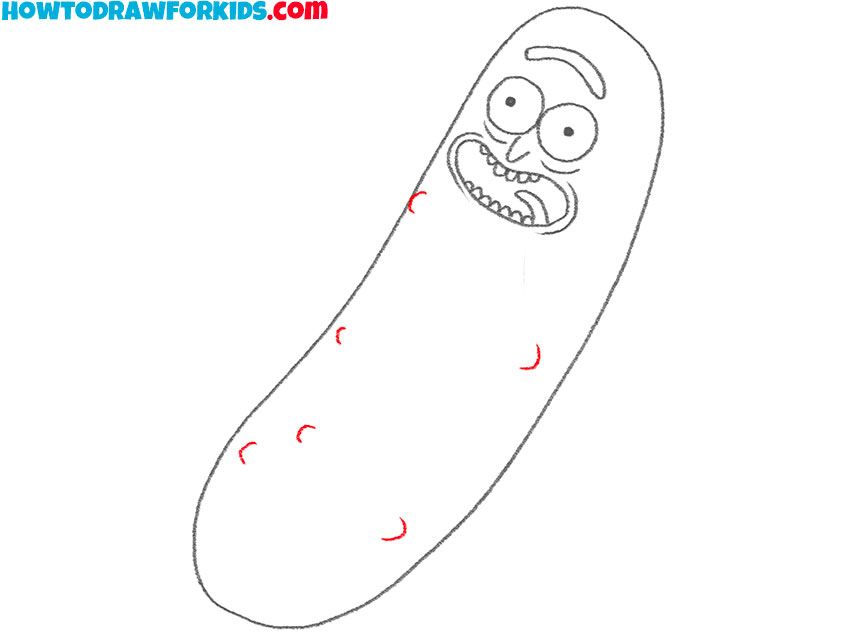
- Detail the surface of the Pickle Rick.
Draw small, irregular curved lines or oval shapes randomly distributed across the surface of the pickle body. These shapes represent the bumps and warts typical of a pickle’s texture. Vary the sizes and placements to make the appearance more natural.
- Color Pickle Rick.
Use a light green shade to fill in the body of the pickle. Add darker green accents to the pickle bumps and along the edges for depth and texture. Color the eyes white with black pupils, and use pink or red for the tongue and mouth interior.

Additional Content
I have created a free PDF file that offers a concise version of this Pickle Rick drawing lesson. This file is created to provide an easy and accessible guide, perfect for anyone looking to learn the art of drawing this popular character.
The PDF format makes it convenient to use, whether you’re at home or on the go, and being downloadable means you can access it anytime, even without an internet connection. This free resource is my way of helping you enjoy and improve your drawing skills.
Drawing Pickle Rick: Advanced Techniques
As we conclude our artistic adventure with Pickle Rick, let’s look at some advanced aspects that can make really your drawing even better. These advanced tips will help you add that extra layer of detail and professionalism to your artwork. Keep these tips in mind:
- Experiment with different shading techniques to give your Pickle Rick drawing more dimension. Start by considering where the light source is coming from and how it affects the shadows on Pickle Rick’s body. Use techniques such as hatching, cross-hatching, stippling, and blending to create varying levels of darkness and light. These techniques will help illustrate the contours and texture of Pickle Rick, making him appear more three-dimensional.
- Give your Pickle Rick drawing an authentic pickle texture by adding small, irregular lines and shapes to mimic the look of a pickle’s skin. These details include drawing tiny bumps, warts, and uneven surfaces across his body. You can use short, curved lines and tiny dots to represent the texture. Pay attention to the natural patterns of a pickle’s surface, which can be random yet consistent in their roughness.
- Master the subtleties of facial expressions to make your Pickle Rick drawings more interesting. Small tweaks to the eyebrows, mouth, and eyes can dramatically change his mood or attitude. For instance, raising one eyebrow can give him a curious or skeptical look, while widening the eyes can make him appear surprised or excited. Adjusting the curve of the mouth can shift his expression from a grin to a smirk or even a frown. Practicing these small changes helps you understand how each facial feature contributes to the overall expression.
Remember, the beauty of drawing lies in the details. As you practice these deeper aspects of your artwork, you’ll improve your skills and start to develop your unique style. Keep learning and training these advanced techniques, and watch how your Pickle Rick drawings better and better.
Conclusion
There are a lot of exciting drawing lessons waiting for you on my website. Ever thought about drawing Among Us or Rocket Raccoon? Well, you can find lessons for these and many more on my site!
Also, don’t forget to join my fun community on social media. When you follow me, you’ll get updates on all the newest and coolest drawing lessons, plus lots of other fun stuff.