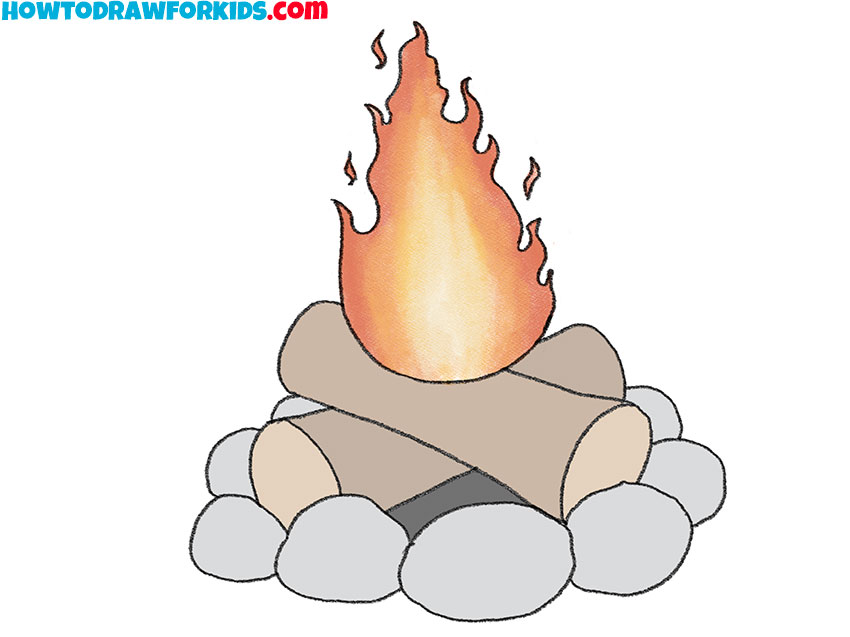
How to Draw a Campfire
Gathering around a campfire has a way of connecting us to the earth and to each other; it’s this connection I aim to kindle as you learn how to draw a campfire. My method simplifies the interplay of light and shadow, the warmth of the flames, and the sturdy comfort of the logs, making it approachable for artists of any level.
How to Draw a Campfire: Basic Information
Capturing the warmth and flicker of a campfire on paper can ignite a sense of adventure and nostalgia. That’s why I’ve tailored a tutorial on how to draw a campfire, so you can evoke the magic of the flames with a few simple steps. My approach breaks down the complex dance of light and shadow into manageable parts, making it accessible for all.
In this lesson, we’ll start with the basics: the gentle curve of the logs and the structure of the flames. I designed this tutorial so that each element of the campfire is easy to understand and replicate. It’s not just about drawing; it’s about understanding how the components come together to create a scene brimming with life and warmth.
By the time we add the final touches of color and texture, you’ll not only know how to draw a campfire; you’ll practically hear the crackle and feel the heat on your face. This method is more than a way to sketch; it’s a gateway to bringing forth memories of starlit nights and storytelling around the fire.
Campfire Drawing Tutorial
Materials
- Pencil
- Paper
- Eraser
- Coloring supplies
Time needed: 30 minutes
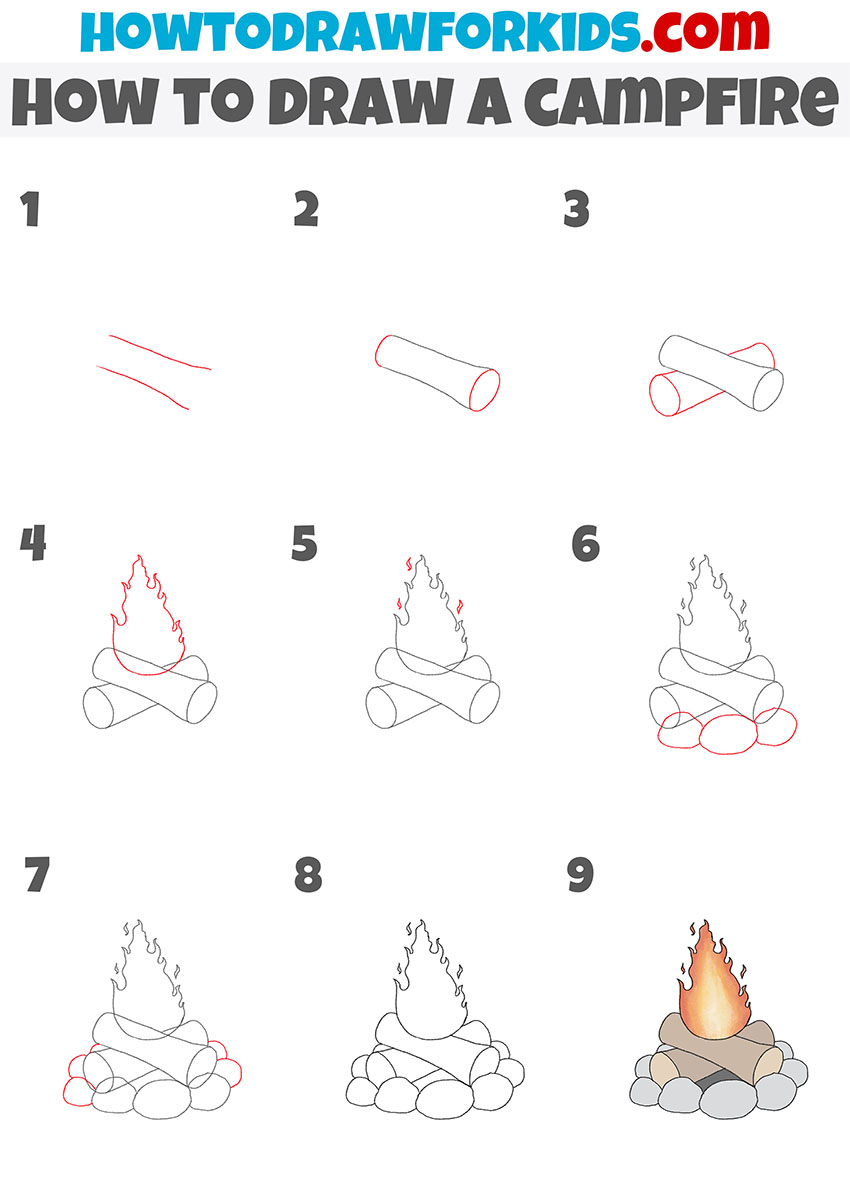
How to Draw a Campfire
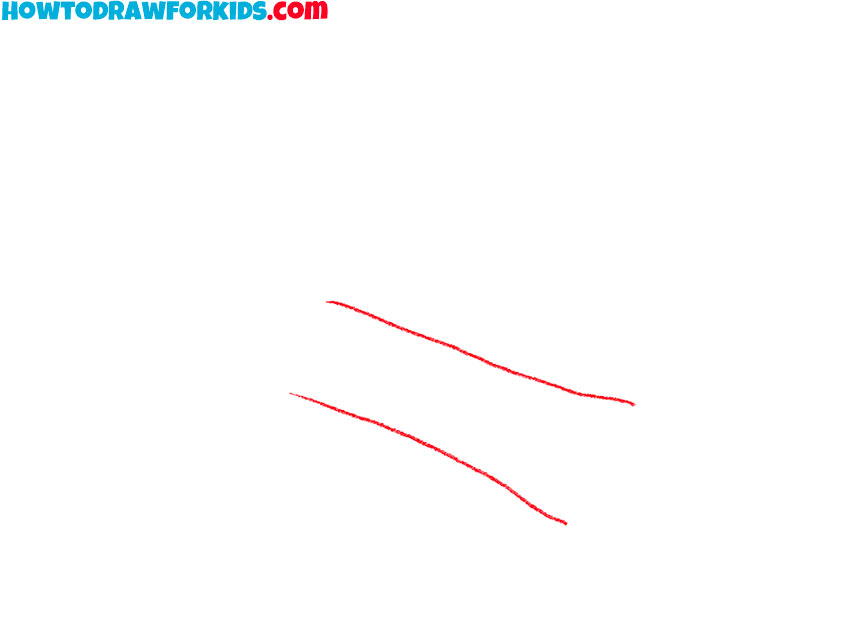
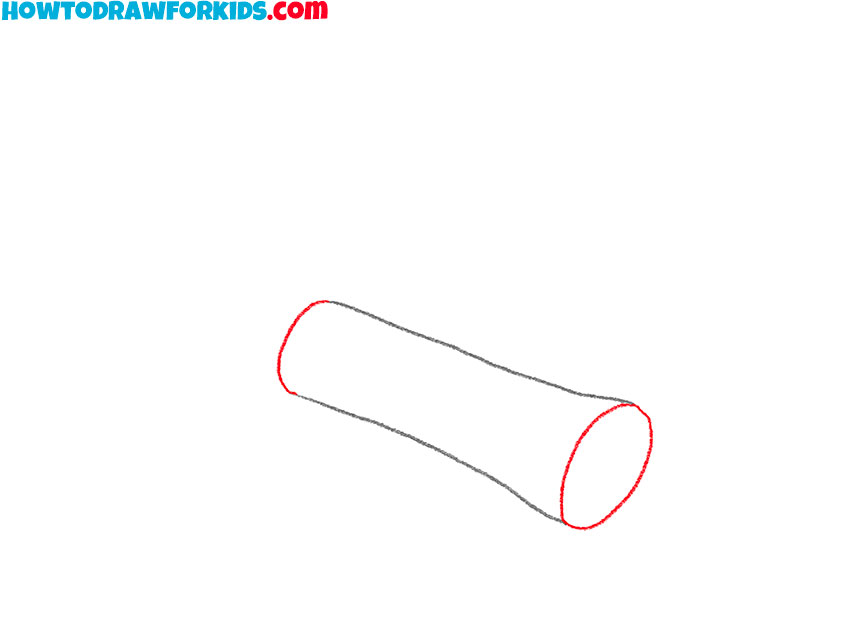
- Draw the middle part of one log.
Sketch out two lines that are parallel.
- Add the ends of the log.
Depict a smooth rounded line on one side of the log and draw an oval on the other side.
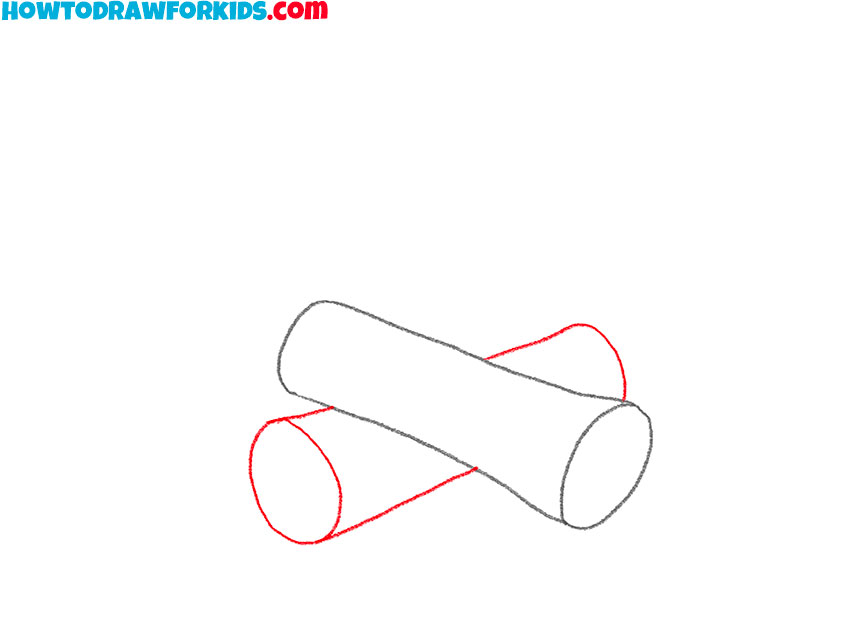
- Depict the second log.
Add another log of the same shape, which is located crosswise.
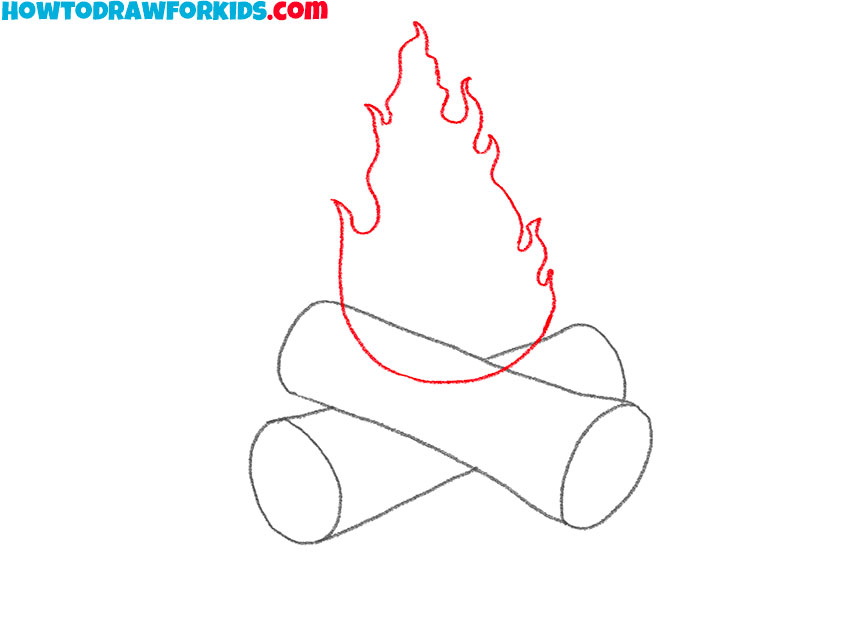
- Sketch out the flame.
The lower part of the flame has a rounded shape, the upper part consists of many curved lines.
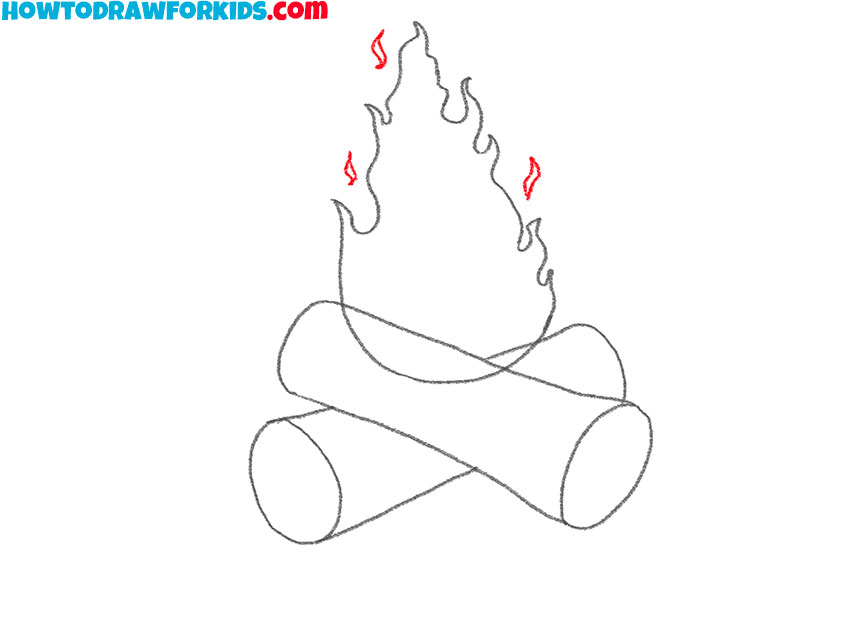
- Draw individual flames.
Above the flame, add some small curved elements.
- Depict the stones.
At the bottom, add three large rounded stones.
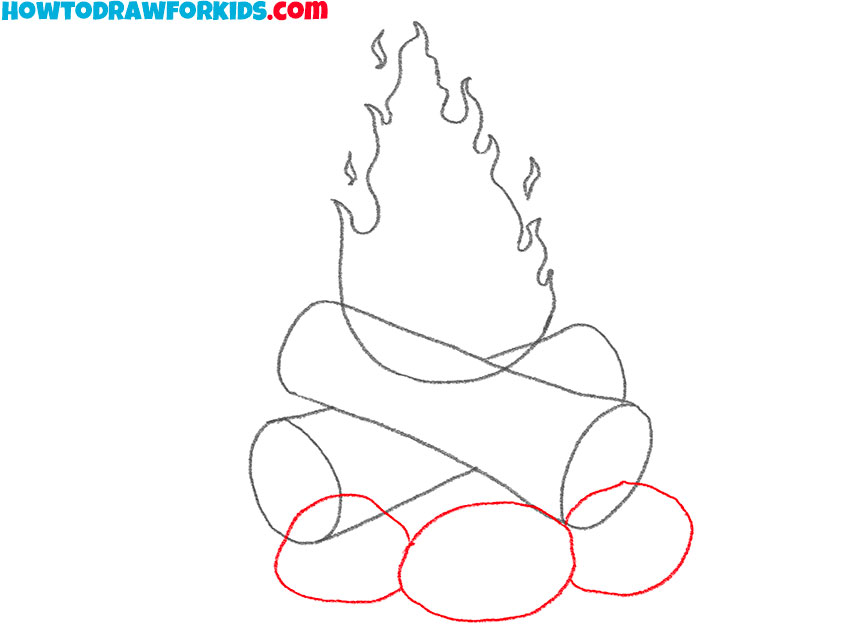
- Add the stones.
Draw some small stones on the sides.
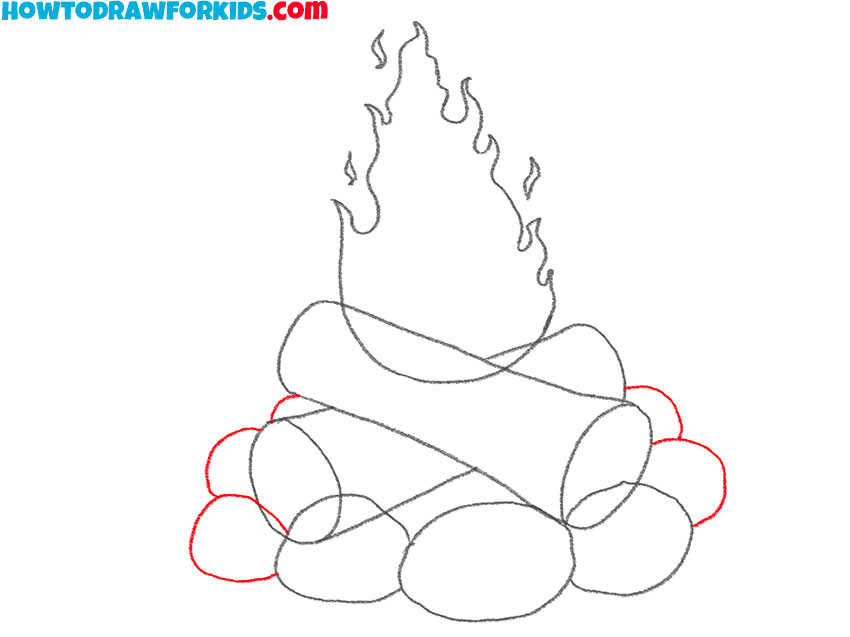
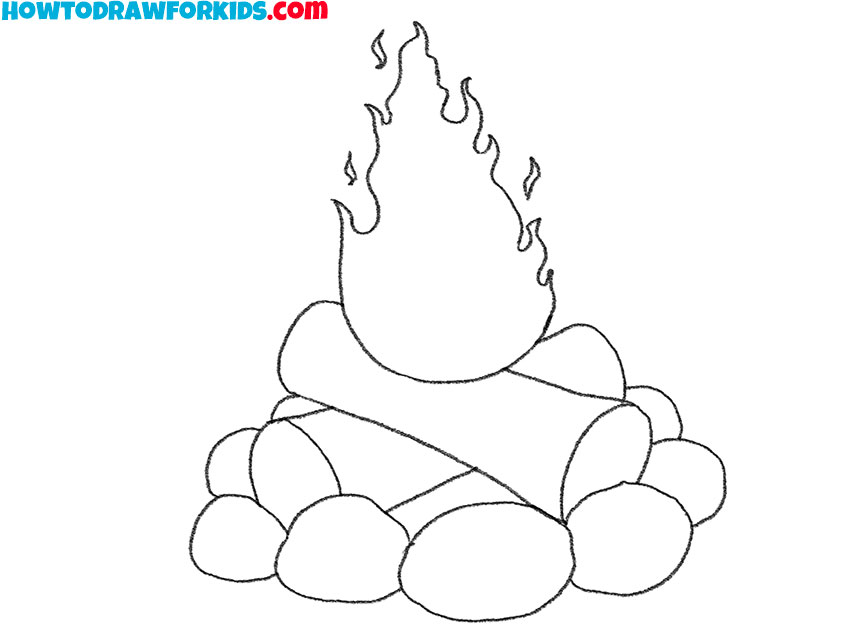
- Correct inaccuracies.
Use the eraser to remove all unnecessary lines.
- Color the campfire.
You will need orange, yellow, gray, brown, and beige.
Additional Content
To enhance your journey beyond the glow of our campfire drawing session, I’ve also prepared a free PDF file. This downloadable resource is the essence of our lesson condensed into a portable format, ready to accompany you in spaces where the internet doesn’t reach, inviting continued practice in any setting.
Within this PDF, you won’t find step-by-step instructions or tips. Instead, it offers additional materials that focus on honing the skills you’ve begun to develop. It’s meant to challenge you further, to take the foundational techniques you’ve learned and expand upon them, fostering greater artistic depth and finesse.
Consider this PDF a companion for the next phase of your artistic growth, one that encourages you to revisit the elements of our campfire drawing with a fresh perspective. It’s an invitation to stoke the creative flames within, to nurture the skills that will allow your artistry to flourish like a fire under the stars.
Alternative Drawing Techniques
In the spirit of kindling your artistic talent, I’ve devised yet another approach to sketching the rustic allure of a campfire. This new method simplifies each element, ensuring you can practice with ease and build your skills on a strong, steady flame of foundational techniques.
This alternate technique is crafted with simplicity in mind, to encourage even more practice, further igniting your artistic capabilities. By paring down the complexity, it becomes the perfect exercise for those moments when you wish to draw with a serene mind and a clear focus.
Let this simplified method be a stepping stone to advanced artistry, a way to refine your hand and eye coordination in the warm updraft of a campfire’s glow. As you practice this technique, watch your skills grow more robust, like flames leaping confidently towards the night sky.
How to Draw a Campfire for Kindergarten
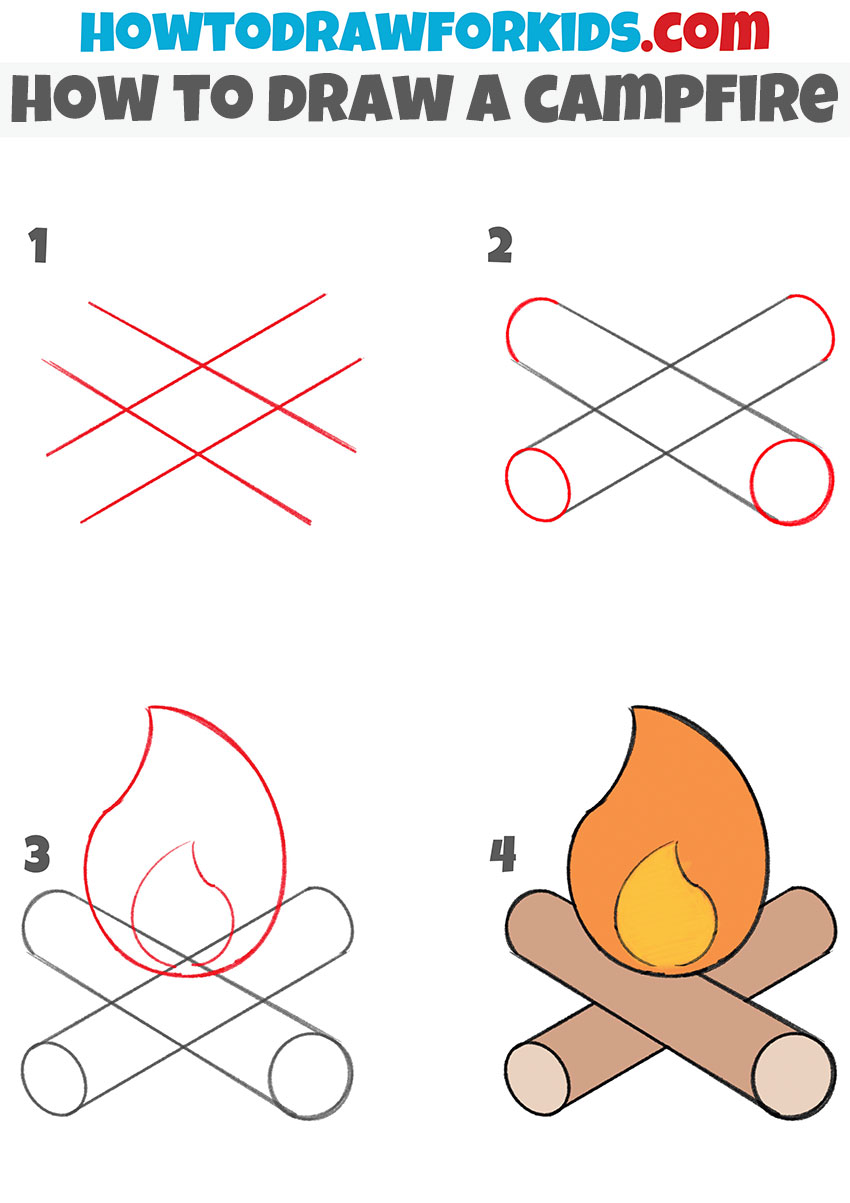
For our littlest artists, a campfire comes to life in just four easy strokes, inviting a sense of warmth and achievement. First, we cross two red lines, playful and carefree, like the crossing of sticks found on a forest floor. This marks the beginning of our campfire, the base upon which our flames will dance.
Next, we add two more sticks, overlaying the first with a simple turn of the wrist. Circles at each end give the impression of logs cut from the heart of the woods. It’s a campfire’s foundation, set down by little fingers exploring the art of drawing for the first time.
With the logs in place, a single flame shape arises, curved and pointed like a leaf caught in an updraft. This is the magic of fire taking shape, the warmth that our drawing will radiate. The fourth step breathes life into our creation with color, a fiery glow that beckons for marshmallows and tales of adventure.
Artistic Embers: FAQs for Aspiring Campfire Artists
In the glowing embers of our creative campfire session, questions often arise like sparks in the night sky. To foster a spirit of clarity and community, I’ve gathered some frequently asked questions to guide you further on your artistic expedition.
- What kind of pencils are best for this campfire drawing? The softness of a B pencil is ideal for crafting the gentle smoke, while an HB will etch in the sturdy logs with precision.
- How can I make the flames look more realistic? Experiment with gentle curves and flicks of the wrist to emulate the whimsical dance of fire. Blend shades of yellow, orange, and red for depth.
- How can we create the effect of glowing embers? Dots and dashes of white and yellow within the orange of your flames can mimic the radiant embers effectively.
- Is there a way to show the campfire’s light on the surrounding ground? Use a soft yellow to lightly color around the base of your fire, fading outward to illustrate its warm glow.
In the soft afterglow of our lesson, let these answers serve as kindling for your continued exploration into drawing. Each question you ask, each challenge you overcome, stokes the flames of your artistic journey, turning flickers of curiosity into a roaring blaze of creativity.
Adding Depth to Your Campfire Scenes
In the serene aftermath of our campfire drawing, a world of artistic possibilities awaits beyond the glow. To elevate your masterpiece and breathe life into its surroundings, consider these suggestions for enveloping your campfire in the embrace of nature.
- Sketch a Starlit Sky: Begin with a dusky blue canvas, then dot with white to mimic the stars. Streaks of darker blue can denote the whispers of the night wind.
- Draw Nearby Flora: Sprinkle your scene with the silhouettes of pine trees. Use short, brisk strokes to give the impression of needles, grounding your campfire in a forest setting.
- Create Camping Gear: To one side, draft a simple tent shape, or sketch a sleeping bag unrolled near the fire, ready to offer comfort after a day of adventure.
- Include Wildlife: With delicate lines, form the outline of a curious raccoon or a wise owl perched on a nearby branch, drawn to the campfire’s warmth.
So, remember that each element added to your campfire scene doesn’t just fill space; it tells a story, invites a memory, or sparks a dream. Let your imagination and pencil roam free, and watch as the simple campfire you began with becomes a gateway to the great outdoors, a canvas teeming with the beauty of the wild.
Conclusion
With the campfire’s final ember drawn and the warmth of your artistic flame burning brightly, this lesson draws to a close. But the journey need not end here; my website is brimming with a variety of tutorials, from the rustic weave of a basket to the aromatic swirls of a coffee cup. Wander through each one and let your creativity spill onto the canvas of possibilities.
I cordially invite you to join our growing community across various social media platforms, where the promise of new lessons awaits. Your engagement lights up our artistic skies, so if there’s a sketch you’re dreaming of or a technique you’re curious about, leave a comment beneath the lesson.