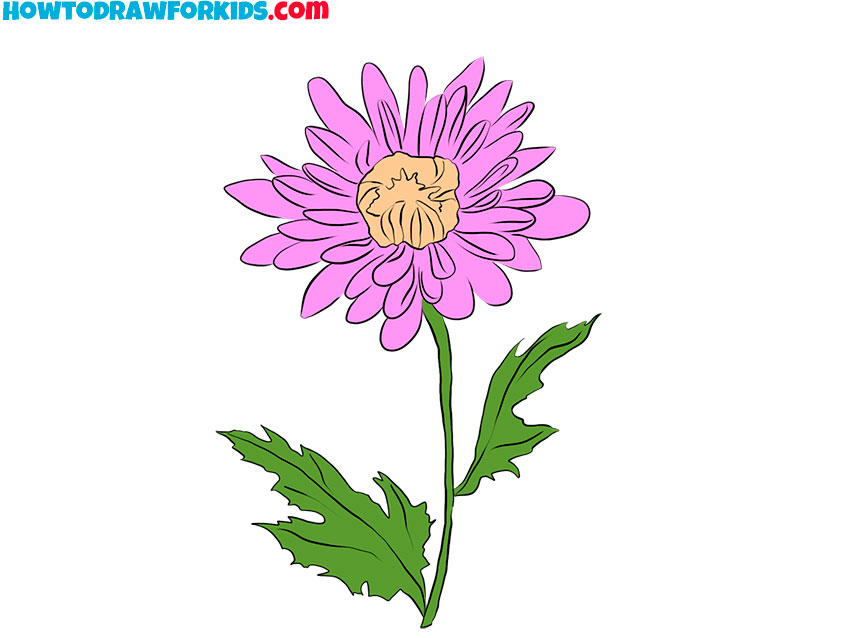
How to Draw a Chrysanthemum
Inspired by the beauty of nature and summer scenery, I’ve created this lesson on how to draw a chrysanthemum.
I am glad to offer you a new interesting lesson in which you will learn how to draw a chrysanthemum. You can use the skills gained in this lesson to draw flowers of other types any create beautiful landscape drawings, as well as a still life depicting chrysanthemums.
Chrysanthemum is a very common beautiful flower. Often people give each other chrysanthemums for any holidays as a sign of love, respect and gratitude. Chrysanthemum is considered an annual plant.
There are many different varieties of chrysanthemums. Depending on the variety, flowers differ in height, shape of the bush, flowering time and color of flowers. This flower is believed to bring good luck.
Materials
- Pencil
- Paper
- Eraser
- Coloring supplies
Time needed: 20 minutes
How to draw a chrysanthemum step by step
- Sketch the center shape of the flower.
To start, you need a base that defines where the chrysanthemum petals will grow outward. Lightly sketch a small, uneven circular shape to represent the flower’s central part. Avoid making it perfectly round, because chrysanthemums have irregular centers, and a wavy contour will look more natural.

- Add the inner folded petals.
This step start adding details of the bloom. Inside the shape you just drew, sketch several short curved lines radiating toward the middle. Use rounded strokes that vary in length and curve to avoid monotony. These petals should look folded and layered tightly, forming a small textured cluster.

- Add more details to the center.
Now it’s time to give the very center of the chrysanthemum a more realistic and detailed look. To do this, carefully draw the texture with smooth lines, repeating those you drew in the previous step.

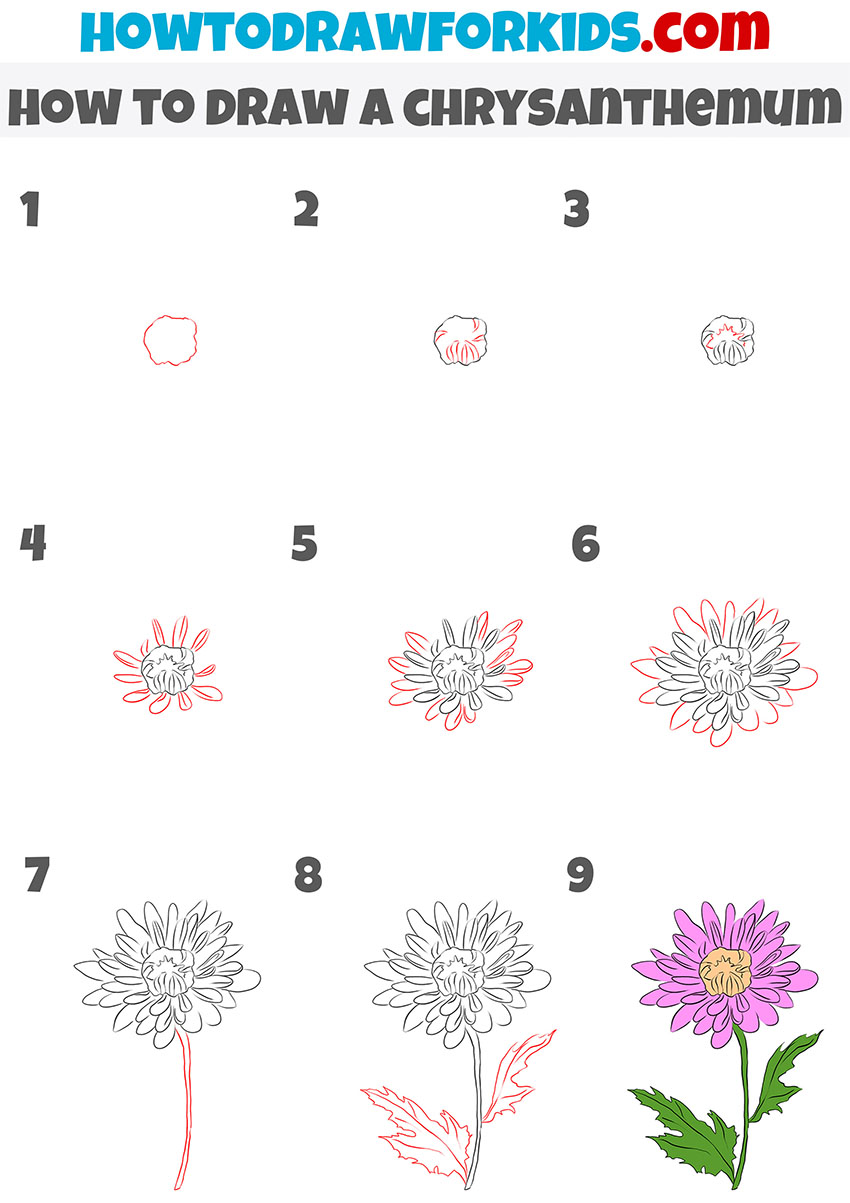
- Draw the first chrysanthemum petal ring.
Around the inner cluster, add a ring of narrow petals. Each petal should start at the edge of the previous layer and extend outward with slightly curved, tapering shapes. Try to make them different lengths and avoid even spacing, natural variation will make your flower drawing more realistic.
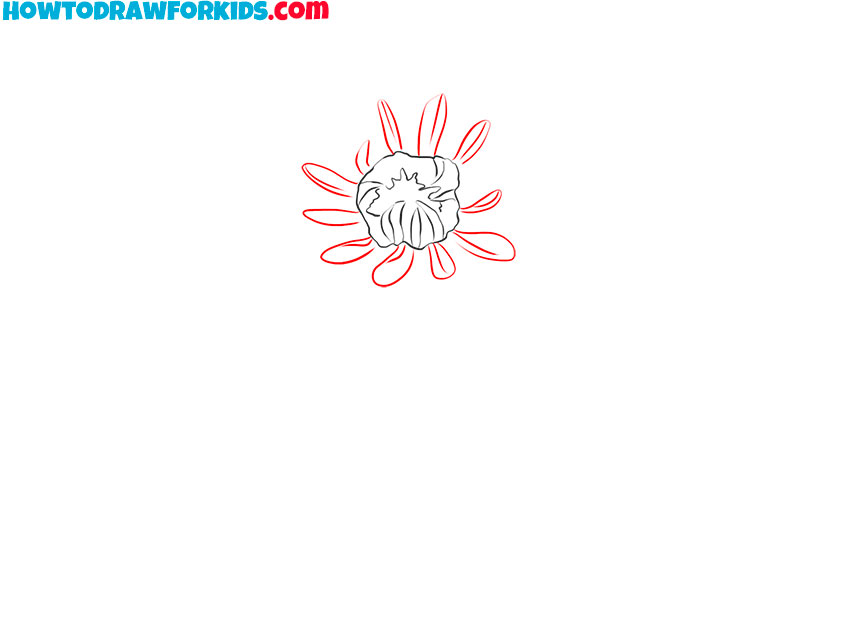
- Add longer, wider petals between the gaps.
Draw a second outer ring of elongated petals that stretch farther from the center. Each petal should slightly overlap or peek between the previous ones. Make them wider toward the tip but still pointed at the ends. You can tilt some petals to different sides to make the blossom look more open.
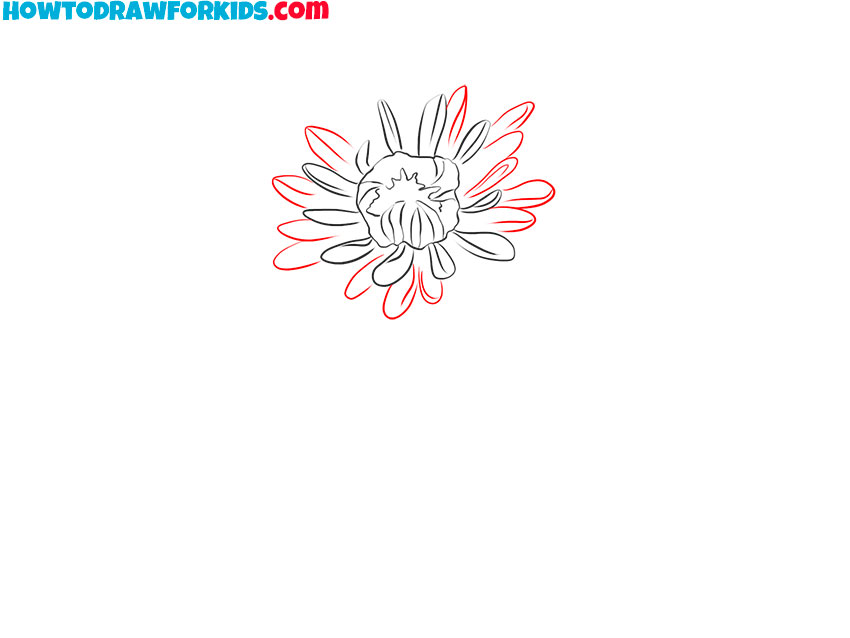
- Complete the outermost petal ring.
Expand your chrysanthemum drawing again by sketching another ring of petals to fill in any gaps. This layer should be drawn with longer and wider strokes. It’s fine to let some petals curve irregularly or overlap, because chrysanthemums naturally have dense blooms.
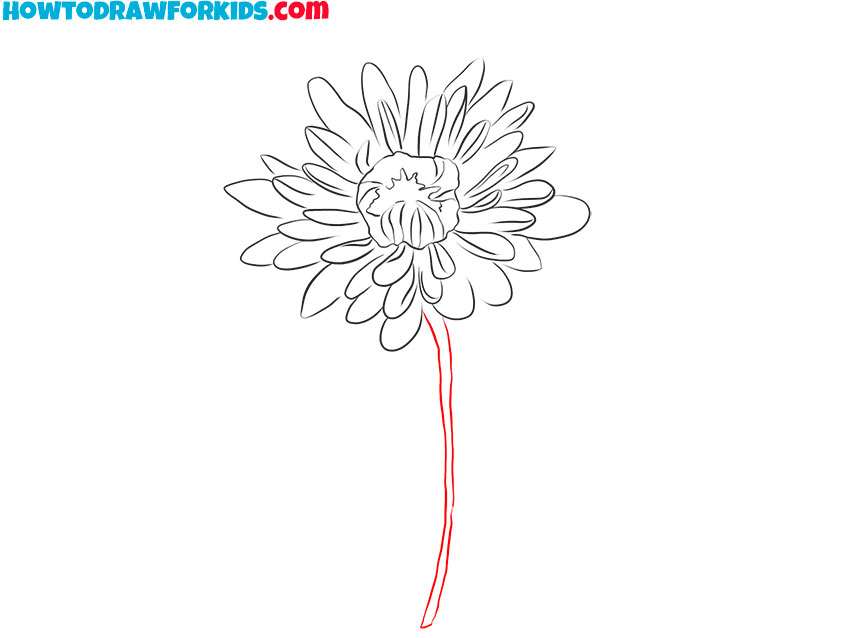
- Sketch the long stem of the flower.
With the blossom complete, it’s time to support it with a stem. Sketch a long, slightly curved vertical line extending downward from the bottom of the flower. Then, add a parallel line beside it to form the stem’s thickness. Keep it narrow and smooth and avoid making it perfectly straight.
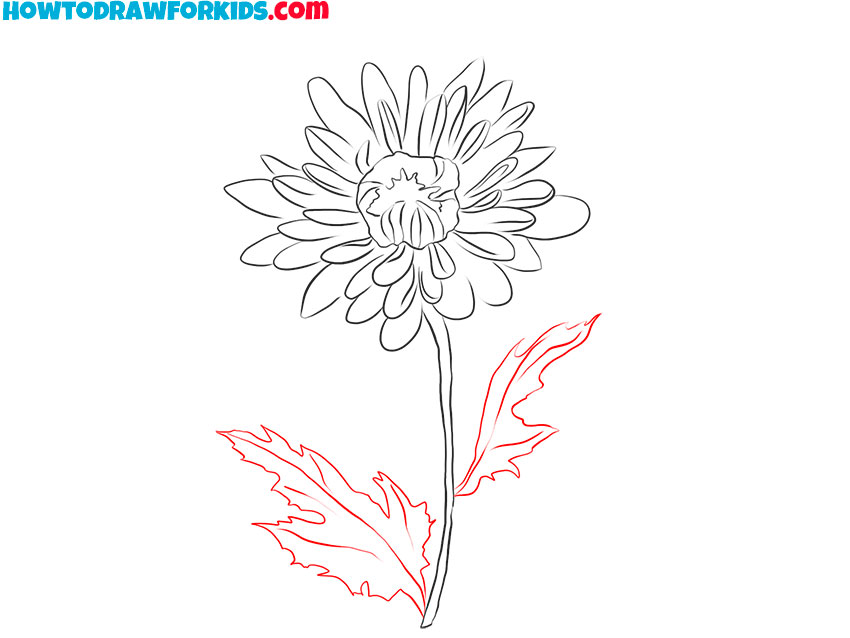
- Draw the chrysanthemum leaves.
Now add the signature jagged leaves typical of chrysanthemums. First, draw a leaf near the bottom of the stem and a smaller one branching off to the side. Use uneven, serrated edges to show the natural texture. Each leaf should have visible veins running toward the edges.
- Paint the petals and leaves.
Finish by coloring the chrysanthemum using shades of pink, purple, or yellow for the petals, and green for the leaves and stem. Additionally, you can apply lighter tones toward the petal tips and deeper hues near the center. For the core, use warm tones like orange or beige.

Don’t forget to follow us on social networks. Now you can download a PDF file that contains a short version of this drawing lesson so you can return to it at any time.