How to Draw a Fruit Bowl
Unleash your creativity with my delightful drawing lesson, showing you how to draw a fruit bowl. It’s simple and ideal for budding young artists!
Set off on an artistic adventure to learn how to draw a fruit bowl with my fun, kid-friendly guide! From the curves of apples to the delicate dimples of berries, my easy-to-follow tutorial is perfect for young artists eager to create. So grab those crayons, and let’s dive into this delicious drawing challenge, step by juicy step!
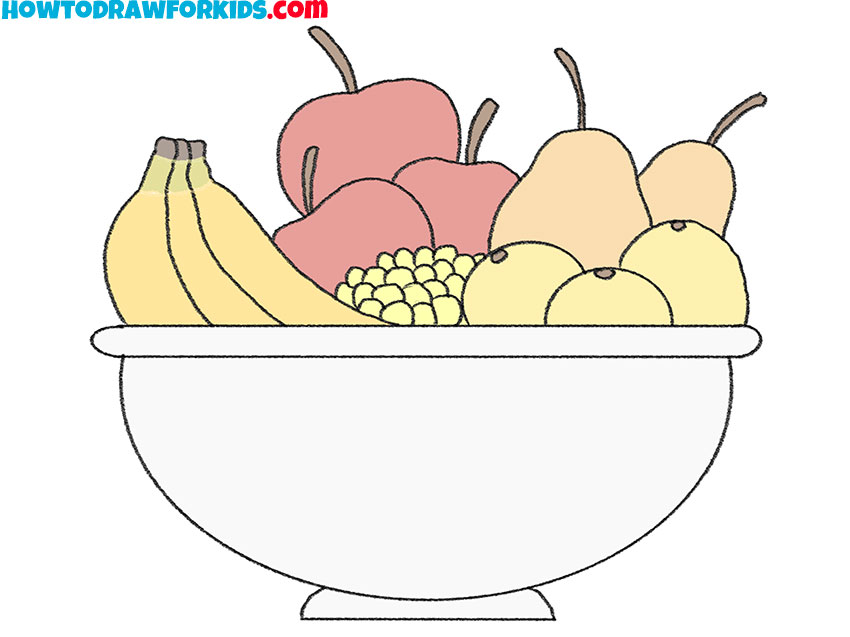
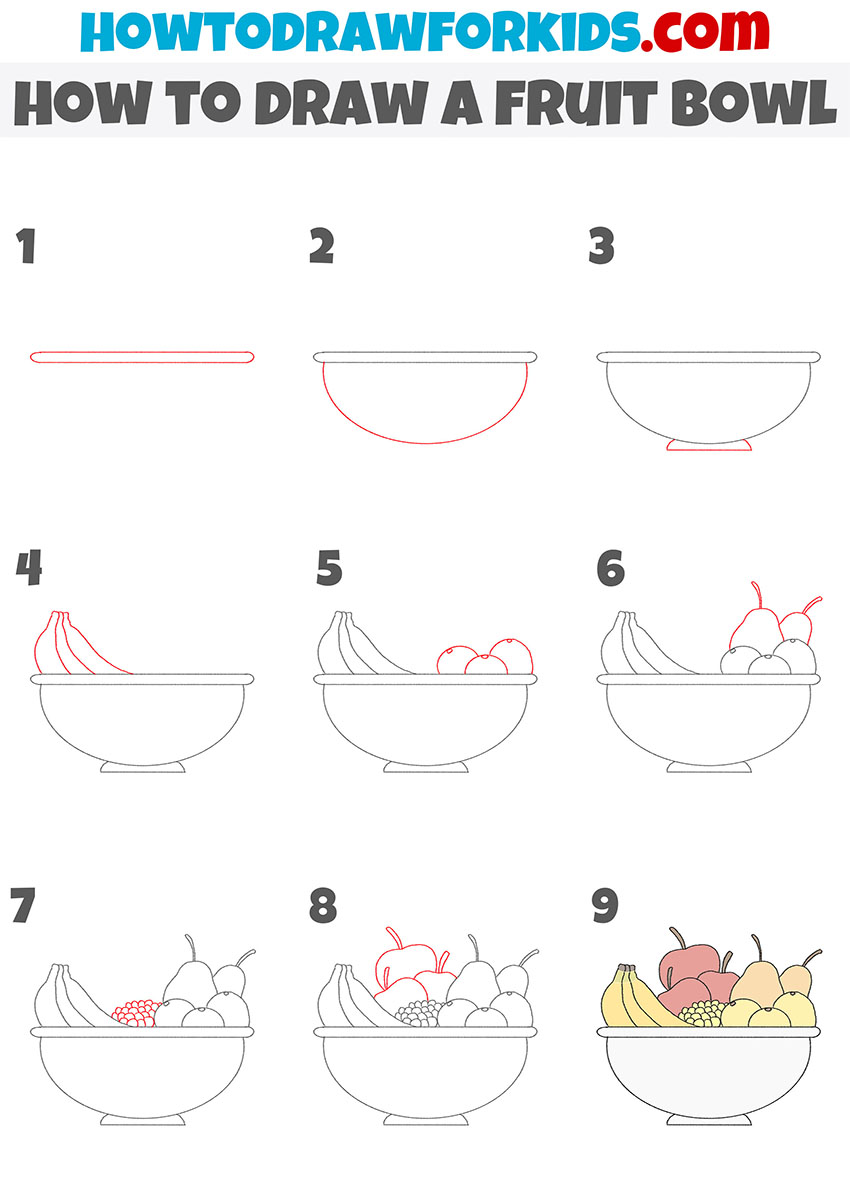
Table of Contents
- Basic information
- Step-by-step tutorial
- Additional content
- Alternative fruit bowl drawing technique
- Enrich your fruit bowl art
- Conclusion
How to Draw a Fruit Bowl: Basic Information
Today’s art adventure is all about bringing a colorful fruit bowl to life right before your eyes. With this easy-to-follow guide on how to draw a fruit bowl, we’ll transform simple shapes into a vibrant composition that’s just bursting with freshness!
I’ll guide you through each cheerful stroke as we draw a fruit bowl that’s wide and ready to be filled with nature’s candies. Imagine your pencil is a magic wand as we conjure up a bowl overflowing with fruit!
So, our first enchanting step is to sketch out a big, welcoming bowl that’s ready to hold our fruity treasure. We’ll learn to draw the curves and edges to make it look just right.
And then, the real fun begins as we playfully place each fruit inside our bowl. We’ll start with the round cheeriness of apples, add the fun curve of bananas, and sprinkle in a bunch of grapes that look good enough to eat. With each step of our on how to draw a fruit bowl, your creation will come to life.
By the end of our time together, not only will you have mastered how to draw a fruit bowl, but you’ll also have a vibrant drawing that reflects your awesome creativity. So, let’s sharpen those pencils and dive into a world of fruity fun! Ready to create some art that’s as sweet as fruit salad? Let’s get started!
Materials
- Pencil
- Paper
- Eraser
- Coloring supplies
How to Draw a Fruit Bowl: Step-by-Step Tutorial
Time needed: 30 minutes
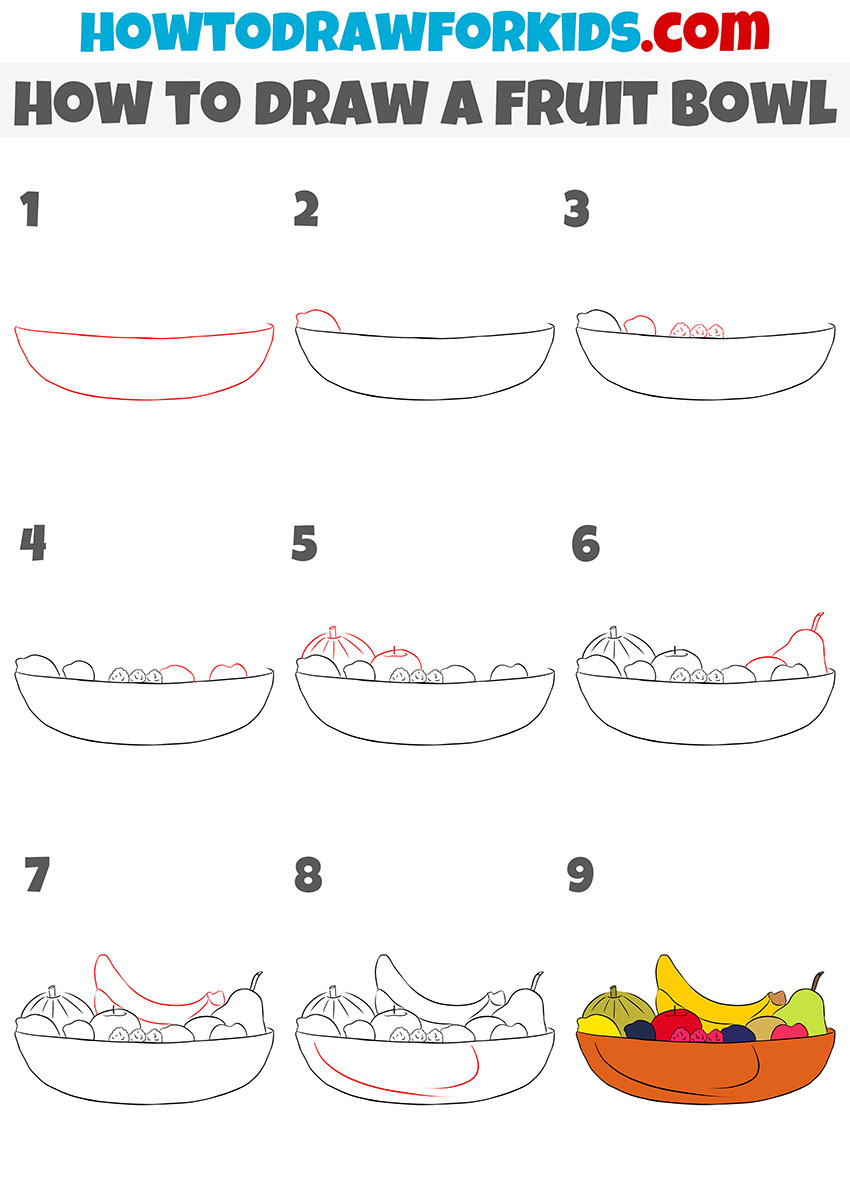
How to Draw a Fruit Bowl
- Draw the top of the bowl.
Start by deciding the size of your fruit bowl sketch. Then, draw a long, narrow rectangle to represent the upper rim of your bowl, ensuring it’s centered on the page.

- Add the main part of the bowl.
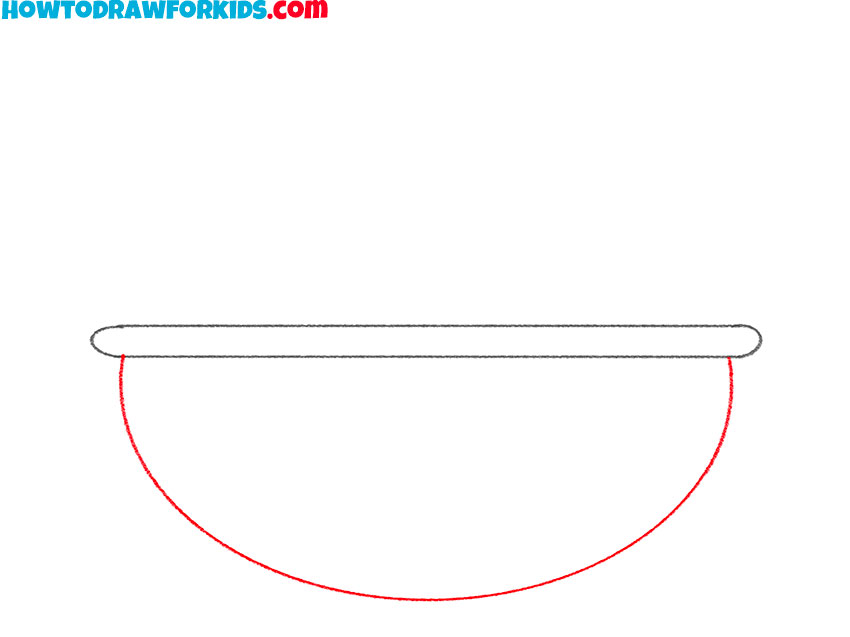
Directly beneath the horizontal line, draw a smooth semicircle to complete the main body of your bowl. Ensure it’s symmetrical and aligns with the ends of your initial line for balance.
- Sketch the base of the bowl.
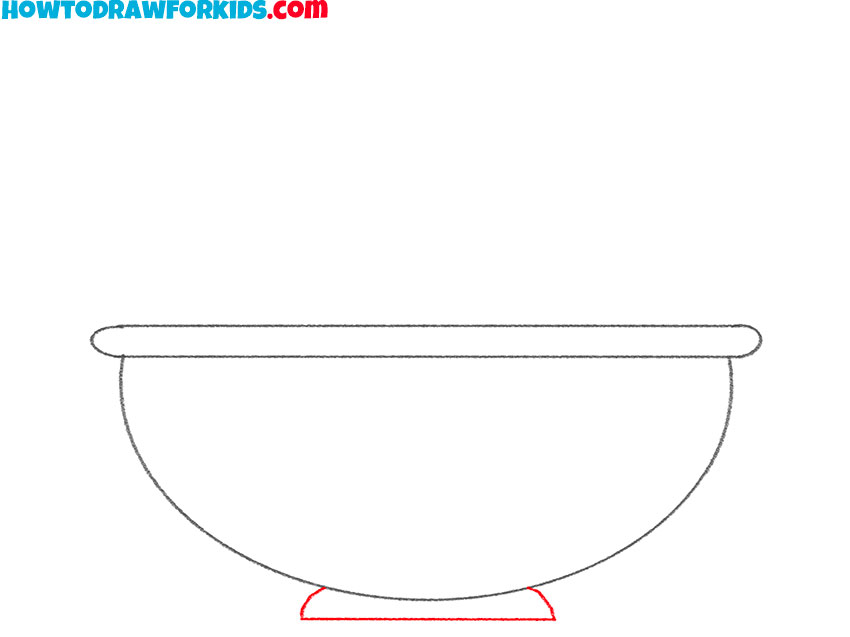
At the bottom of your bowl, sketch a small base by drawing one straight line for stability and two curved lines to connect it back to the bowl, creating a solid foundation.
- Start drawing the fruits.
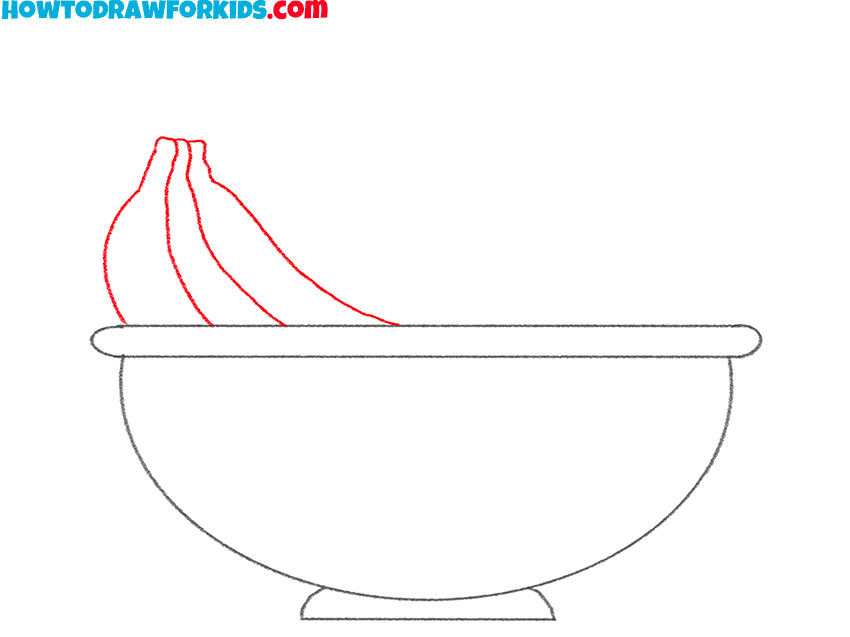
On the left side of your bowl, draw the bananas with their stems pointing upwards. Use curved lines to represent the bananas’ elongated shapes and indicate their clustered arrangement at the stem.
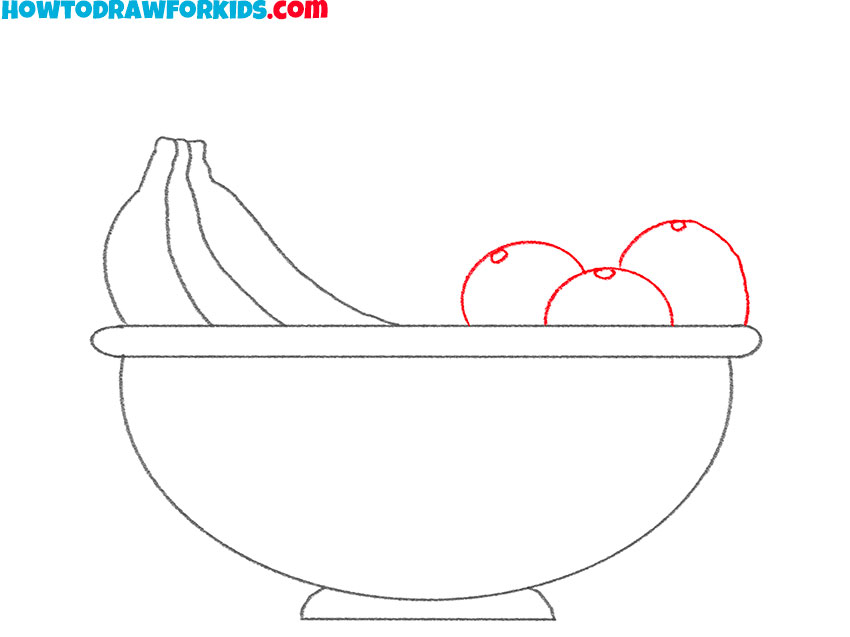
- Depict the oranges.
Begin on the right side of your bowl and sketch a series of overlapping semicircles to represent oranges. Then, top each with a small circle to simulate the stem.
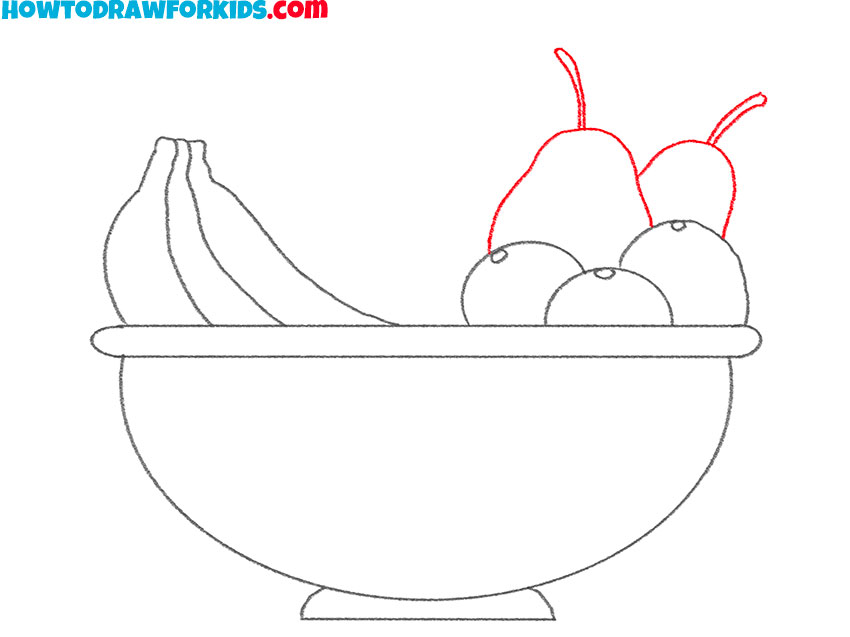
- Draw the pears.
Position your sketching tool above the oranges and carefully draw two pears. Use smoothly curved lines to form their characteristic shapes, complete with narrow tops and slightly wider bottoms.
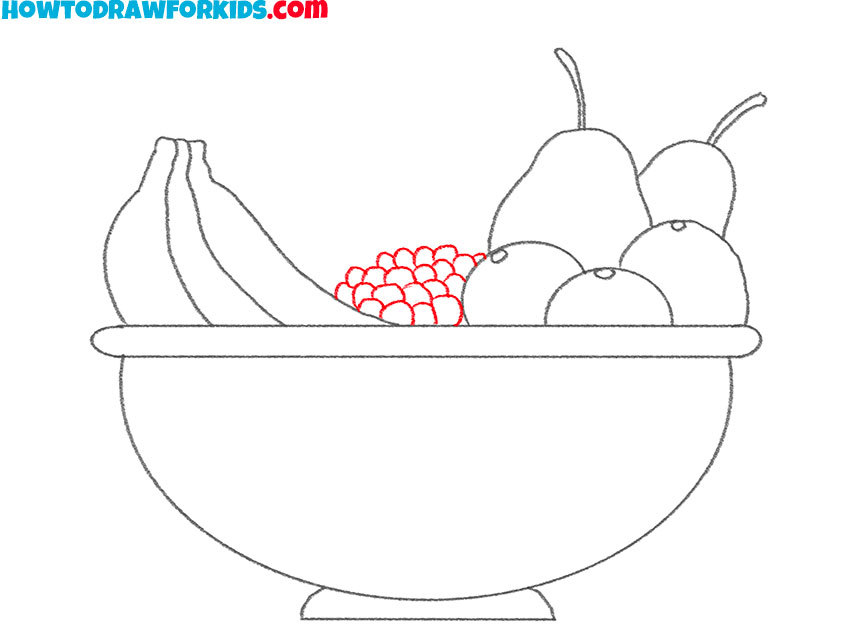
- Add the grapes.
Directly at the center, draw the clusters of the grapes by sketching multiple small, overlapping circles to create the bountiful bunch. Ensure each grape is distinct for a realistic effect.
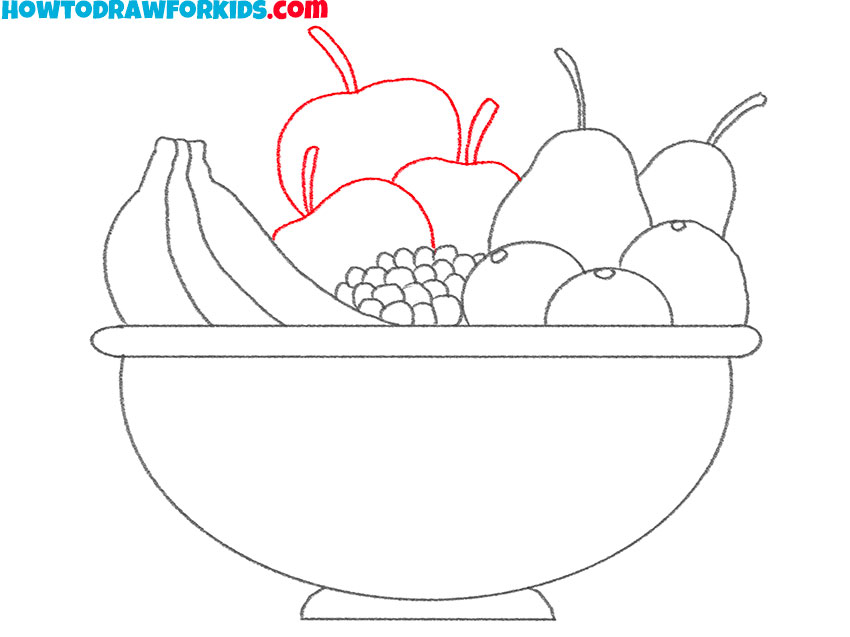
- Sketch the apples.
Above the grapes, sketch three apples by creating rounded shapes with a slight indentation at the top for the stem. Position them as illustrated, with one apple slightly overlapping the others to add depth.
- Color your fruit bowl drawing.
For the bowl, select a light gray shade to simulate the appearance of a ceramic material. Then, use vibrant yellows and deep reds to bring your bananas, apples, and pears to life with color.

Additional Content
To ensure you can enjoy this fruit bowl drawing lesson anywhere and anytime, I’ve crafted a complimentary PDF file that encapsulates a succinct version of the tutorial. You can effortlessly download this file, and it’s designed for convenient use offline, so a lack of internet connectivity won’t hinder your artistic pursuits.
Alternative Way to Learn How to Draw a Fruit Bowl
So, to boost your artistic journey, I’ve crafted an alternative method for you to draw a fruit bowl, a pathway that promises to sharpen your drawing talents. This tailored approach is your next step to mastering the art of the fruit bowl.
How to Draw Another Fruit Bowl
In this approach to draw a fruit bowl, the shape of the fruit bowl has a more elongated base, giving it a distinct, oval-like appearance compared to the rounded style in the first method. This version includes a variety of additional fruits.
These additions not only introduce a richer palette of colors but also offer an opportunity to learn how to draw different shapes and textures, adding complexity and diversity to the fruit bowl drawing.
Enrich Your Fruit Bowl Art
Imagine where your colorful fruit bowl could fit perfectly in the real world. Let’s get creative and find the perfect spot!
- Breakfast table: Add a morning touch by drawing a breakfast table setting around your fruit bowl, complete with a glass of orange juice and a cheerful morning napkin.
- Summer barbecue: Place your fruit bowl on a picnic table with grilling tools and a checkered tablecloth, giving it a summer barbecue vibe.
- Holiday feast: Surround your fruit bowl with holiday decorations like candles, pine cones, and a festive table runner, making it part of a holiday centerpiece.
- Artist’s still Life: Draw an artist‘s easel and paints in the background, turning your fruit bowl into a work-in-progress still life painting.
- Fruit stand: Envision a roadside fruit stand with your bowl as the star, alongside baskets of fresh produce and a chalkboard with the day’s specials.
Don’t forget, each stroke of your pencil adds character to your creation, making it uniquely yours. If you’re eager to adorn your art pieces with an array of the objects we’ve chatted about, my website is your go-to creative corner. Dive into my collection of tutorials, where every guide is a gateway to mastering the art of embellishment.
Conclusion
So, you’ve just brought to life a delightful fruit bowl drawing, bursting with life—kudos, young artists! But why stop there when my website is overflowing with new challenges? Whether you’re in the mood to sketch a zesty Pokémon or a purring cat, there’s an array of diverse lessons waiting for you on my site for all sorts of themes!
Finally, pop into my social media for a ton of fun with drawing lessons. Thus, stay tuned for my updates! And if you have an idea or a specific wish to draw something? Drop it in the comments section—I’m all ears and ready to see your creativity blossom!

