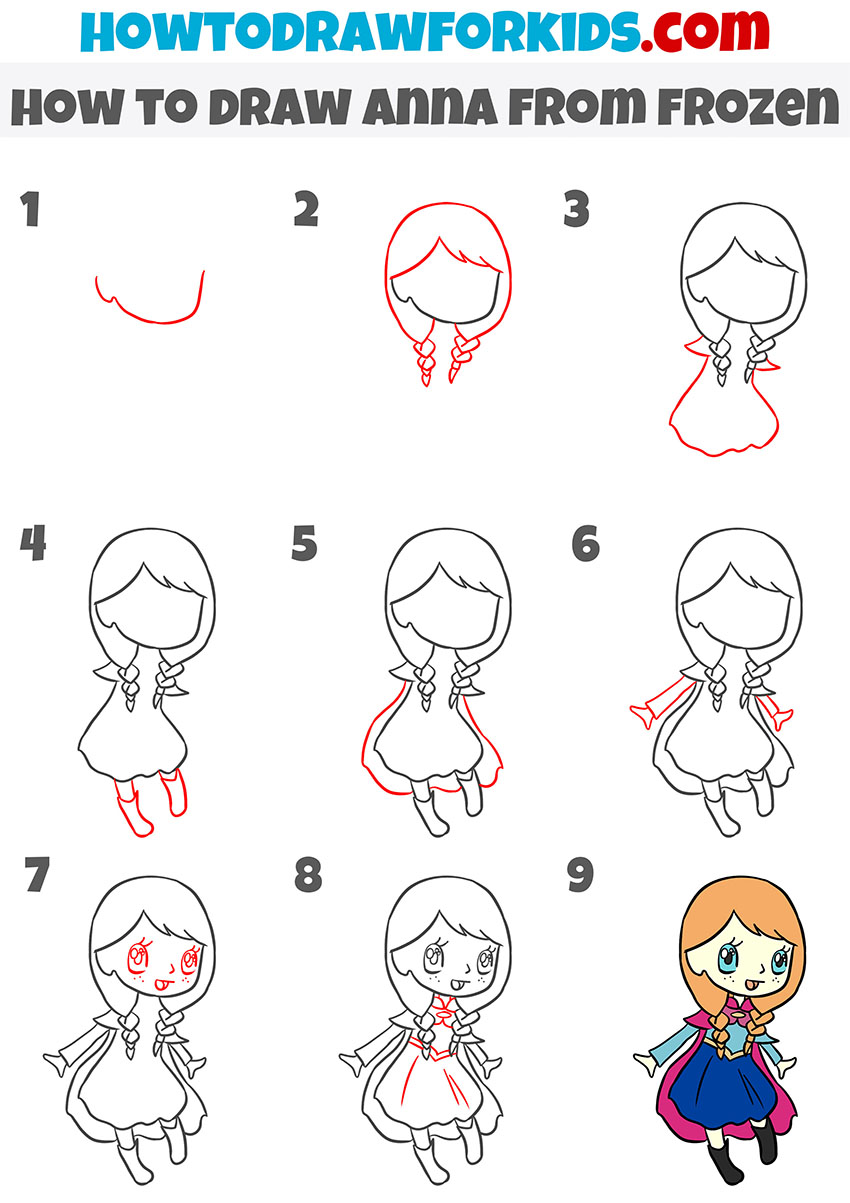
How to Draw Anna from Frozen
Even famous cartoon characters can be simplified while still maintaining an authentic look, as we’ll see in this tutorial on how to draw Anna from Frozen.

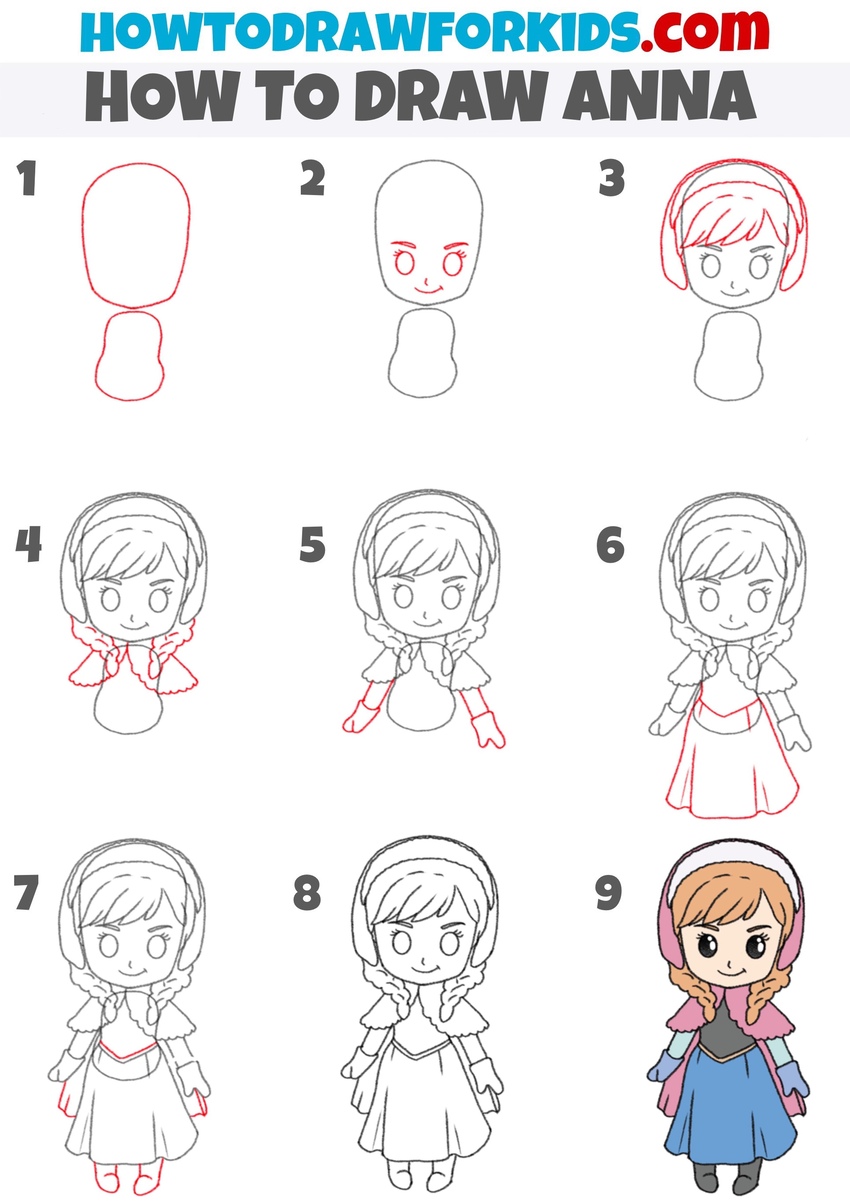
In this lesson, you will learn how to draw Anna from Frozen. If you watched this cartoon, you must have been fascinated by the beauty and courage of the main character – Princess Anna, who goes on a dangerous journey to save her kingdom and her sister.
Anna is cheerful, open, and sociable, but sometimes she can be impulsive and short-tempered. Anna has light brown hair, large expressive eyes, and a beautiful outfit that accentuates her slender figure. You will enjoy drawing this character, especially since it will be easy.
This step-by-step guide is intended for those users who do not have much experience in drawing but have a desire to learn new techniques in drawing characters. In this tutorial, you will easily draw Princess Anna with simple steps. At each stage there will be a small hint, thanks to this you will achieve excellent results.
Materials
- Pencil
- Paper
- Eraser
- Coloring supplies
Time needed: 45 minutes
How to draw Anna from Frozen
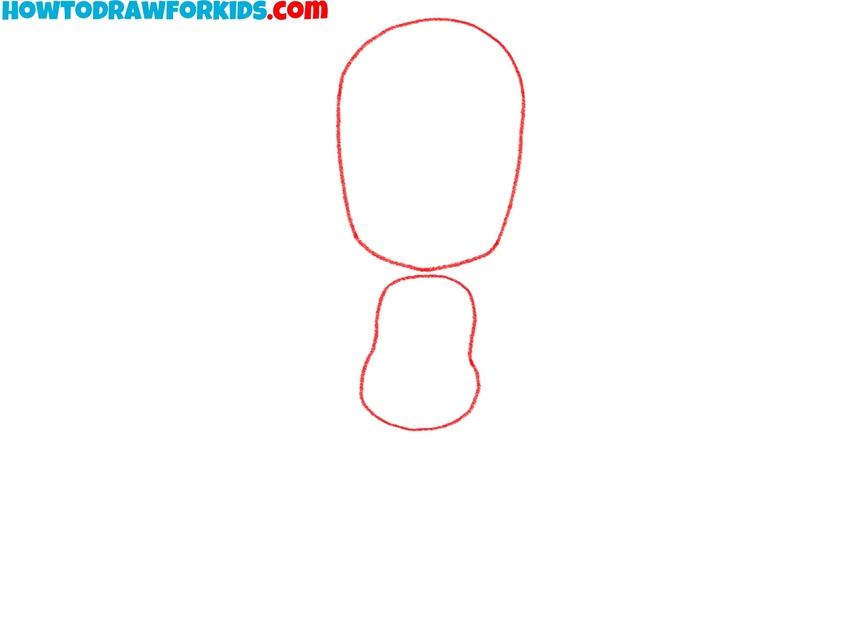
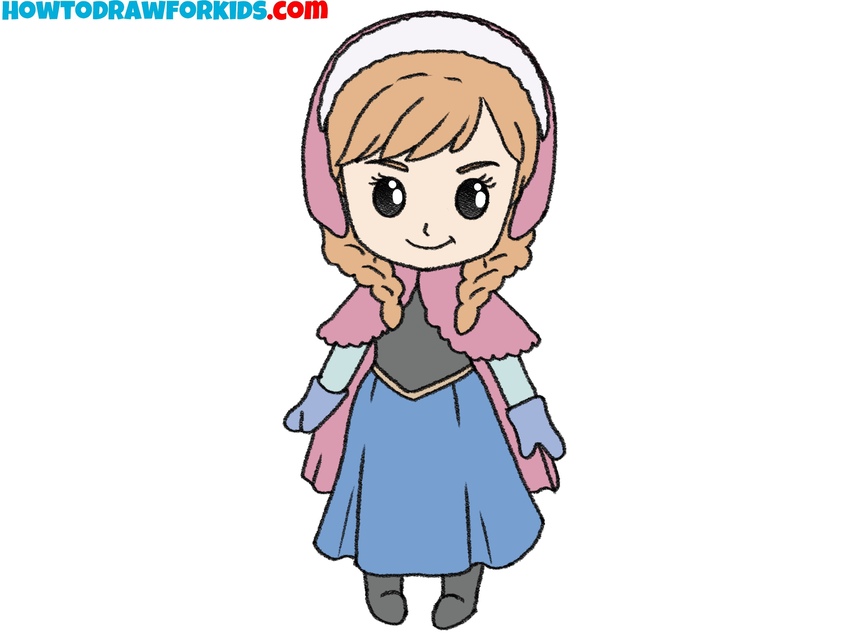
- Sketch Anna’s head and body.
To begin the drawing, define the main proportions of Anna’s figure. Sketch a large vertical oval for her head. Just below it, add a small curved shape for the torso that narrows near the neck and widens toward the bottom. The form should look like a simple doll-like structure. Keep your lines light and simple. Check the symmetry by lightly comparing the distances from the center line to each side.
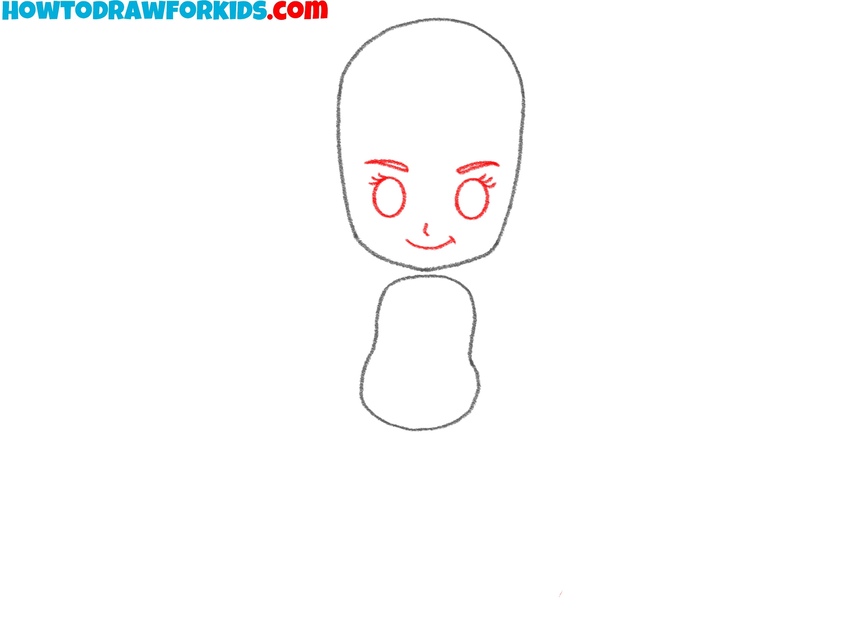
- Draw the character’s facial features.
Before refining the outer shapes, it’s important to give Anna’s face its main structure. Draw the eyes as two large circular shapes positioned slightly below the horizontal midpoint of the head. Sketch gently arched eyebrows above the eyes, trying to make them symmetrical. Below, draw a small curved line for the nose and a light smile. Place the mouth halfway between the nose and chin.
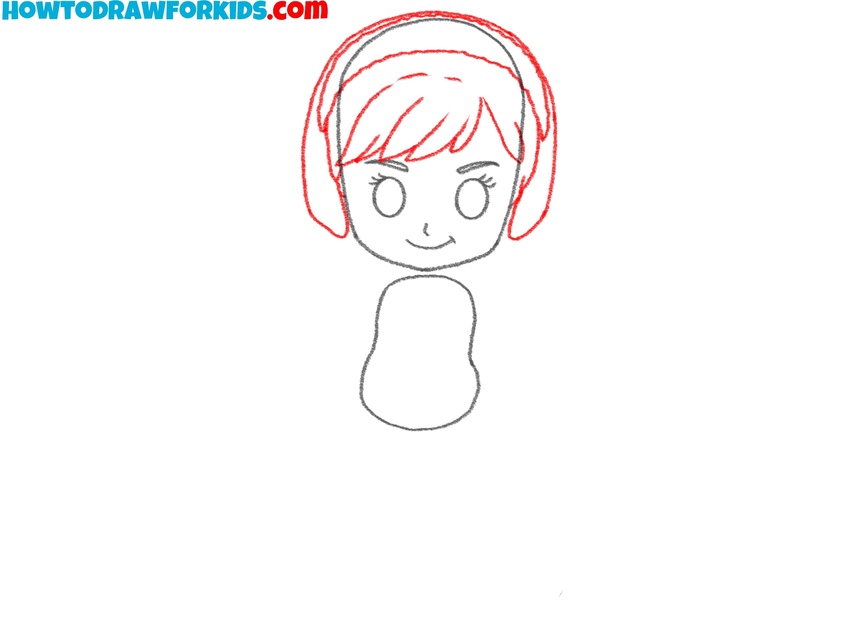
- Draw Anna’s hair and winter hood.
Now let’s frame Anna’s face with her hairstyle and hood. Outline her bangs with a series of short, curved lines that follow the contour of her forehead. Then add the side sections of the hair extending down toward the cheeks. Over the head, illustrate the rounded hood that will later belong to her winter outfit.
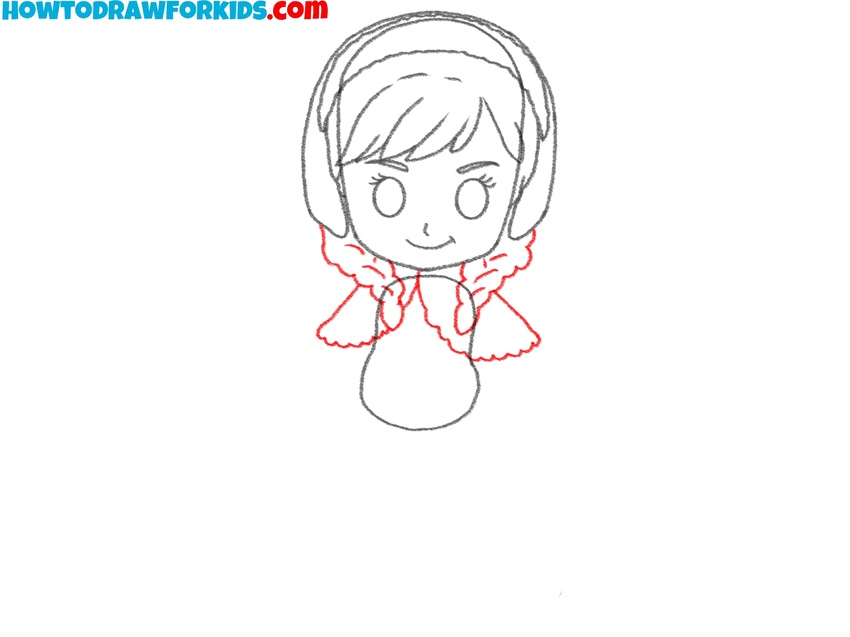
- Illustrate the cape collar and braids.
First, draw the braids extending down from the sides of the head. Before working on the arms and dress, outline the upper clothing details. Anna’s cape has a fluffy collar, so sketch a wavy shape around her neck that extends over the shoulders. Use soft curved lines to make the fur trim look light and natural.
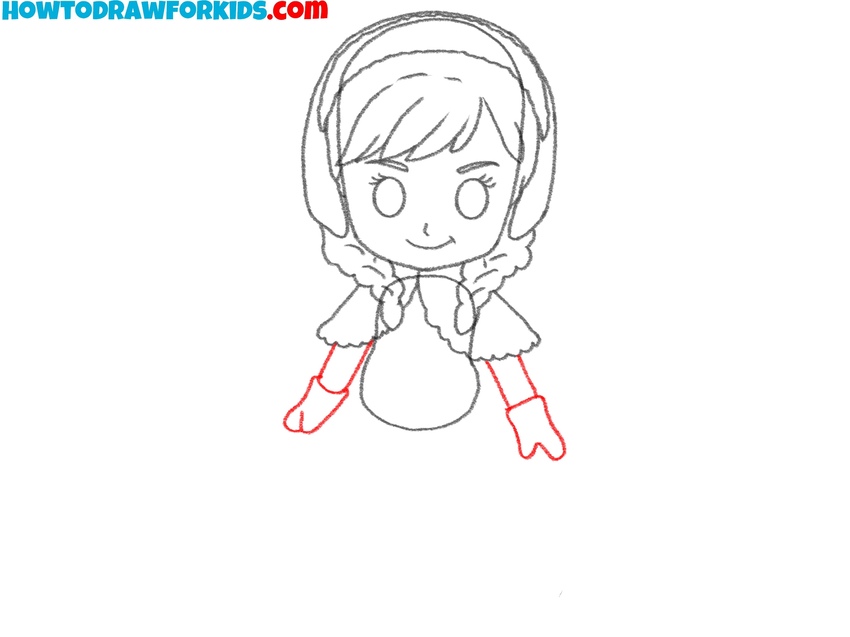
- Sketch the arms and mittens.
To make the cartoon character’s pose complete, add her small arms. Use simple cylindrical forms for each arm. Sketch the mittens with rounded ends, marking the separation between glove and sleeve with a small line. Keep the arms and hands proportional to each other.
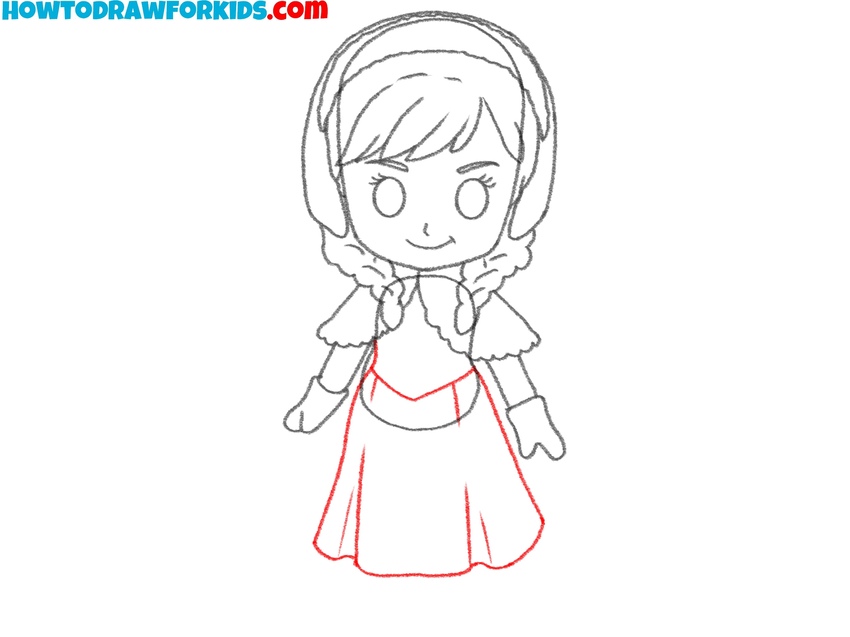
- Sketch the shape of Anna’s skirt
It’s time to give Anna her long winter dress. Below the body, extend the lines of the torso downward into a wide, gently flaring skirt. Use soft curved lines to indicate the folds at the bottom. Add a belt-like line at the waist to separate the top and bottom parts of the dress.
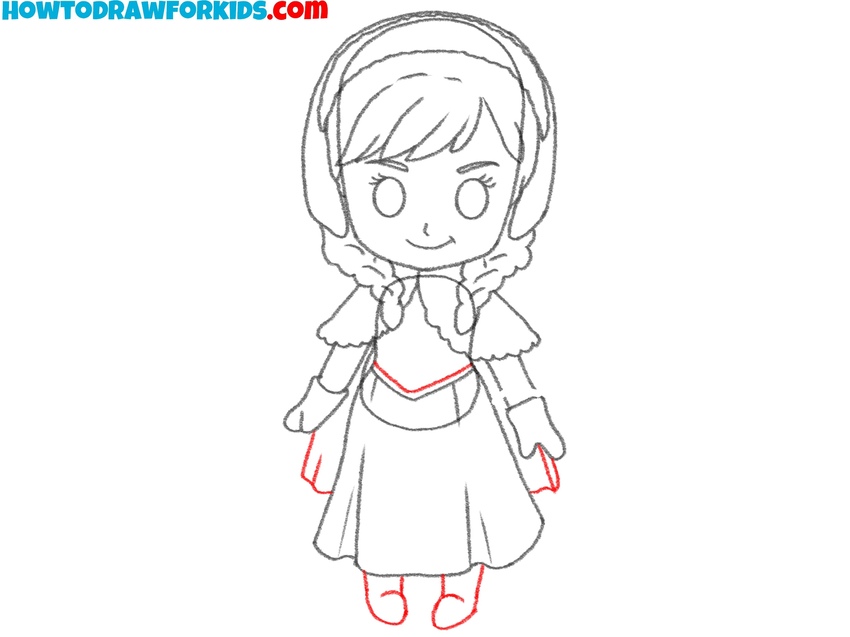
- Complete the Frozen character’s costume.
Before finalizing the line art, refine the design of Anna’s outfit. Sketch the decorative patterns on the dress near the waist and indicate folds or seams where the fabric bends. Draw the simple outlines for the shoes peeking from beneath the dress. Then, sketch the cape, that extends behind the body and slightly outward to both sides. Add any small adjustments to the hood and collar lines if necessary.
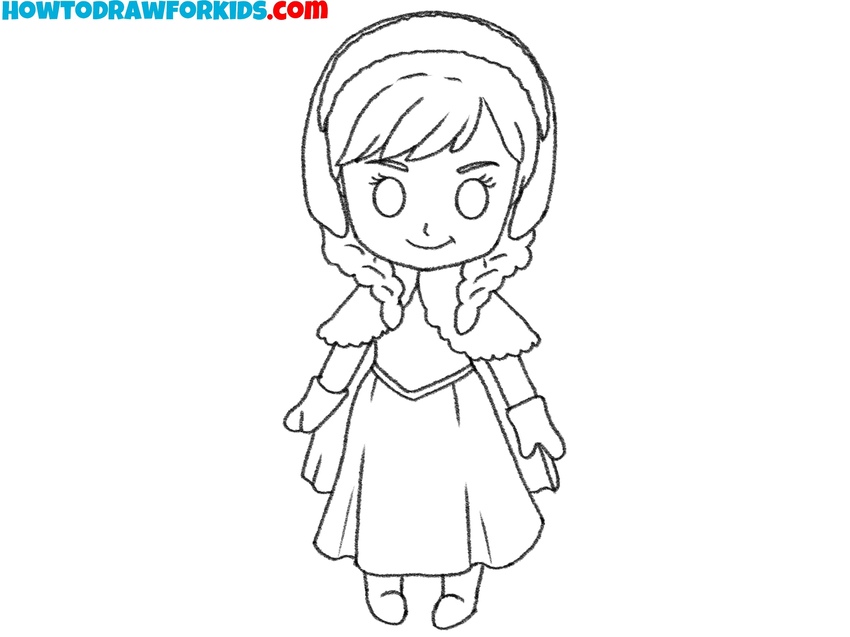
- Polish the drawing before coloring.
Now it’s time to clean up the drawing of Anna. Carefully erase all construction lines inside the head, torso, and clothing that were used for proportions. Remove overlapping lines where the hood meets the hair, where the sleeves connect to the body, and where the dress overlaps with the legs. Once the extra lines are gone, go over the entire Frozen character drawing with more confident and smooth strokes.
- Paint Anna’s face, dress, and hair.
To complete the drawing of Anna from Frozen, apply warm and pastel tones that match her look in the movie. Her skin should have a light peach tone, while the hair can be colored in soft orange-brown shades. The hood and cape are best done in pink and purple, and the dress should feature deep blue and violet hues. The gloves can be bluish-gray, and the boots dark brown.
Easy Anna Drawing Tutorial
To sketch Anna in this style, outline the lower part of the face and connect it with a large oval forming the head. Add the bangs and two symmetrical braids on both sides, using small curved segments for each braid section.
Sketch the shoulders and then draw the main contour of the dress with a flared lower edge. Add narrow arms extending from the shoulders.
Draw the boots under the dress with light vertical angles. Inside the face, mark the position of the eyes and mouth. Indicate the details of the cape and add a few guiding lines on the dress to show folds.
Check all proportions carefully before outlining the drawing. For coloring, apply warm brown for the hair, blue for the dress, and deep magenta for the cape, using slightly lighter tones on the sleeves and boots.