How to Draw Blade
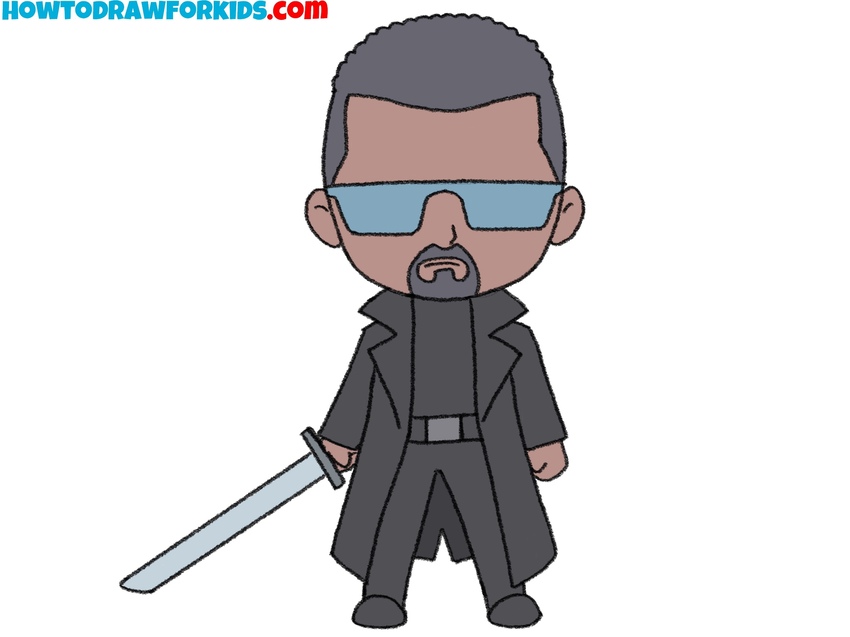
This comic-book tutorial will demonstrate you how to draw Blade, the legendary vampire and vampire hunter from the Marvel Universe.
How to Draw Blade: Introduction
In this tutorial, I will demonstrate how to draw Blade in the style typical for my site, which is simplified and slightly cartoonish. Following tradition, I will simplify the details, focusing only on the most essential parts to create a clear, recognizable image of a vampire hunter.
Given the minimalistic style used here, understanding how to simplify Blade’s details while maintaining recognizability is essential. The goal is to create a character that remains instantly identifiable, even with reduced detail. Simplification requires careful selection of features that define Blade’s look without overwhelming the design.
Key elements that characterize Blade include his coat, sword, and sunglasses, with few other defining features. Blade’s design depends heavily on these accessories, making them integral to the character’s visual identity. This process highlights the role of accessories in character design, showing how specific items contribute to a complete and distinctive look.
In this tutorial, Blade’s facial features are minimal yet effective for achieving a recognizable appearance. By focusing on simplified facial elements, this approach helps artists understand how to construct identifiable characters using a limited range of details.
Blade Drawing Tutorial
Materials
- Pencil
- Paper
- Eraser
- Coloring supplies
Time needed: 35 minutes
How to Draw Blade
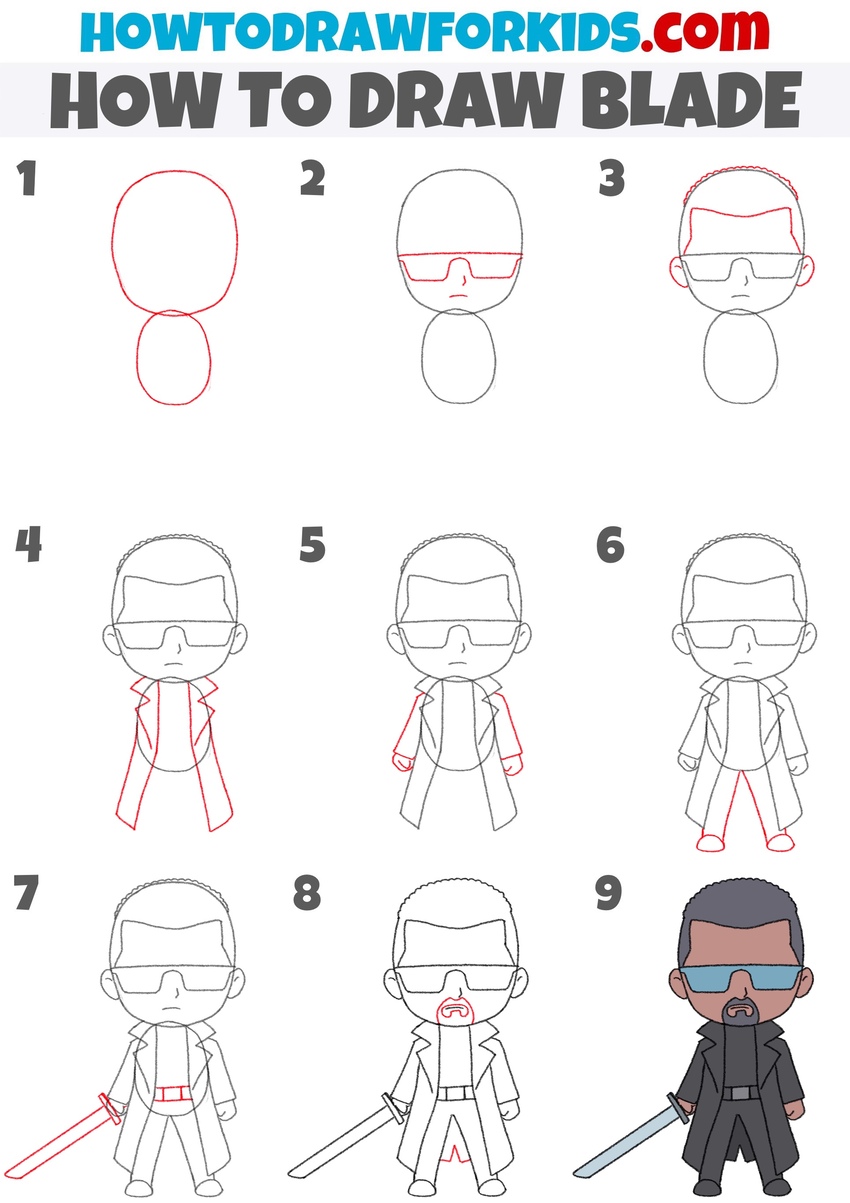
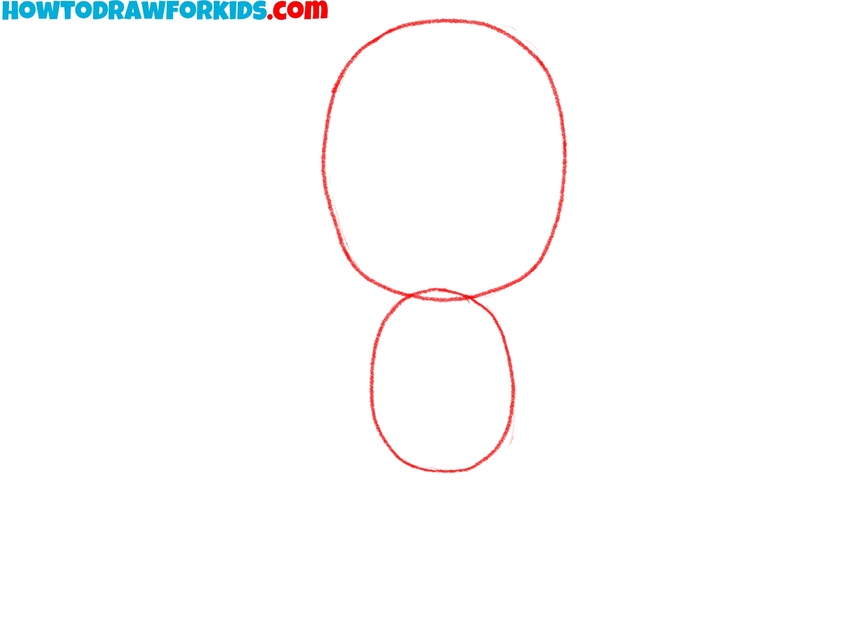
- Sketch the head and torso of Blade.
To begin drawing Blade, start by sketching the outline of his head and body. Draw a large oval shape at the top for his head, followed by a smaller oval underneath for his body. These shapes serve as the base for Blade’s head and torso, helping you to illustrate the character.
- Draw the face of Eric Brooks.
Now, draw the sunglasses of Blade and a simple facial detail. Draw a horizontal line across the face to mark the top of his sunglasses, then outline the glasses around his eyes. Then, sketch the mouth with a simple short line. Then, add a short line to create the mouth.

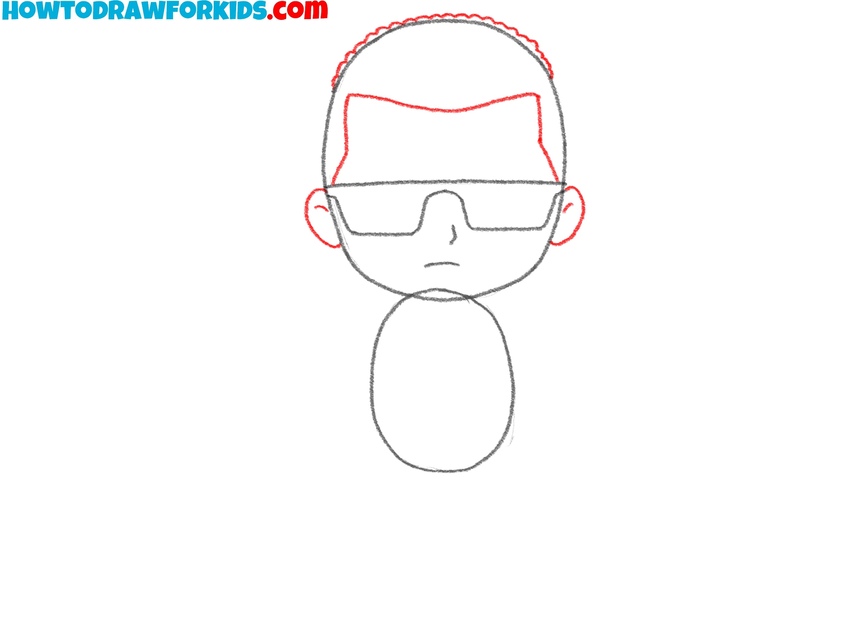
- Draw the hair and ears of character.
For his hair, draw a close-cropped outline around the top and sides of his head, adding a wavy line to illustrate texture. Then, add two small ovals on each side of the head to draw the ears. Keep the lines simple, as Blade’s hairstyle is neat and does not require excessive detail.
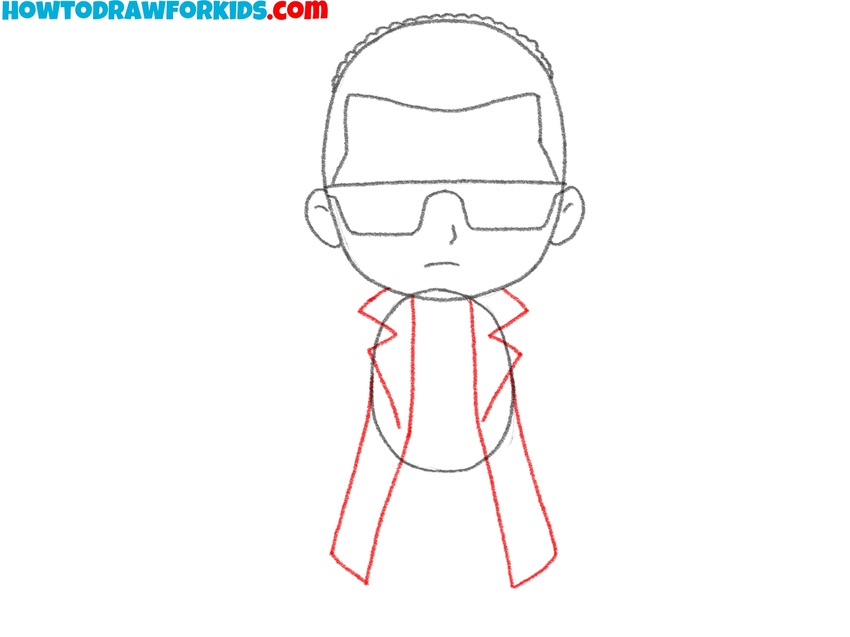
- Draw the coat of Blade.
Start drawing the coat by sketching the lapels of the coat below the head of Blade. Then, draw long lines going downward from each side of the lapels to form the coat’s length, which flows past his knees. Illustrate the bottom edge of the coat with a pair of short horizontal lines.
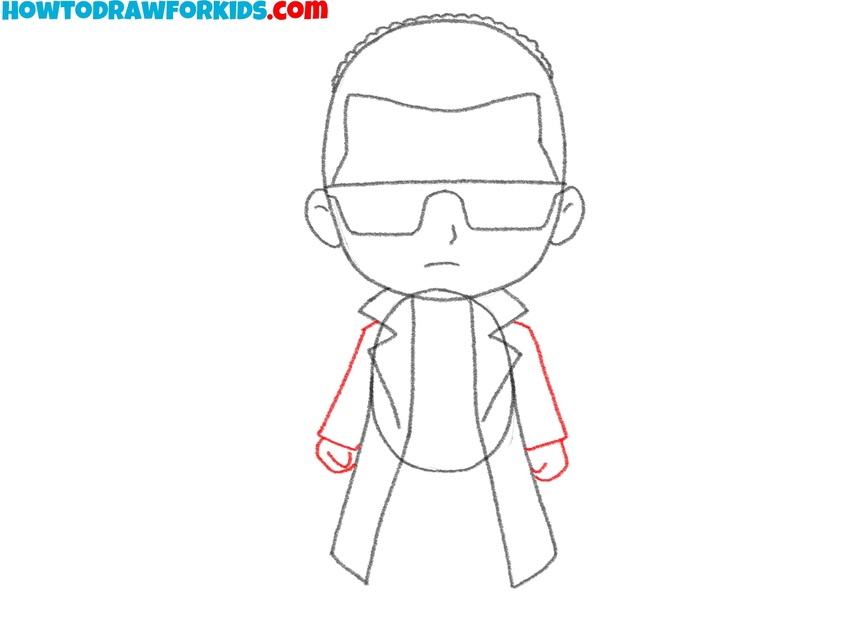
- Sketch the arms and hands.
Draw two lines from each shoulder, angling slightly outward to create the sleeves of his coat. At the end of each sleeve, draw the hands as small, rounded shapes. The addition of arms and hands completes the outline of his upper body.
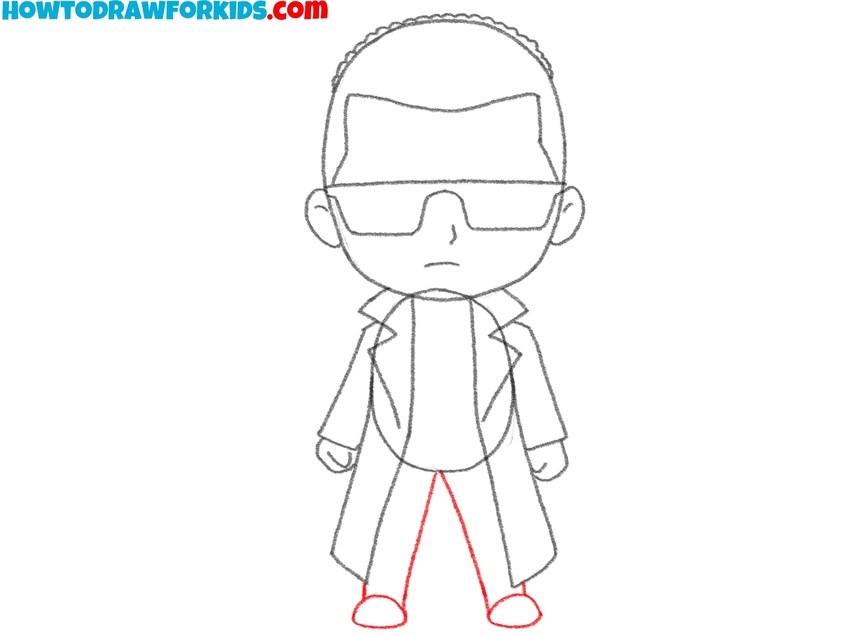
- Add the legs and feet.
For Blade’s legs and feet, draw two simple lines down from the bottom of his coat to indicate his pants. Make sure the lines are slightly apart to define each leg individually. Add small, rounded shapes at the bottom for his feet. Keep the lines simple and symmetrical.
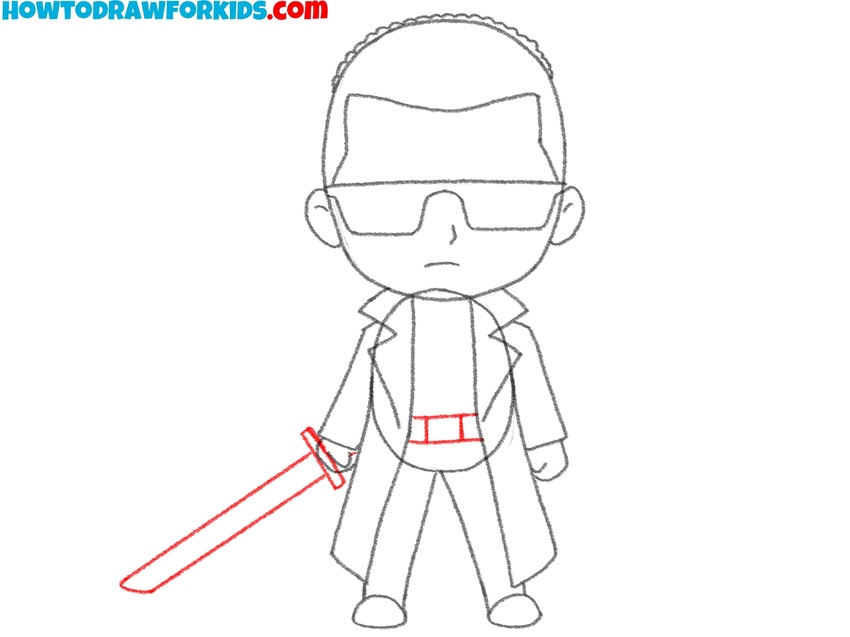
- Add the iconic sword.
Draw the hilt of the sword in his hand, extending two straight lines outward to form the blade. Keep the sword long and straight, giving it a narrow tip to highlight its sharpness. Next, draw the belt on the waist with a pair of horizontal lines, drawing the buckle as a simple rectangle in the center.
- Finalize the sketch.
In this step, add final details to complete Blade’s appearance. Draw a thin line on his face to represent his goatee, illustrating his characteristic facial hair. Add some final lines to your Blade drawing to finalize the artwork. Erase the guidelines to give the character a finished look.

- Color the drawing of Blade.
Use dark shades for his coat, pants, and boots, making his outfit mostly black or dark gray to reflect his classic look. Color his sunglasses with a light blue or gray tint, and add a dark brown or black shade for his hair and goatee. The sword can be gray or metallic silver to make it look more realistic.

How to Draw Blade: Interesting Background Ideas
What can elevate a good superhero drawing to a great one? Adding a cool background and other characters as part of the environment can make a significant difference. Let’s learn how to incorporate interesting details to give your Blade drawing a polished and complete appearance.
To improve your Blade drawing, consider adding a background that complements his character. A night cityscape can be an effective choice, with tall buildings, dim streetlights, and a hint of fog to create an ominous atmosphere. Let me remind you that on my site you can find a lesson on drawing a cityscape. Visit it and learn how to create an interesting background for Blade.
An abandoned house could also serve as a fitting background. Broken windows, decaying walls, and overgrown vegetation create a haunting atmosphere. Or, you can draw a haunted house, which would also be a great background for Blade.
For added intensity, consider placing Blade in the midst of a group of vampires. If you want to make it as simple as possible, then go to my tutorial on how to draw a vampire.
Another option is to depict Blade facing off against a well-known Marvel superhero or villain. This could include characters like Wolverine, Punisher, or a classic villain such as Doctor Doom.
Conclusion
This was a simple and minimalistic lesson on how to draw Blade. If you found this lesson interesting, visit the comics section of my site to learn how to draw Wolverine and other heroes, villains, and antiheroes from the Marvel and DC Universe.
If you found this tutorial helpful, consider following me on Pinterest for announcements and additional content, and on YouTube for video versions of my drawing tutorials.

