How to Draw Elsa
After watching the cartoon Frozen, I thought I could try drawing the main character, and you can too. So, let me show you how to draw Elsa.
How to Draw Elsa From Frozen: Basic Information
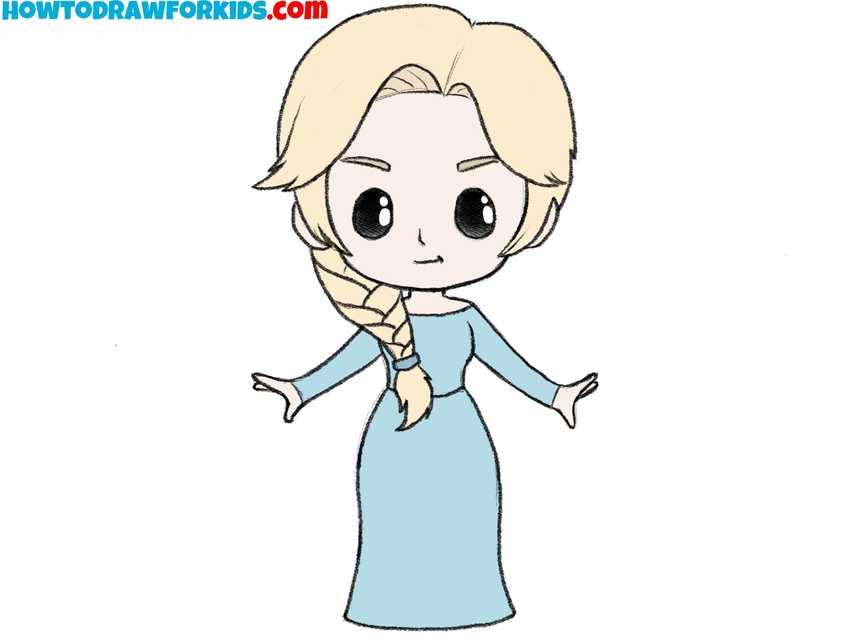
In this tutorial, I will show you how to draw Elsa, the main character from the cartoon Frozen. Many children and adults enjoyed this cartoon. Queen Elsa is a young girl with a magical ability to create snow and ice. Elsa is known for her blue-toned outfits, thick blonde hair, and gentle facial features, which will be replicated in this tutorial.
After watching Frozen, many children became interested in drawing Queen Elsa. Numerous drawing styles for Elsa have since appeared online and in print. This lesson provides a method for drawing this character, using a style that features unusual proportions, where the head is larger than the body. This approach is simple and easy, suitable for both children and beginner artists.
This cartoon-like style is easy to replicate, though there are a few important details to note when drawing Elsa. Focus on conveying her facial features while maintaining a simplified form. Additionally, it’s very important to keep her clothing details clear without overcomplicating them.
To complete this tutorial, two additional drawing options are included. The first provides a more simplified approach to drawing Elsa, while the second option presents a more detailed method.
Elsa Drawing Tutorial
Materials
- Pencil
- Paper
- Eraser
- Coloring supplies
Time needed: 45 minutes
How to Draw Elsa From Frozen
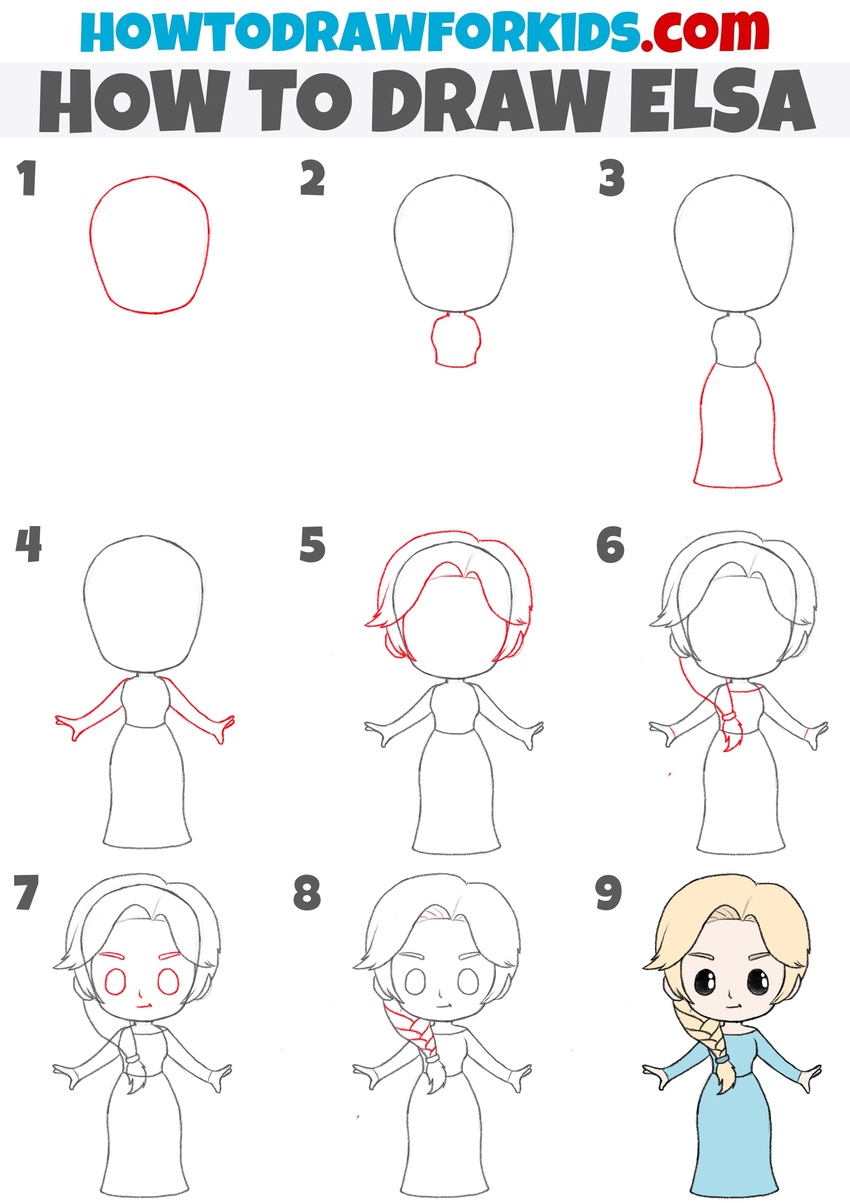
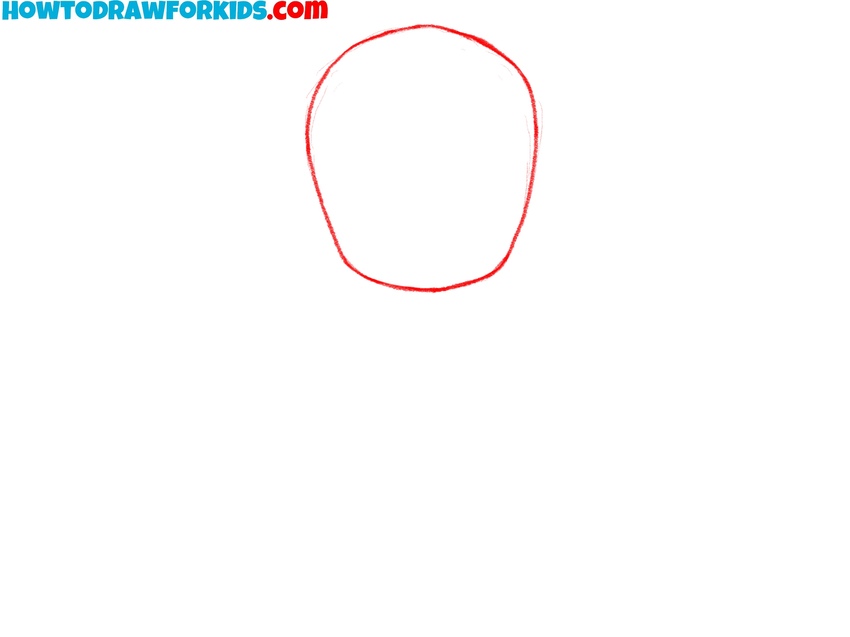
- Sketch the head of the character.
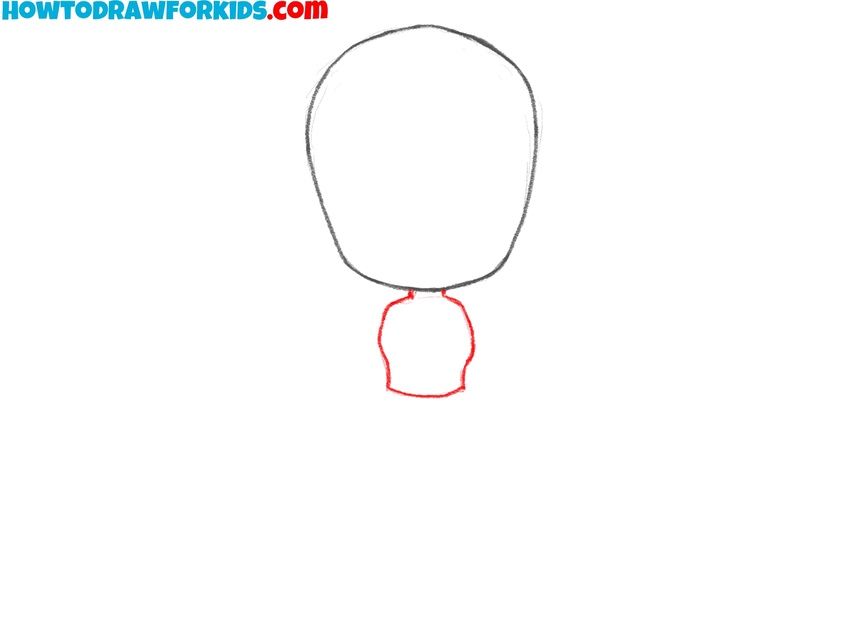
To start drawing Elsa, begin with the head shape by sketching a slightly elongated oval with a gentle point at the chin, forming a shape similar to an upside-down egg. Keep the lines light and smooth, as this shape will serve as the base for her facial features, and will be adjuster later.
- Sketch the neck and upper torso.
Next, draw Elsa’s neck as a narrow, short geometric shape extending down from the bottom of the head. Connect this with a simple rounded shape just below the neck, creating the top of her torso. This rounded shape should be slightly wider at the chest and narrower at the waist.
- Draw Elsa’s dress.
In this step, extend two long, slightly flared lines downward from the torso to draw the dress of Elsa. The lines should start narrow near the waist and gradually widen as they move downward to give the dress a flowing effect. Finish by connecting these lines with a slightly curved horizontal line at the bottom.

- Add the arms and hands.
Now, add Elsa’s arms by extending two slightly curved geometric shapes outward from each side of her upper body. At the end of each arm, draw the hands by forming small, delicate curves for the fingers. Each hand should have a gentle outward spread, giving the impression of open arms.

- Draw Elsa’s hair.
Begin shaping Elsa’s hairstyle by sketching the outline around her head, trying to create volume at the top and sides. For a more authentic look, make the outline slightly wavy. The hair should frame her face without covering too much of it.

- Add the braid and detail the dress.
To add Elsa’s signature braid, begin at the base of her head and draw two lines that curve over her shoulder. The braid should taper gradually as it reaches the end to illustrate the natural thickness of Elsa’s hair. Next, draw the top edge of the dress using a simple horizontal line on the top of the chest.

- Draw the facial features.
Start with two large, oval shapes to draw the eyes, positioned symmetrically near the middle of the head. Above each eye, draw thin, curved lines for her eyebrows. Add a small curved line for her nose and a gentle smile below to complete her face.

- Finalize the sketch and detail the braid.
Divide the braid into sections by drawing simple interlocking shapes, starting near her neck and continuing down over her shoulder. Each section should overlap slightly with the previous one, creating the illusion of a woven braid. Erase unnecessary guidelines and complete the sketch of Elsa.

- Color the drawing of Elsa.
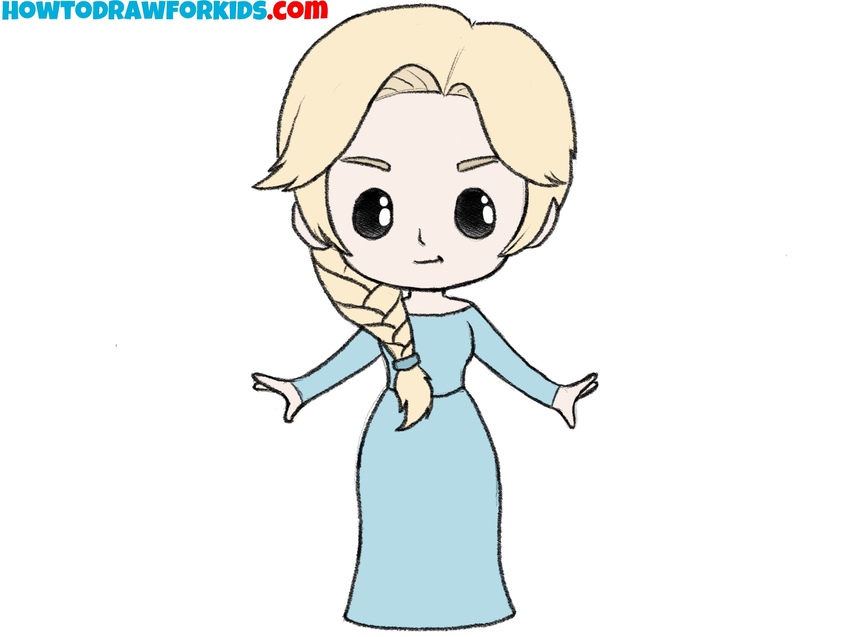
Use light shades of blonde for the hair of Elsa. Color the skin in tones, similar to colors from my example. For her dress, choose soft blue tones. Color her eyes black with highlights, or use a light blue. Then, you can add a soft pink or peach tone to her cheeks for warmth.
How to Draw Elsa: Video Tutorial
How to Draw Elsa: Additional Tutorials
If you’re interested in learning other ways to draw Elsa, I’ve included two additional tutorials that offer different styles and levels of detail. These alternative methods are perfect for experimenting with various approaches, whether you want a more simplified version or one with extra detail. Both tutorials demonstrate easy-to-follow steps, and allow you to practice and boost your drawing skills.
Simple Elsa Drawing Tutorial
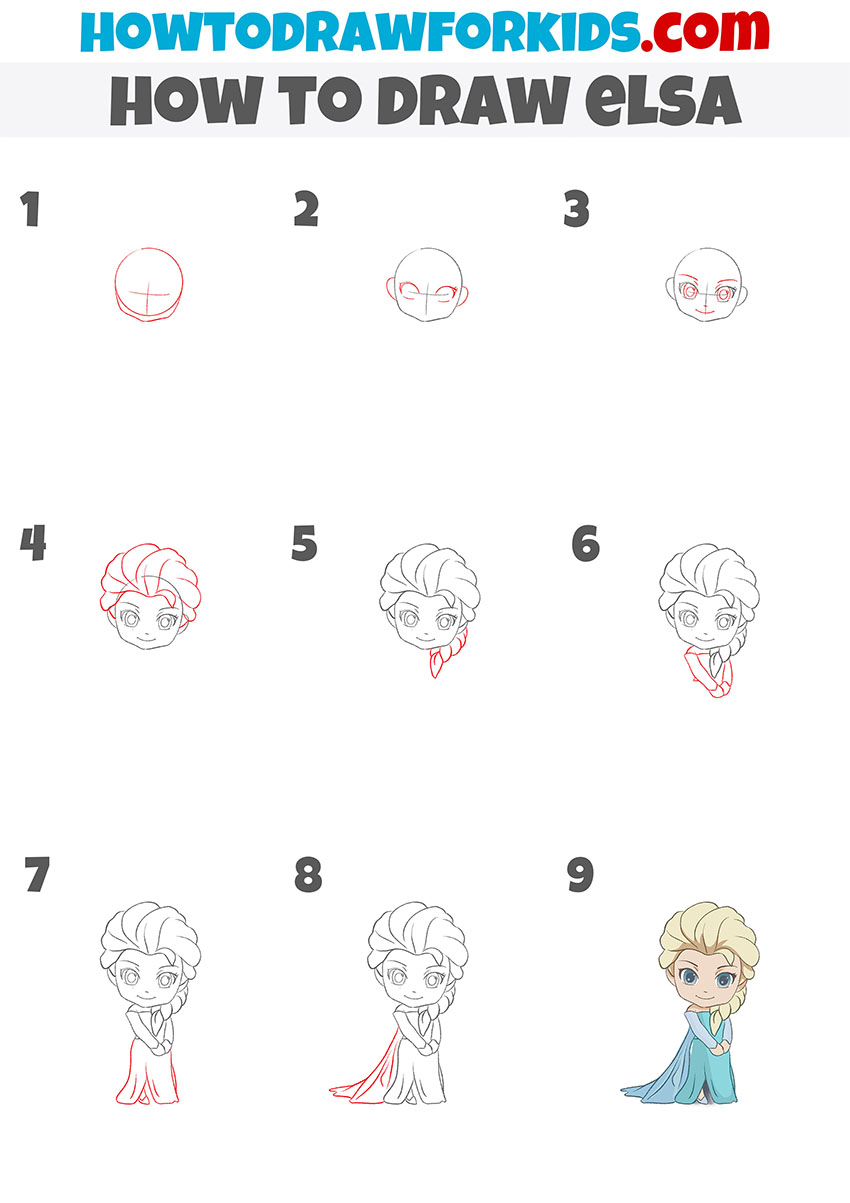
The main difference between this tutorial and the first one is the approach to drawing Elsa’s hairstyle and the level of detail in her dress. This tutorial focuses more on creating a chibi-style version of Elsa, with simplified features and exaggerated proportions, making it look cuter. Additionally, the steps in this tutorial are shorter, focusing more on outlining and less on details, with a simpler approach to her braid and clothing.
To start this easy tutorial on how to draw Elsa, sketch the face and ear outline by drawing a rounded line. Next, add her hair by drawing large, wavy shapes around her head, with smaller sections framing her face. Extend the hair on the left side to form Elsa’s braid, using curved interlocking lines for a woven look.
Then, draw the outline of her dress below the neck, widening the bottom to illustrate a flowing gown. Add a cape shape behind her dress, creating wavy edges. Next, draw Elsa’s facial features by adding large, rounded eyes, small circles for blush on her cheeks. Finalize the face drawing the mouth with a simple curve. Finally, color her hair a light blonde, dress in shades of blue, and add a soft skin tone to complete the drawing of Elsa.

Detailed Elsa Drawing Tutorial
In this tutorial you will learn how to draw Elsa in a slightly more detailed chibi style. This is a very easy way to draw and you will quickly get the hang of it. Here the character has unrealistic proportions, but is easily recognizable. Be careful at every stage of drawing and carefully draw all the lines that are marked in red.
This tutorial differs from the first two by focusing more on the detailed structure of Elsa’s facial features, while the first two tutorials simplify her face and show a more cartoonish look. This version includes more detailed steps for her eyes, mouth, and hair.
To draw Elsa in this detailed chibi style, begin by sketching an oval for her head and add horizontal and vertical guidelines to place her facial features accurately. Draw her ears on each side, aligning them with the guidelines. Add her large, almond-shaped eyes, positioning them symmetrically. Include thin eyebrows and a small mouth with a gentle smile.
Then, start illustrating her hair, sketching the top and drawing the braid with simple shapes. Add details to the braid, forming overlapping curved lines to create the woven effect. Continue with the outline of her upper body, positioning her arms in a crossed pose in front of her. Draw the outline of her dress, allowing it to flow down naturally. Finish with a long, flowing cape, adding a few curves for more detail. Color her hair light blonde, her dress in shades of blue, subtle peach tones for her skin and light blue for the eyes.
Conclusion
I hope you found this Elsa drawing tutorial helpful and that your drawing of Queen Elsa turned out well. I would appreciate it if you shared your results in the comments. Feel free to show your drawing to others.
Additionally, remember to download the PDF files, which include short versions of the additional tutorials along with other useful materials. You can use these downloadable instructions whenever you want to draw.

