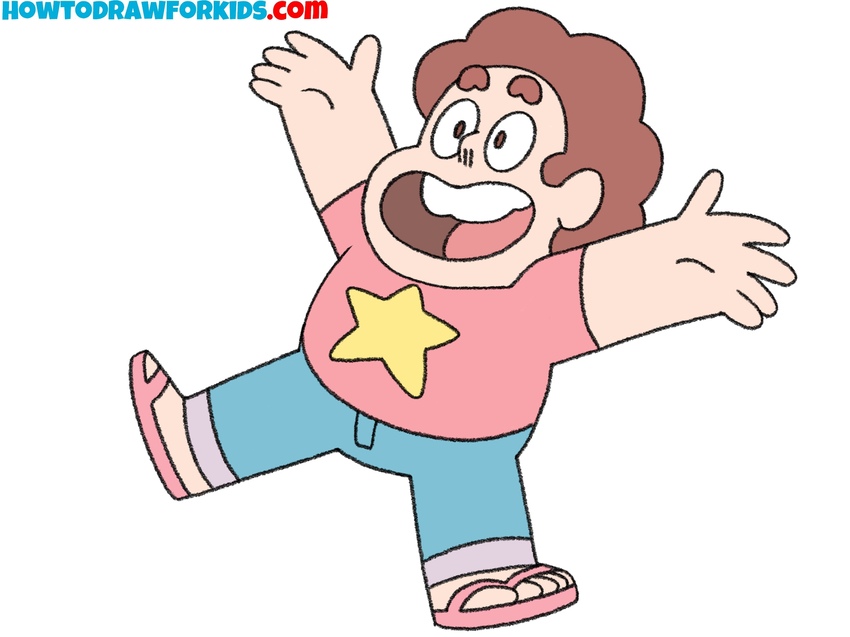
How to Draw Steven Universe
In this tutorial on how to draw Steven Universe, I’ll give you a few helpful tips that will teach you the basics of cartoon drawing.
How to Draw Steven Universe: Introduction
On my website, we often draw cartoon characters, create fun and interesting designs from various animated series, and learn the basics of cartooning. In this tutorial on how to draw Steven Universe, I want to share a few more important tips that will help you better understand how to create cartoon characters.
We’ll be drawing a Steven from a well-known animated universe, and along the way, we’ll look at how to simplify the human figure while still respecting the fundamental principles of drawing. The goal is to make the character easy to draw without losing what makes them recognizable.
Once again, we’ll learn how to reduce facial features and body shapes to their simplest forms, helping make the drawing process easier while keeping the character’s personality and look intact. Animation styles vary, and different artists use different methods of simplification.
We’ve already looked at several ways to draw cartoon characters, and this lesson on how to draw Steven Universe will help build on those skills even further.
Steven Universe Drawing Tutorial
Materials
- Pencil
- Paper
- Eraser
- Coloring supplies
Time needed: 40 minutes
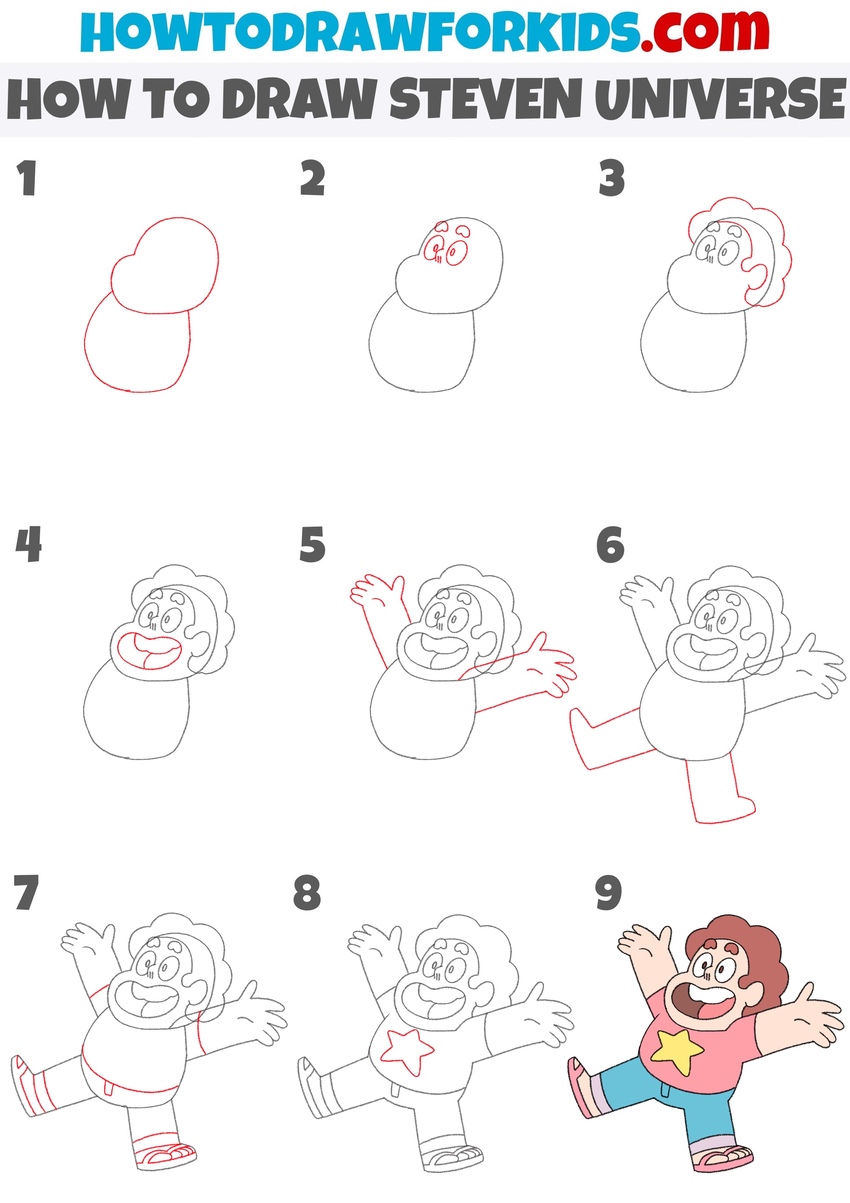
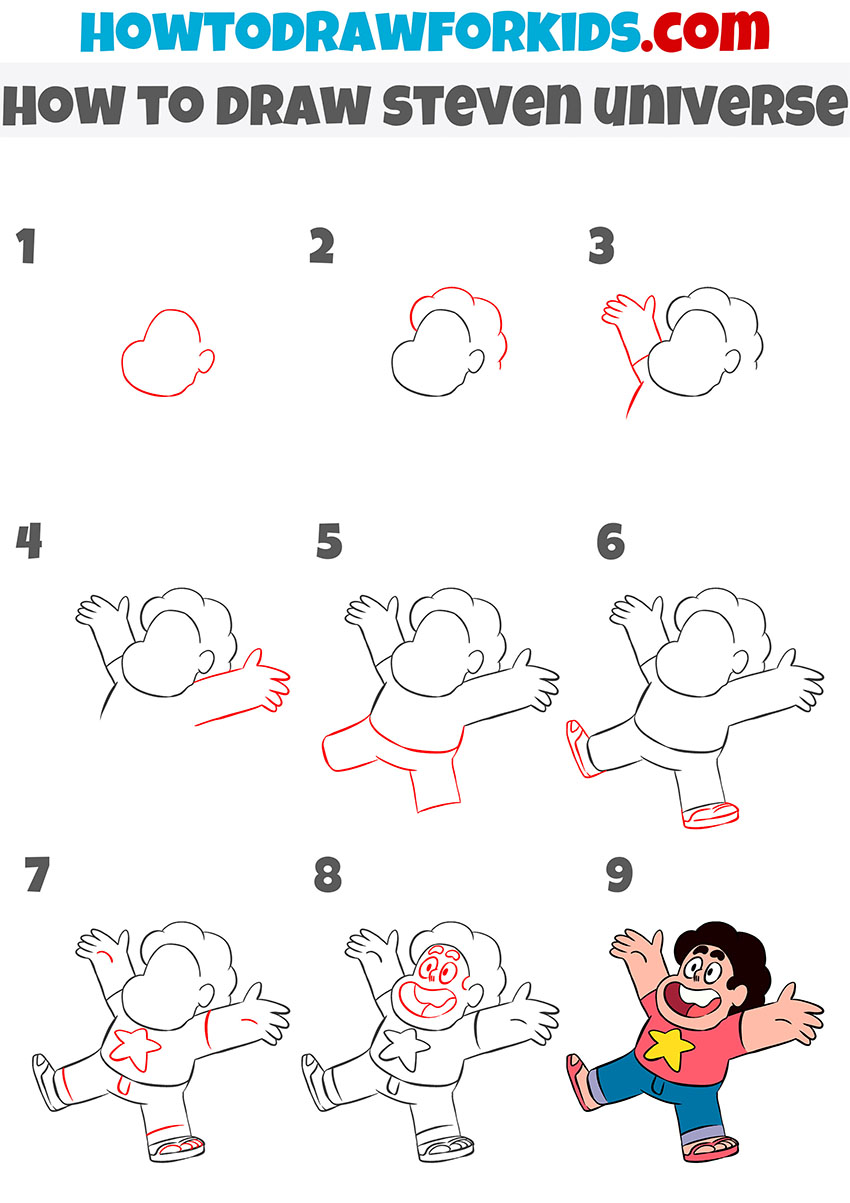
How to Draw Steven Universe
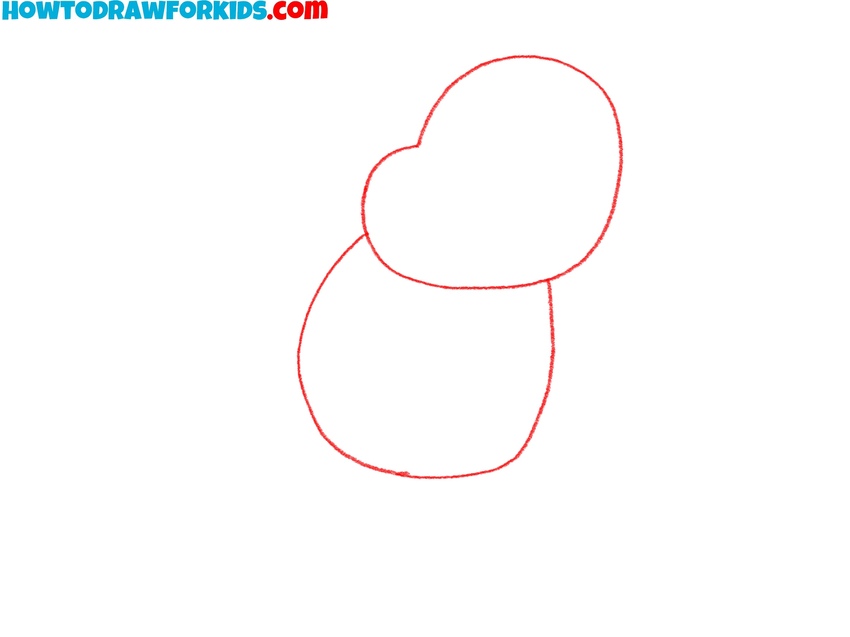
- Sketch the head and torso.
First, sketch the basic shapes that will serve as the foundation for Steven’s figure. Start with the head – a rounded oval shape tilted slightly to the right. Underneath the head, draw a larger oval shape for the body, overlapping the bottom part of the head. This shape should resemble a slightly squished circle.
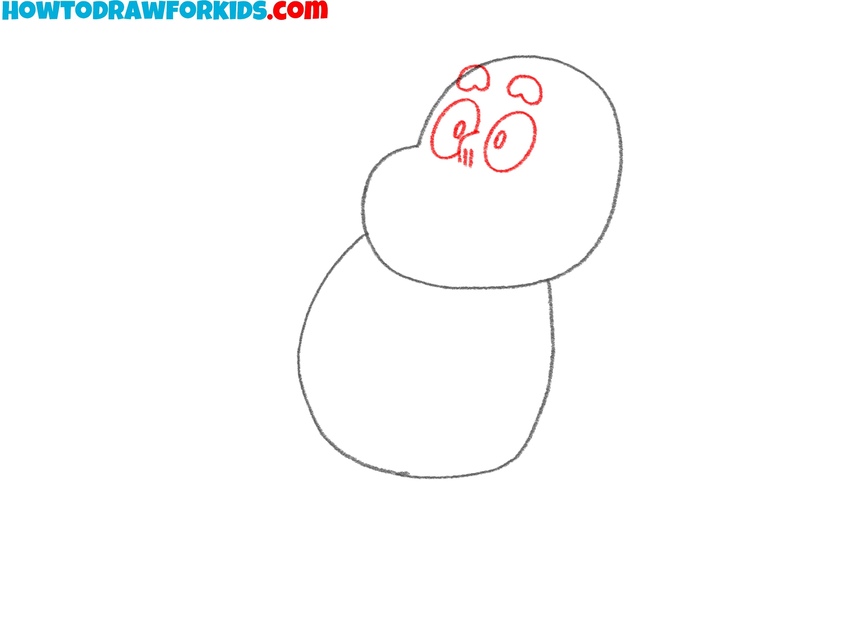
- Add the facial features.
Now, draw the cartoon eyes of Steven, positioned toward the upper center of the head. Draw them side by side, leaving a small gap between them. Inside each eye, sketch a smaller oval for the pupils. Above the eyes, draw thick curved eyebrows. Between the eyes, just below the eyebrows, draw a simple curved nose.
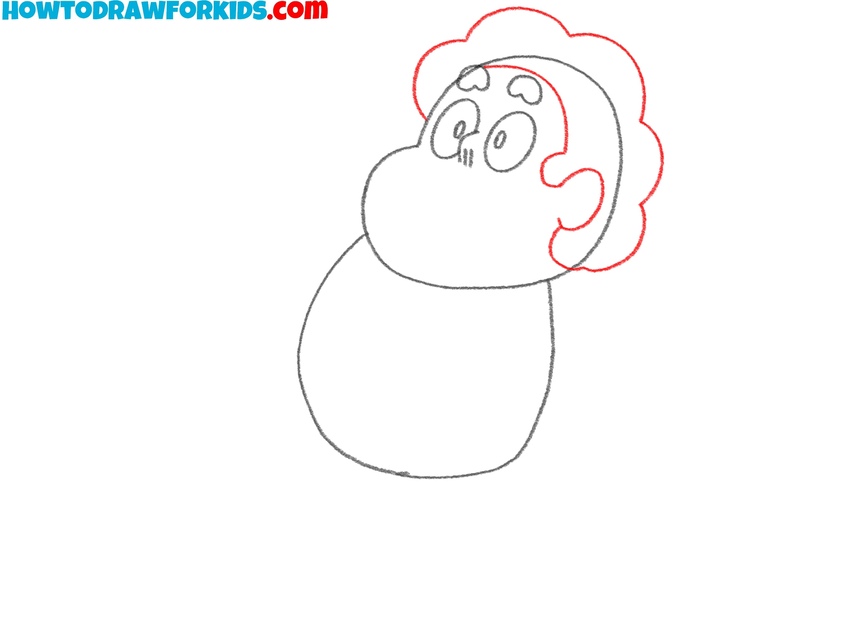
- Draw Steven’s hair and ears.
Steven’s hair is big and fluffy. So draw the hair as a series of large, rounded bumps around the top and sides of his head. These bumps form a soft, cloud-like outline and should stick out slightly from the head shape you drew earlier. Once the hair is complete, add a half-circle shape for the ear.
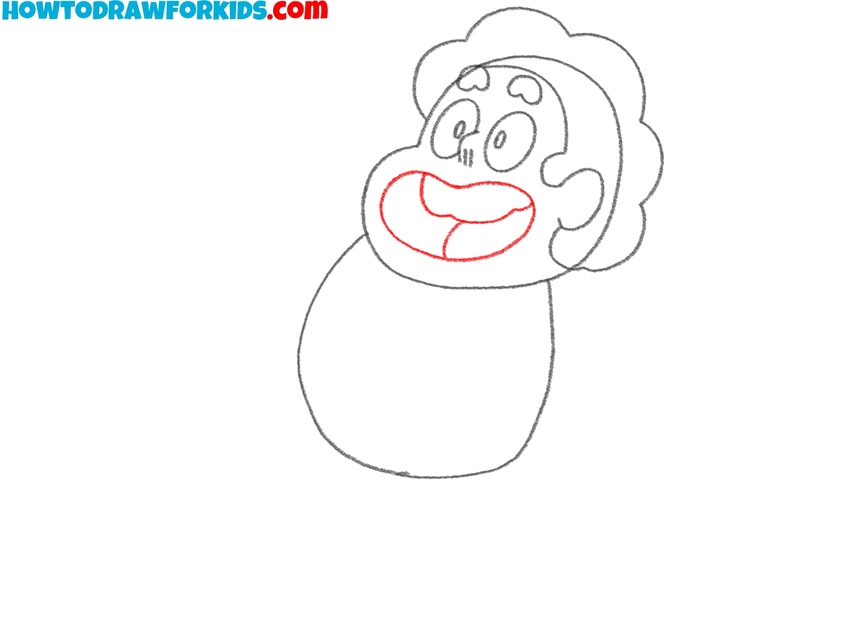
- Add the mouth and tongue.
Now, draw the mouth, shaped like a wide sideways “D.” Place it beneath the nose. Make the corners of the mouth reach out wide to show excitement or laughter. Then draw a rounded, curved tongue at the bottom of the open mouth. Keep all the lines smooth and rounded.
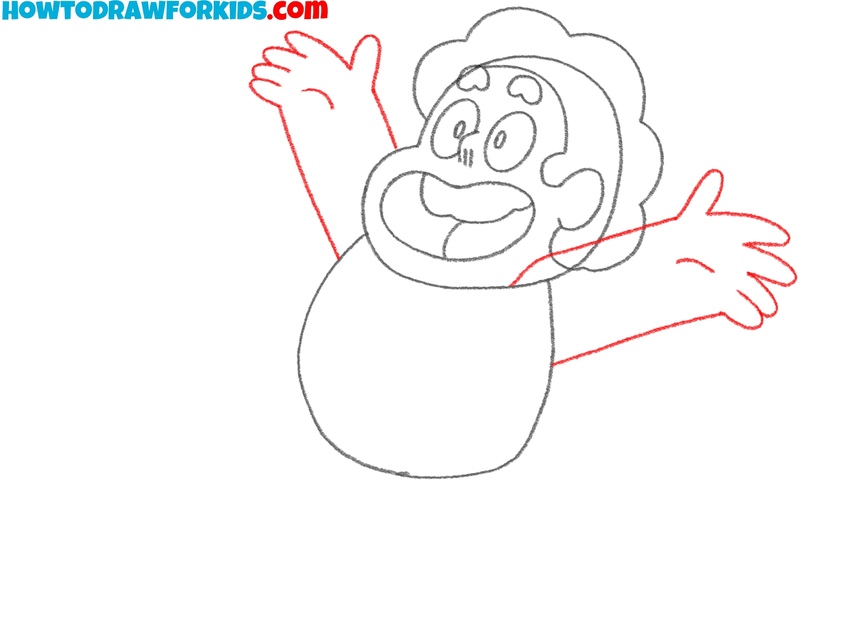
- Draw Steven’s arms and hands.
Now sketch Steven’s arms raised upward in an excited, open pose. Extend long straight lines up from the shoulders, tapering it slightly toward the wrists. Draw the hands as two exaggerated mitten-like shapes with four fingers. Since this is a cartoon style, you don’t need to worry about exact finger details.
- Add the legs and feet.
Sketch two wide rectangular shapes down from the bottom of Steven’s body to form his legs. Position the legs so they point outward. After that, draw the feet as two simple flat forms. Each foot is drawn simply and should feel slightly oversized. Keep the legs wide enough.

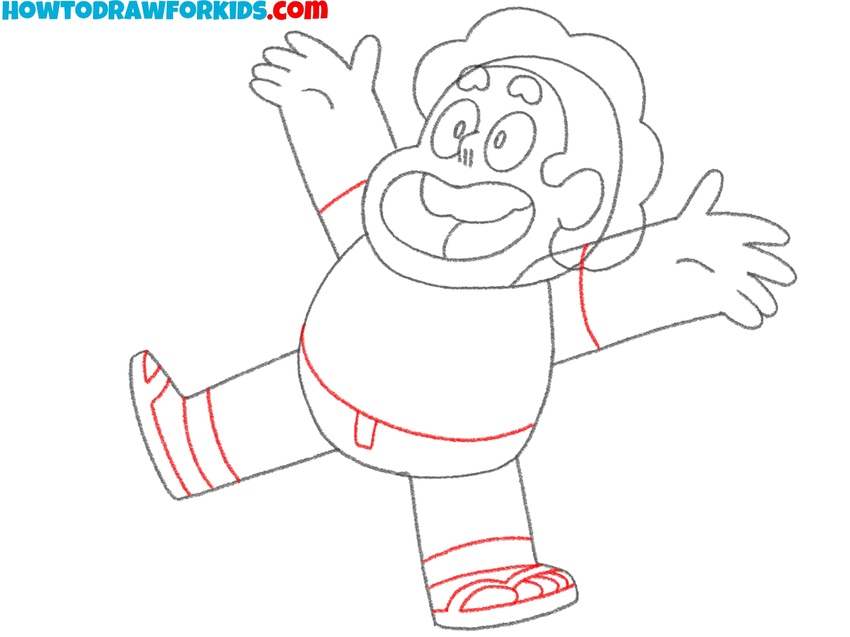
- Draw Steven’s clothing details.
First, sketch the bottom edge of his shirt with a curved line across his waist. Then, add the edges at the end of each sleeve with two short lines. Now move on to the shoes – draw two straps on each foot to make them look like sandals. Add the sole lines and shape of the toes to the bottom of each shoe.
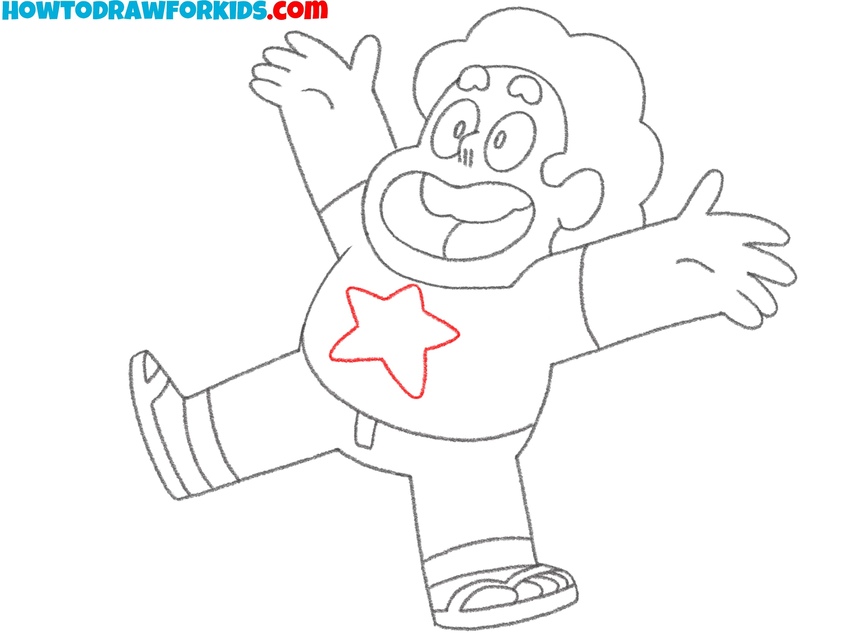
- Add the star and finalize outlines.
To learn how to do it in detail, visit my star drawing tutorial. Make sure it fits neatly within the shirt. Keep the shape bold and clear, as it’s one of the most important details of his outfit. You can go over your entire Steven Universe drawing with a darker pencil or marker now to finalize all the outlines.
- Color the drawing.
Use a dark reddish-brown for his curly hair and light pinkish-beige for his skin tone. Color the shirt a bright pink or red, with a bold yellow for the star on his chest. His pants should be a medium blue, and the sandals can be light brown or pink with darker soles. Add a soft pink inside the mouth and tongue.

Easy Steven Universe Drawing Tutorial
This version of the tutorial on how to draw Steven Universe is a simplified and easier method compared to the first one. It uses fewer lines, avoids extra details, and focuses on basic shapes and simpler outlines. The facial features are drawn last, and the entire body is completed before any inner details are added. The pose and general structure remain similar, but this version is more accessible for beginners. Colors are also slightly different – shoes and shirt details vary, and the approach to proportions is more blocky and compact.
To follow this method and learn how to draw Steven Universe, begin by outlining the shape of the head and ear as one connected figure using curved lines. Add the basic hair shape around the head with soft rounded edges. Draw one arm extended upward with a mitten-style hand, then draw the other arm pointing to the side.
Complete the body by sketching a rounded torso, then draw both legs extending from the bottom. Add shoes with thick soles and a simple strap design. Outline the shirt and pants using curved lines and add a star shape in the center of the shirt. After the body is complete, draw the eyes, eyebrows, nose, and mouth. Color the character following the example shown below.
Conclusion
Today’s lesson on how to draw Steven Universe was fairly simple, and I truly hope it inspired you to become a cartoon artist – or at least helped you learn the basics of cartoon drawing. Now you should be able to draw this character with ease, or even come up with your own character in a similar style.
Let me know how easy it was for you to draw Steven, and which of the two drawing tutorials you liked more. Also, don’t forget to share this lesson with your friends and classmates – they might also want to learn how to draw Steven Universe or practice drawing cartoon characters.
And if they’re interested in drawing something else, they’ll find plenty of fun and useful content on my website. I regularly post drawing lessons, coloring pages, and other creative, helpful materials. To stay updated on new tutorials and content, make sure to follow me on social media.