How to Draw the Cat in the Hat
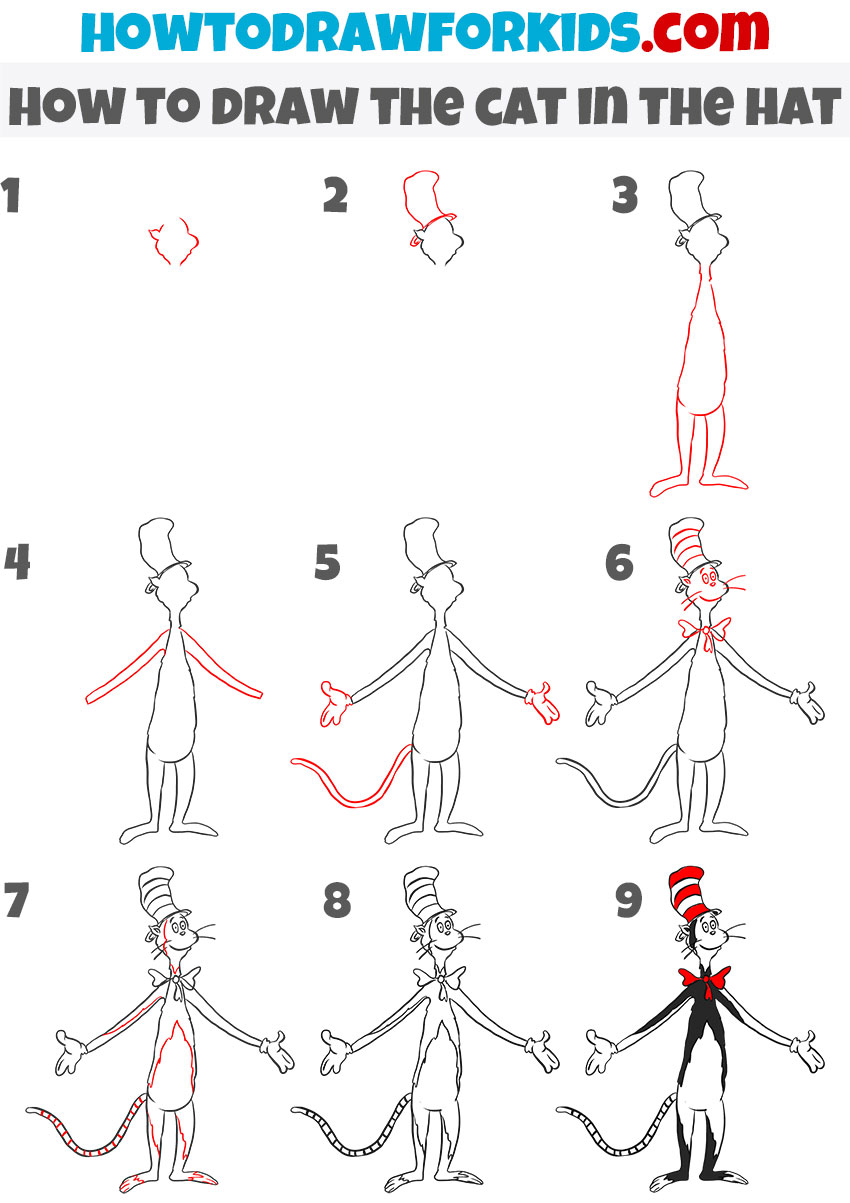
This step-by-step tutorial demonstrates how to draw the Cat in the Hat, a tall, anthropomorphic cat character from Dr. Seuss’s books.

How to Draw the Cat in the Hat: Introduction
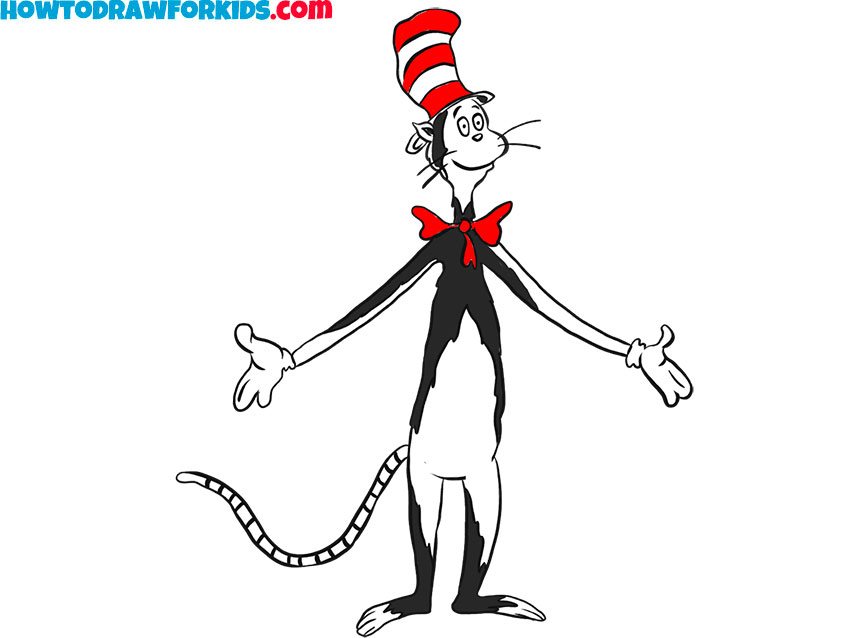
This tutorial explains how to draw the Cat in the Hat. In this lesson, you can enjoy drawing and practice your skills. The figure features a cat that performs tricks, ready to impress with unique transformations. The cat has a tall hat, gloves, and a bow tie.
You will follow this task step by step, minimizing difficulties. This figure is simple, making it suitable for children and beginner artists. Traditionally, we will not go into details, but will depict only the most important parts of the character’s appearance.
When drawing the Cat in the Hat, be very careful. This character has an anthropomorphic form, meaning you need to depict a figure that combines human and cat features, and these elements should blend as seamlessly as possible.
Also, keep in mind that, in addition to the tall figure and cat-like features, this character includes distinctive details such as a tall hat and a striped pattern across the entire body.
The Cat in the Hat Drawing Tutorial
Materials
- Pencil
- Paper
- Eraser
- Coloring supplies
Time needed: 35 minutes
How to Draw the Cat in the Hat
- Draw the outline of the head.
Begin by drawing the basic outline of the Cat in the Hat’s head. Keep this shape simple, focusing on illustrating the overall contour of the head without any added details. This outline is very important as it helps detail the structure and positioning of the character’s facial features in the following steps.

- Draw the hat of the character.
Position the hat directly above the head outline from the previous step, creating a long, cylindrical shape with a slight tilt. Don’t forget to draw the brim of the hat using a couple of slightly curved lines. The hat is a distinctive feature of the Cat in the Hat, so aim to draw its unique shape accurately.

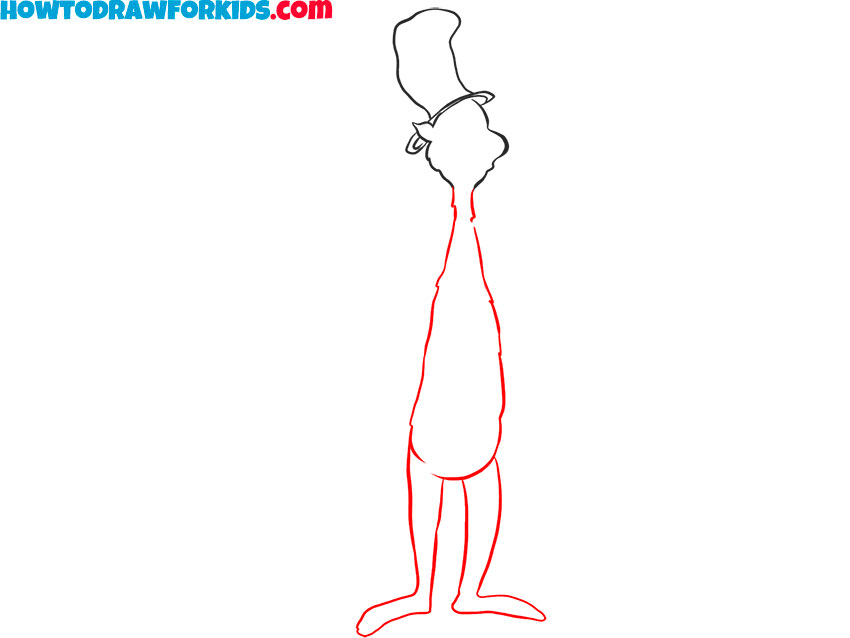
- Draw the torso and legs.
Now, move on to drawing the main outline of the Cat in the Hat’s body. First, sketch the neck, then create a long, slender shape extending down from the head, widening slightly at the waist. Next, split the lower part of the torso outline into two sections to represent the legs, finishing with long, flat feet.
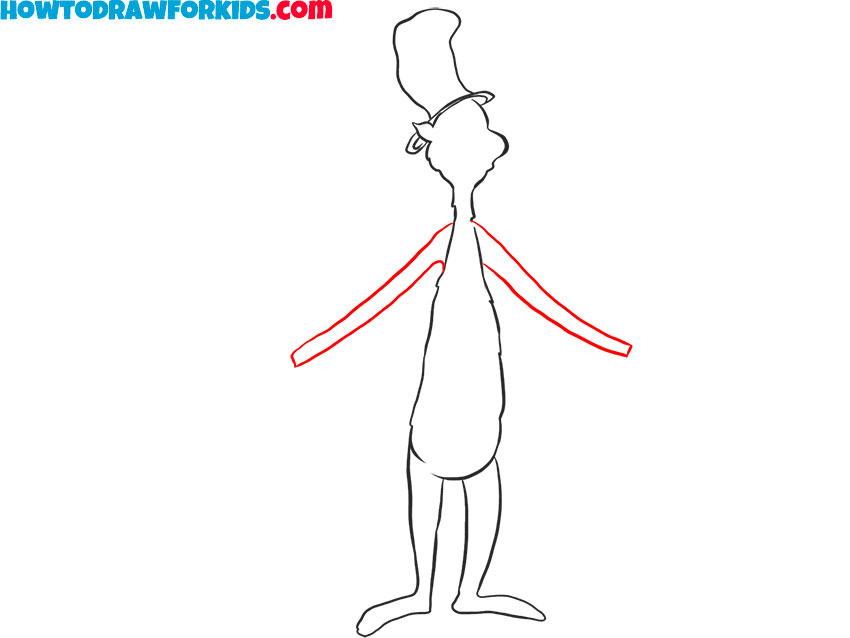
- Add the long and thin arms.
Draw two elongated shapes extending from each side of the body, angled slightly outward to create a welcoming gesture. The arms should be thin and long, reaching around waist level and curving gently to create open posture.
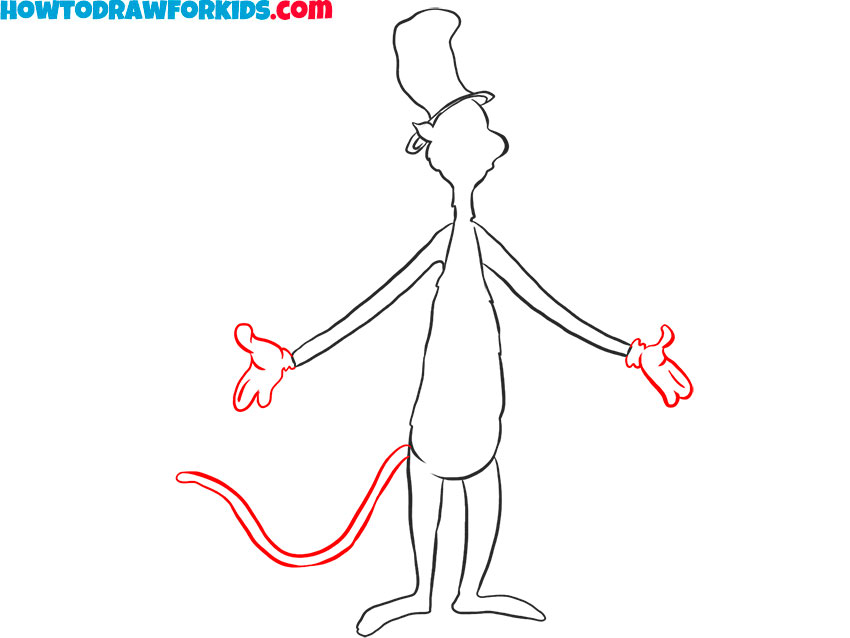
- Draw the hands and tail of the Cat in the Hat.
Now, add the hands at the ends of the arms and draw the Cat in the Hat’s tail. To draw the hands, create mitten-shaped palms and rounded fingers, positioned at the end of each arm outline. Then, add a thin, Draw the curved line extending from the lower back to draw the cat tail, curving slightly to indicate movement.
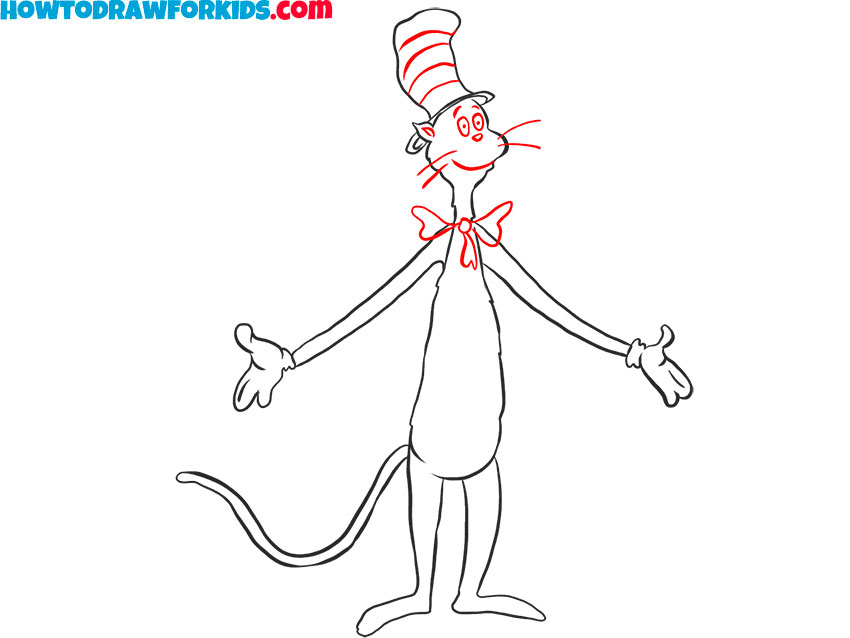
- Detail the head of the Cat in the Hat
Start by drawing the cat eyes, nose, and mouth on the face, giving the Cat in the Hat face recognizable look. Keep the facial features simple and clear, with eyes that are round and cartoonish. Then, draw the bow tie around the neck, with two ends extending outward.
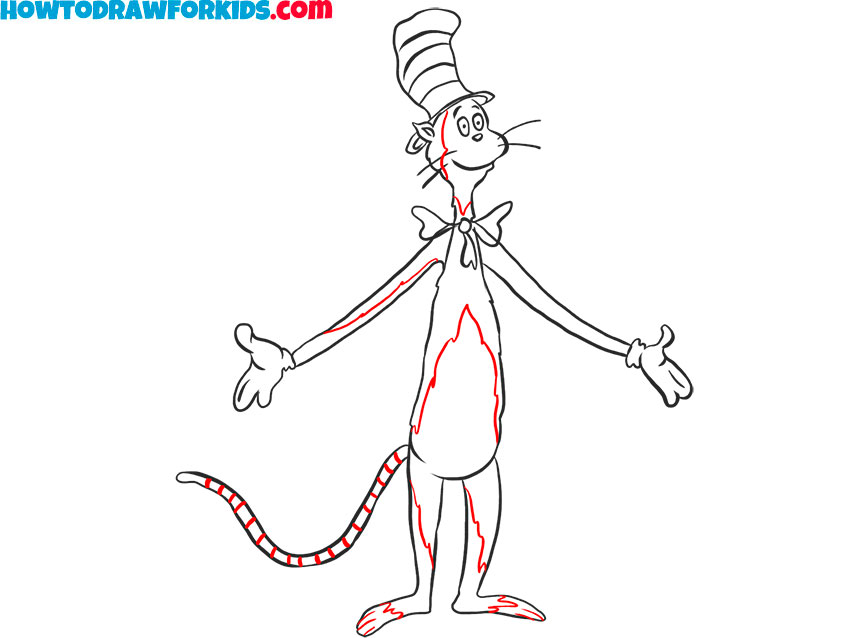
- Draw the patterns on the body.
In this step, draw horizontal lines along the hat to create the recognizable striped pattern. Then, add a few simple lines along the body to indicate fur texture. These details help to illustrate the distinct appearance of the Cat in the Hat. Keep the lines smooth and simple.
- Finalize the outlines of the sketch.
Go over your Cat in the Hat drawing, refining the main lines and erasing any unnecessary guidelines. Focus on smoothening the outline, leaving clean lines. This step prepares the drawing for the final stage. This is the step where you can add missing details and correct the necessary lines.

- Add color to the Cat in the Hat.
Color the hat with alternating red and white stripes, and fill in the bow tie with a bright red shade. Color the body of the Cat in the Hat in black and white, as shown in my example. These colors are typical for this character, and will give him a truly recognizable look.
Additional Content
We hope the Cat in the Hat drawing turned out well and that you are satisfied with the result. Now you can share this Cat in the Hat drawing with your friends, and I look forward to providing you with new drawing lessons to help improve your skills.
For your convenience, we have prepared a PDF file containing a condensed version of the lesson. You can download it and practice drawing at any time, either on your own or with friends.
Conclusion
The lesson on drawing the Cat in the Hat is now complete. Let me remind you that on my site, you can find hundreds, even thousands, of different drawing lessons. For example, you can draw a cat to practice your skills in depicting these animals, or try drawing a person to further develop your drawing abilities.

