How to Draw the World Tree
Learn how to draw the World Tree, a legendary and massive tree from mythology that connects the heavens, earth, and the underworld.
How to Draw the World Tree: Basic Information
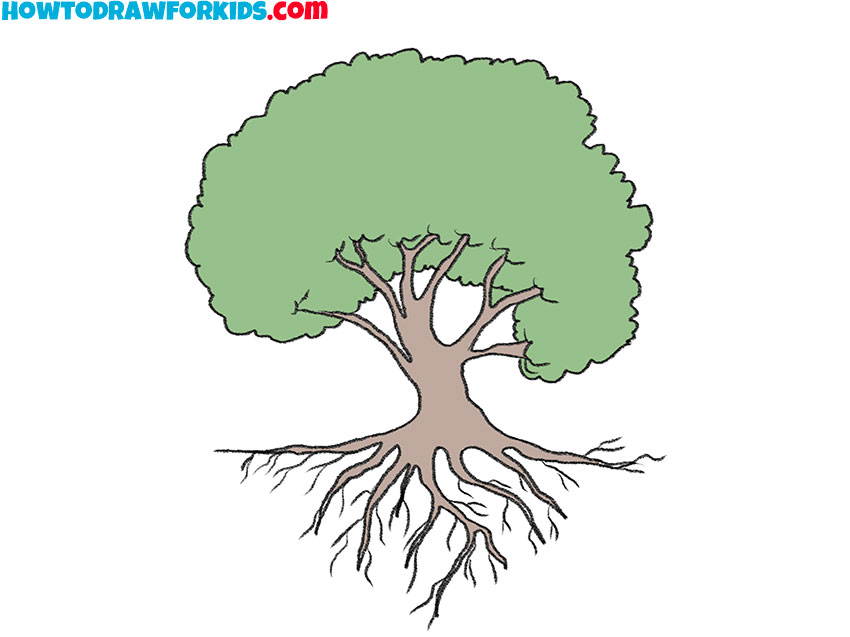
In this tutorial, young artists will be guided through the process of drawing the World Tree, a powerful symbol of life, growth, and connection that appears in various cultural myths and legends. The World Tree is often imagined as a massive, ancient tree that connects different realms or layers of existence, such as the heavens, the earth, and the underworld.
This lesson is very similar to my tree drawing tutorial, but has some differences. It begins with the foundation – the roots. These roots symbolize the tree’s deep connection to the earth. As the drawing moves upward, attention shifts to the trunk, which serves as the central support of the World Tree.
Finally, the branches reach out toward the sky. Artists will learn to draw these branches spreading wide, representing the tree’s vast reach and the idea of connection to the heavens or higher realms.
The World Tree has very different images in different cultures and works, and of course, this lesson shows only one of these options. But using the knowledge gained in this World Tree drawing lesson, young artists will be able to illustrate their own version of the World Tree.
World Tree Drawing Tutorial
Materials
- Pencil
- Paper
- Eraser
- Coloring supplies
Time needed: 30 minutes
How to Draw the World Tree
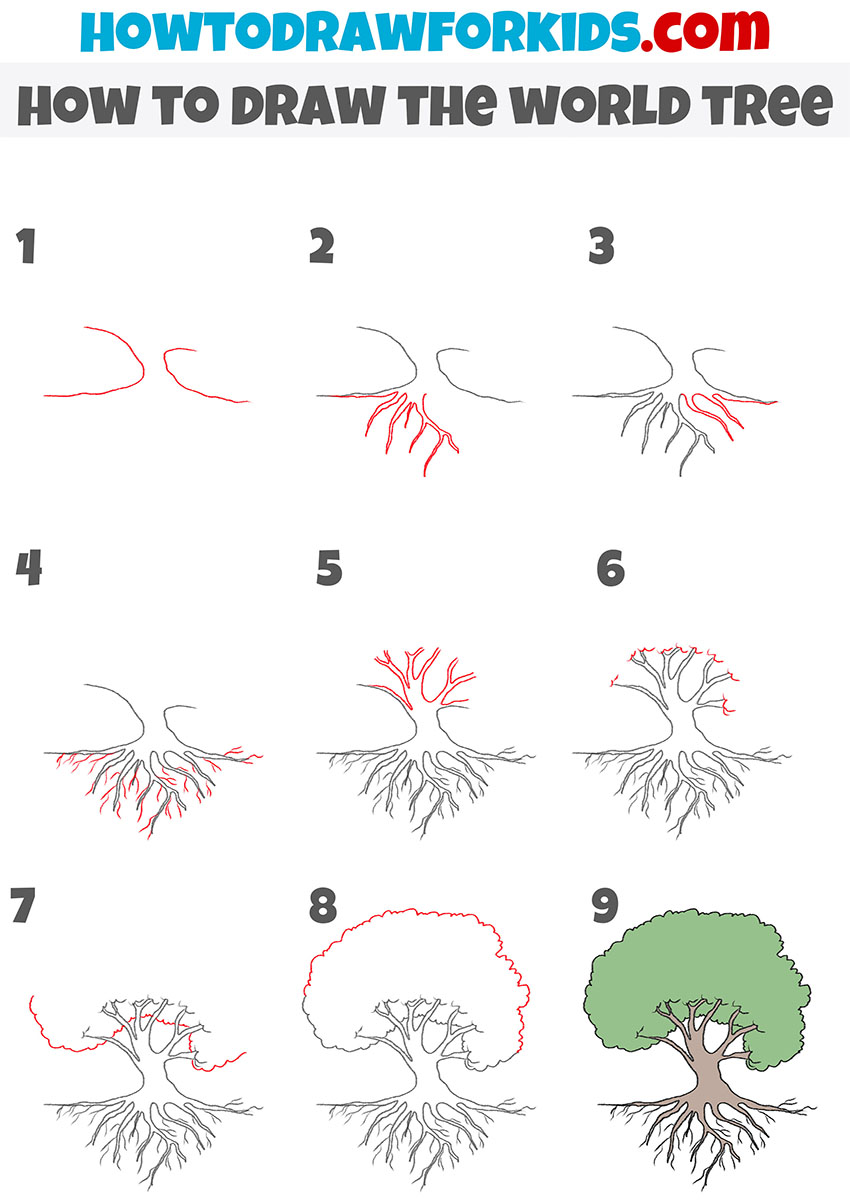
- Sketch the trunk of the World Tree.
Start drawing the World Tree with two slightly curved lines that form the trunk and hint at the initial structure of the sketch. These lines should angle outward from the center and gently curve, creating a wide base for the roots of the tree.

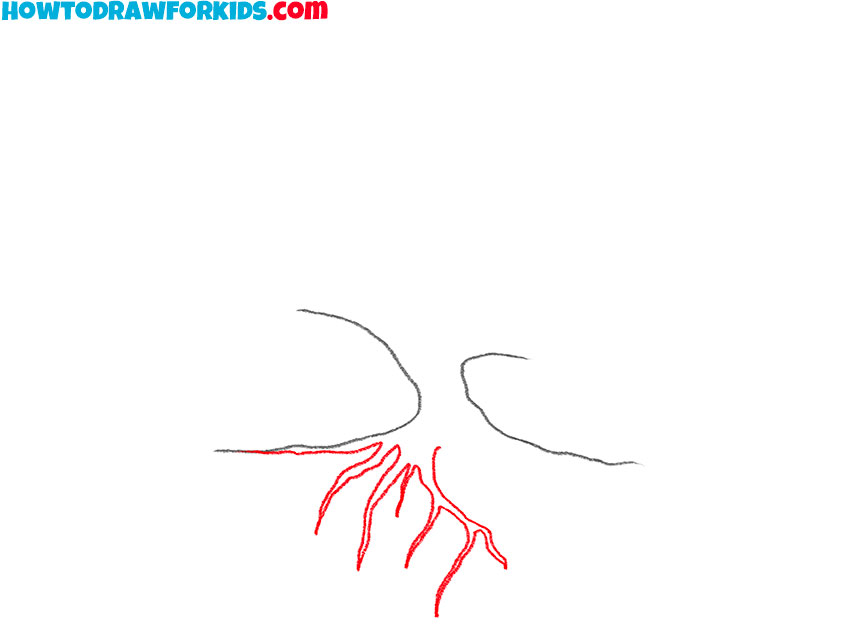
- Draw the roots on the left side.
Now, add the first set of roots extending downward from the base structure. Draw the roots of the tree as multiple lines branching out from each side of the trunk’s base. Make these roots curve and split into smaller lines as they spread out.
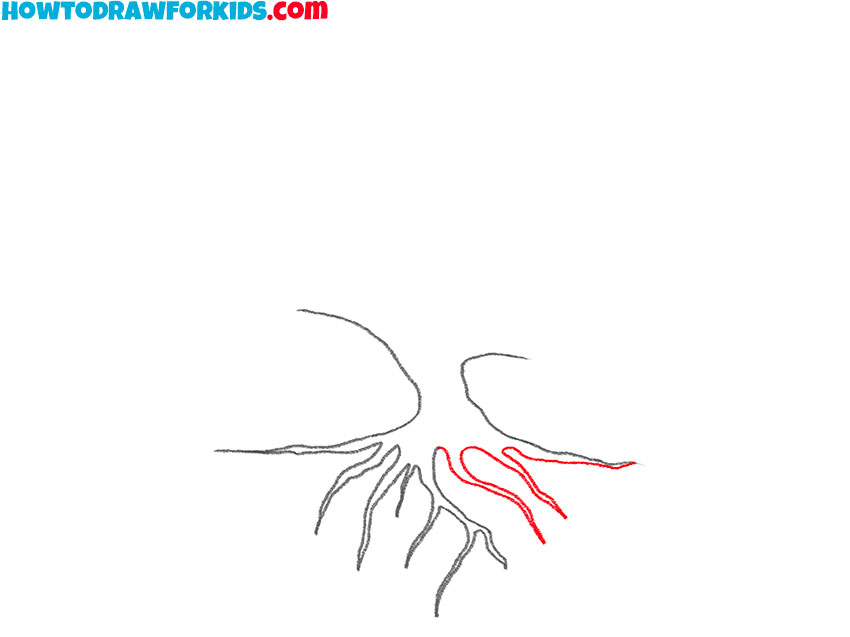
- Draw the roots on the right side.
Continue adding more roots to create a fuller, more intricate root system. Extend lines from the existing roots, branching them out further to cover a wider area. The roots should spread unevenly to maintain a natural look, with some curving deeper or longer than others.
- Complete the roots.
Finish detailing the roots of the World Tree by filling in any remaining gaps and drawing thinner root branches, creating a dense, interwoven appearance. Each root should have multiple branches extending outward to cover a wide base below the trunk.
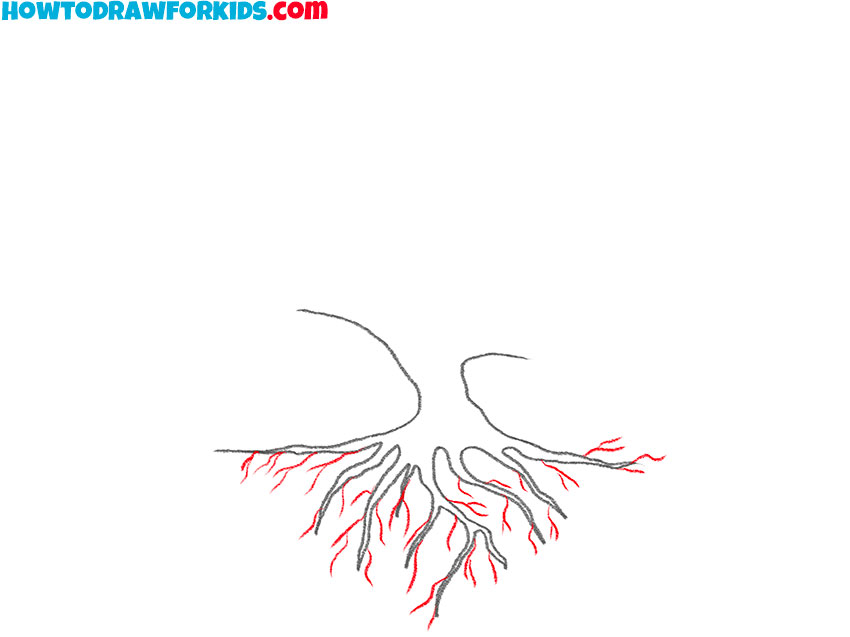
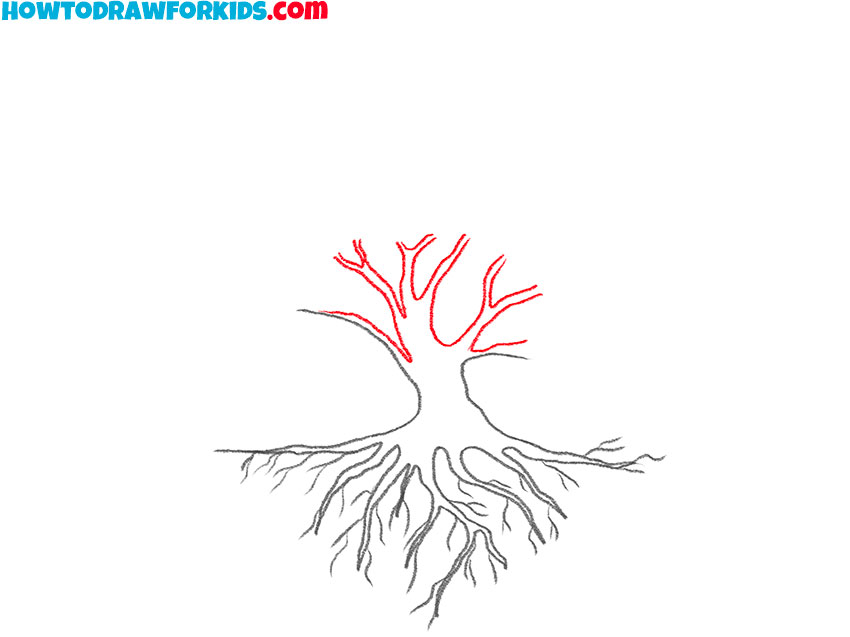
- Draw the branches of the World Tree.
Move upward to detail the trunk and draw the branches of the World Tree. From the top of the trunk, add several large branches that split off and stretch upward. These branches should have a strong, sturdy look. Give the branches a very uneven and twisted look for greater realism.
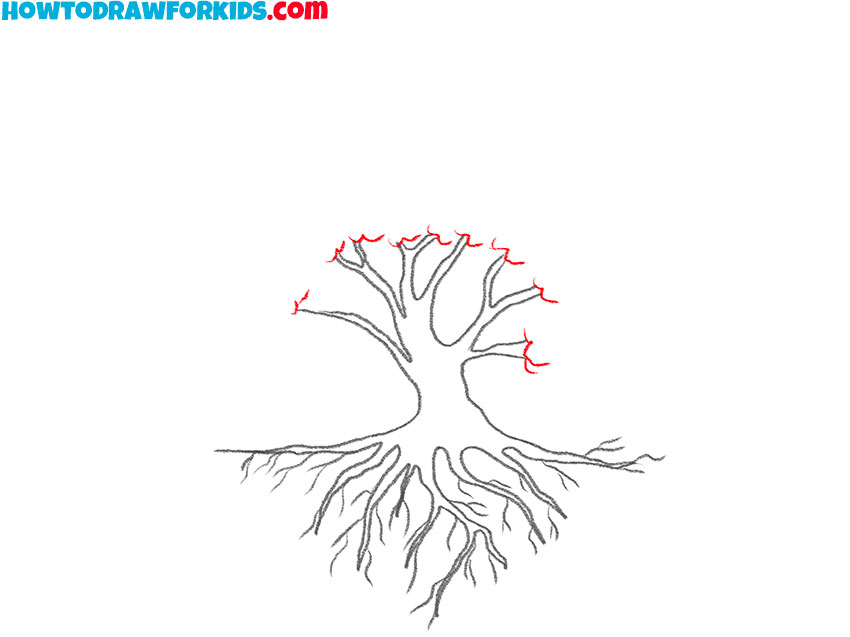
- Start the crown at branch intersections.
Begin drawing the crown of the World Tree, focusing on where it meets the branches. To do this, draw small curved lines at the ends of the branches from the previous step, depicting where the branches are hidden under the foliage.
- Define the bottom edge of the crown.
Draw the outline of the bottom edge of the crown to establish its shape. Using a long and irregular line, form a smooth, rounded border that will contain the bulk of the foliage. You do not need to draw the leaves separately, instead, depict their outlines in the form of a large number of curves of different sizes.
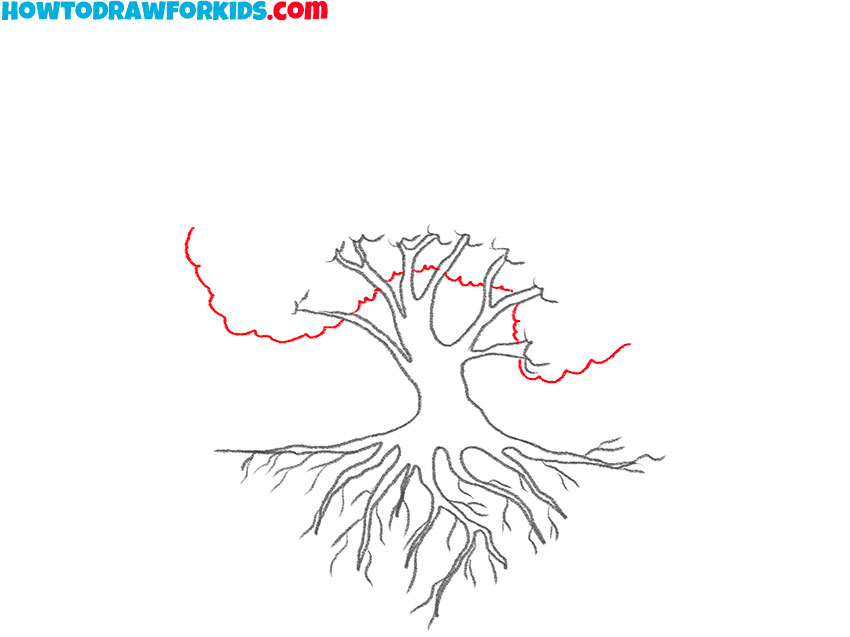
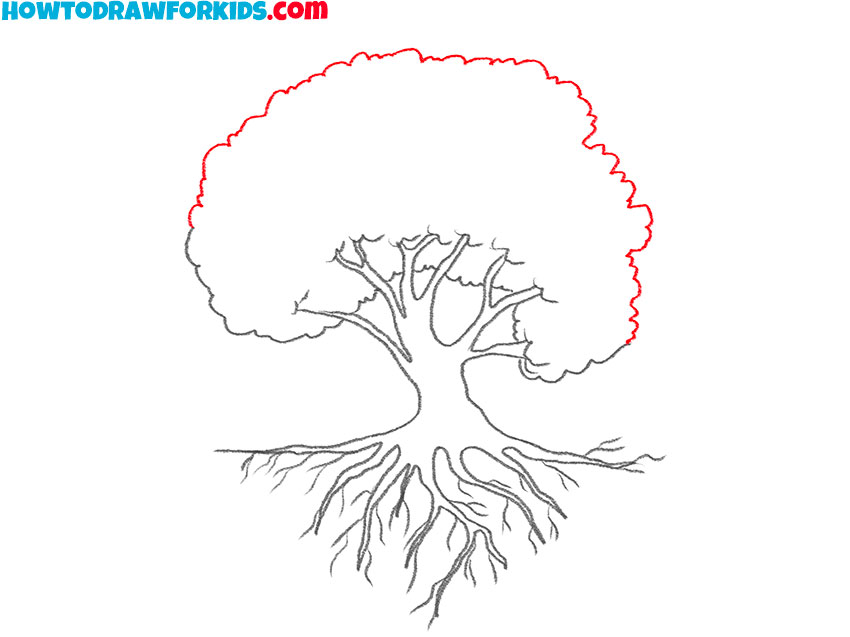
- Draw the top outline of the crown.
Now, draw the top outline of the crown to complete the canopy’s shape. Follow along the branches, creating a rounded, slightly wavy line that mimics the natural look of a leafy tree top. This top outline should close the crown, giving it a full and lush appearance.
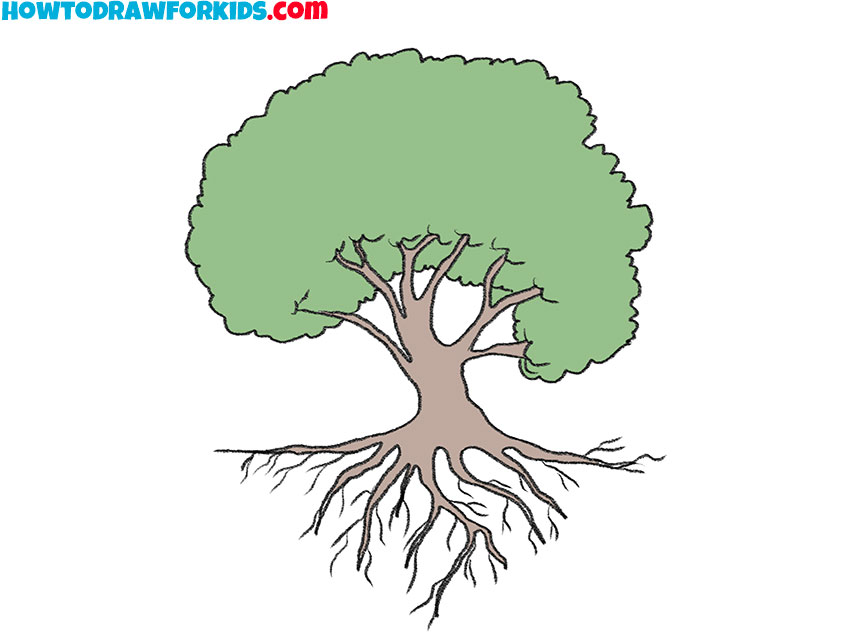
- Add colors to the drawing.
Use shades of green for the crown to give a natural and realistic look to the foliage. For the trunk and roots, apply brown tones. You can give your World Tree drawing a more realistic look by adding shadows to the bottom of the tree’s crown.
Additional Content
I’ve created a complimentary PDF file for this World Tree drawing lesson. It’s a concise version of the tutorial, designed to be easily downloadable so that you can enjoy learning to depict the World Tree anytime, anywhere – even without internet access.
How to Draw the World Tree: Professional Tips
To improve your World Tree sketch, you can add details that give the tree more unique look. Begin by shading the leaves to add dimension. Use various shades of green, applying darker greens to areas that would naturally fall in shadow and lighter greens for areas that would catch more light. This contrast will create a full look for the foliage.
Next, you can add texture to the bark to give the trunk a more rugged, aged appearance. This can be achieved by drawing crisscross lines along the trunk to mimic the natural texture of bark. These lines can be adjusted in thickness and density to show areas that might be more worn or knotted. To learn how to do this, visit my tree bark drawing tutorial.
The roots of the tree can be detailed further by drawing small lines along their curves to make them appear stronger and more realistic. These roots should look as if they’re stretching deep into the earth, anchoring the tree firmly.
To add an extra details, consider including small animals around the tree, such as squirrels or birds. These animals can be sketched as peeking from the branches or resting near the roots. To learn this, visit my squirrel drawing tutorial and lesson on how to draw a bird.
These additional touches transform your sketch from a simple drawing into a more detailed depiction of the World Tree. Practicing these details will help create more unique and interesting sketches.
Conclusion
If you enjoyed drawing the World Tree, you may also find value in other tutorials on my website, such as lessons on drawing a rose or learning to draw grass. Each lesson provides an opportunity to improve your drawing skills and learn new techniques.
To stay updated with new tutorials, tips, and art project ideas, follow me on social media. You can subscribe to my YouTube channel for video tutorials and follow me on Pinterest for additional inspiration and drawing resources. Regular updates will help you keep your drawing skills active and inspire your next project.

