How to Draw a Flying Dragon
Let’s learn how to draw a flying dragon step-by-step and find out how to turn an ancient mythical monster into a cute flying creature.

How to Draw a Flying Dragon: Basic Information
Usually the dragon is depicted as a formidable and dangerous creature, but in this drawing the dragon looks very cute, funny, and he is not scary at all.
Emphasizing rounded shapes, gentle curves, and minimalistic features, the tutorial transforms a traditionally fearsome creature into a friendly and whimsical character.
Capturing the dynamic motion of a flying dragon teaches how to illustrate movement. This tutorial shows how to position the body, tail, and wings to create the illusion of flight, improving the sense of action in your artwork.
Adding spikes, claws, and wing webbing introduces texture and detail. This practice will train you to create realism in your drawings and helps you master the art of detailing intricate elements.
Flying Dragon Drawing Tutorial
Materials
- Pencil
- Paper
- Eraser
- Coloring supplies
Time needed: 30 minutes
How to Draw a Flying Dragon
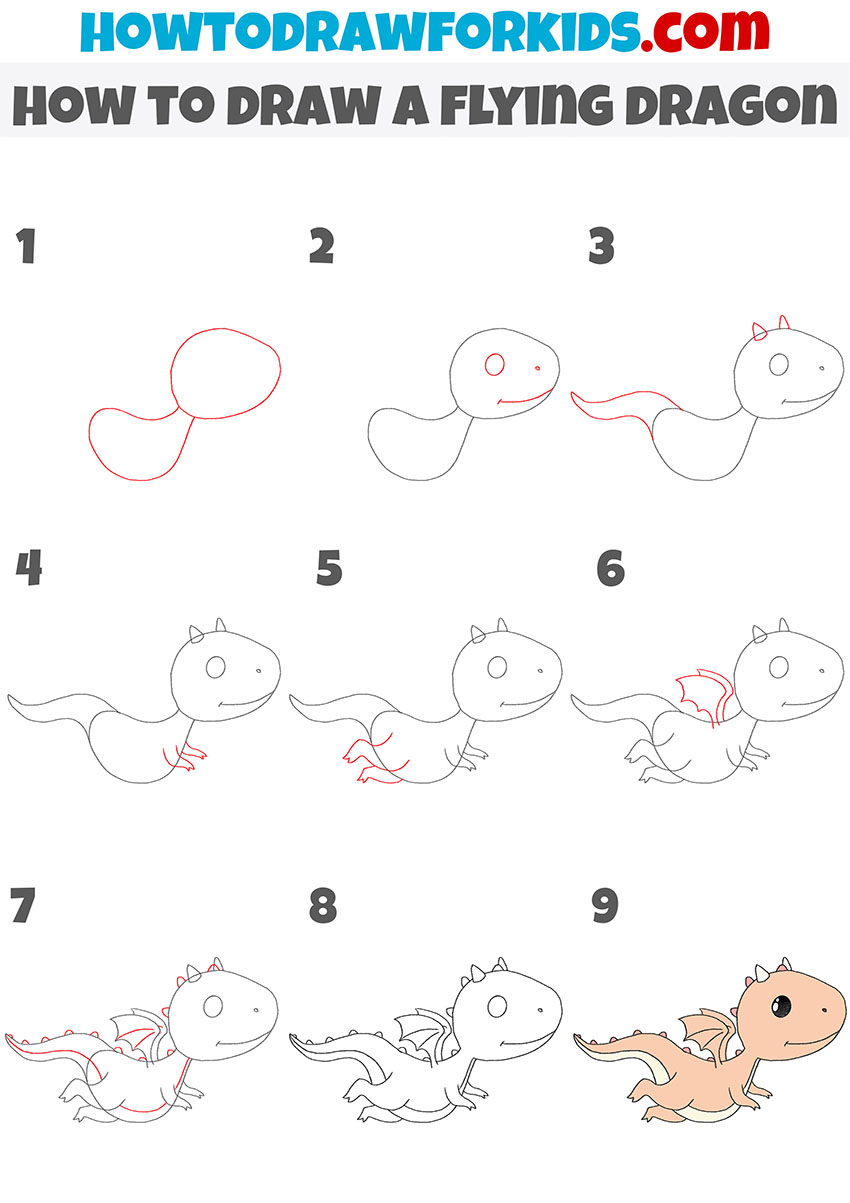
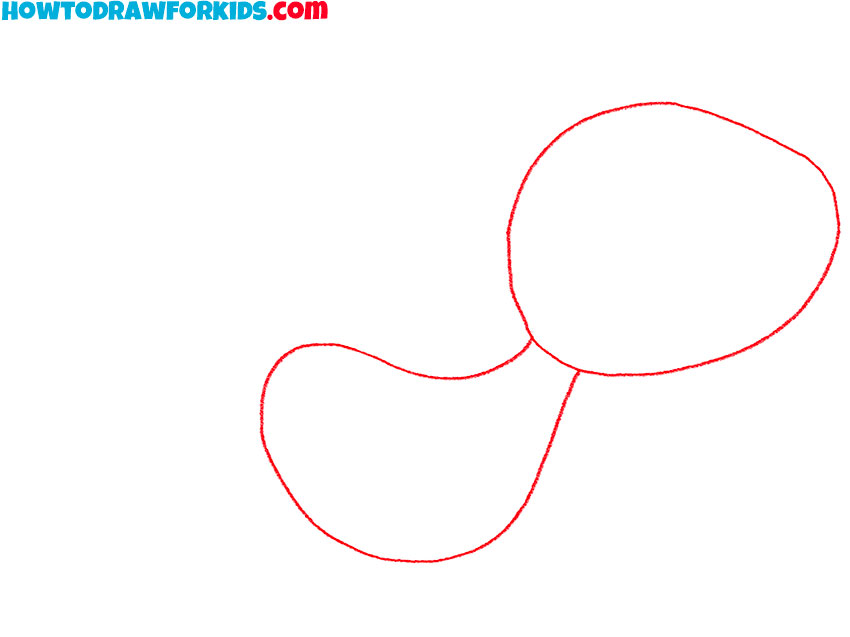
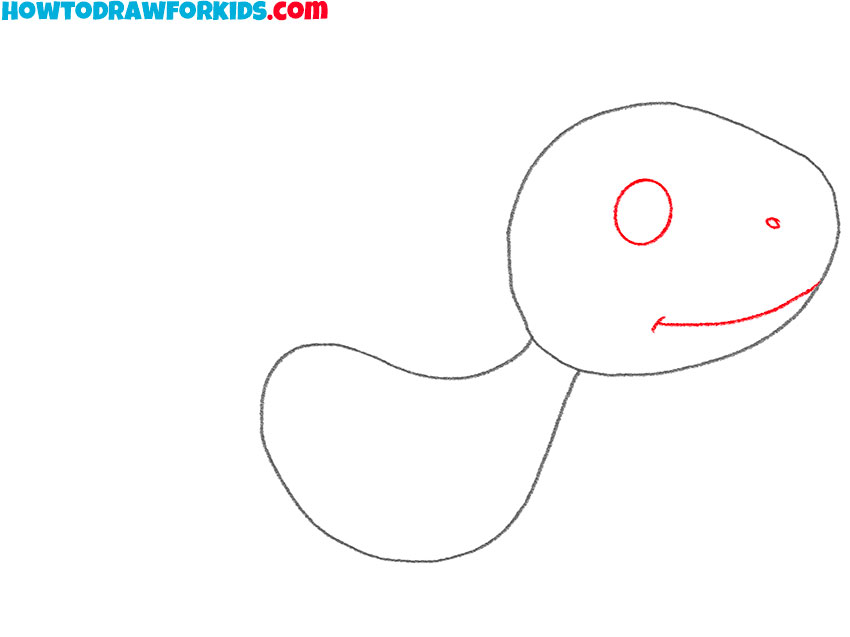
- Draw the head and torso of the flying dragon.
Begin by drawing the basic shapes for your dragon. Sketch a small oval for the dragon head and a larger, elongated oval for the body. Connect these shapes with a curved line to form the neck. Use light strokes so you can easily adjust if needed in the next steps.
- Add the elements of the face.
Let’s, add facial features of the dragon. Draw a small circle for the eye. You can add another smaller circle for the pupil inside it. Add a simple curved line for the mouth. Ensure the facial features are positioned appropriately to give the dragon a friendly appearance.
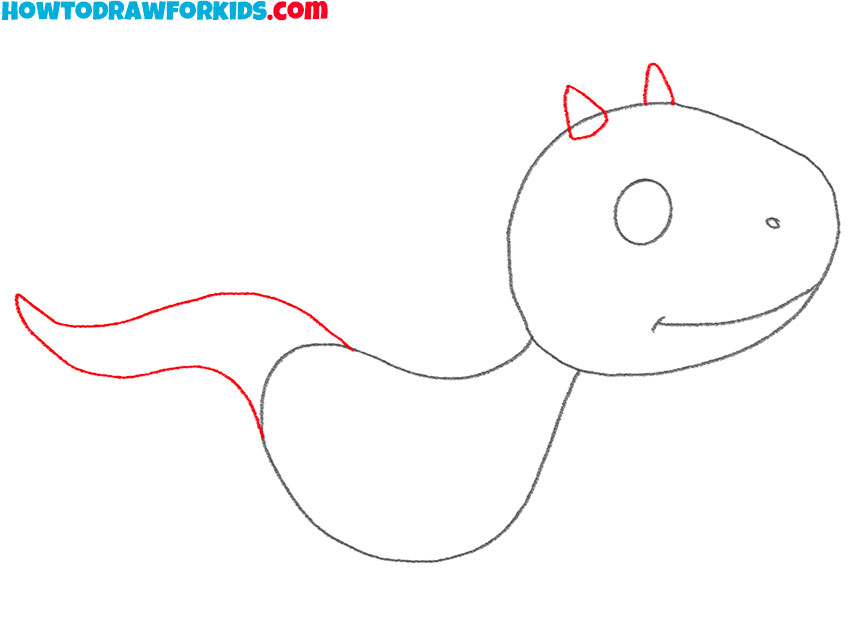
- Sketch the horns and tail.
Now, extend the dragon’s body by drawing a long, curving tail. Add two small triangles on top of the head to represent horns. These features will give your dragon its distinct fantasy look. Ensure the tail curves naturally from the body, and the horns are symmetrically placed.
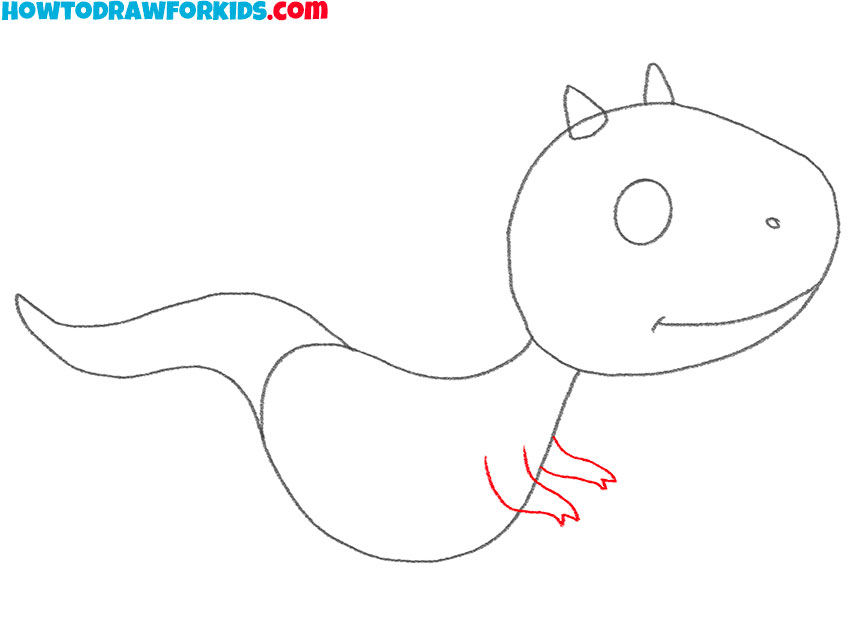
- Illustrate the forelimbs.
Add the dragon’s arms by drawing two small, curved lines extending from the body. Each arm should have a slight bend to imply movement. Draw simple short lines at the ends of these lines to form the fingers. The dragon’s arms should resemble the arms of the tyrannosaurus in their size and shape.
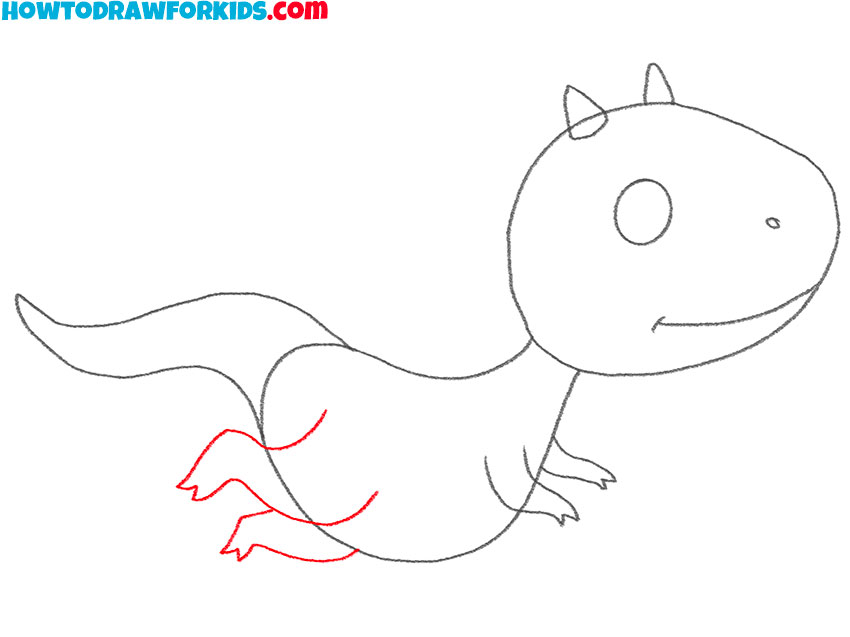
- Draw the hind limbs.
Continue by drawing the dragon’s legs. Position these legs slightly behind the arms, ensuring they are proportionate and similarly shaped. The legs should also have a bend to suggest that the dragon is in mid-flight. Add short curved lines or shapes at the ends to indicate the paws.
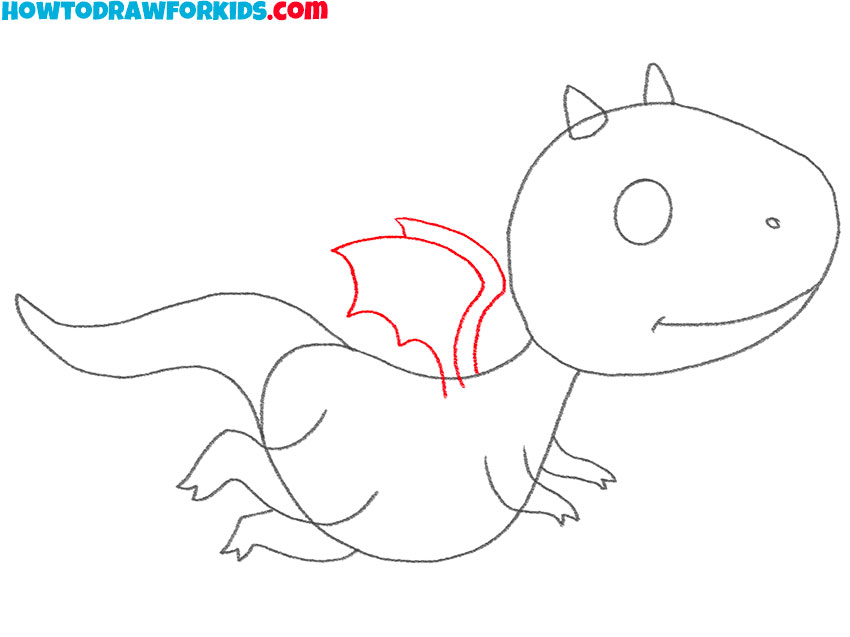
- Draw the wings of the dragon.
Start from the back and sketch out two broad, curved lines that form the dragon wings structure. Add smaller lines within the wings to create the appearance of webbing. The dragon’s wings should be narrow at the base and widen towards the middle.
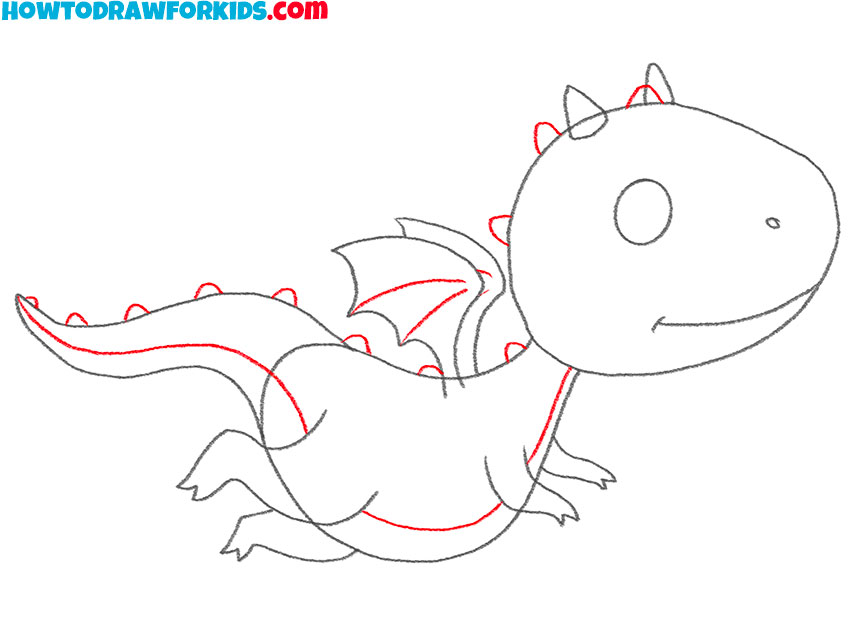
- Add details to the body.
Draw small spikes along the dragon’s back and tail to give it a more formidable look. Next, draw a long line from the lower head to the end of the tail, dividing the upper body from the lower. Draw a couple of short lines to detail the wing.
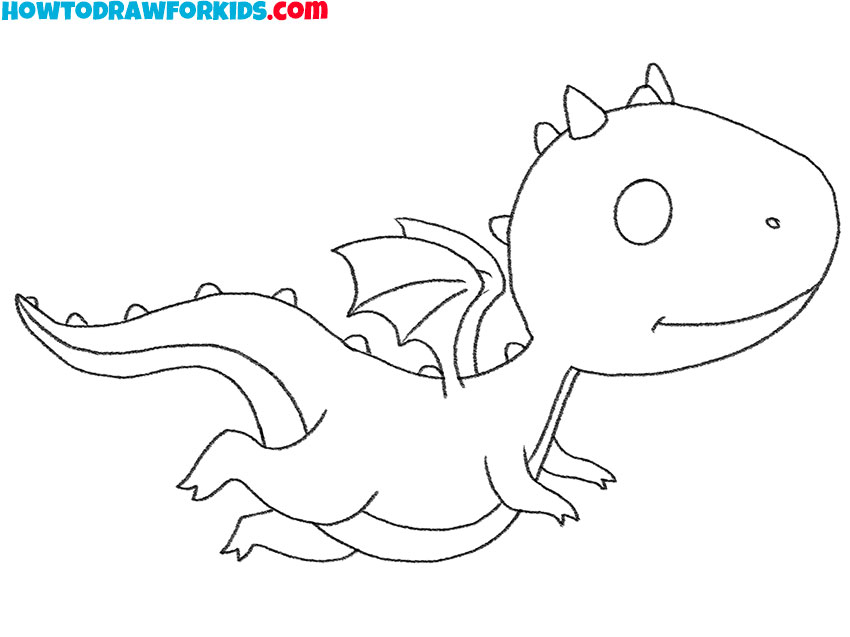
- Review the sketch and erase the guidelines.
Refine the entire dragon drawing by finalizing the lines. Move over all the lines with a darker pencil or pen, making sure the dragon’s form is clear. Erase any unnecessary or overlapping lines from previous steps. This step will make your drawing clear and prepare it for adding colors.
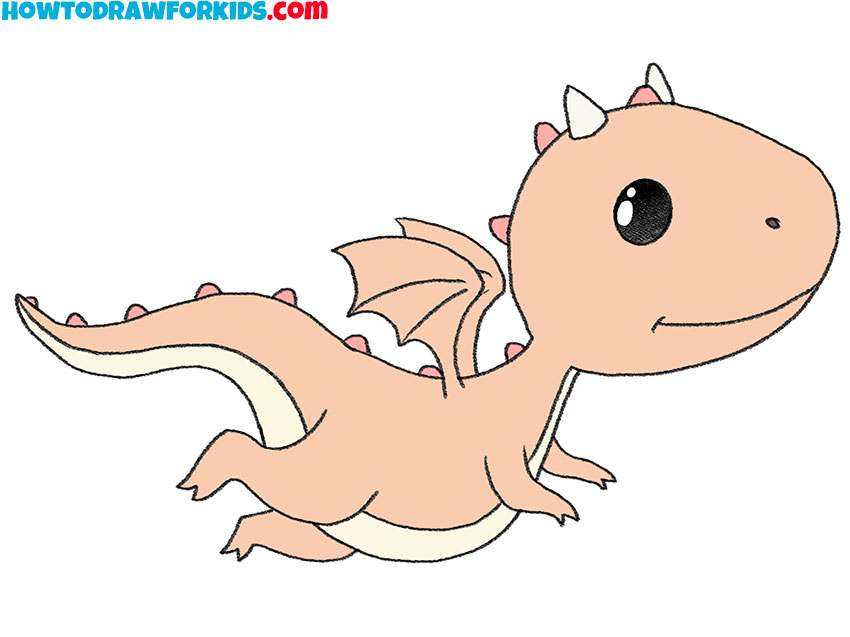
- Add colors to your dragon.
Choose shades that complement the fantasy theme, such as earthy browns, vibrant greens, or fiery reds. Color the body, wings, horns, and spikes. You can pay some attention to shading and highlights to add to your artwork. Your flying dragon is now complete and ready to soar!
Additional Content
The lesson is now complete. I hope your drawing of a flying dragon looks incredibly cute and that you feel proud of your accomplishment. Share your drawing with your friends and consider doing this lesson together for added fun.
To make it easier for you, I have prepared a PDF file that includes a concise set of instructions along with additional materials necessary for effectively following this lesson. This resource is created to help you and your friends enjoy the process and improve your drawing skills together.
How to Draw a Flying Dragon: Advanced Techniques
To make your flying dragon look more realistic, add intricate details to the scales. Vary the size and shape of the scales along different parts of the body. Larger scales can be drawn on the back and limbs, while smaller ones can cover the face and tail. Experiment with overlapping scales to create a more three-dimensional effect. This attention to detail will make your dragon appear more lifelike and textured.
Improve the wings by adding more structure and detail. Study the anatomy of bird or bat wings and incorporate those elements into your drawing. Add veins, joints, and subtle textures to the wing membranes. Ensure that the wings have a natural curve and show the muscles that control the wing’s movement. This will make your dragon’s wings look more believable and capable of flight.
Enhance your dragon by refining the shading and highlights. Use a consistent light source and apply shading to create depth and volume. Highlight the areas where light would naturally hit, such as the top of the head, back, and wings. Blend the shading smoothly to avoid harsh lines. This technique will make your dragon look more dynamic and three-dimensional.
Add a background to place your dragon in a context. Draw elements like mountains, forests, or castles to create a fantasy setting. Ensure that the background complements the dragon and adds to the overall composition. Using perspective and varying the intensity of the background elements
FAQ: Flying Dragon Drawing
As you draw your flying dragon, you might encounter some common questions or challenges. To assist you, I’ve compiled a list of frequently asked questions that address various aspects of the drawing process. Whether you’re looking for tips on adding details, creating dynamic poses, or making your dragon look more expressive, this section offers valuable insights and solutions.
To make the wings look dynamic, draw them in different positions and angles, showing them mid-flap or fully extended. Adding curves and details like veins can enhance the sense of motion.
Start with small, overlapping shapes for scales, varying their size depending on the body part. Practice drawing scales in rows and layers to create a realistic texture.
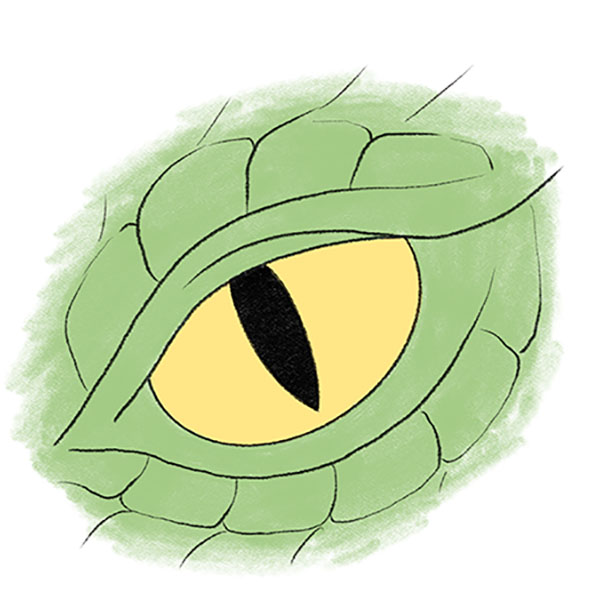
To convey emotion through the dragon’s eyes, focus on the shape, size, and position of the eyes. Use arched or angled lines for different expressions and add details like pupils, reflections, and eyelids to show the emotions.
Study real-life animals like birds and reptiles for anatomy and movement. Look at other dragon artwork for inspiration and technique, and practice incorporating these observations into your drawing.
To draw realistic fire, use flowing, wavy lines to create flames of varying lengths and thicknesses. For a more detailed look at how to draw this, check out my tutorial on how to draw flames.
Draw long, curved lines for the claws, tapering them to a sharp point. Add knuckles and joints to show how they attach to the dragon’s limbs, and use shading to give them a three-dimensional appearance.
Focus on the dragon’s anatomy, drawing a well-defined jawline, nostrils, and forehead. Add scales, horns, and other texture details to make the dragons head more realistic. Use shading to give depth to the features.
Conclusion
Congratulations on completing the tutorial! You’ve learned how to draw a cute, simplified flying dragon. You’ve mastered techniques for creating dynamic poses, simplified anatomy, and adding texture. Your new skills in cartoonish proportion, perspective, and detailing will make your future drawings more realistic.
I hope you enjoyed this tutorial. Share your dragon drawings with friends and classmates. Don’t forget to share this tutorial on your social media to help others discover my drawing tutorials.
Subscribe to my social media for more art tutorials and tips. Write comments with your wishes, questions, and suggestions. Your feedback helps me create tutorials that you love.