How to Draw a Kid on a Bike
Earlier we learned how to draw a bicycle, and now let’s practice our skills further and study how to draw a kid on a bike.
How to Draw a Kid on a Bike: Introduction
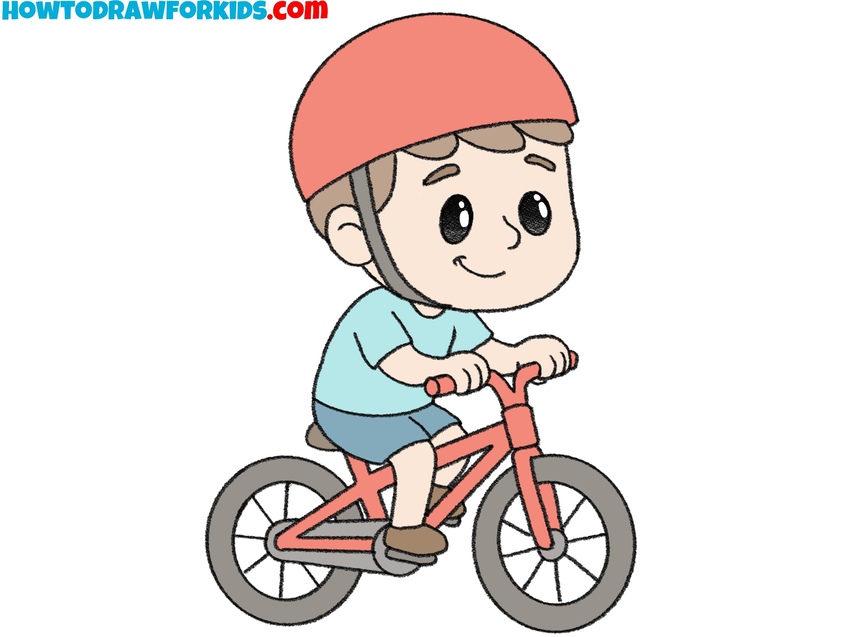
In this lesson, you will learn how to draw a kid on a bike. It will be interesting and useful for you because once again you will practice drawing a person and a train our skills in drawing a bike.
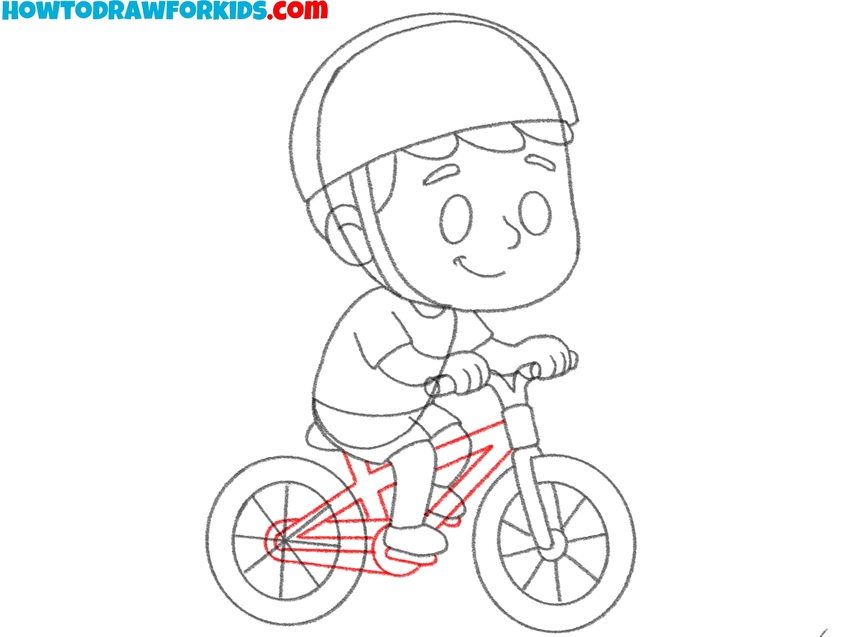
In the picture, you see a small kid riding a two-wheeled bike. The kid has a protective helmet on his head. The design of the bike is very simple, here are the main elements that you can easily repeat. You will succeed, even if you have not drawn such an object before.
During the lesson, you will sequentially draw all the parts of this object. Show attention and accuracy at each stage of drawing, then you will get a good result. To color your drawing, you can choose the same colors as in the example, or you can use any other colors.
Kid on a Bike Drawing Tutorial
Materials
- Pencil
- Paper
- Eraser
- Coloring supplies
- Ruler (optional)
- Compass (optional)
Time needed: 40 minutes
How to Draw a Kid on a Bike
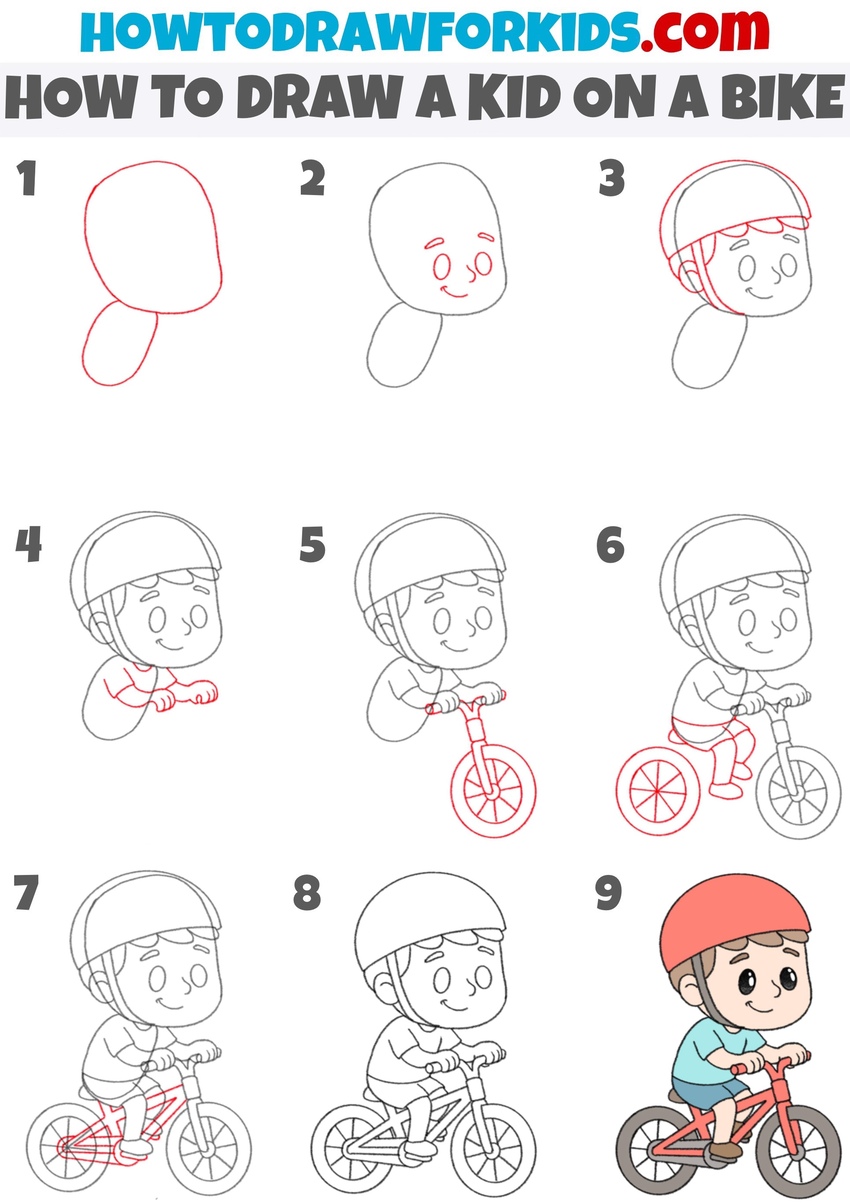
- Sketch the figure’s head and torso.
Every drawing benefits from a solid starting structure, so here you’ll sketch two basic shapes that will guide the rest of the figure. Draw an oval for the child’s head, tilting it to one side. Below it, sketch a smaller oval shape for the torso. Sketch these shapes very simple and light.

- Form the kid’s basic facial features.
Now that the base is sketched, you can begin shaping the character’s face. Draw the eyes as two large oval shapes in the center of the head. Above them, sketch two small curved eyebrows. Below the eyes, add a tiny upward curve for the nose and a wider curve for a smiling mouth.

- Draw the helmet, ear, and hair.
Because safety is part of riding a bike, the character should be wearing a helmet. On top of the head, draw the helmet as a large rounded dome. Beneath the helmet, sketch a few locks of hair peeking out at the front and sides, using short curved strokes. Add the helmet straps on the side of the head.

- Draw the kid’s arms and hands.
Next, you’ll connect the child to the future bike by sketching the arms holding the handlebars. From each side of the torso, draw curved lines, then round them at the ends to represent simple hands. The hands should show the gesture as they lightly grip the horizontal handlebar.

- Outline the bike’s handlebar and front wheel.
Now, draw the handlebars using short lines inside the existing hands. Then draw a large circle just below the handlebars for the wheel. Inside it, sketch a smaller circle for the hub and connect it with several straight lines to illustrate spokes. Join the wheel with the handlebars, forming the bike’s fork.

- Add the legs and back wheel.
The drawing now needs legs to show the child actually riding. From the lower torso, sketch bent legs toward the pedals. One leg should bend more, showing it’s pushing down, while the other is lifted slightly. Behind the legs, draw a large circle for the back wheel, matching it in size and design with the front wheel.

- Draw the bike frame and pedals.
To connect the wheels and make the bike complete, draw the frame using simple straight and diagonal lines. Draw the horizontal bar that supports the seat and a few small details around the pedal area. These lines form a triangular frame. It’s also a good idea to use a ruler to keep the lines clean and straight.
- Finalize the outlines neatly.
At this stage, the main figure and bike are complete, so you can give everything a finished look. Erase any unnecessary construction lines that overlap or distract from the main forms. Redraw any parts that look uneven. Add a few extra touches, if needed.

- Add color to the kid and bike.
Take some bright shade for the helmet and clothing, such as red or blue. Color the bike frame in a simple color, perhaps orange or another bright tone. The wheels should be shaded gray or black. The skin tones should be natural, and the hair can be brown or any other color you prefer.

Bonus Drawing Tutorial
In this tutorial, the drawing is built up from the top to bottom, without any construction lines. Draw the head first with a rounded helmet shape, then sketch the outline of the upper body.
After that, form the legs in a bent position. Add two circles for the wheels. Next, illustrate the bike frame with straight connecting lines and the pedal under one foot. Draw the handlebars up and show the child’s hands resting on them.
To complete the character, refine the helmet details, add facial features, and outline the wheel rim area. Coloring the helmet, clothes, and bicycle at the end will give the drawing a finished look.

Conclusion
You can also try the child drawing tutorial to practice another figure in a simpler form, or the girl drawing tutorial to see a variation in proportions and details.
Adding a background with elements from the park drawing tutorial can also make the picture more complete and give context to the subject. These extra lessons will help expand your drawing and make it feel like part of a full scene.
Share your finished drawing, compare your result with earlier attempts, and notice where your progress shows. Write down what you found difficult, and set small goals for your next practice.
Post your work, leave a comment on my social media with your thoughts, and return for more step-by-step lessons to keep improving your skills.

