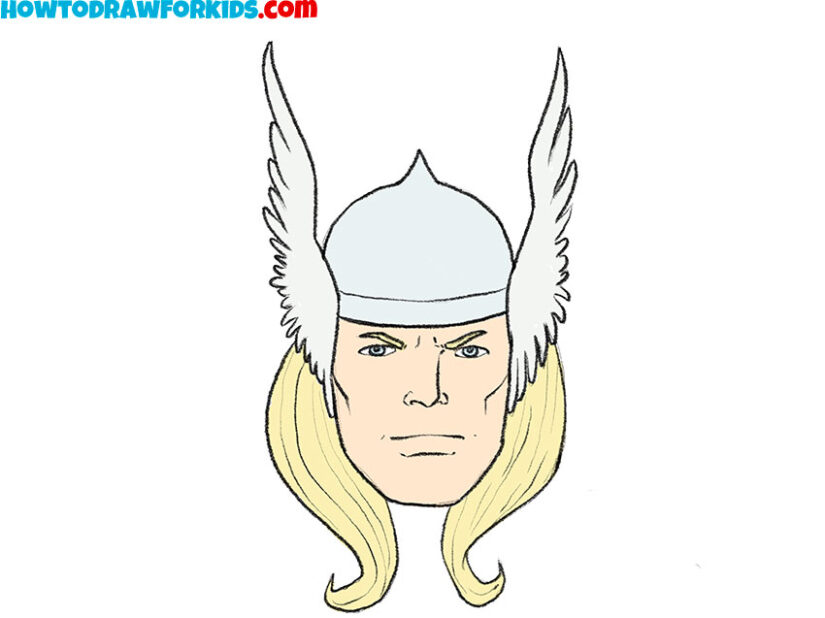
How to Draw Thor Face
This lesson is dedicated to a character from Norse myths and a superhero at the same time, as here we will learn how to draw Thor face from the Marvel universe.
How to Draw Thor Face: Basic Information
As I have said many times before, drawing faces is essentially a scheme – once you know it, you can create any portrait. If you want to go deeper into this topic or refresh your knowledge, you can check out the face drawing lesson.
So if you already know how to draw faces, this lesson on how to draw Thor’s face won’t be difficult for you. We will go over and reinforce the process of drawing a face while adding distinctive features that will make your drawing of Thor’s face instantly recognizable.
The most essential details and defining features of Thor’s appearance are his famous winged helmet and his Norse facial features. These are the traits we will aim to convey in this lesson on how to draw Thor’s face.
And, of course, another goal of this lesson is to teach you how to draw Thor. Knowing how to draw his portrait will also give you a significant advantage when drawing this superhero in full length.
Thor Face Drawing Tutorial
Materials
- Pencil
- Paper
- Eraser
- Coloring supplies
Time needed: 30 minutes
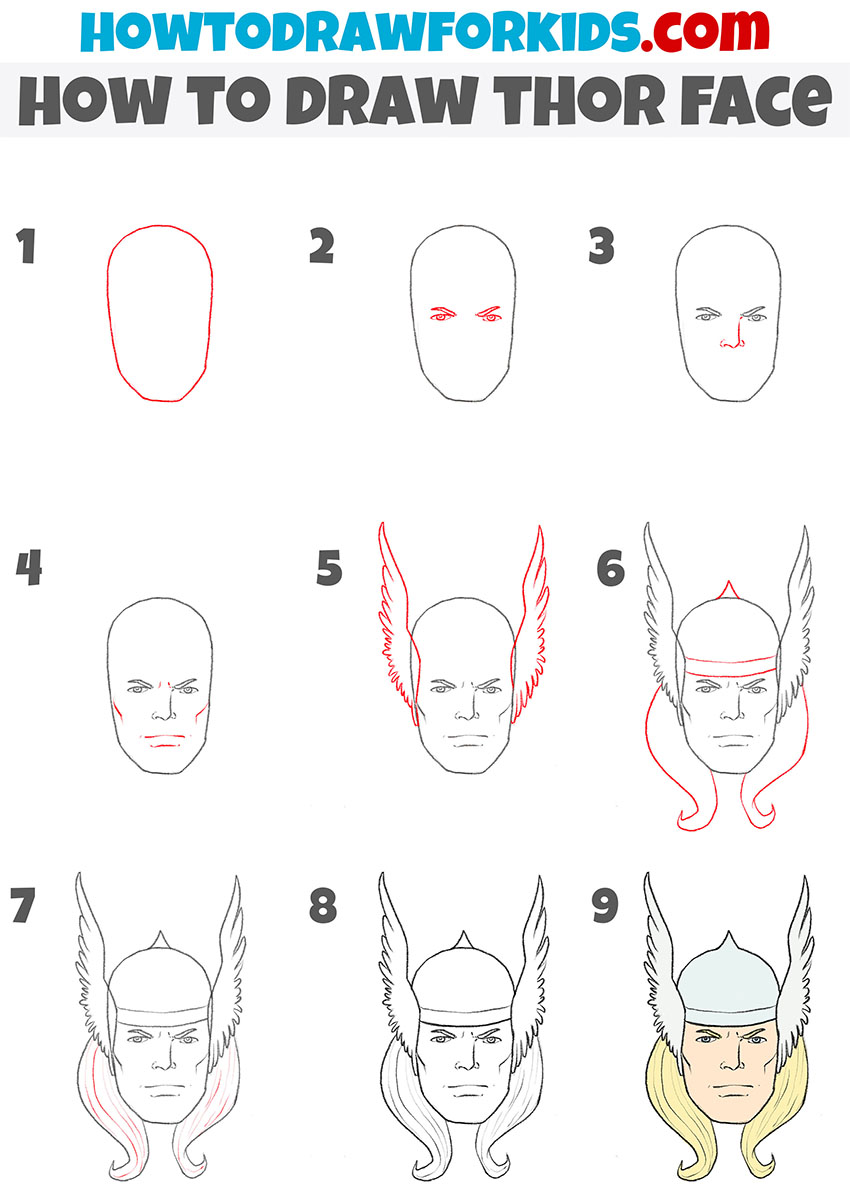
How to Draw Thor Face
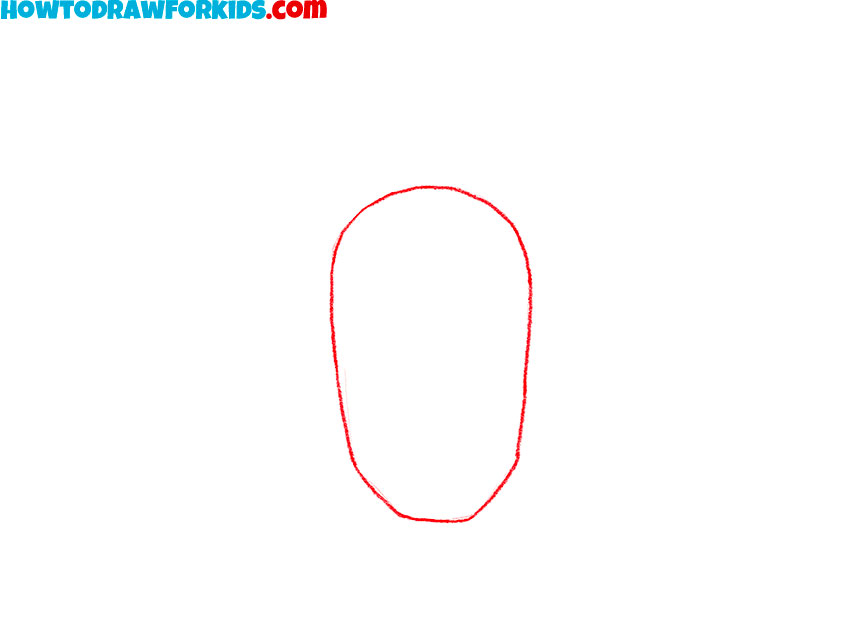
- Draw the outline of Thor face.
To start drawing Thor’s face, begin with an oval-like shape that has a slightly pointed chin. Keep the top part rounded while making the bottom slightly angular to match Thor’s strong jawline. Make sure the outline is symmetrical. Use light pencil strokes, as you may need to refine the outline in later steps.
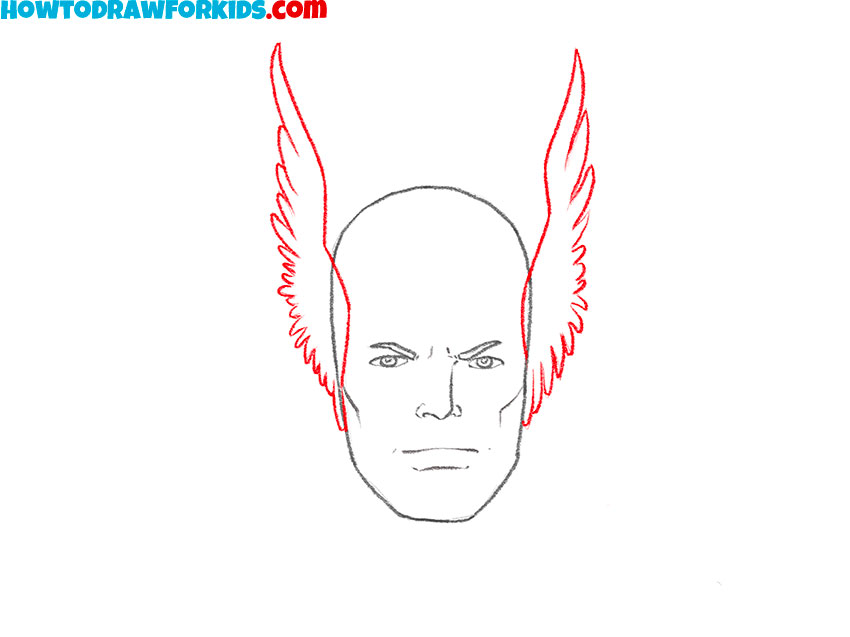
- Sketch the eyes and eyebrows.
Now that the base shape is ready, it’s time to draw the eyes and eyebrows of Thor. Start by drawing two horizontal shapes for the eyes. Then, within these eye shapes, add the pupils. Next, focus on the eyebrows. His eyebrows should be thick, slightly arched, and angled downward.

- Add the nose of Thor.
Now, draw the nose of Thor in the center of the face, keeping it relatively straight. Draw the nostrils with a couple of curves. Thor has a well-defined nose, so ensure that the lines are bold but not overly exaggerated. To give the nose a more comic-book look, try to combine slightly rounded lines with more angular ones.

- Add the mouth and detail the face.
Once the nose is complete, move on to drawing the mouth. First, draw the central line of the mouth. Then, outline the shape of the lower lip. Then, refine the overall shape of Thor’s face by adding contour lines to illustrate his strong jawline and cheekbones.

- Draw the wings of Thor helmet.
Thor’s helmet is one of his most iconic features, and in this step, you will begin drawing its distinctive winged design. First of all, let’s draw the wings on the sides of the helmet. Start by sketching two large, curved shapes extending outward from both sides of the head. Then, add individual feather-like segments.
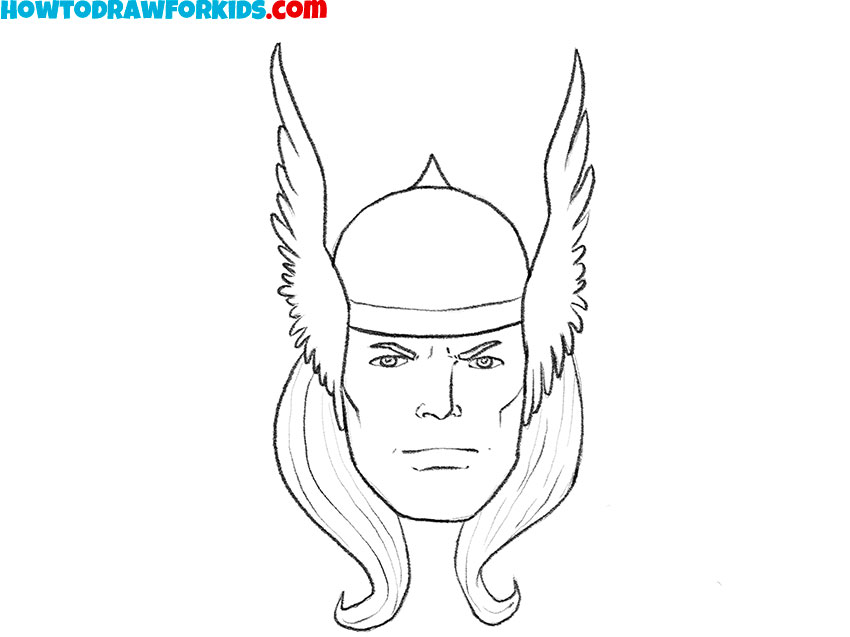
- Finish the helmet and add hair.
Draw a curved band across his forehead, ensuring it follows the natural contour of his head. This band will be the lower part of the helmet. Then, extend the top into a slightly pointed shape. After completing the helmet, start sketching Thor’s hair flowing down from beneath it. His hair should be long and slightly wavy.

- Detail superhero’s hair.
Now, detail the hairstyle of Thor, adding texture. Sketch long and smooth lines, reflecting the flow of the hair. To make the hair look more interesting, the lines should follow the general shape of the hairstyle but vary slightly in direction and thickness.

- Finalize the line art.
Now, go over your entire Thor face drawing with clean, confident lines to finalize the line art. If any areas seem off, now is the time to make small corrections. Erase any unnecessary construction lines to clean up the drawing. You can also add small details, like minor facial lines.
- Color the drawing of Thor face.
Use light gray, blue, or silver for the helmet. For the wings, use light gray or beige. Thor’s hair should be a golden blonde, with variations in tone. Color the skin in light peach color or beige and the eyes in light blue. For additional details, you can add shadows.

How to Draw Thor Face: Video Tutorial
Conclusion
This lesson was easy, wasn’t it? If so, be sure to let me know in the comments on this article so I can hear your thoughts.
To boost your comic book drawing skills check out my Comics section. With my tutorials you will learn now to draw Spider-Man, train your skills in drawing Captain America and other superheroes from Marvel and DC universes.
Also, don’t forget to follow me on social media for quicker updates on comic-related topics. With new lessons, you’ll be able to take your comic character drawing skills to an entirely new level.