How to Draw a Person With Wings
Learn how to draw a person with wings! Boost your skills with this detailed tutorial, focusing on cartoonish anatomy, motion, and simplified texture.

How to Draw a Person with Wings: Basic Information
I suggest you complete a simple and interesting lesson on how to draw a man with wings. With this lesson you will practice drawing a human figure and practice drawing wings. The acquired skills will be useful to you in the future when you want to draw the figures of other people or birds.
One of the key aspects of this tutorial is the addition of wings. Drawing wings requires attention to symmetry, structure, and texture. The detailing of feathers within the wings introduces artists to repetitive patterns and textures, boosting their ability to create realism on a paper.
While drawing a person with wings pay special attention to the movement and pose of the figure. Depicting a person in flight introduces dynamic motion, which is more challenging than static poses. This aspect of the tutorial encourages artists to think about how the body moves and interacts with elements like wind and gravity.
Like all the lessons on my site, this will be very simple. A cartoonishly simplified drawing style will help you cope with this task. The only difficult point here is the angle. Our person with wings deviates a little to the side. So, this creates a dynamic effect, which is very important to maintain in order to get a cool result.
Person with Wings Drawing Tutorial
Materials
- Pencil
- Paper
- Eraser
- Coloring supplies
Time needed: 30 minutes
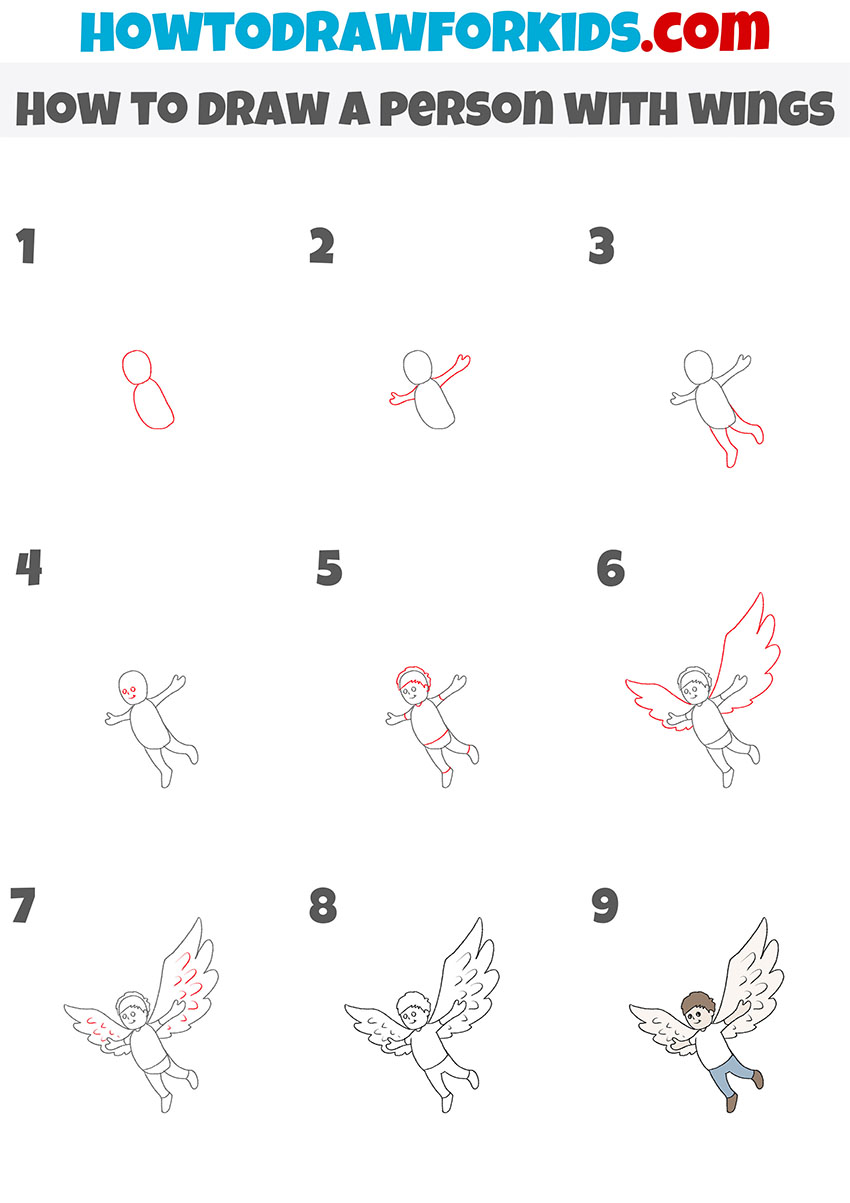
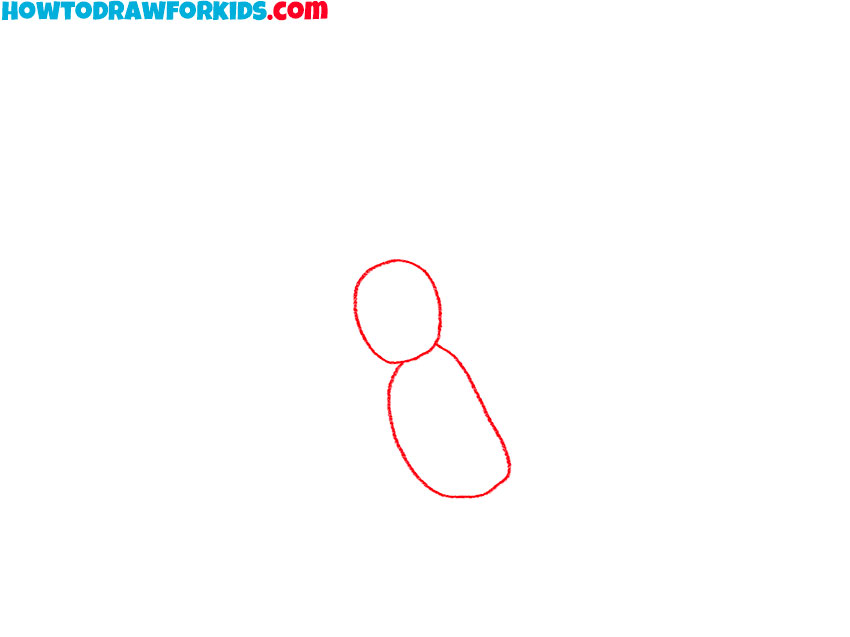
How to Draw a Person with Wings
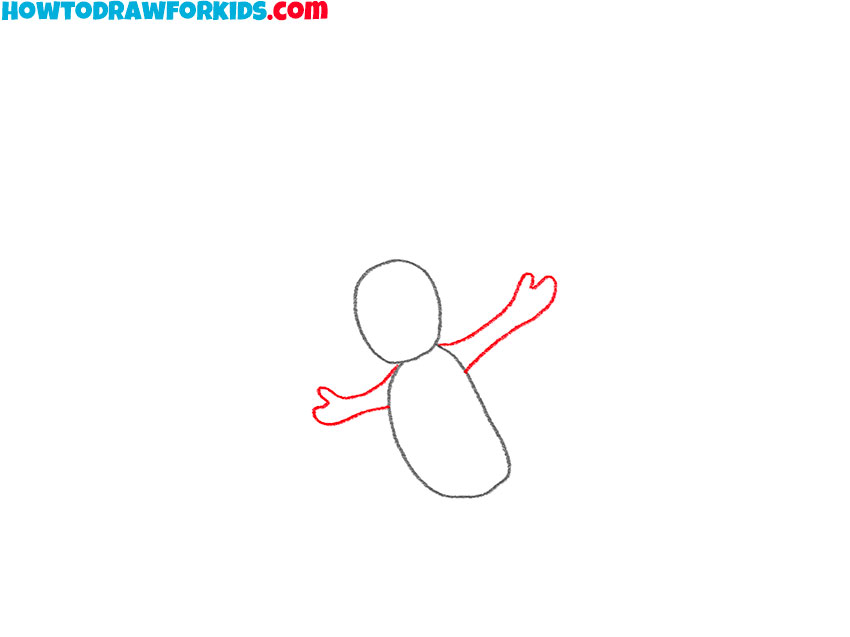
- Draw the head and torso.
Start by drawing the outline of the head and body. Draw a small oval shape for the head and a larger, slightly elongated oval for the body. These shapes should be connected at the neck, forming the basic structure of the figure. These shapes will serve as the base for the rest of the drawing.
- Illustrate the arms.
Draw two curved lines extending from the upper part of the body, forming the arms in a slightly upward and outward position. At the end of each arm, sketch the hands. Here, we encounter the peculiarities of the perspective. The arm farthest from us looks much smaller than the one closest to us.
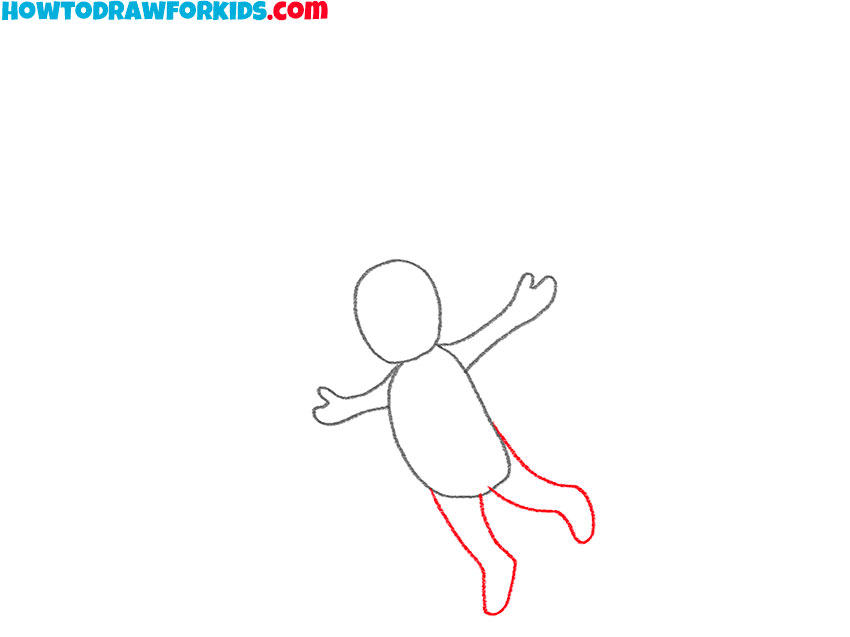
- Sketch the legs.
From the lower part of the body, sketch two downward-curving lines for the legs, adding simple shapes for the feet. The legs should be slightly bent at the knees, giving a natural, relaxed posture. This step completes the basic structure of the person’s figure, preparing it for the details.
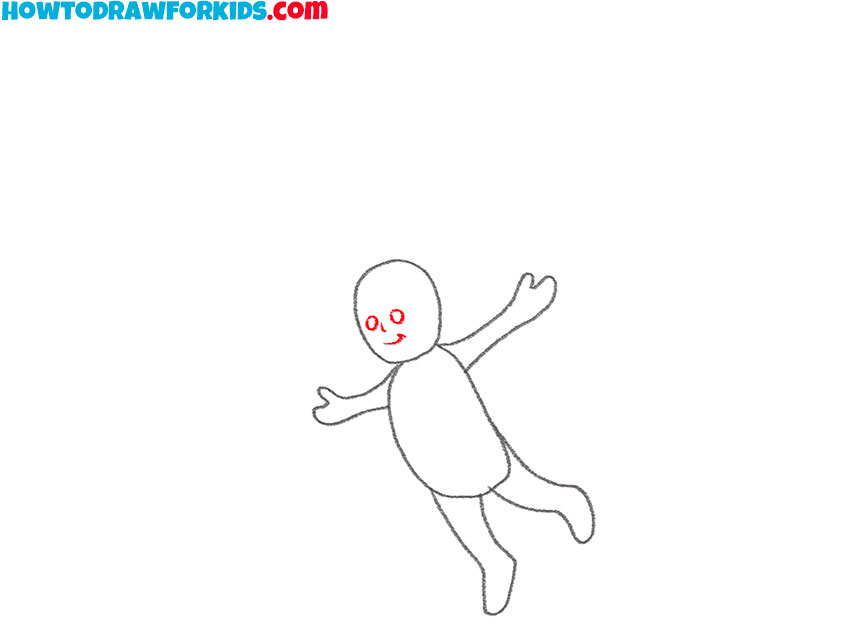
- Add the elements of the face.
Now, add the facial features. Draw two small circles for the eyes, a tiny curve for the nose, and a smiling curve for the mouth. These features should be placed appropriately on the head to give a friendly expression. You can add details such as a beard and eyebrows.
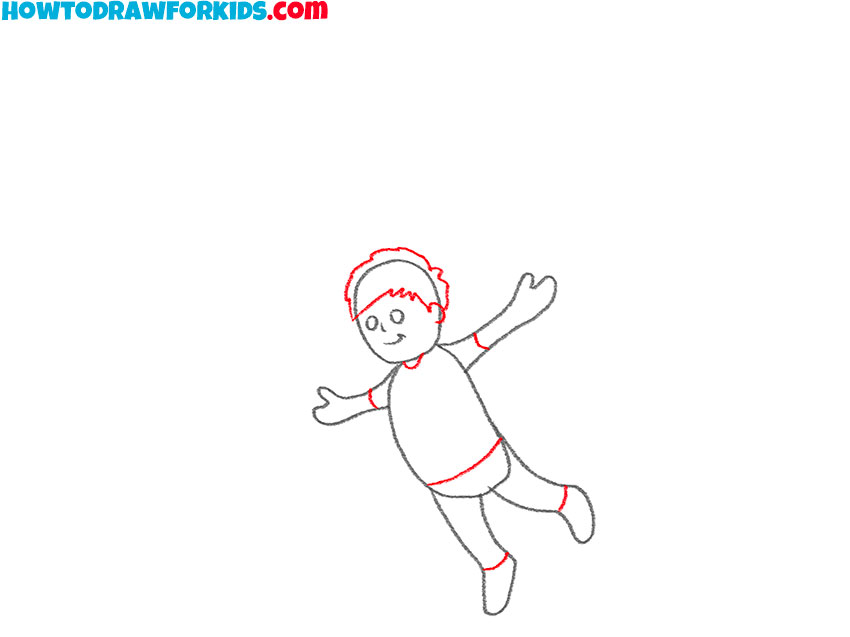
- Draw the hair and outlines of the clothes.
Sketch the hair on top of the head with simple curved lines, giving it a neat appearance. Draw the ear using a small curved line. Then, draw the outline of a simple shirt or dress around the body, adding details like a collar or sleeves. Use a couple of short lines to separate the feet from the rest of the legs.
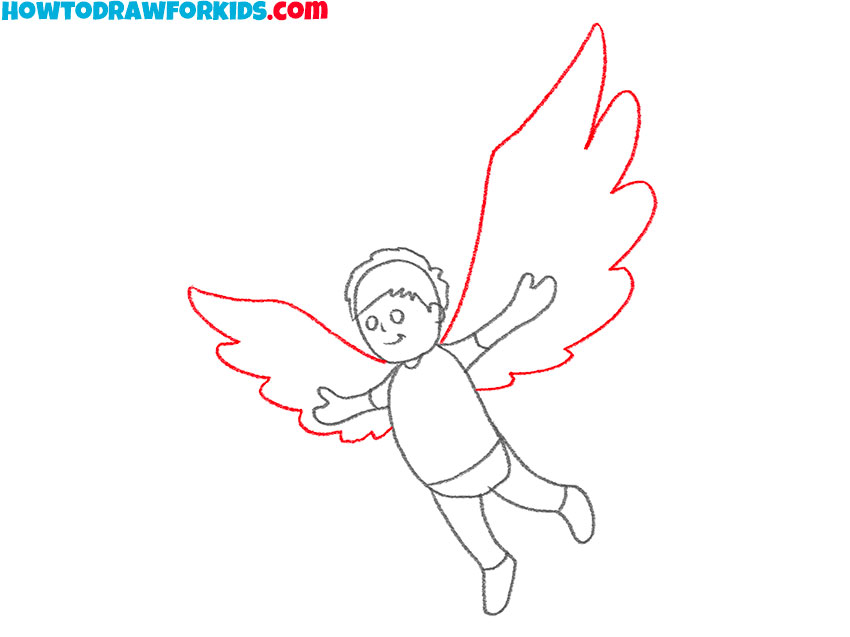
- Draw the wings.
Start from the back of the figure, drawing two large, curved shapes that extend outward and upward. The different sizes of the wings greatly emphasize the dynamic angle. The wing closest to us is much larger and longer than the character’s body.
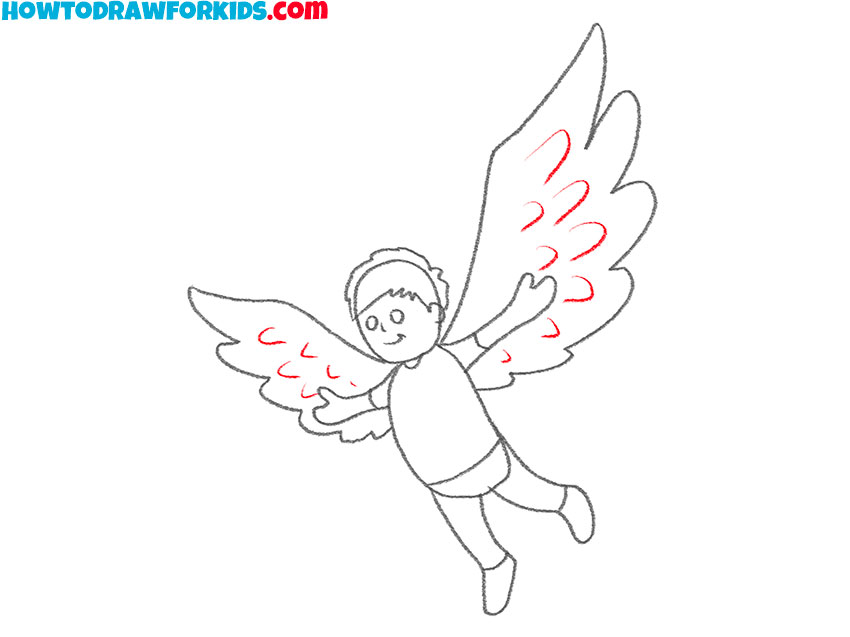
- Detail the wings.
Now, add details to the wings to make them look more realistic. Draw smaller curved lines inside the wings, indicating individual feathers. These lines should follow the curvature of the wings, giving a layered effect. Avoid placing the lines of the feathers too close or far.
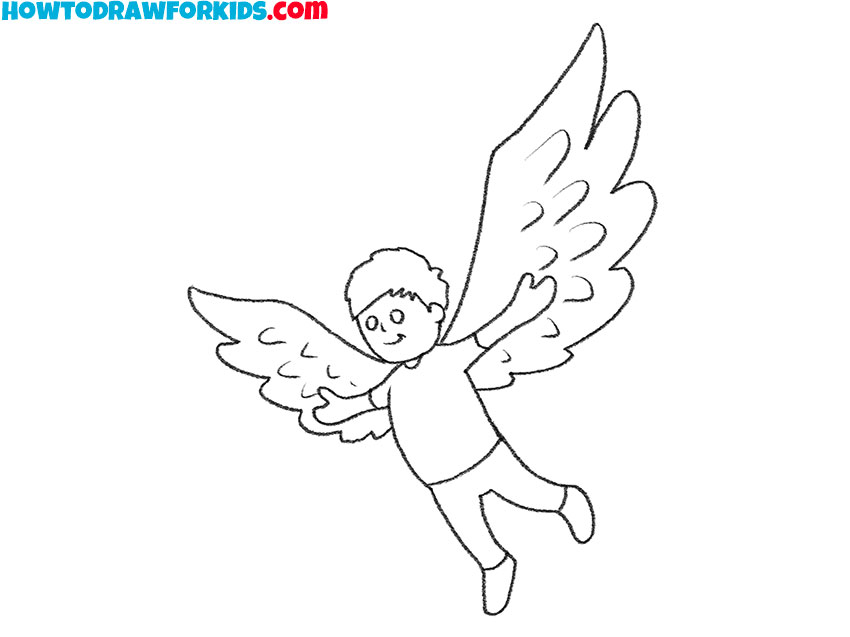
- Correct the inaccuracies and add details if required.
Refine the drawing by cleaning up any unnecessary guidelines and correcting the mistakes. Go over the outlines with a darker line to detail the final shapes. Now is the time to add details to make your drawing of a person with wings more unique. I will tell you how to do this at the end of the page.
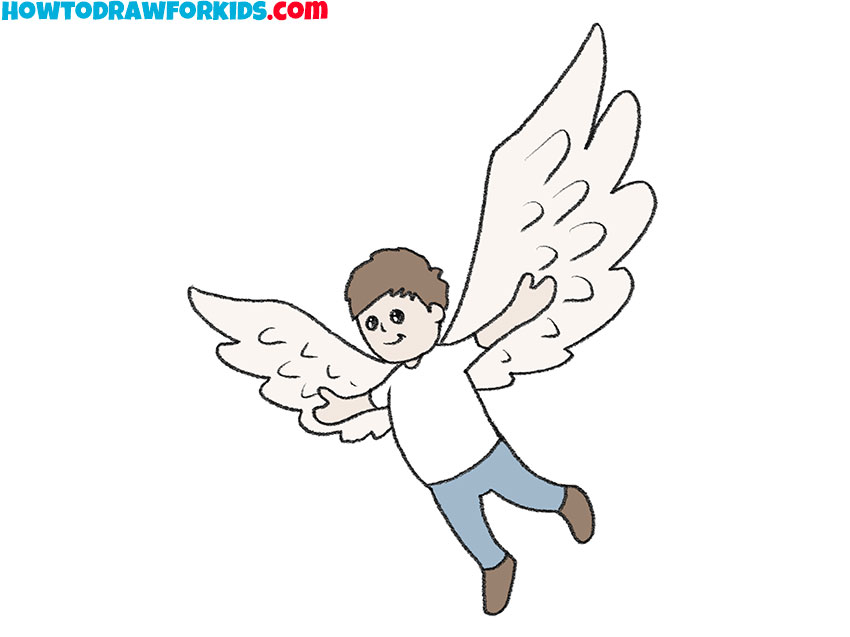
- Add colours to your drawing.
Use any natural colors for the skin, hair, and clothing. Choose a light color for the wings to give them a delicate and ethereal look. Make sure to color within the lines. You can also add shadows to make the drawing more voluminous. I will tell you how to do this below.
Additional content
And a small gift – a free PDF with a short version of this drawing lesson. This will help you draw a person with wings anywhere, even without the Internet. Also here you will find some more ways to draw it. If the step-by-step method doesn’t suit you at all, just try other drawing strategies.
How to Draw a Person With Wings: Tips and Tricks
As always, I recommend more practice. In this case, the most difficult moments are perspective and proportions. To avoid problems with this, try to draw a few more similar people with wings with slightly different poses and slightly different angles. Try to avoid a frontal angle. Practice this only if my version is too difficult for you.
Add shading to give your drawing more dimension. Identify the light source and shade the opposite sides of the figure and wings. Use lighter shades for areas facing the light. Highlights on the hair, wings, and clothing can create the three-dimensional effect.
Add more intricate feather details to the wings. You can draw different sizes of feathers to create a more realistic and textured look. Consider studying bird wings to understand feather arrangement better.
Experiment with different facial expressions to convey various emotions. Adjusting the eyes, eyebrows, and mouth can dramatically change the character’s mood, making the drawing more unique and interesting.
Add a background to place your character in a setting. Whether it’s a simple sky with clouds or a fantasy landscape, a background can add context and make your drawing even more interesting.
Consider adding more details to the clothing, such as patterns, textures, or additional accessories like a belt, jewelry, or a hat. This can make your character more unique.
Draw other characters or animals to accompany your winged person. Or create a detailed environment such as a forest, a cityscape, or a mountain range. Including elements like trees, buildings, or some magical portals can make your scene more interesting.
Conclusion
Drawing a person with wings allows you to combine human and fantastical elements to create a unique character.
I hope you found this lesson truly useful. If you encounter any difficulties with any of the steps, please let me know. Your feedback will help me create more useful drawing lessons. Additionally, your suggestions and ideas for new topics on my website are greatly appreciated and very helpful.
Feel free to revisit this lesson frequently to practice and boost your drawing skills. Additionally, don’t forget to subscribe to my social media and share this lesson with your friends or classmates.